Foundation Trestle
In July of 2025 I began the Foundation Trestle project. The seed of this project was planted years ago. I have been fascinated by building tables ever since living on a commune in Kentucky when I was 18 and learned that I valued making things that supported people or supported people gathering (like, sharing a meal together).
I haven’t made many tables but my first foray into table-making was when I first moved to Austin in 2012 and I wanted to build my own desk. A desk made from a reclaimed door that I veneered with 3/4 inch thick red oak boards from Home Depot. The top rested on a metal filing cabinet on one end and two 4x4’s joined to form an X on the other. I used copious amounts of wood screws.
This top was heavy and solid but lacked finesse, design sense, and good traditional joinery.
This was just a desk though. A desk that sat in my home office, hidden from view. A surface that wasn’t being shared by my guests, that I wasn’t breaking bread over.
I have felt dissatisfied with every dining table I have ever owned. They all fall prey to the same problem: wobbly legs. Many table designs are well-crafted such that you can remove the legs from the table but this always results in legs that need re-tightening. Still. All of these tables, despite great design taste and good craftsmanship were too wobbly and too low-mass for my taste.
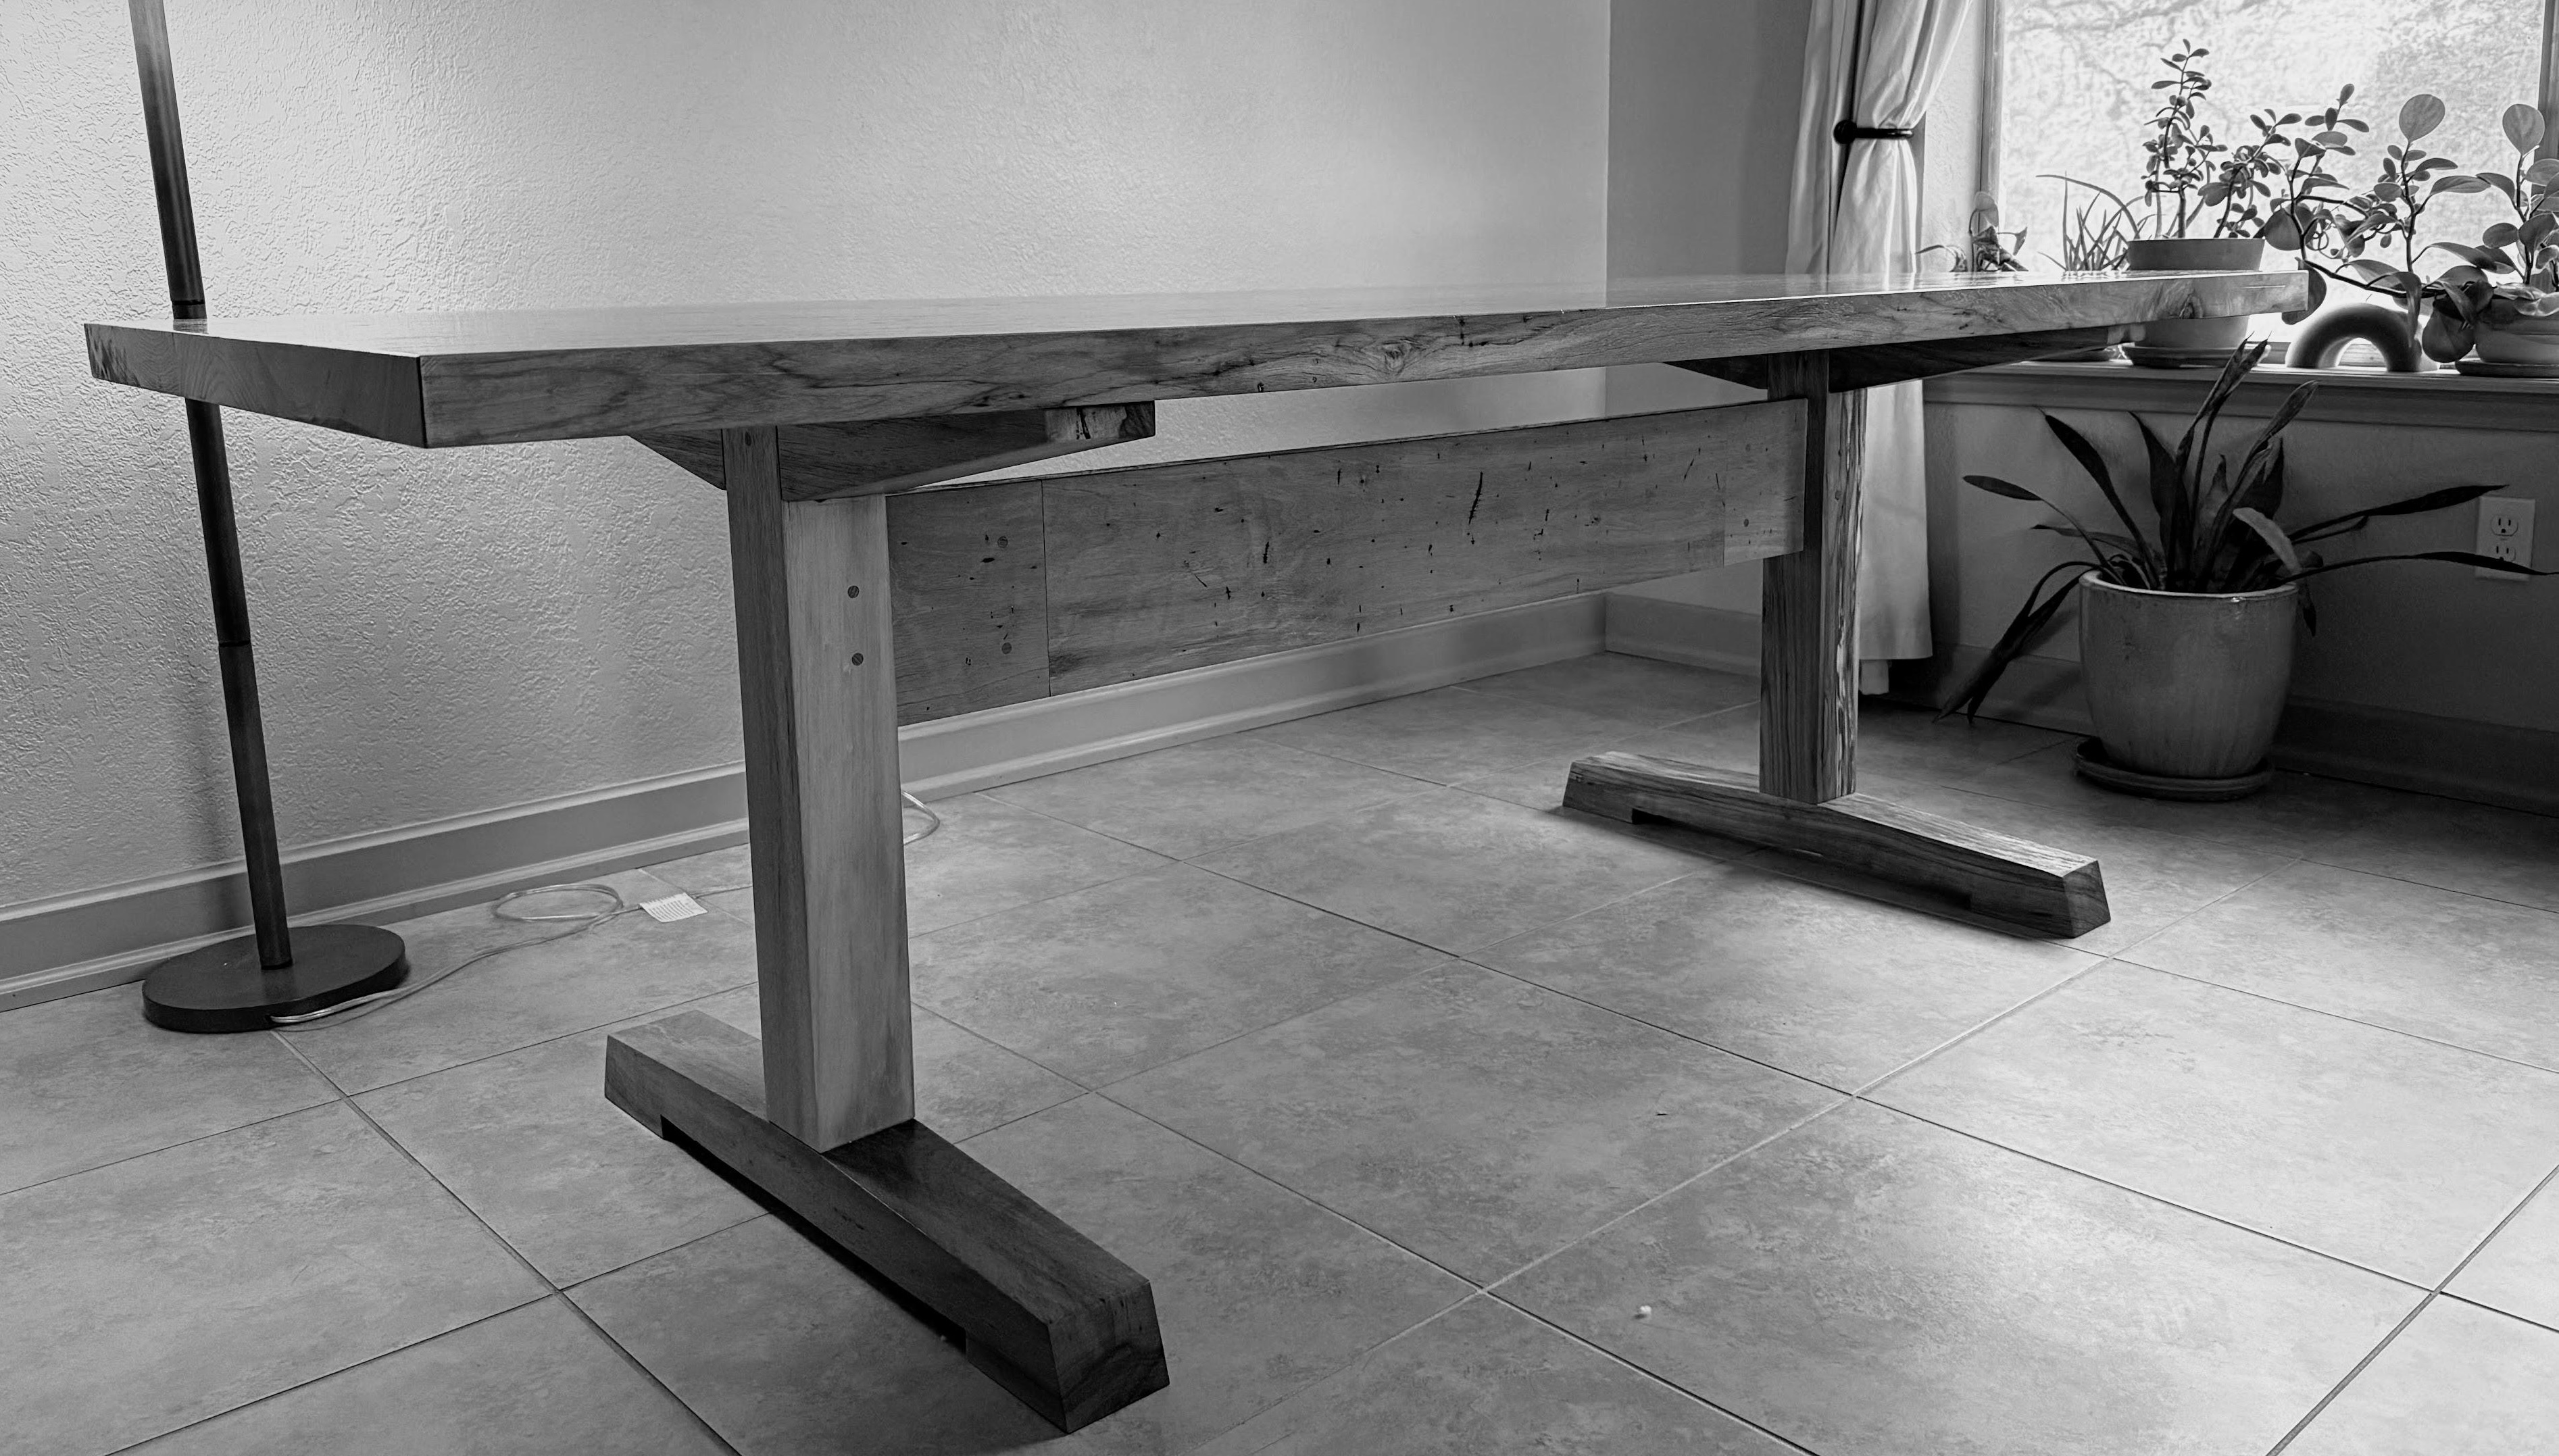
Fast forward to earlier this year when I finished my Anarchist’s Workbench and I had the pleasure of experiencing what a traditionally joined, draw-bored joints, high-mass “table” can feel like. It’s been incredible. I decided right then and there that I’d prioritize making a dining table for the house with clean lines, thick proportions, and high-mass.
I also knew I wanted to make this particular piece of furniture from Southern Texas Pecan, the second hardest domestic hardwood in the USA and the material I chose for my workbench’s vise chop.
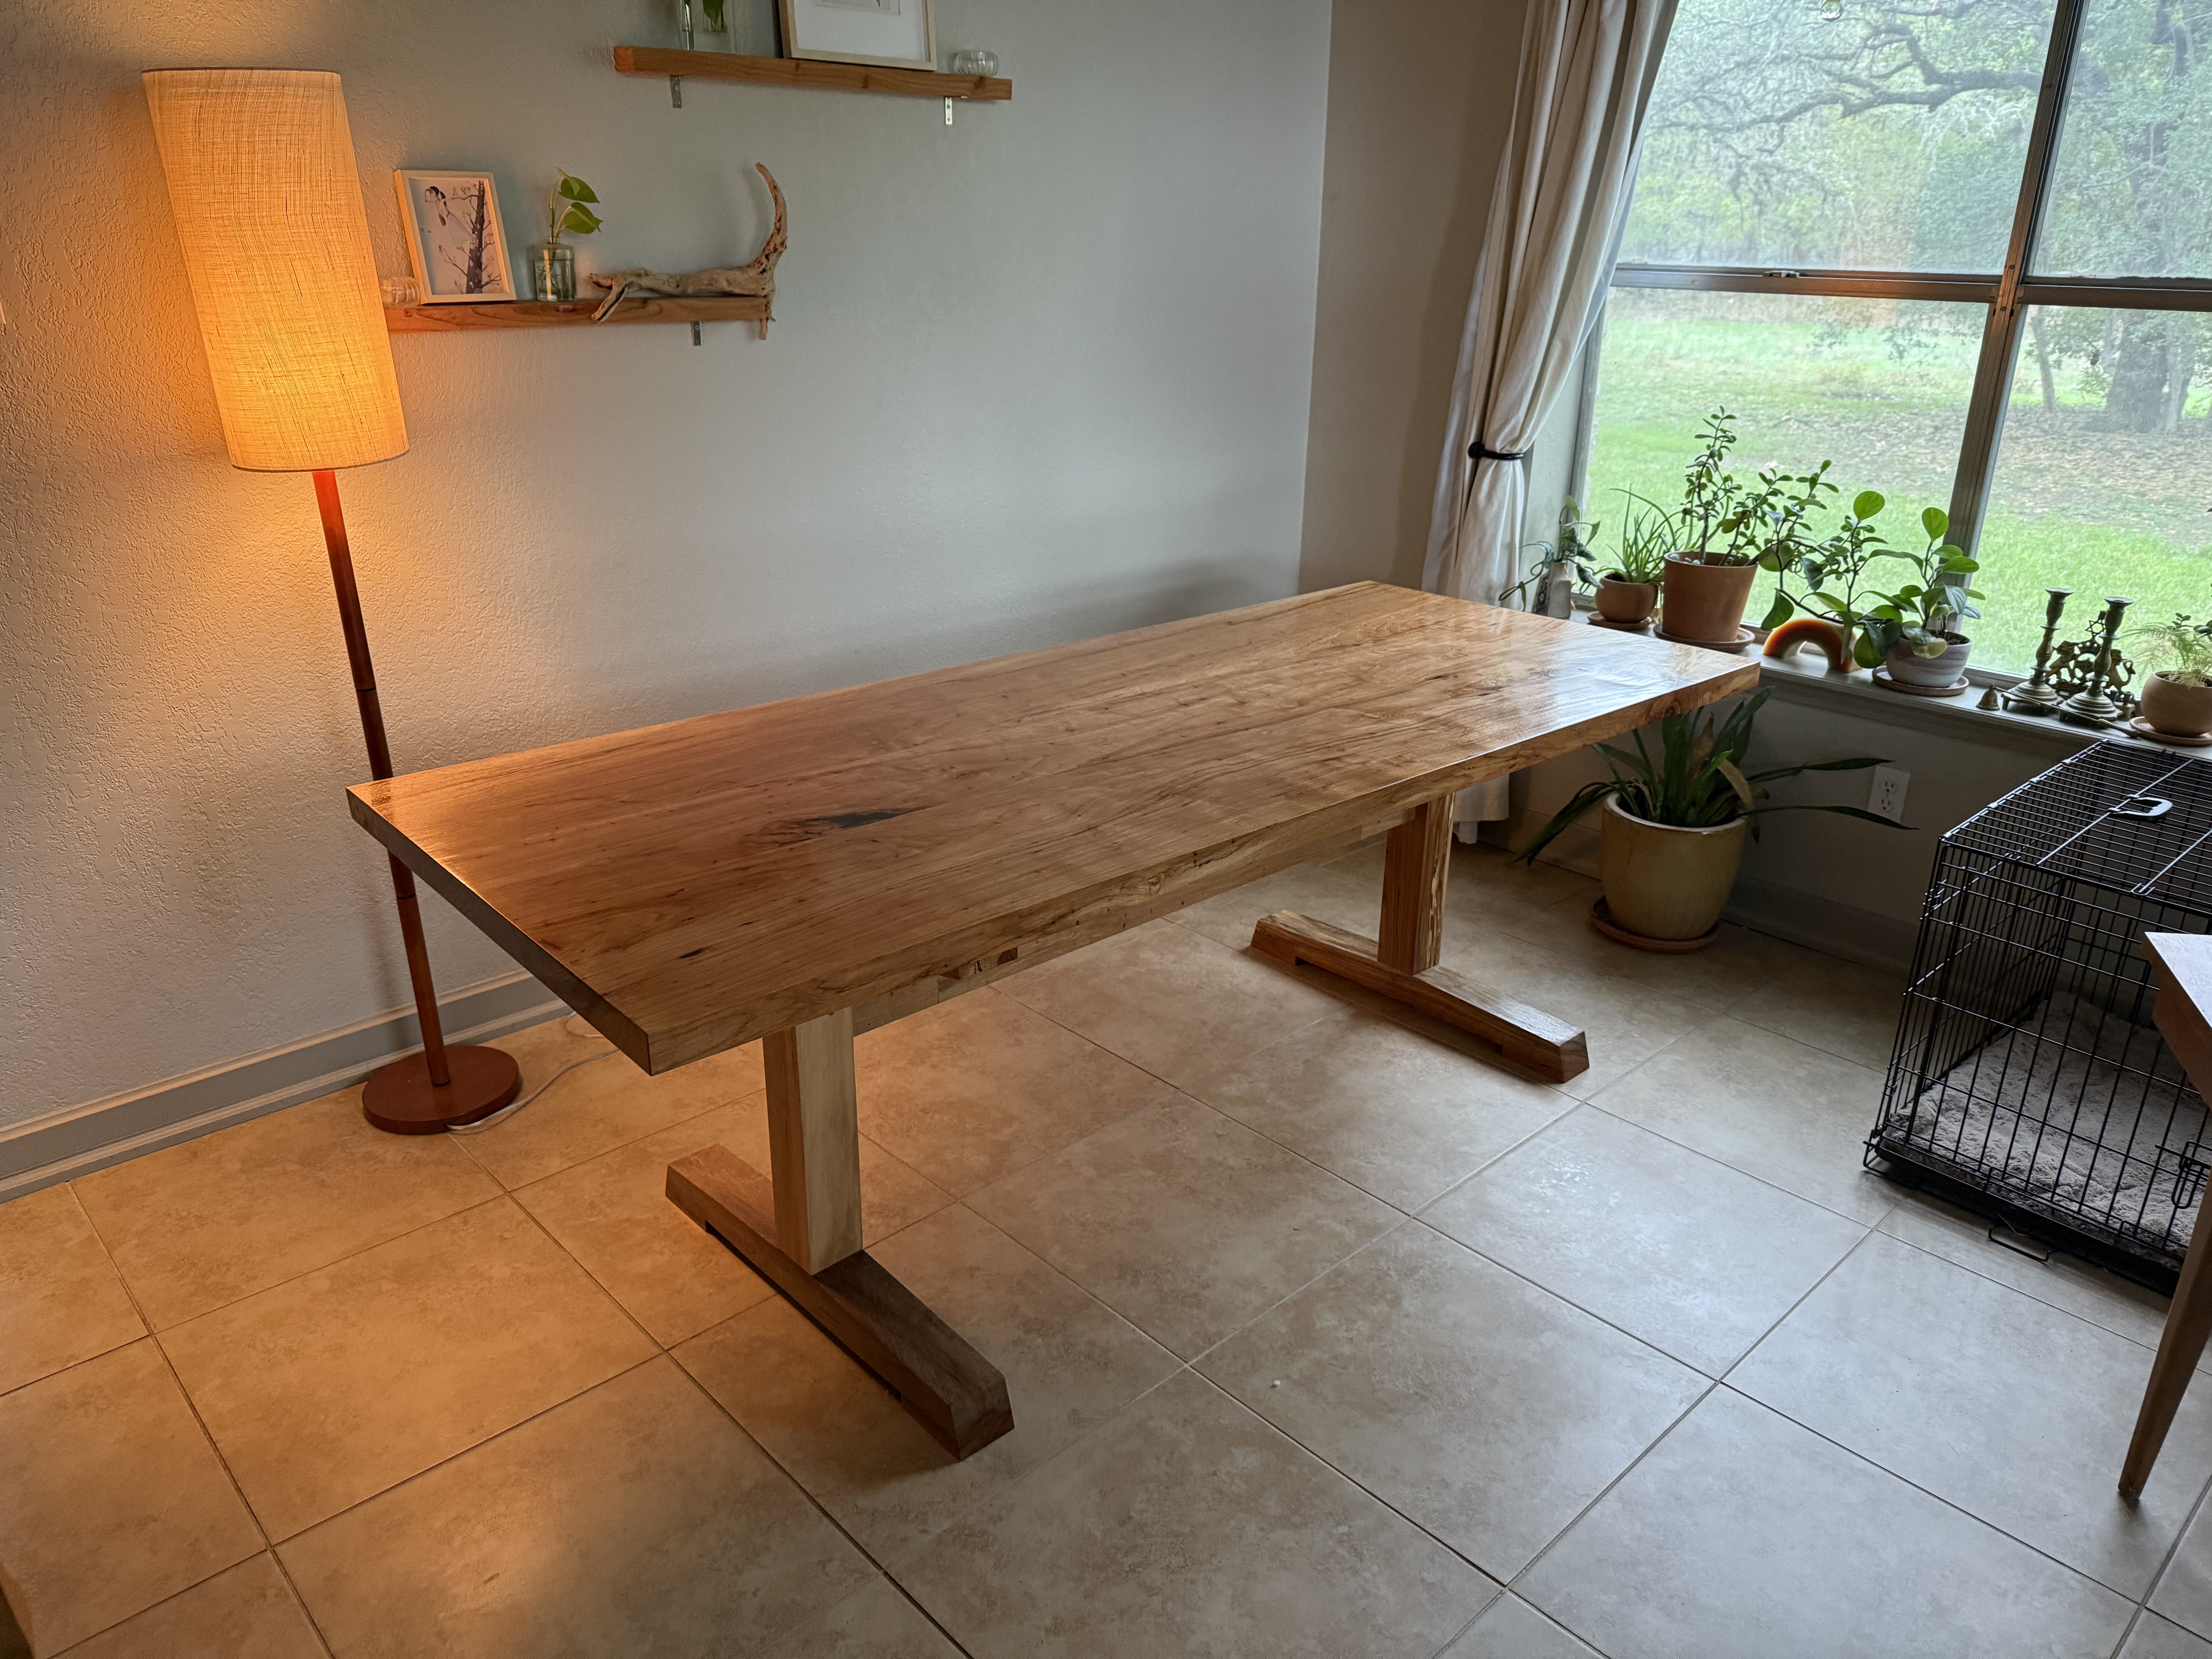
Thus was born the Foundation Trestle.
The Design
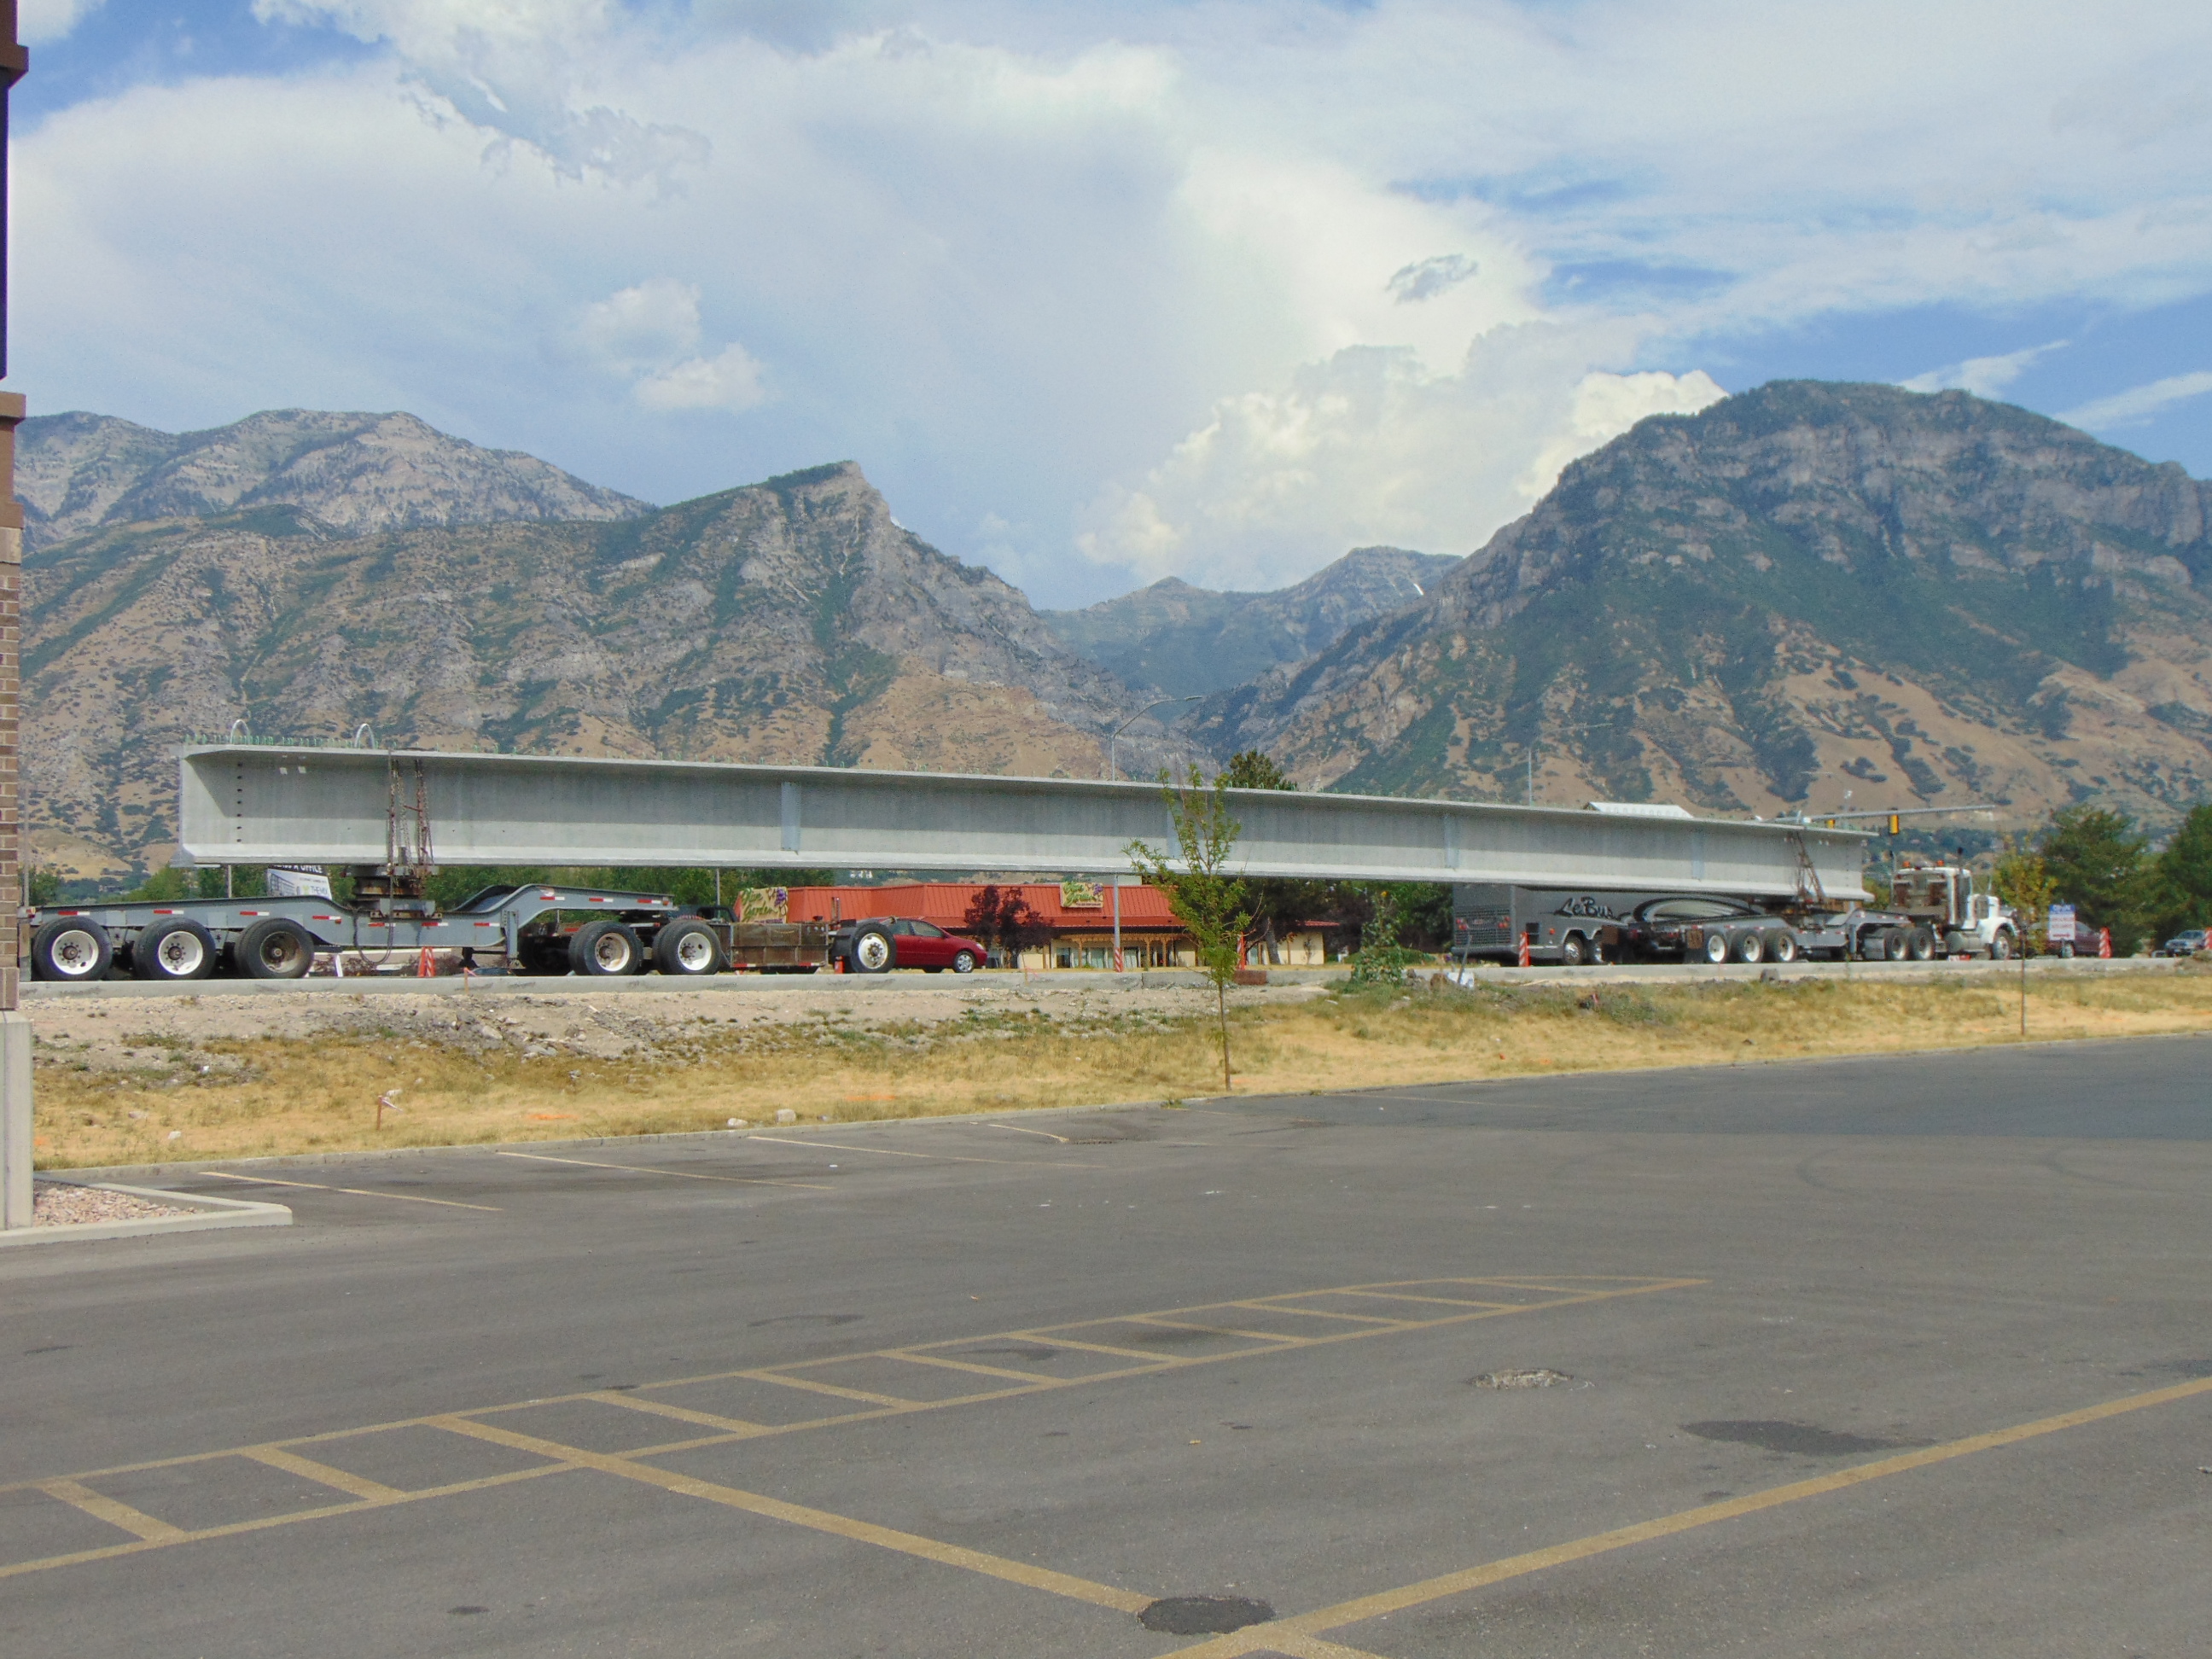
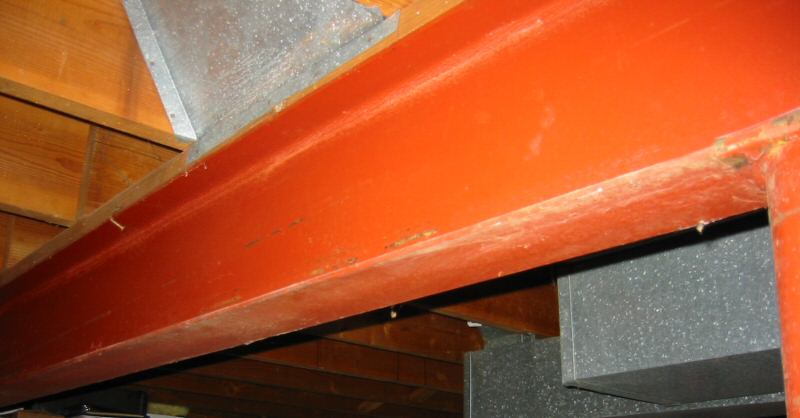
I chose a design based off of Christopher Schwarz’s trestle table. In particular I liked how he talked about the simple and strong form of the I-beam, clean and simple geometry, etc. What drew me to this design in particular is the intentionality behind using the timeless and strong I-beam form.
The I-beam’s timelessness comes from its efficiency. It uses the least amount of material possible to handle the maximum amount of bending (span) load and this form shows up everywhere:
.jpg)
.jpg)
Many of the things that irritate me about contemporary tables are:
- Flimsy construction and thin or light materials.
- Weak, poor joints for the legs and aprons and stretchers.
- Table heights made for smaller people.
… these complaints produced a set of requirements that were really clear for me:
- The wood species needed to be dense, heavy, and strong.
- The proportions of everything from the feet, the legs, the stretcher, to the top needed to be thicker than usual.
- The joints needed to be over built and strong enough to resist decades of forces placed on them.
My final design came out to:
- Southern Texas Pecan for all the parts as it’s a beautiful wood and it is the second hardest domestic hardwood in the United States (as well as native to Austin, Texas).
- I thickened everything from Schwarz’s original design plans:
- The feet, legs, and braces I kept square and made 3-7/16” x 3-7/16”.
- The stretcher is taller (7-1/4”) and thicker (1-1/2”).
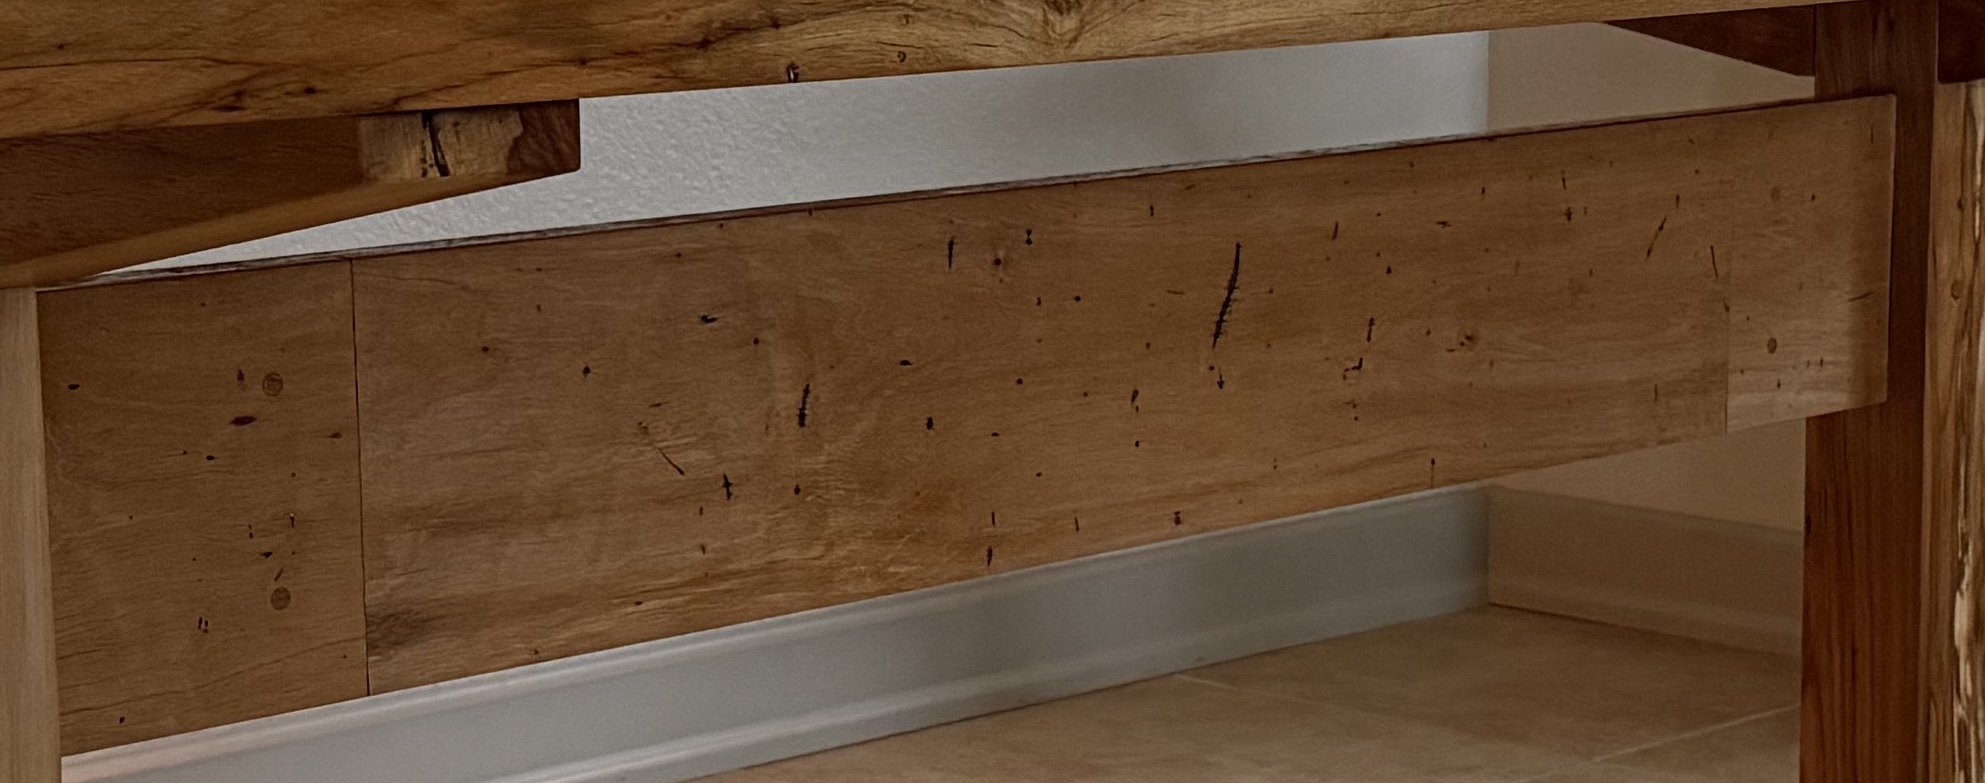
- The top is thicker (1-7/8”) and wider (34-1/2”).
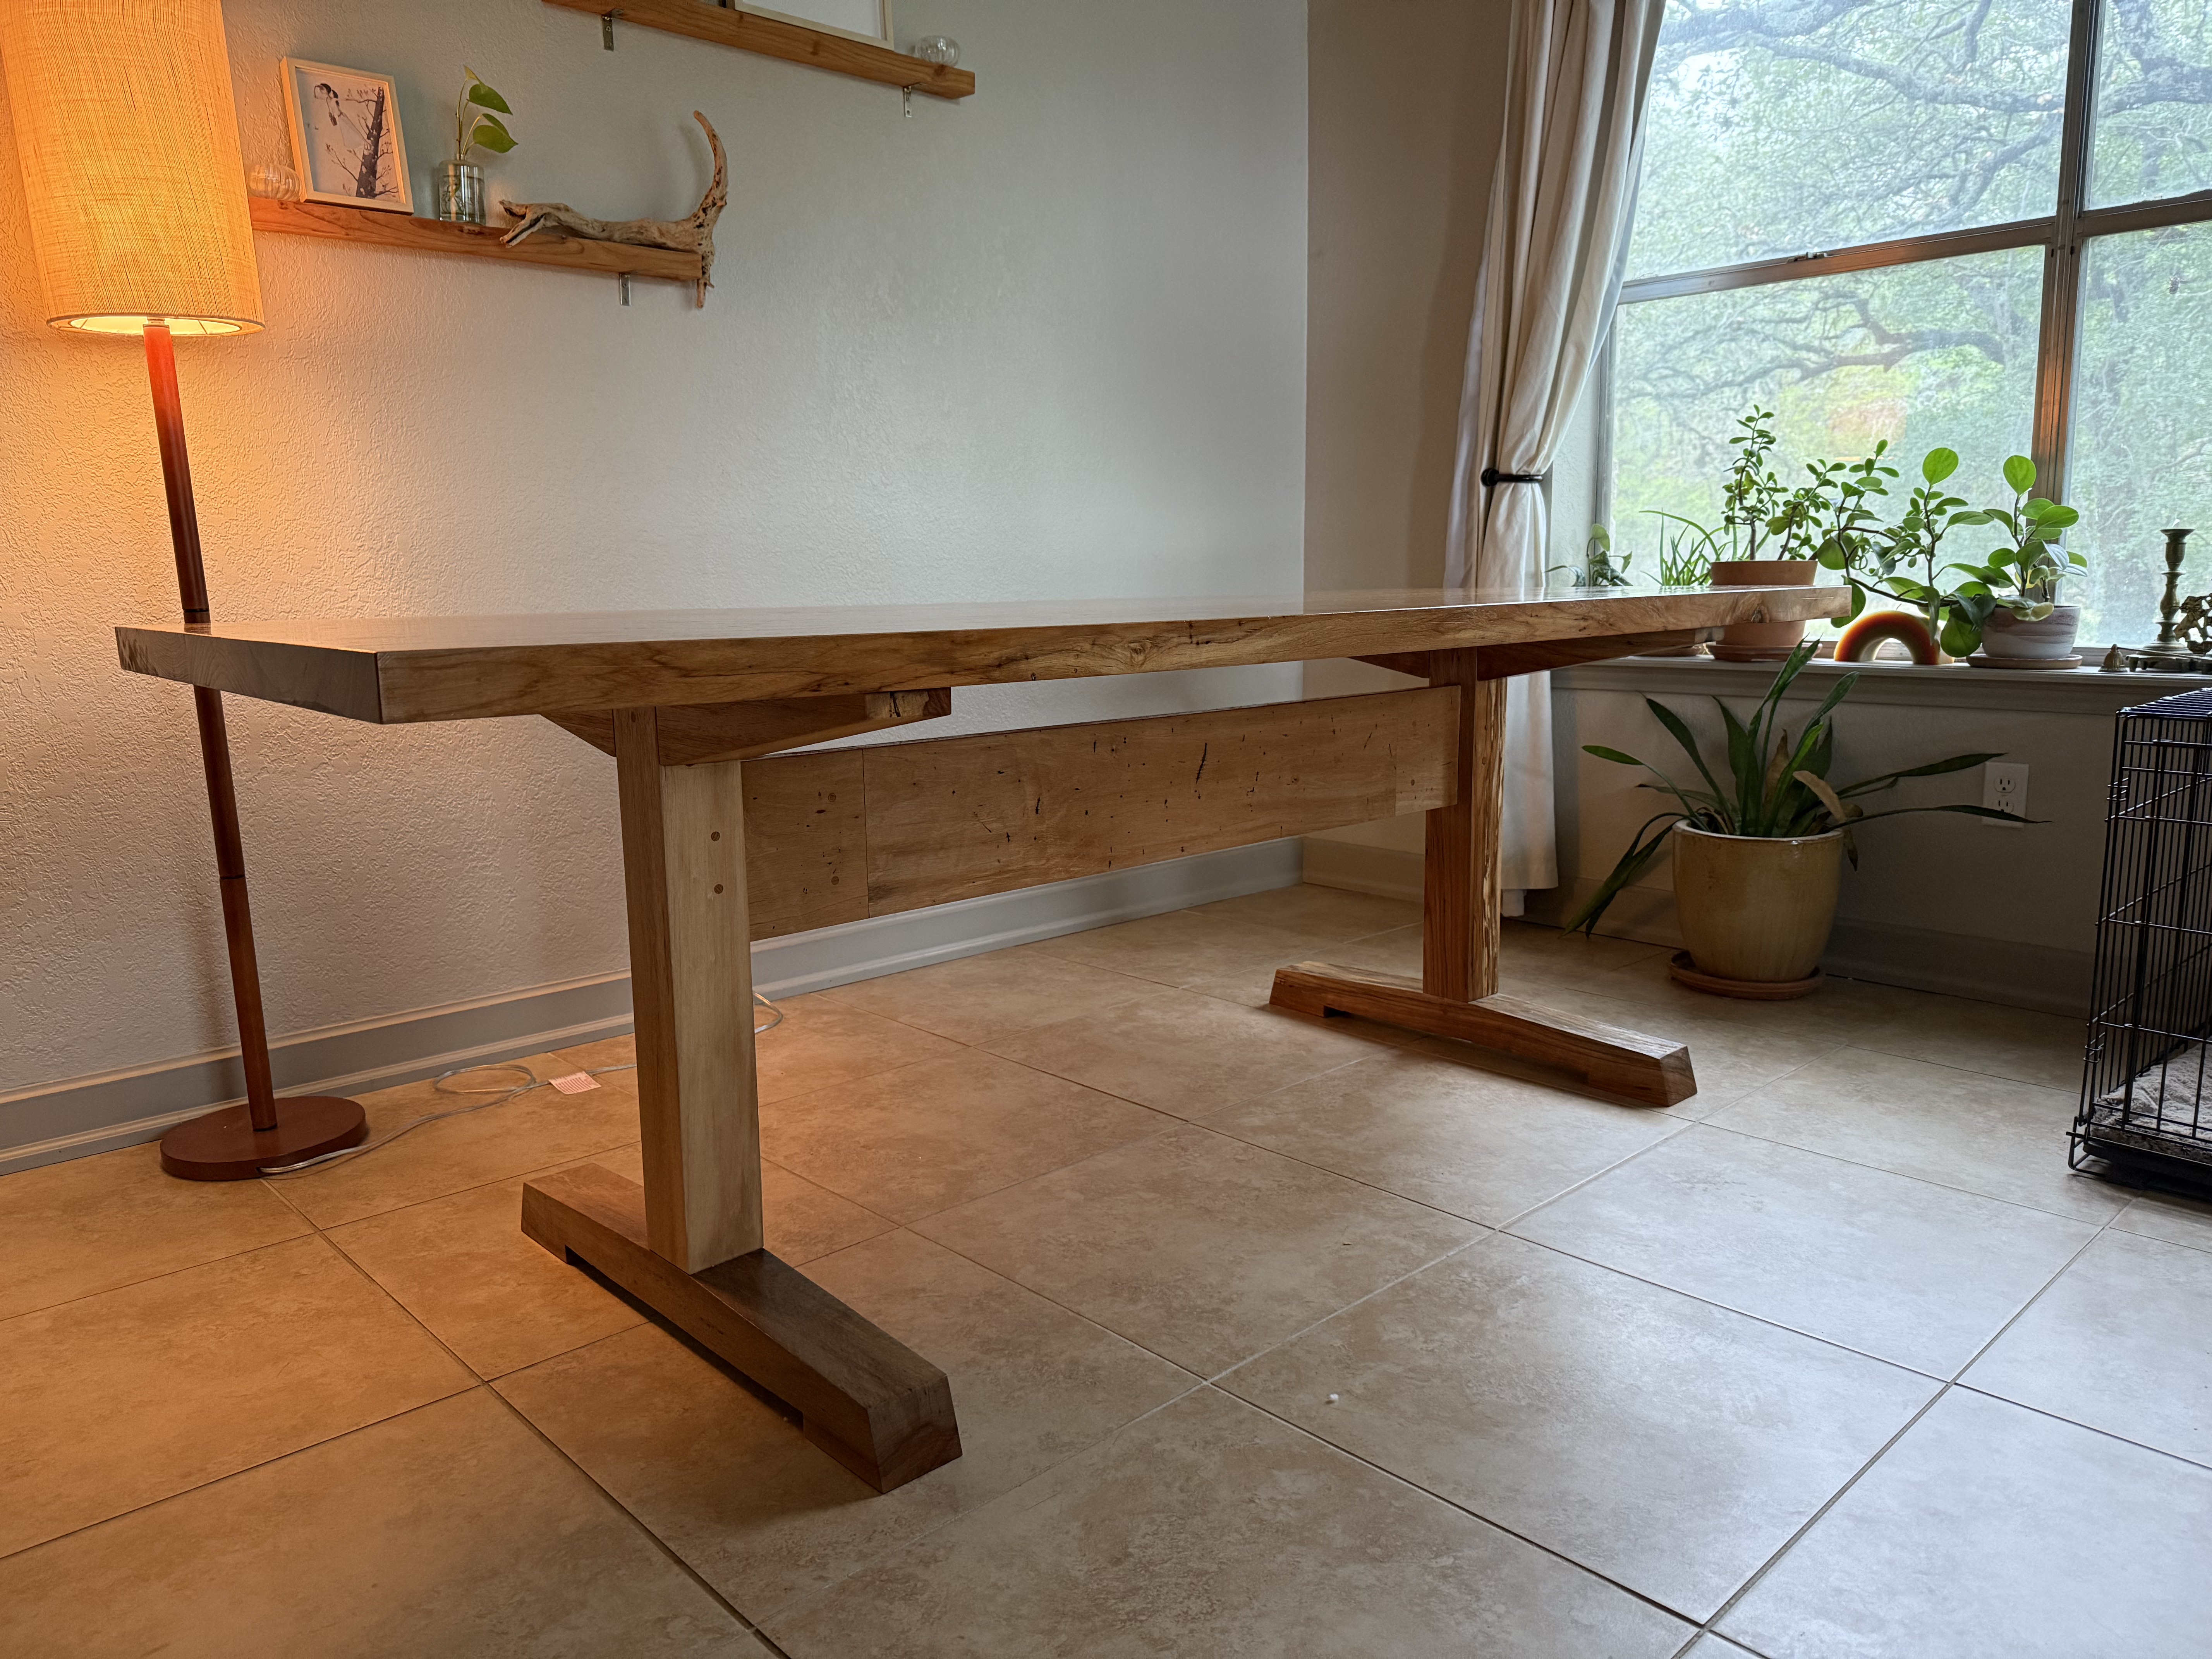
- I chose blind mortise and tenon joints for the leg-to-feet and
stretcher-to-leg joints but because of the thicker base components I was able
to make the tenons taller.
- Crucially, to make these joints bomb-proof, I draw-bored the peg holes and used shagbark hickory dowels (in the same species as pecan but slightly higher modulus of elasticity giving the pegs more “clamping force” than pecan pegs would allow).
- For the stretcher, due to the taller dimensions, I could use two draw-bored dowels in the M&T joinery.
- I also placed the stretcher lower on the leg than Schwarz did because I wanted
a less complicated joint for the stretcher to leg and brace to leg, I also
wanted as much material as is safe for the stretcher since it does the
majority of the work resisting racking forces over time.
- The stretcher connection is the backbone of this table, utilizing a deep, tall tenon locked in place by two separate, draw bored, Shagbark Hickory pins. By double-pinning this joint, we double the active mechanical tension, creating a live connection that constantly clamps the frame tight.
- For this joint to fail, physics would have to overcome nearly a thousand pounds of active clamping force, simultaneously shear through four solid points of the hardest domestic hardwood, and finally fracture the massive surface area of the glue bond. It will hold firm for decades.
The primary result of these design changes are: an increase in the mass of the table (it does move when my body comes into mild contact with it as I’m scooting in a chair), zero racking or wobbliness now and decades into the future, permanent and non-disposable functionality, and an aesthetically pleasing object.
The Build Log
Beginning with the feet and legs
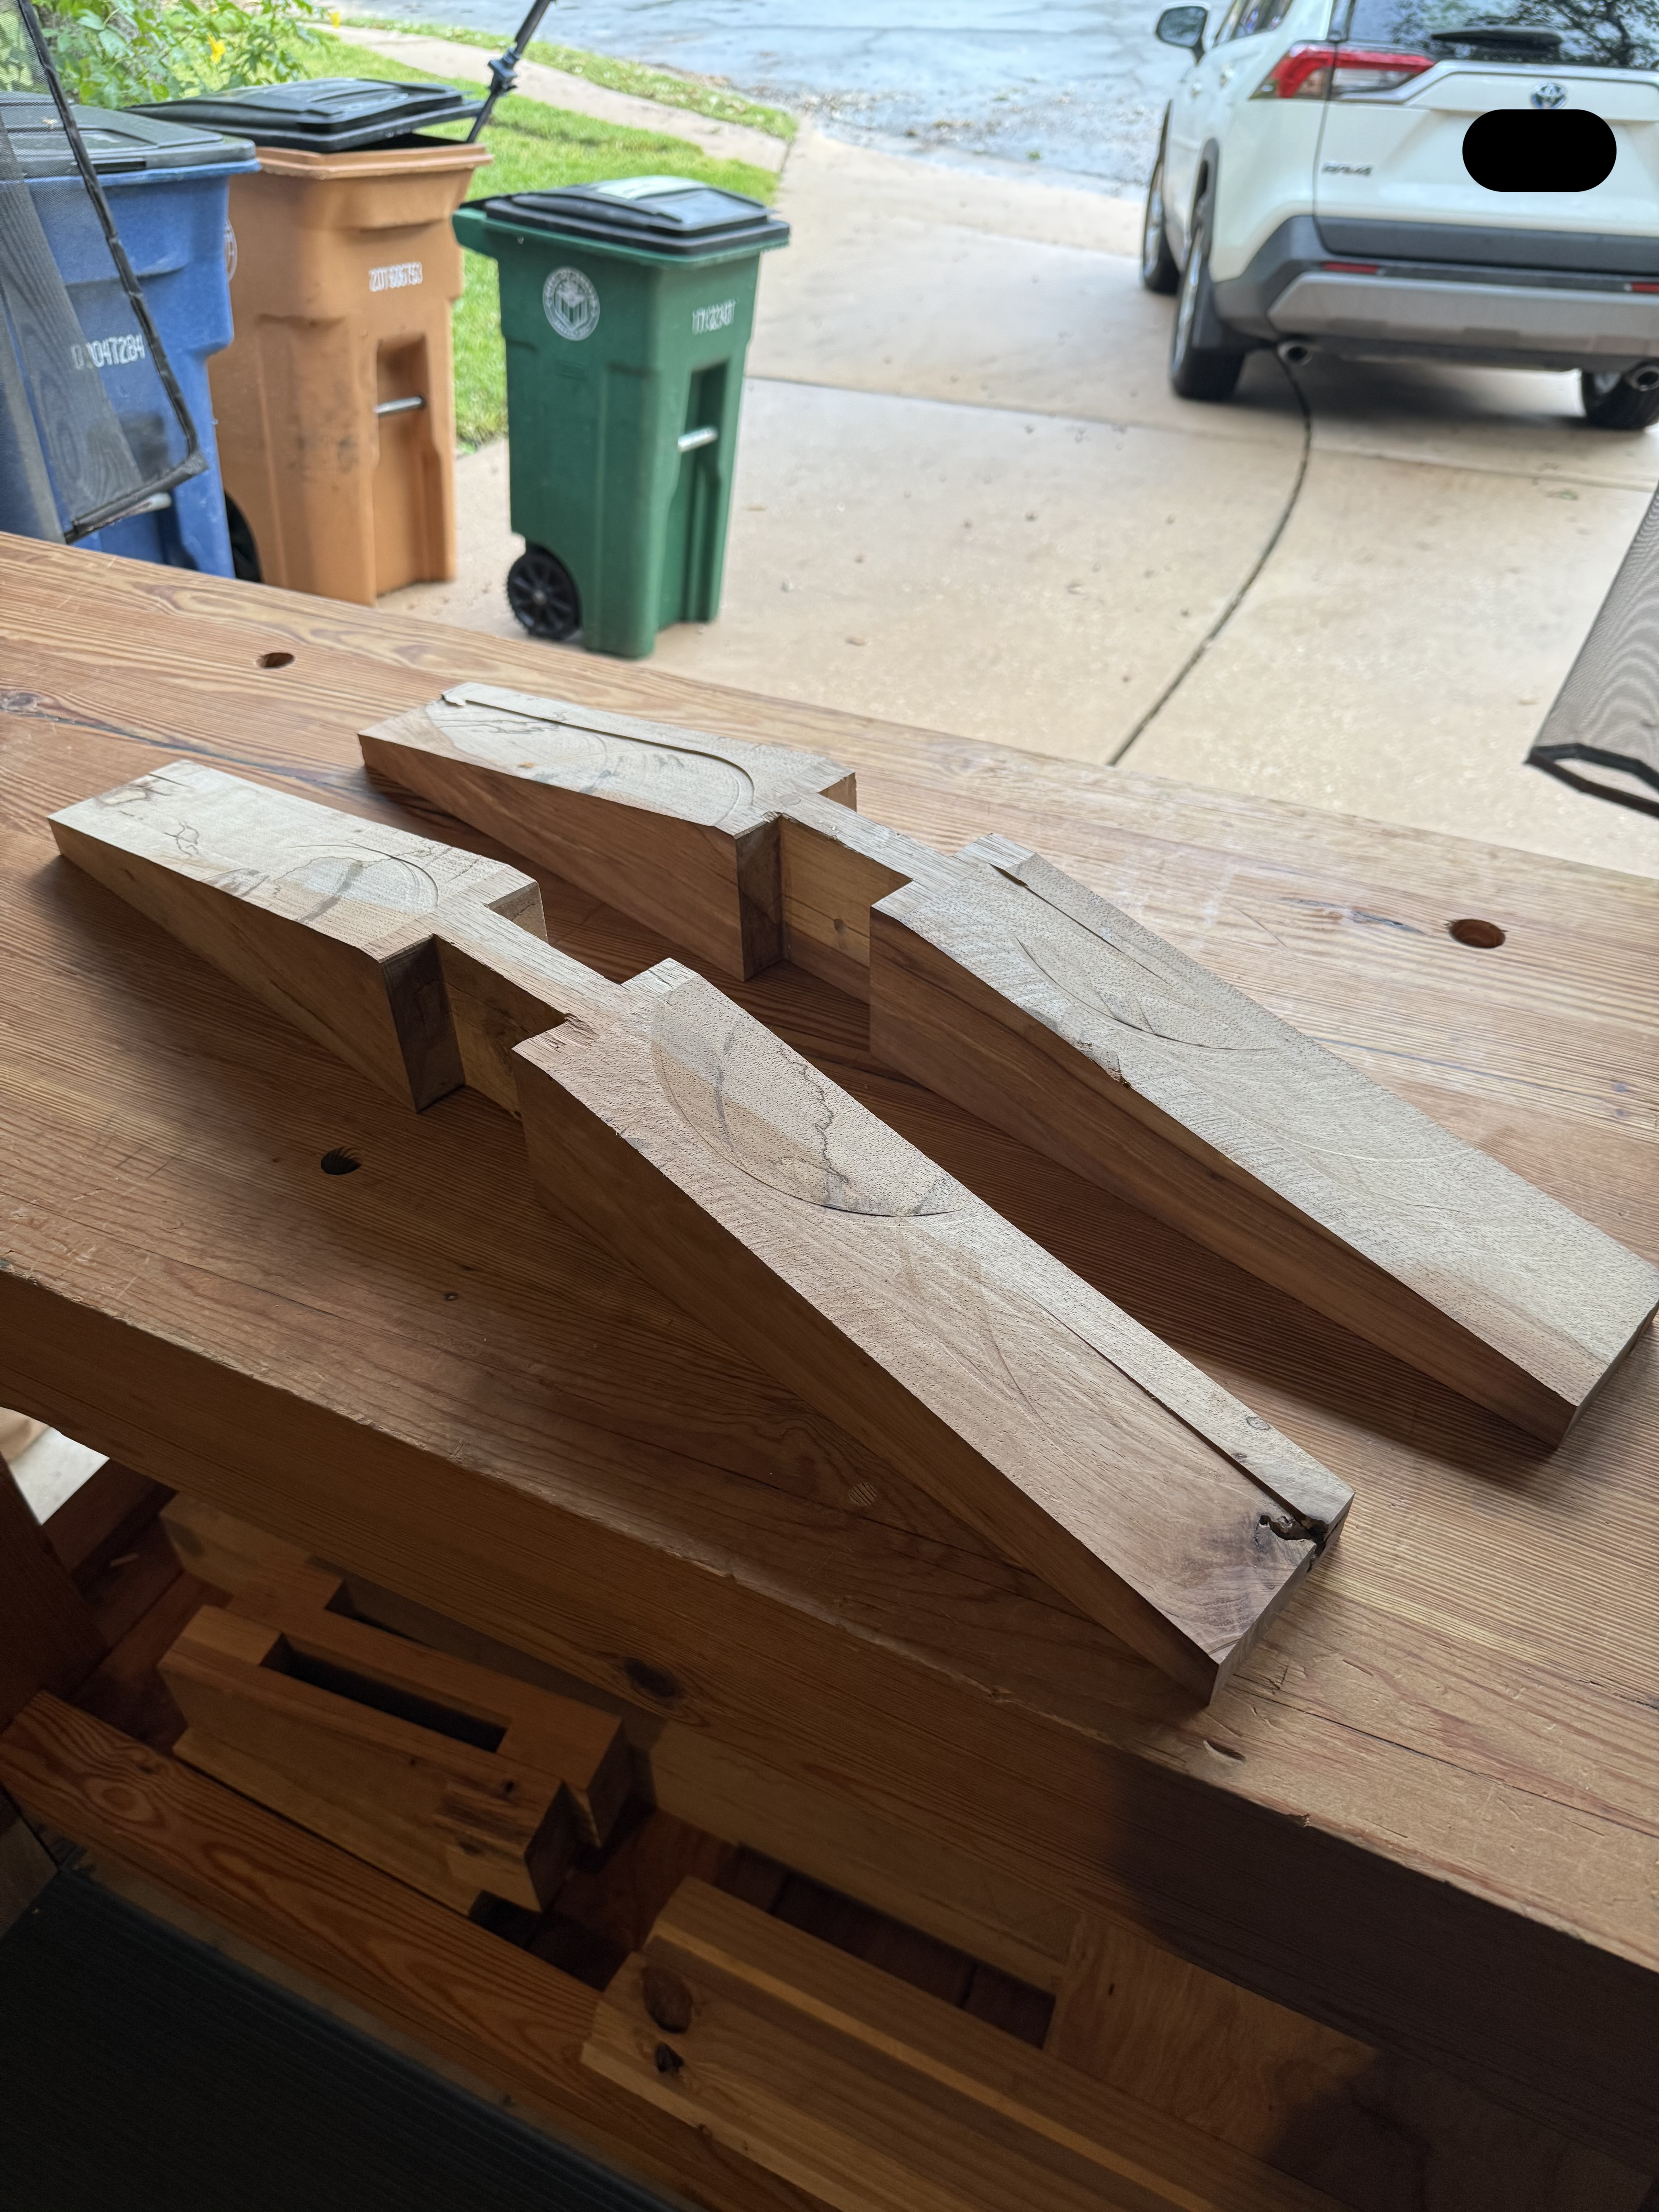
This project began (after picking up quite a bit of 8/4 boards and pecan blanks from Berdoll Sawmill) with cutting and shaping the blanks for the feet and legs.
To shape the feet, I used Schwarz’s pleasing design choice for angles on the toes and feet tops.
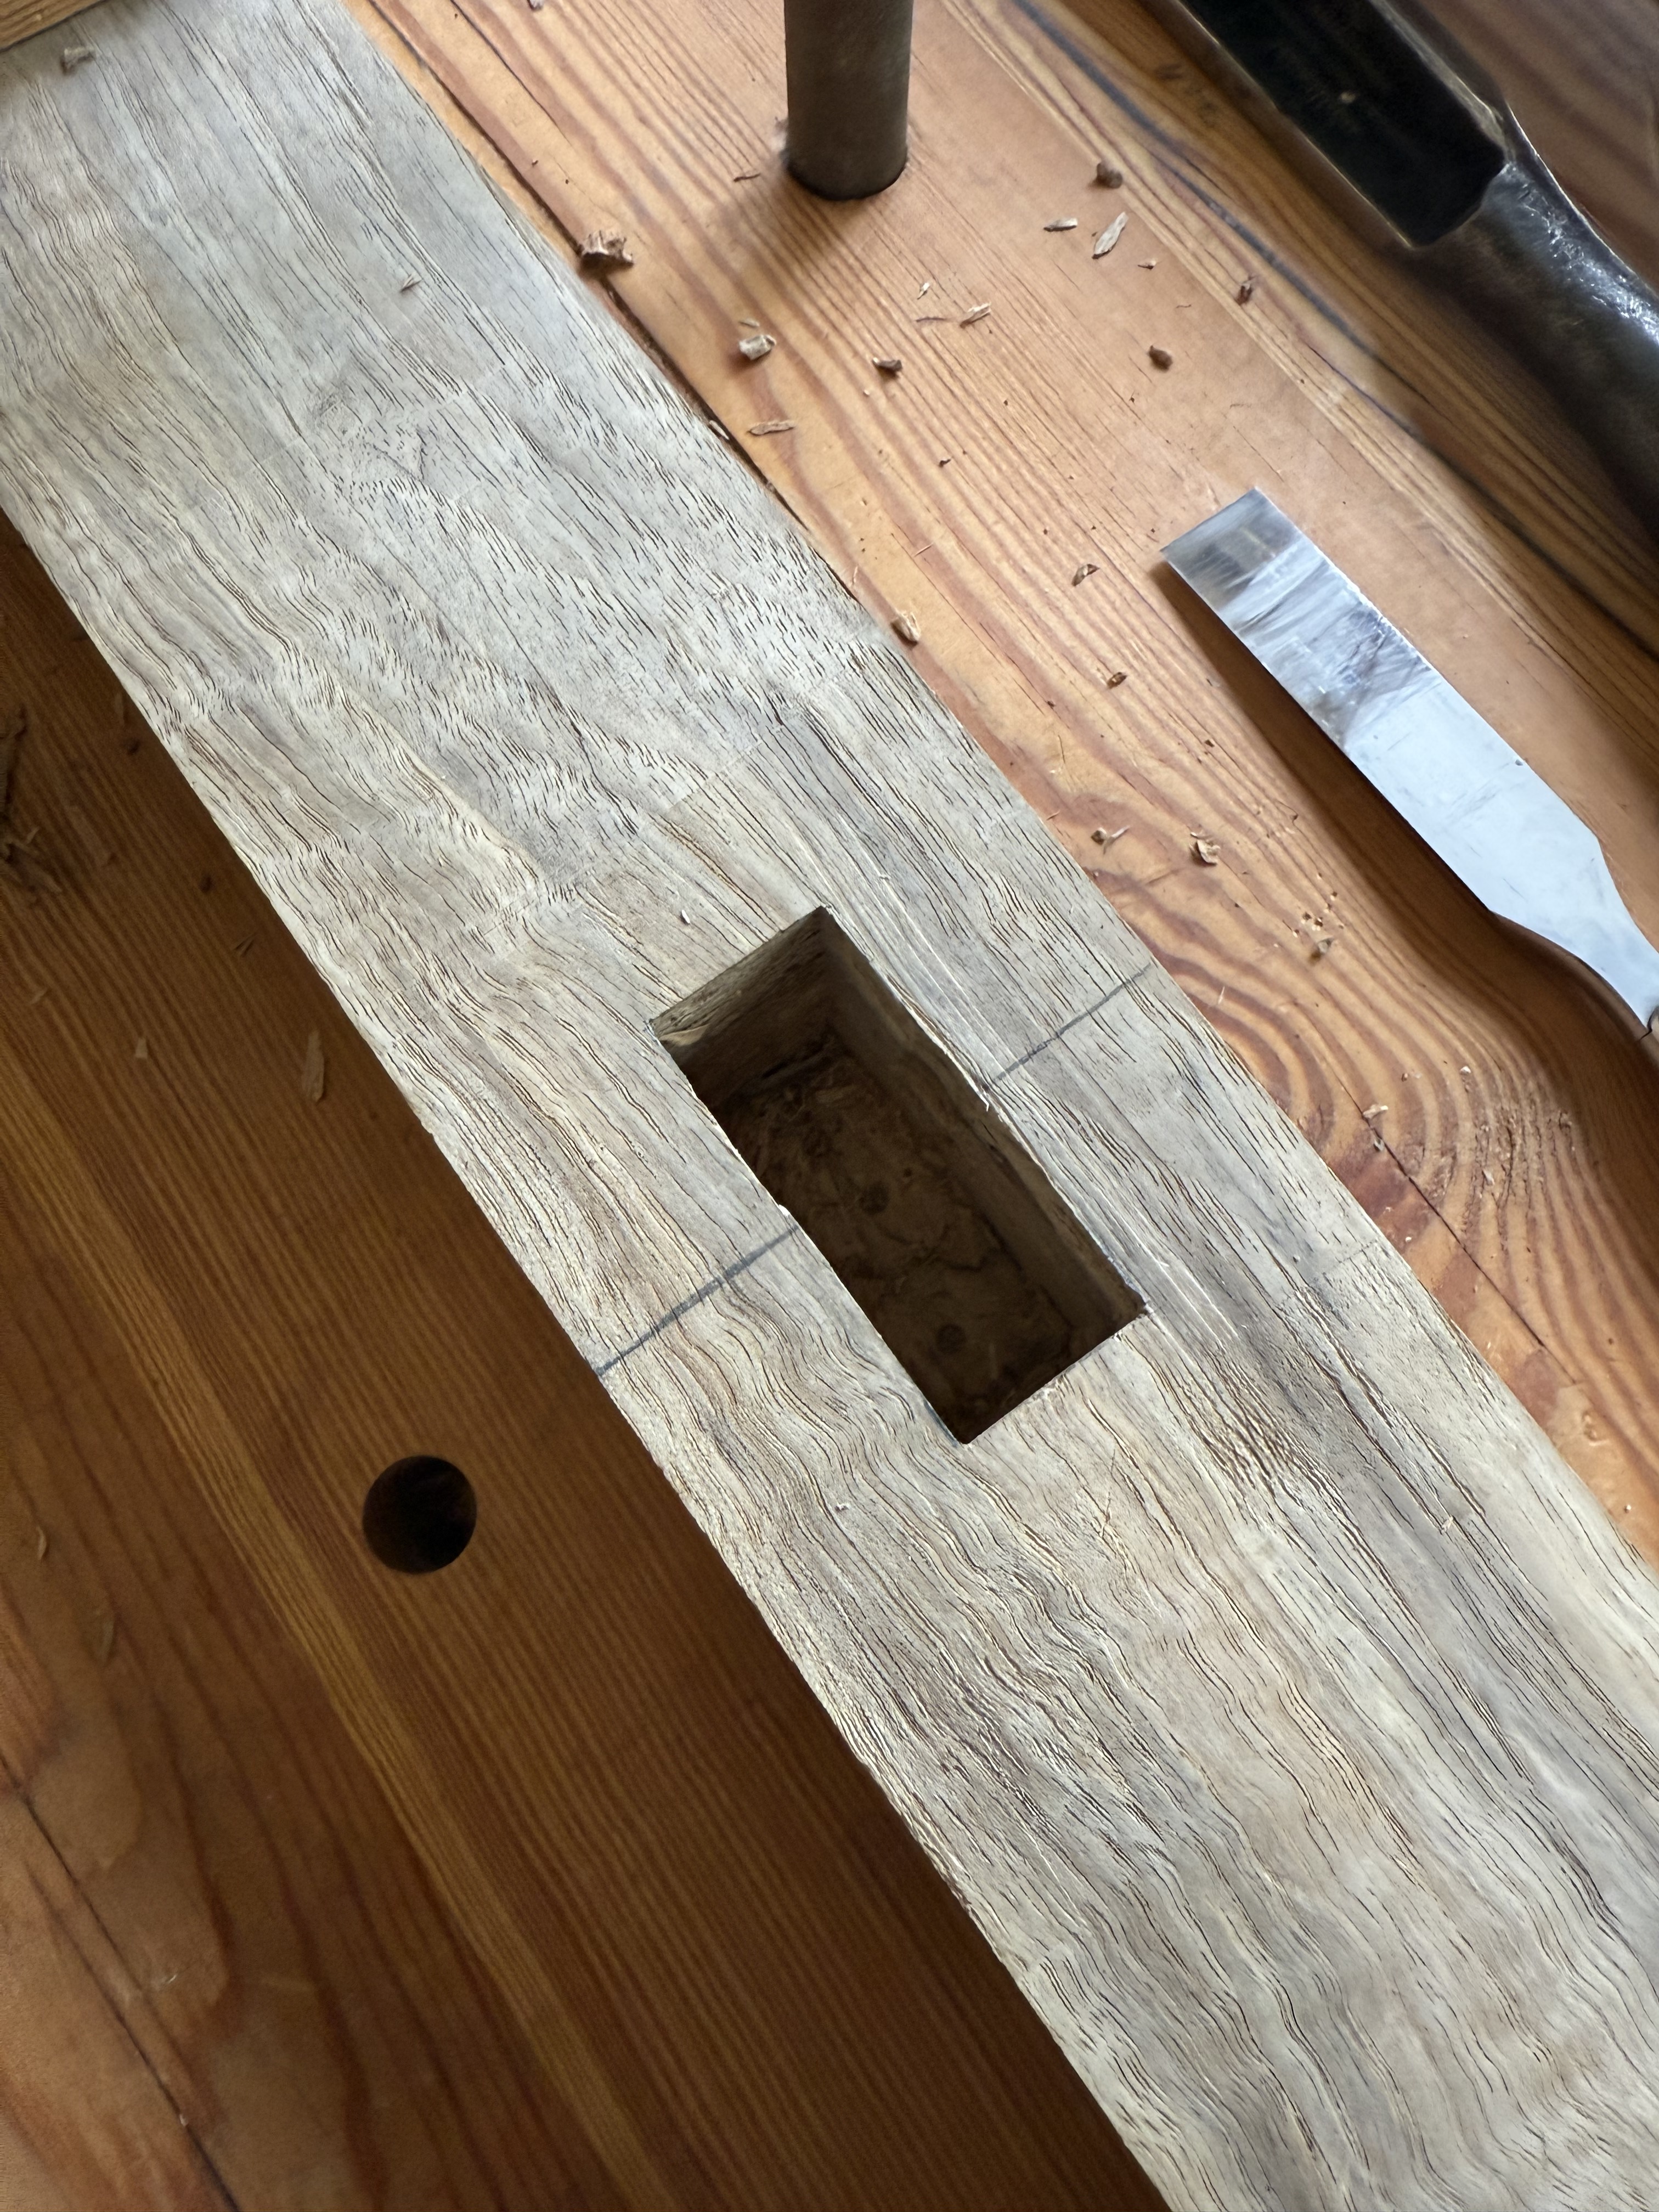

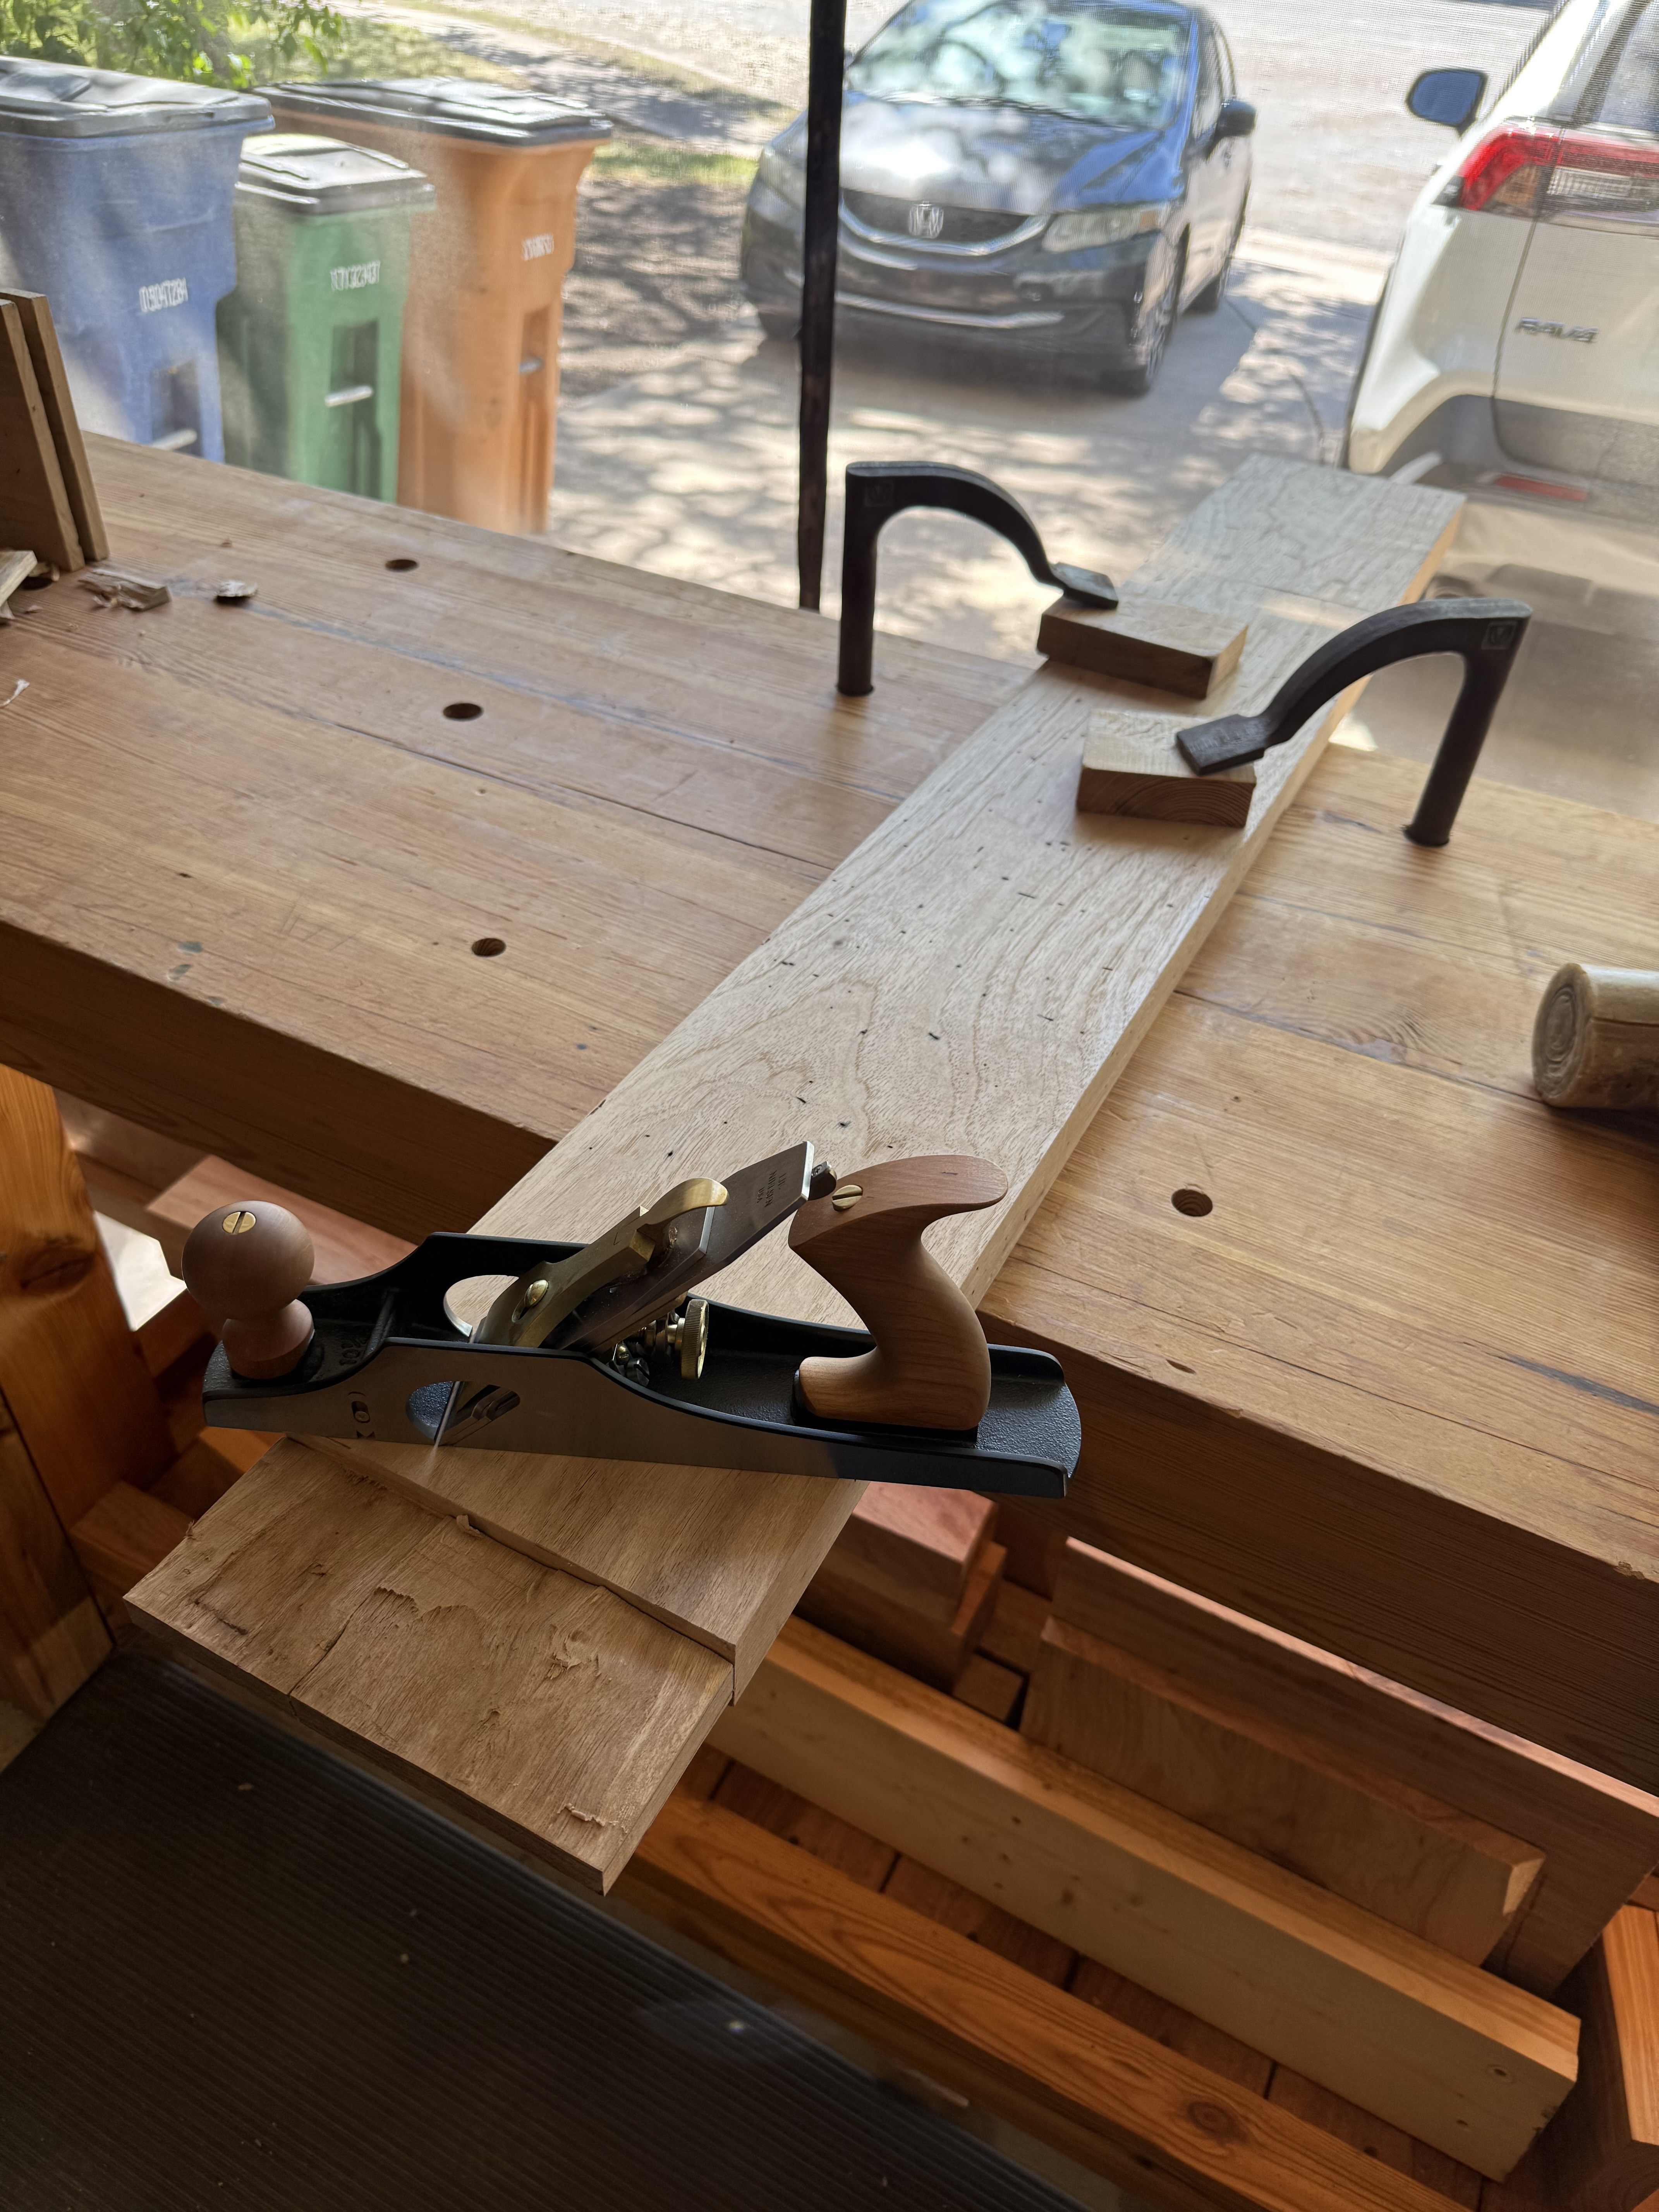
Flattening the stretcher and fixing a mistake
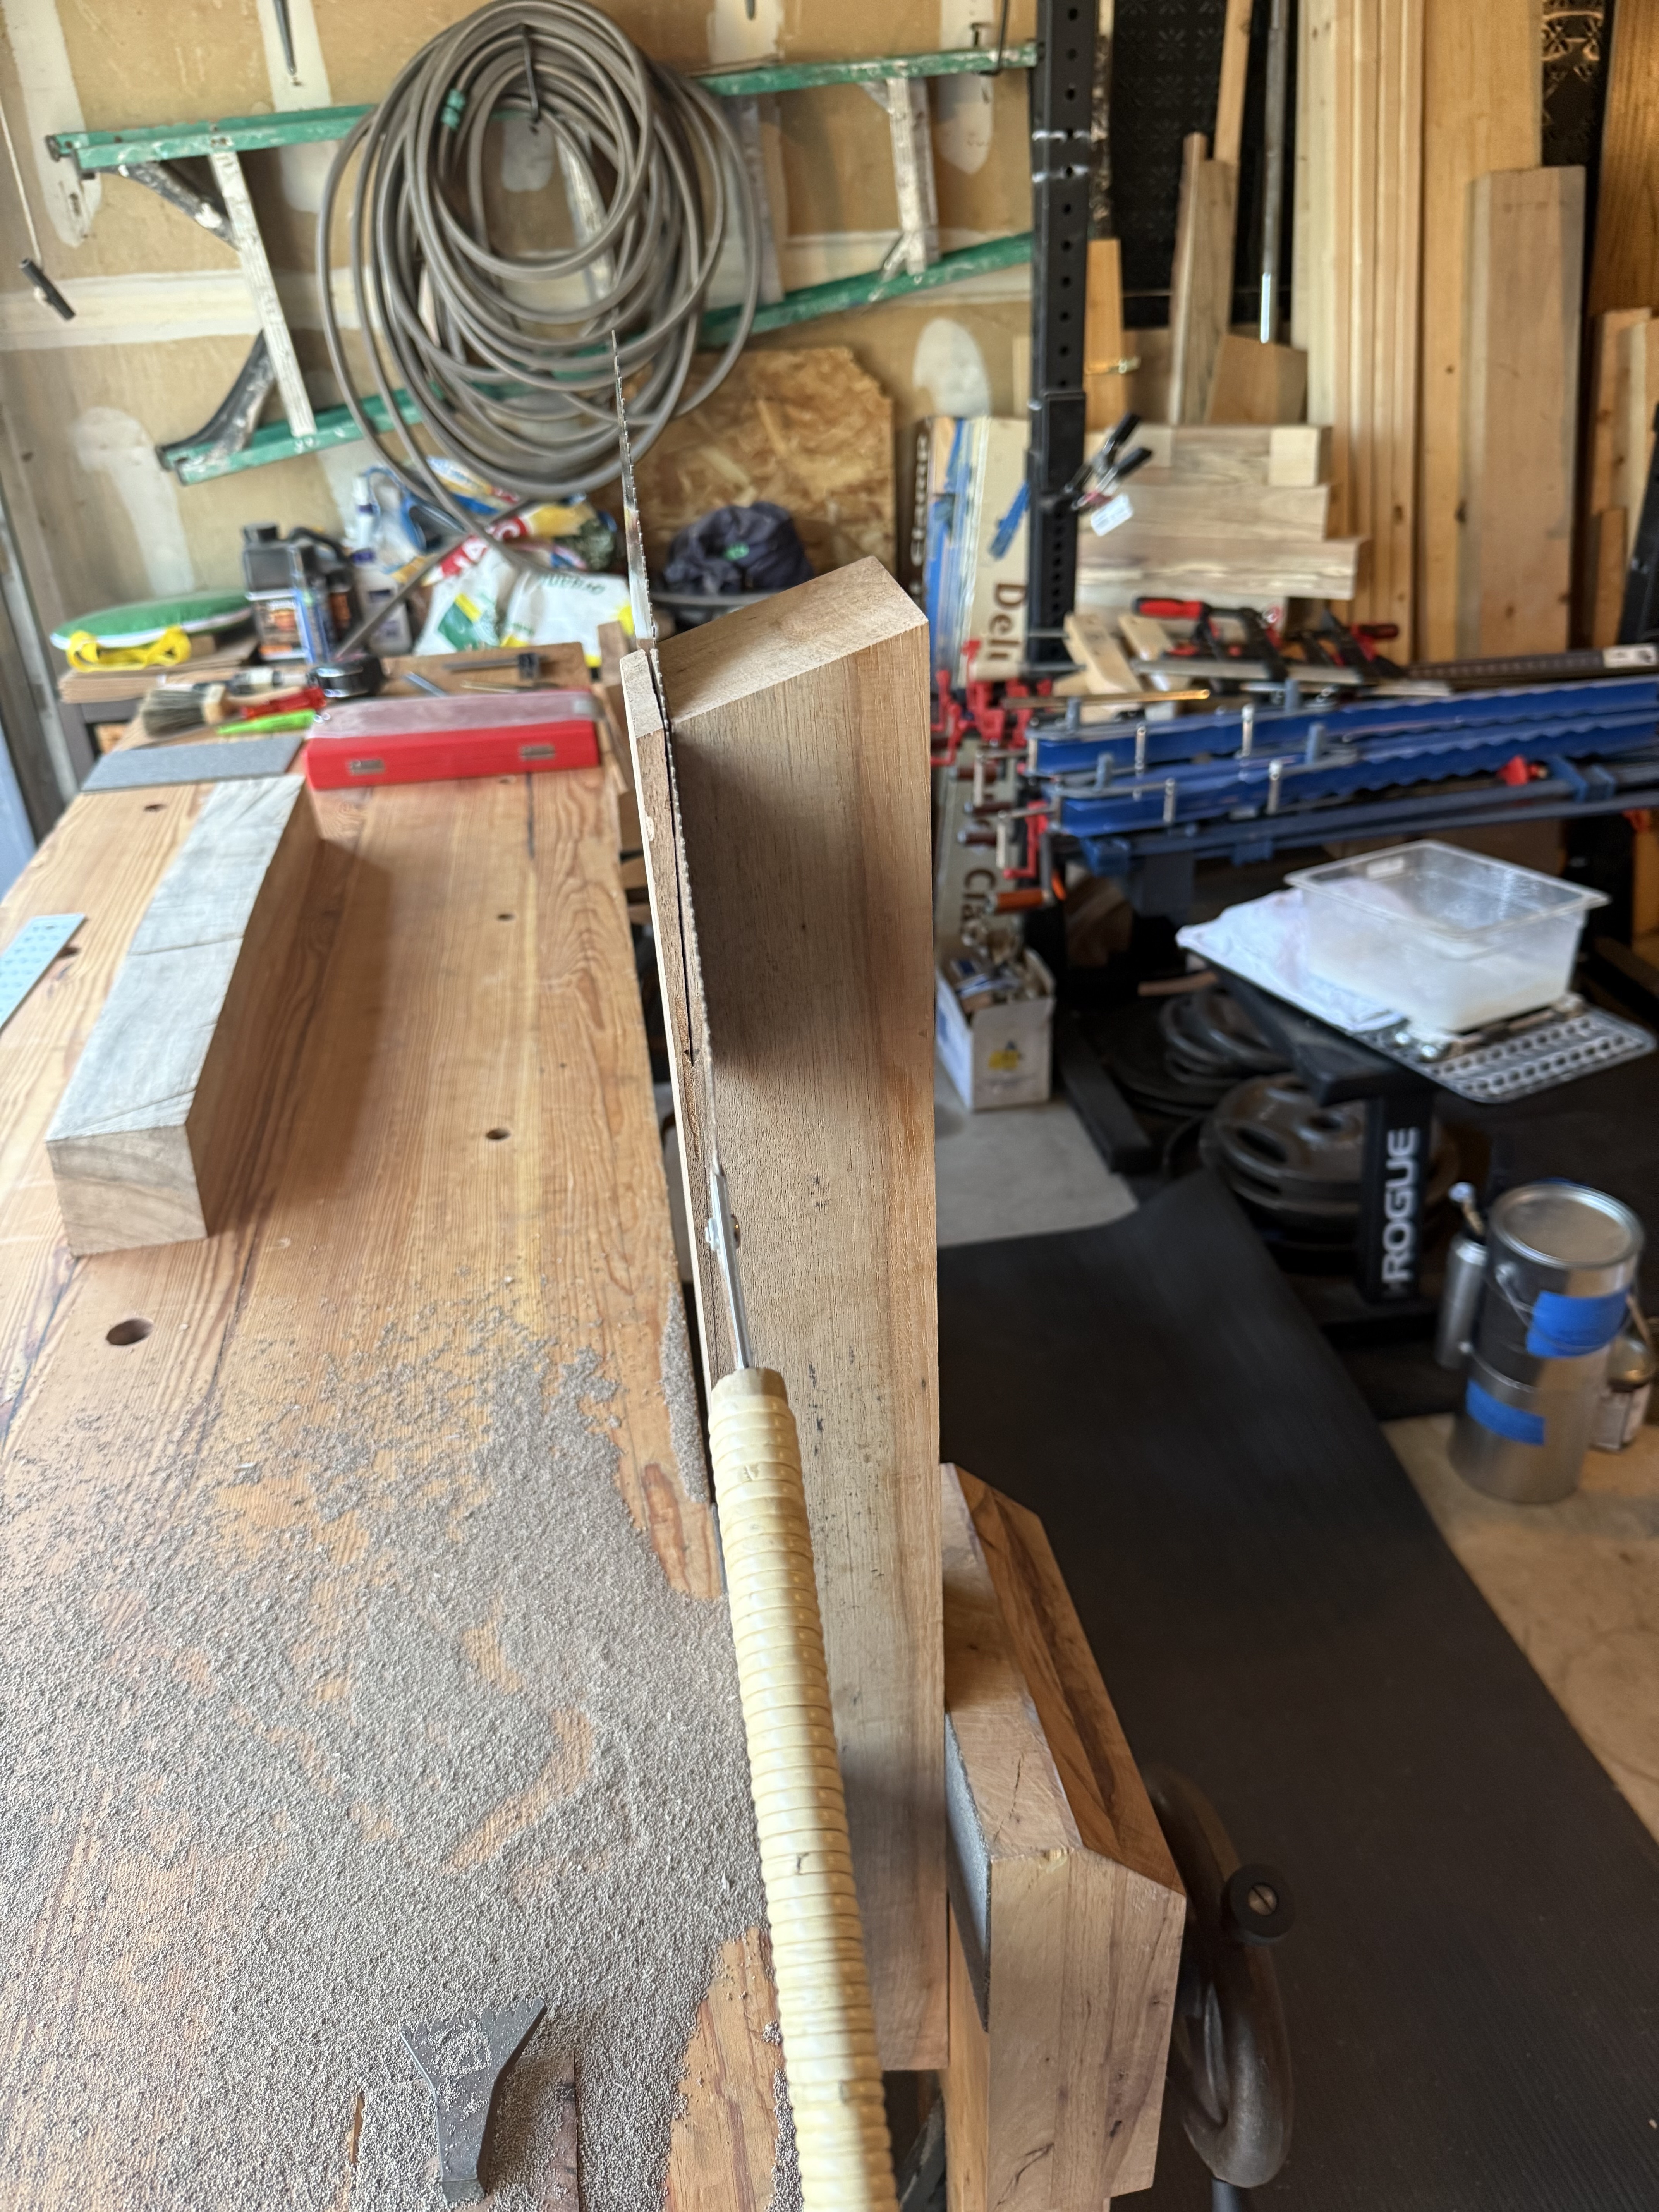
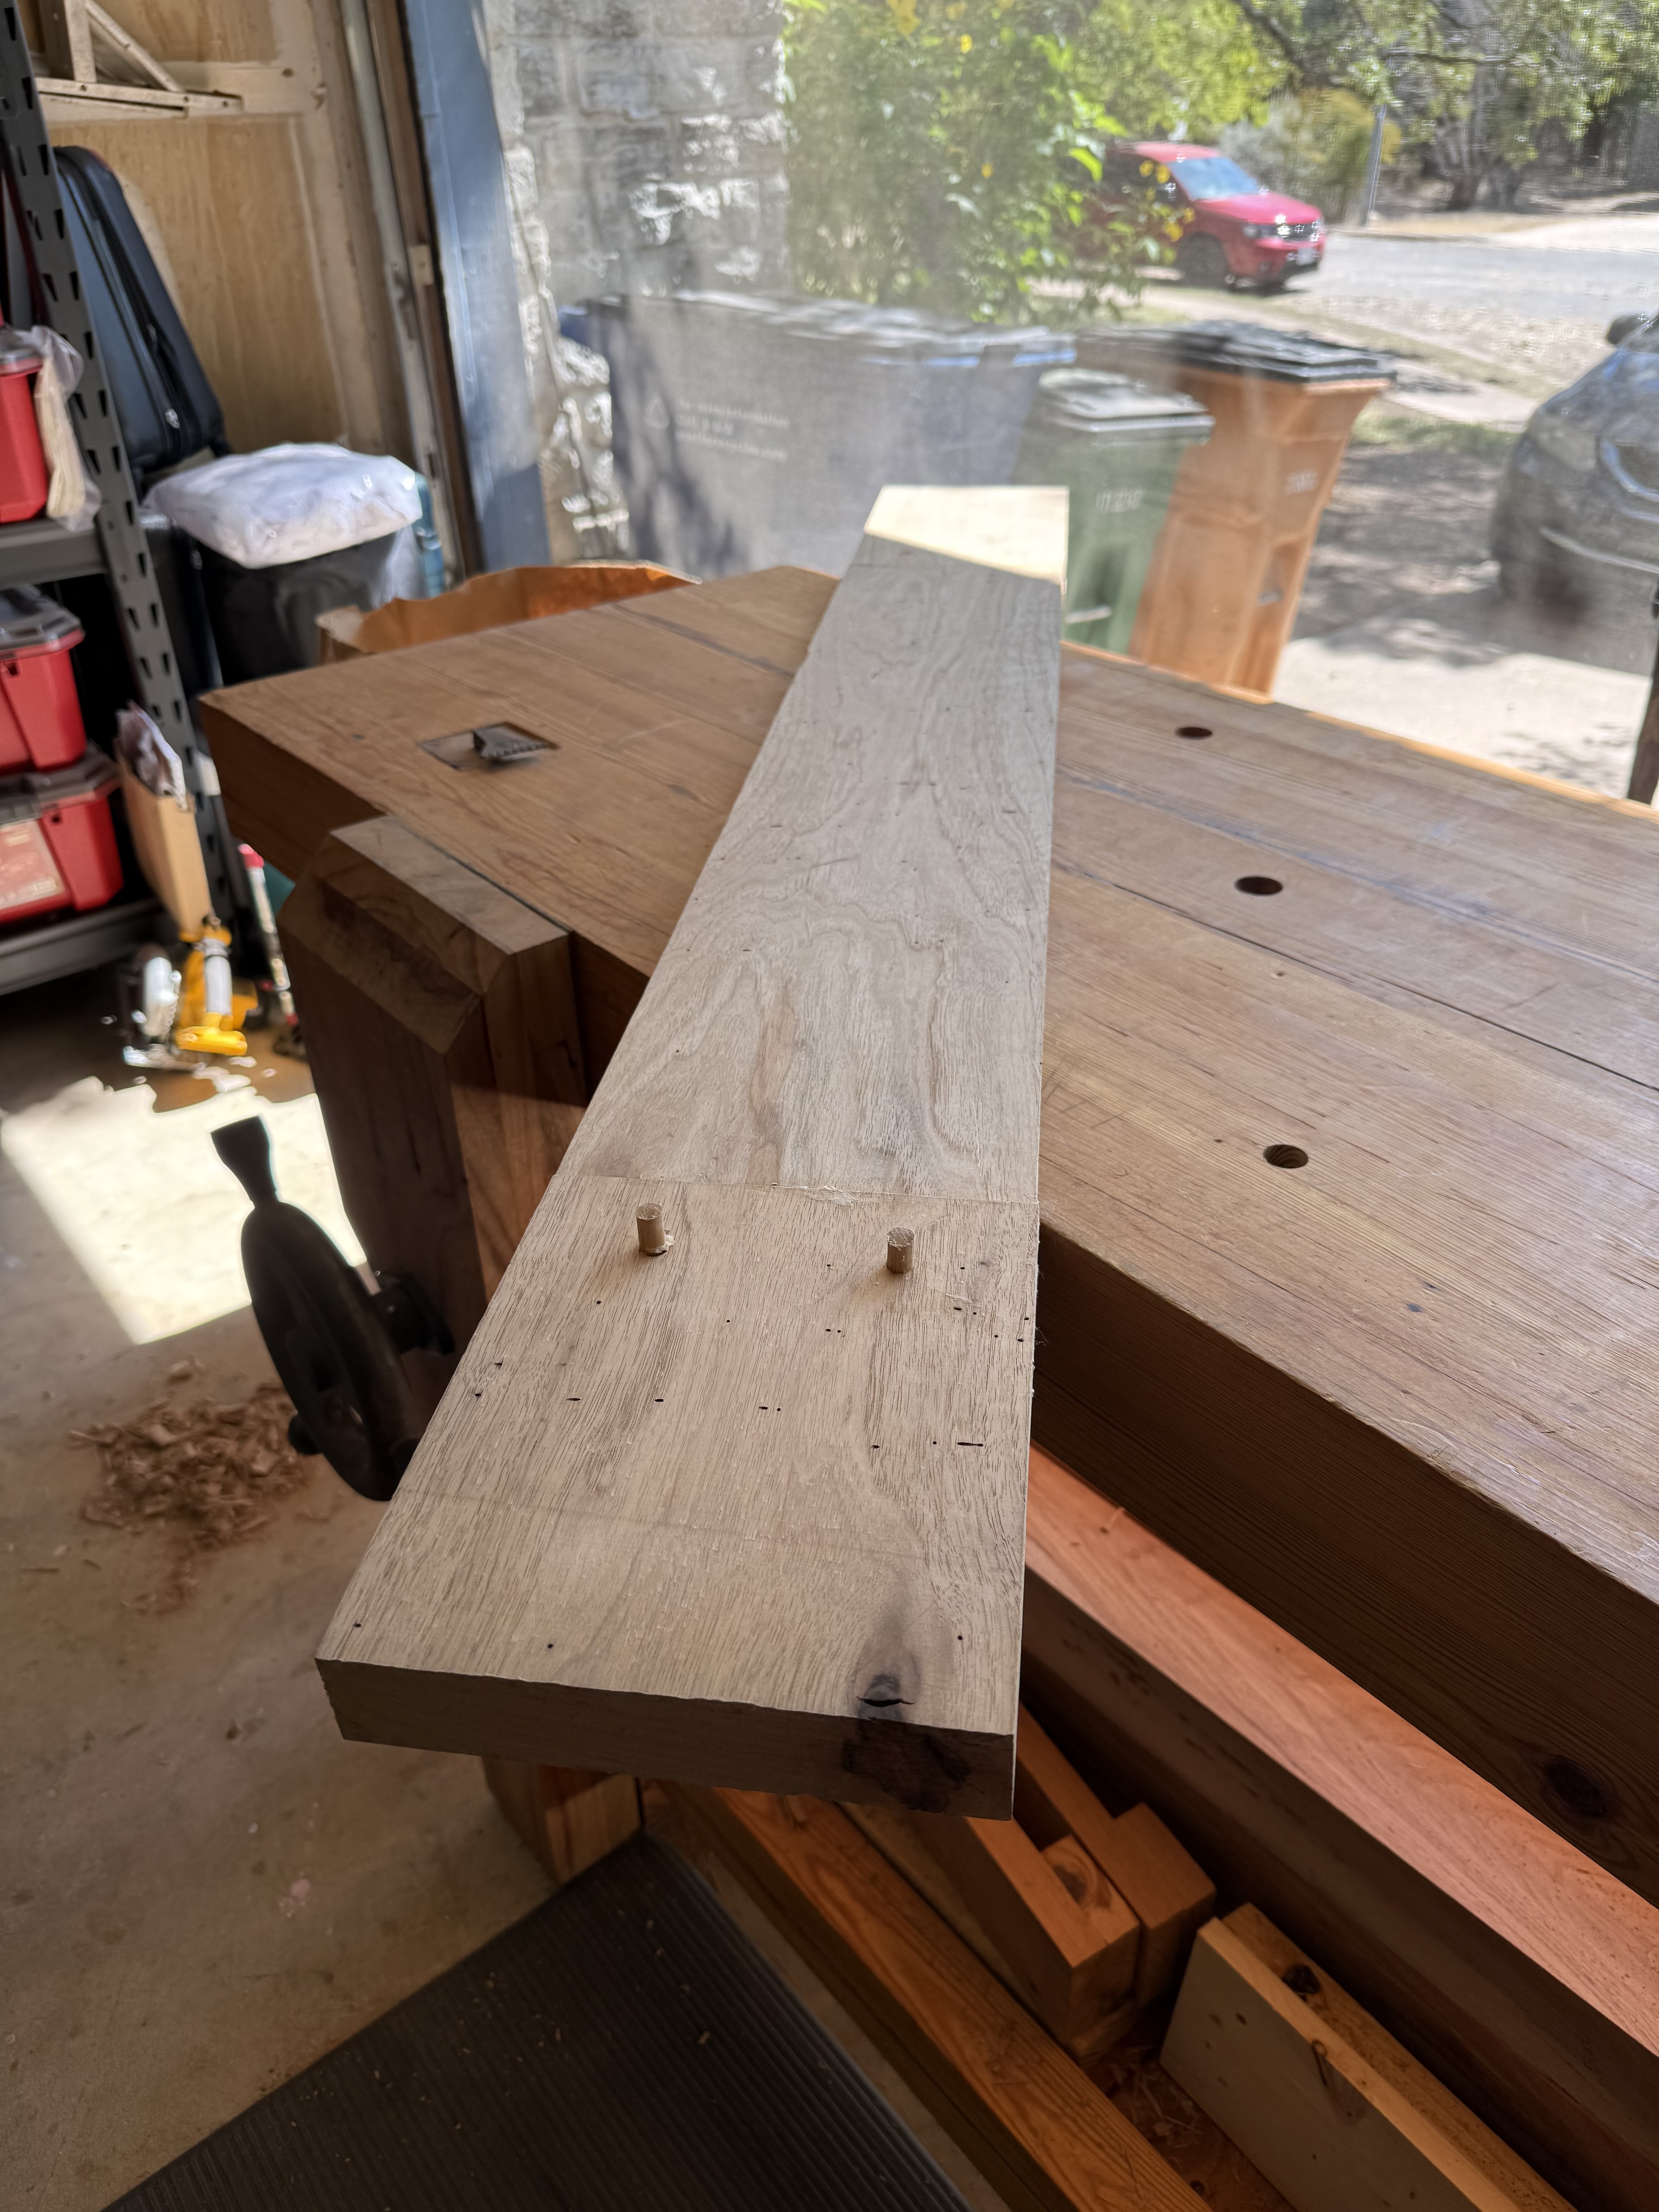
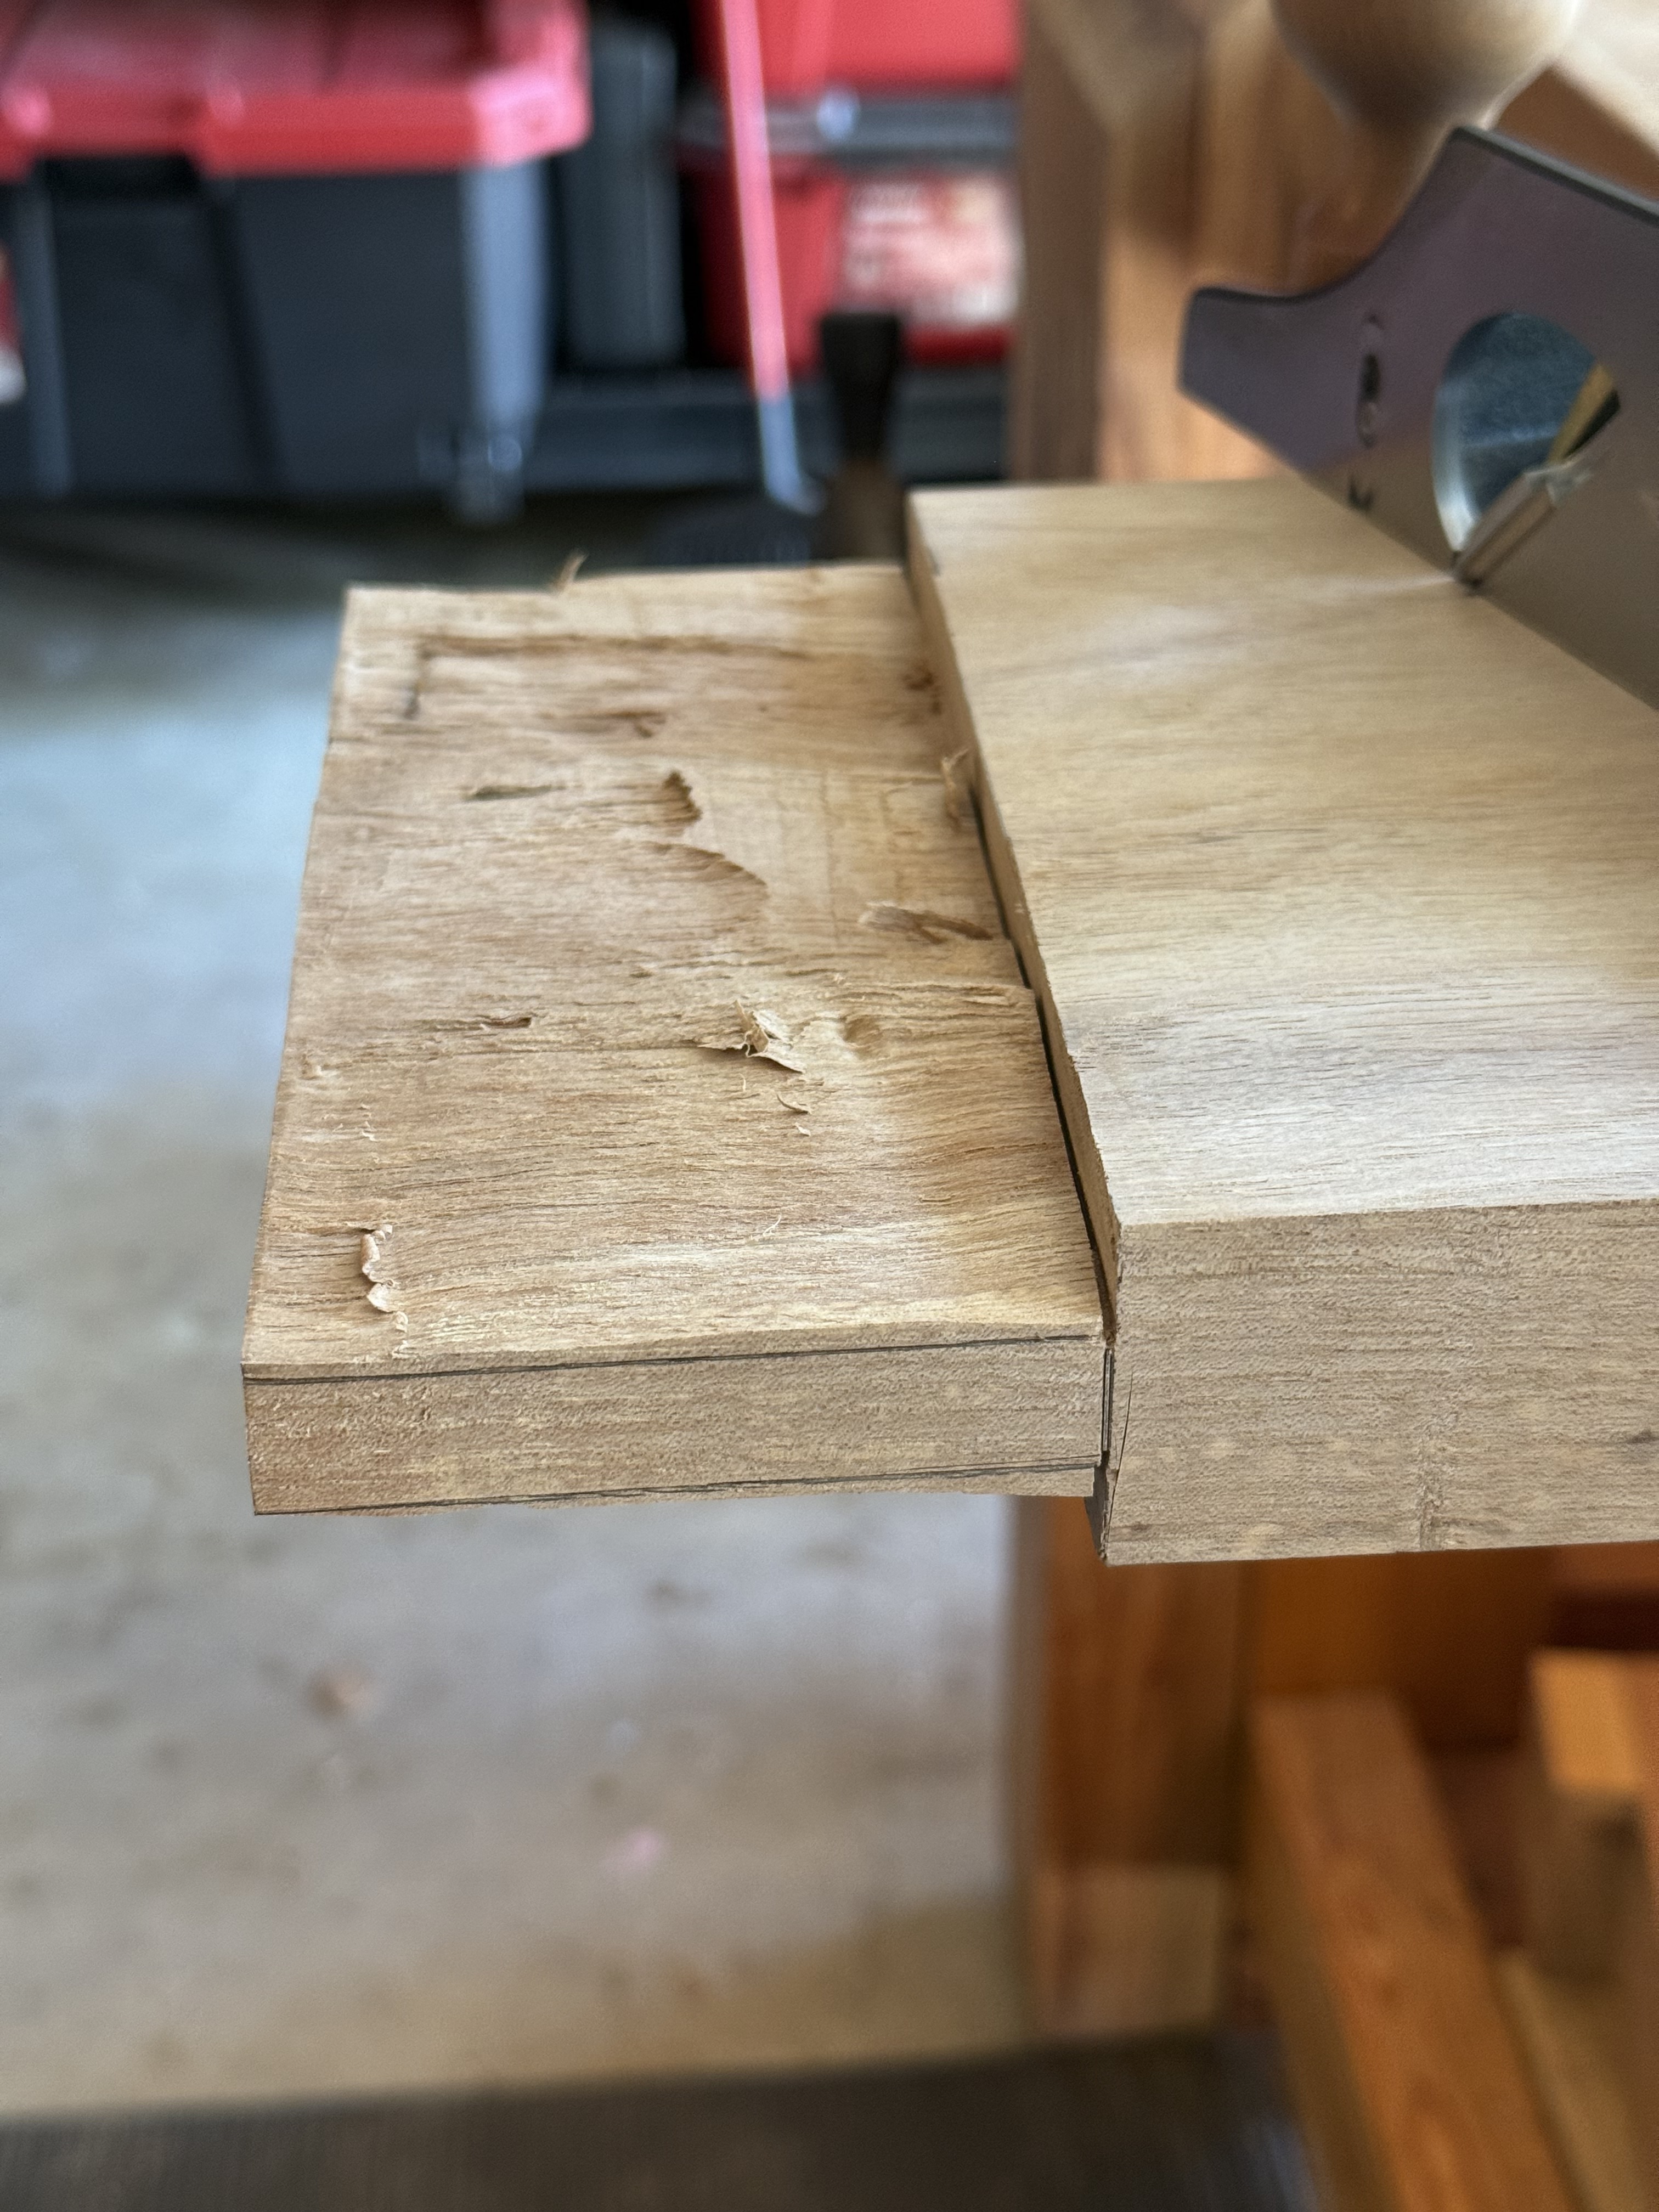
Next I cut then flattened the stretcher board by hand. Later, I discovered I cut too much off!
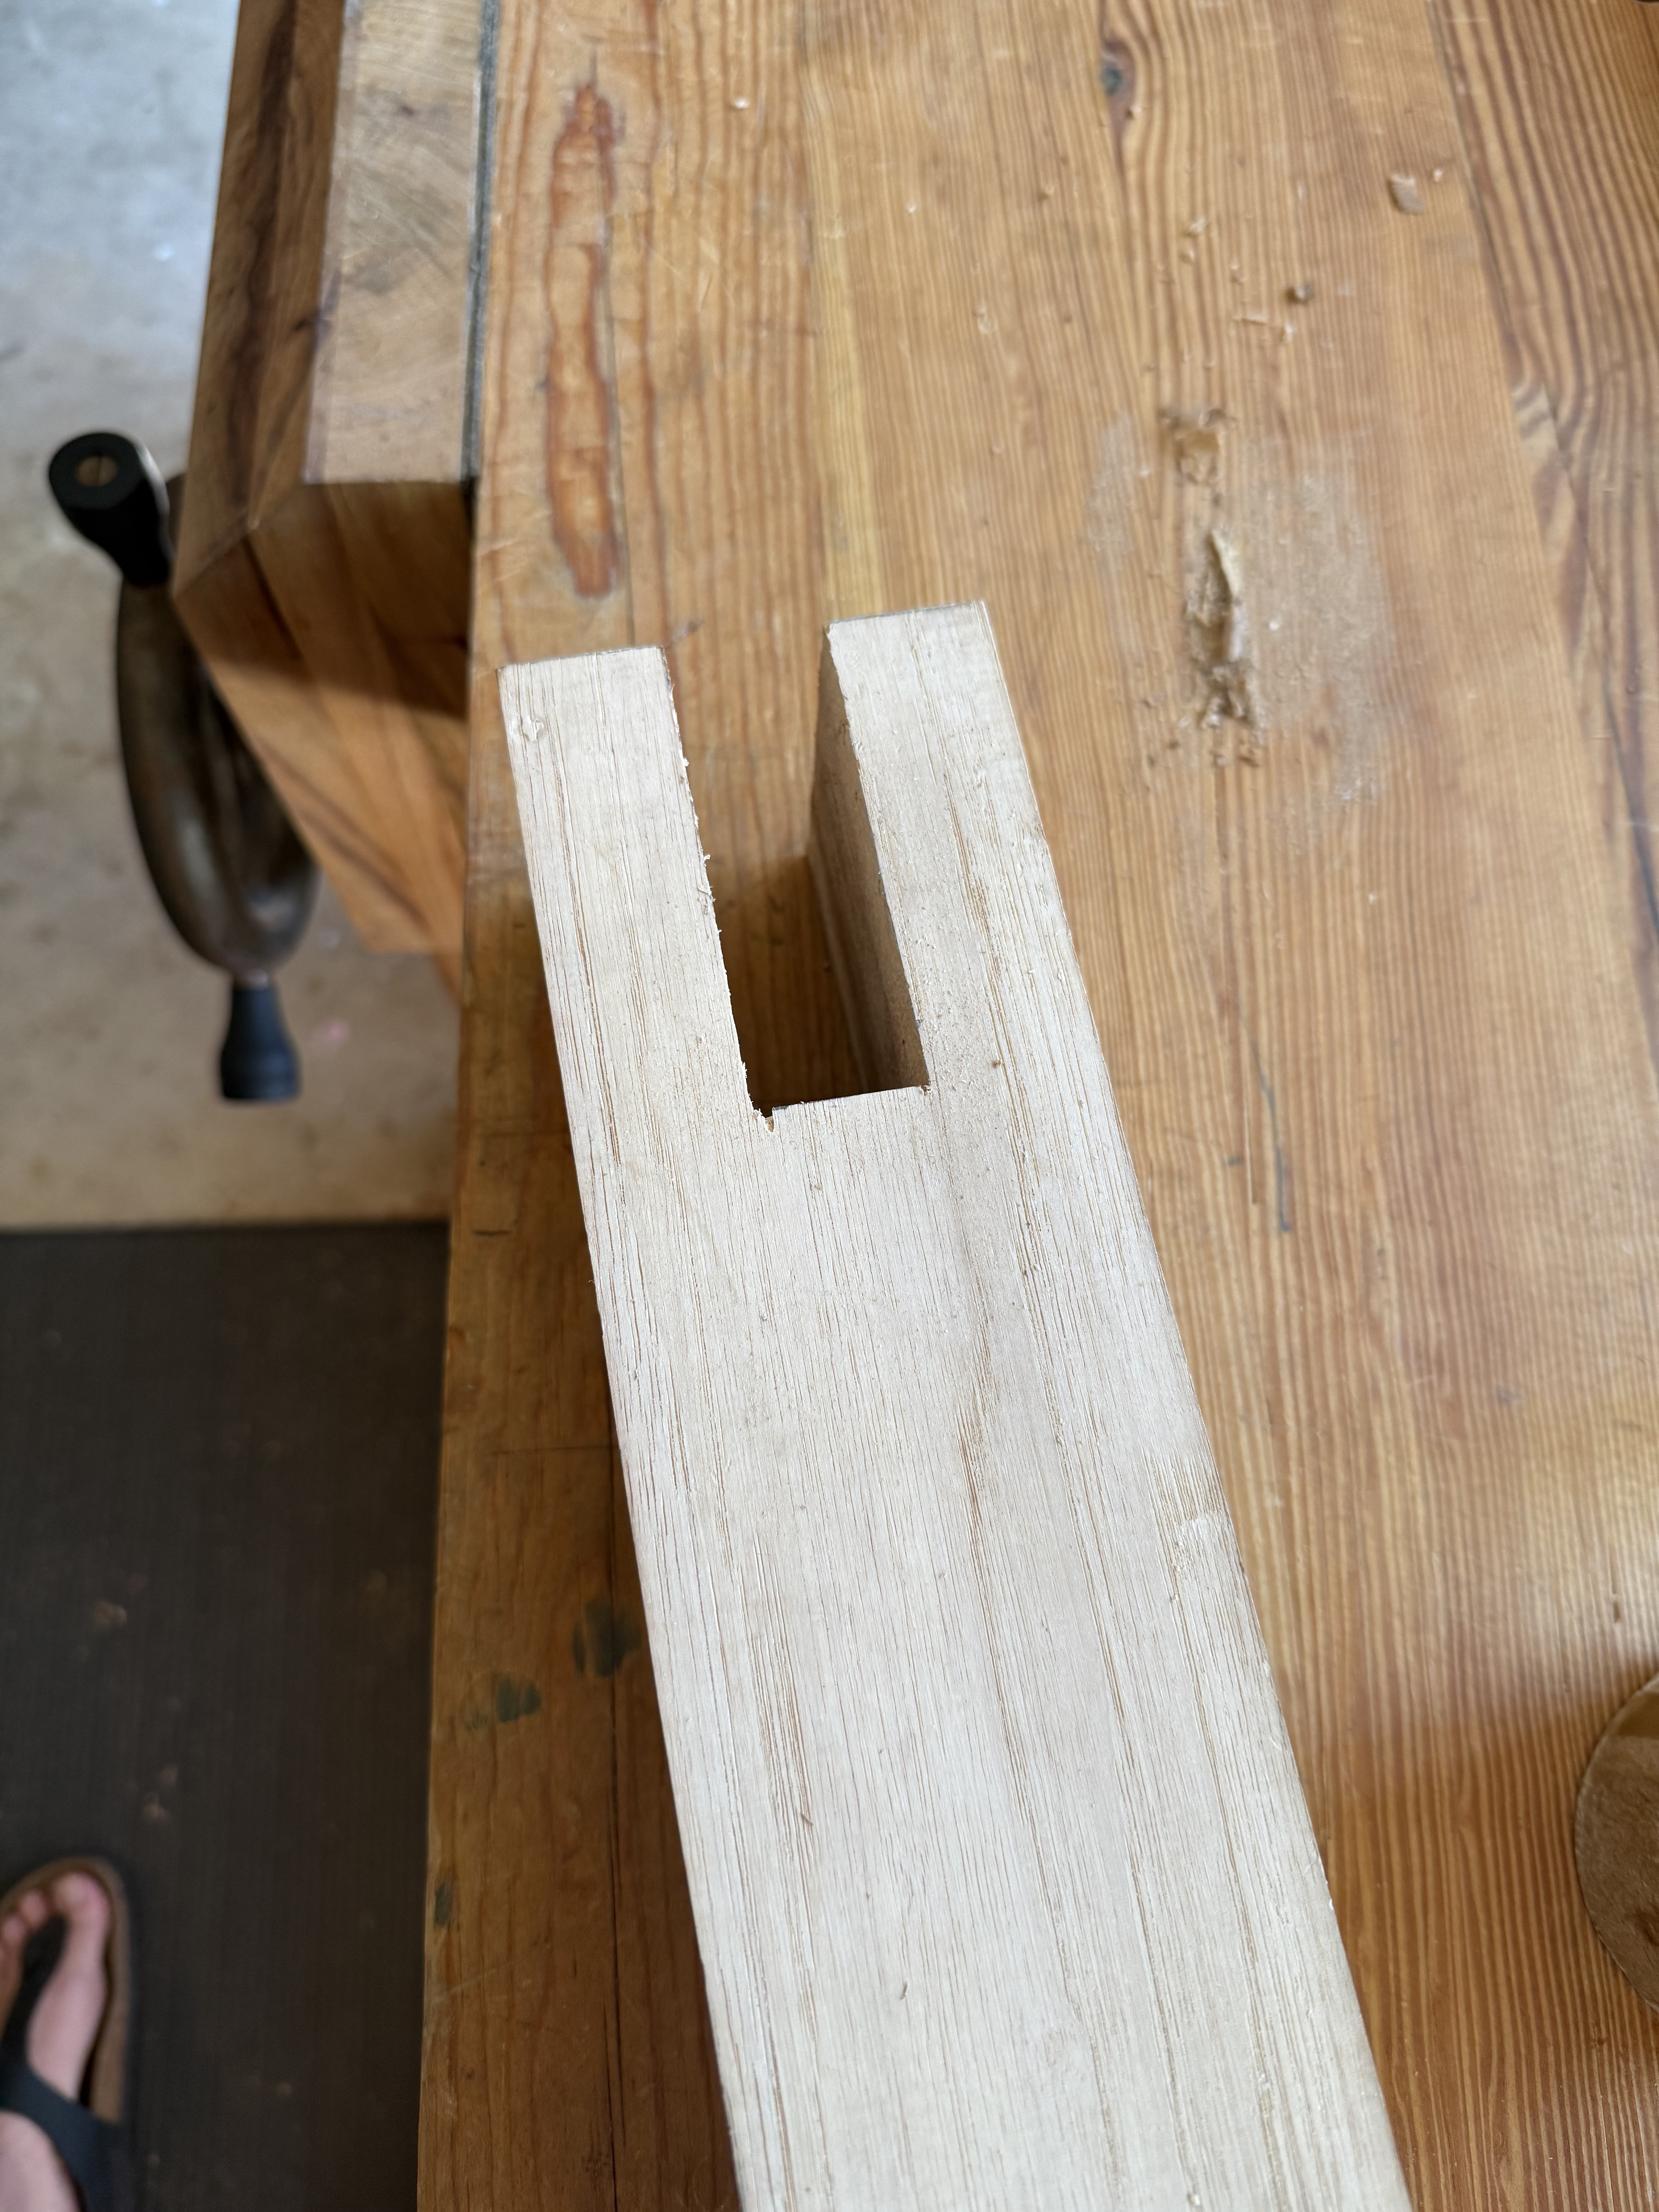
I hemmed and hawed a lot over finding another board to cut and flatten or extending the existing board using joinery. I decided to practice my joinery skills and lengthen the board (not with my “board stretcher”!) using two pieces of equal length and deep tongue and groove joints with two draw bored shagbark hickory dowels in each joint to give it incredible strength.
Flattening the too-short board and the final jointed board with both extensions:
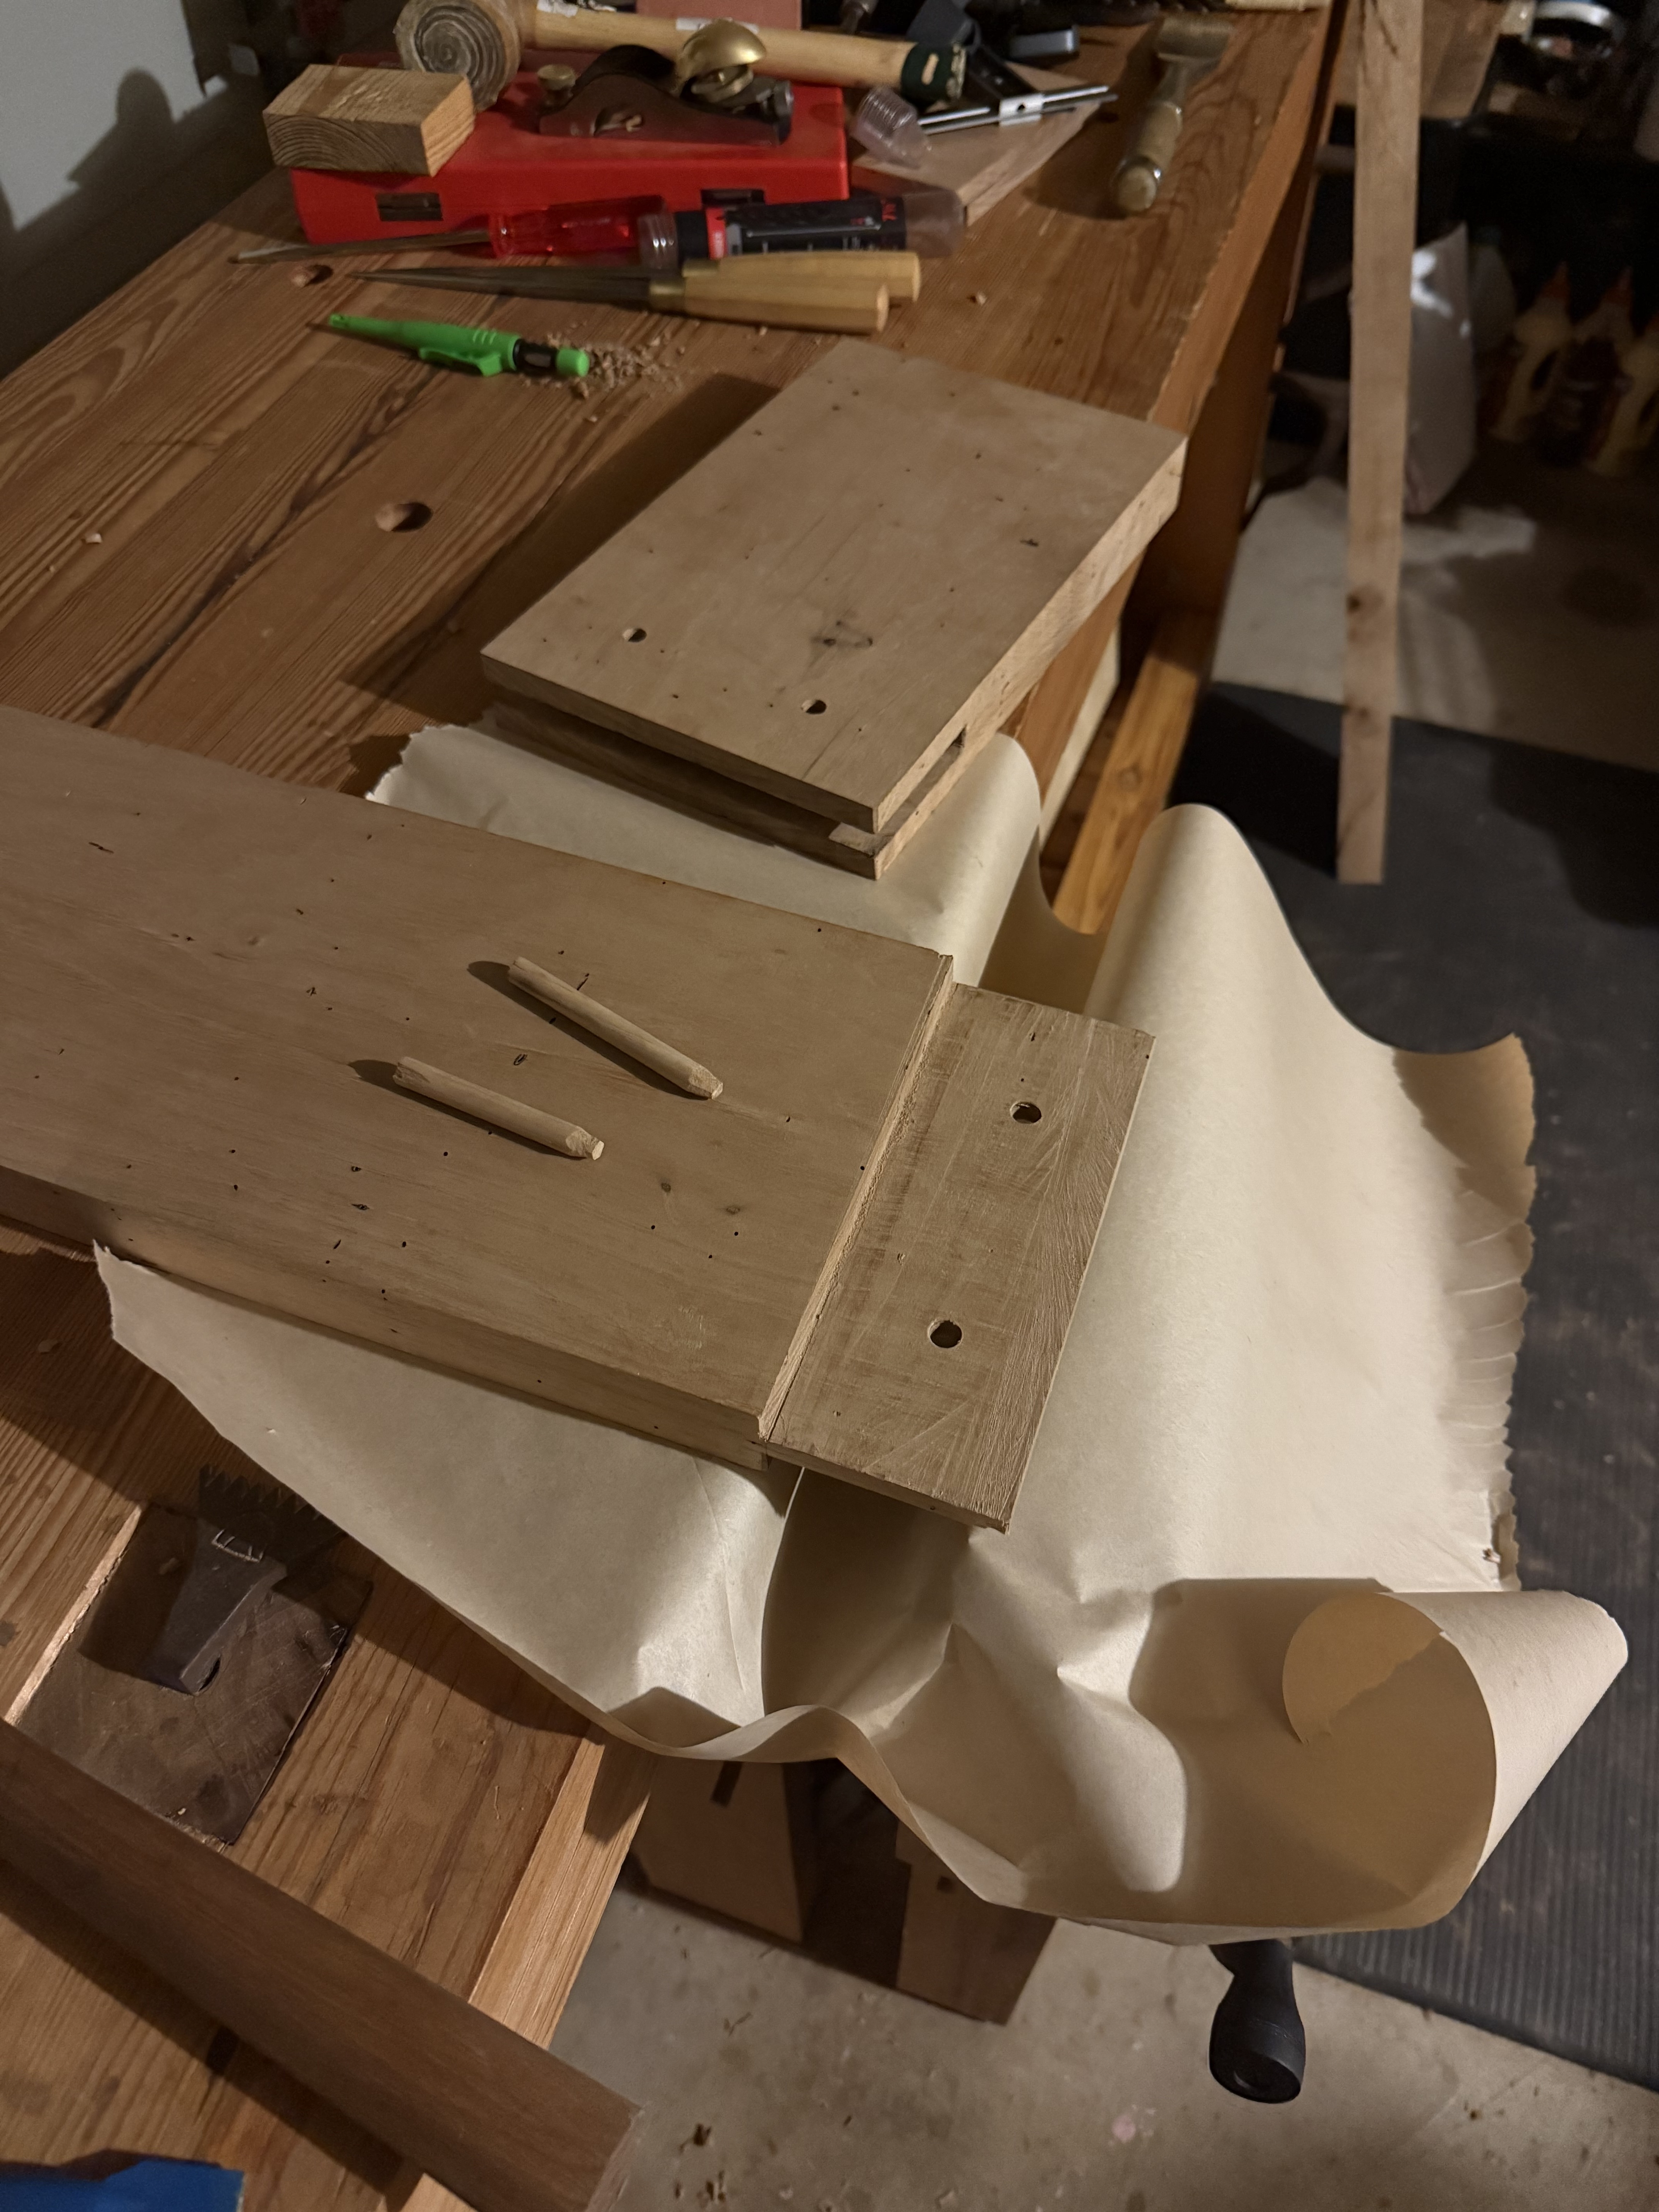
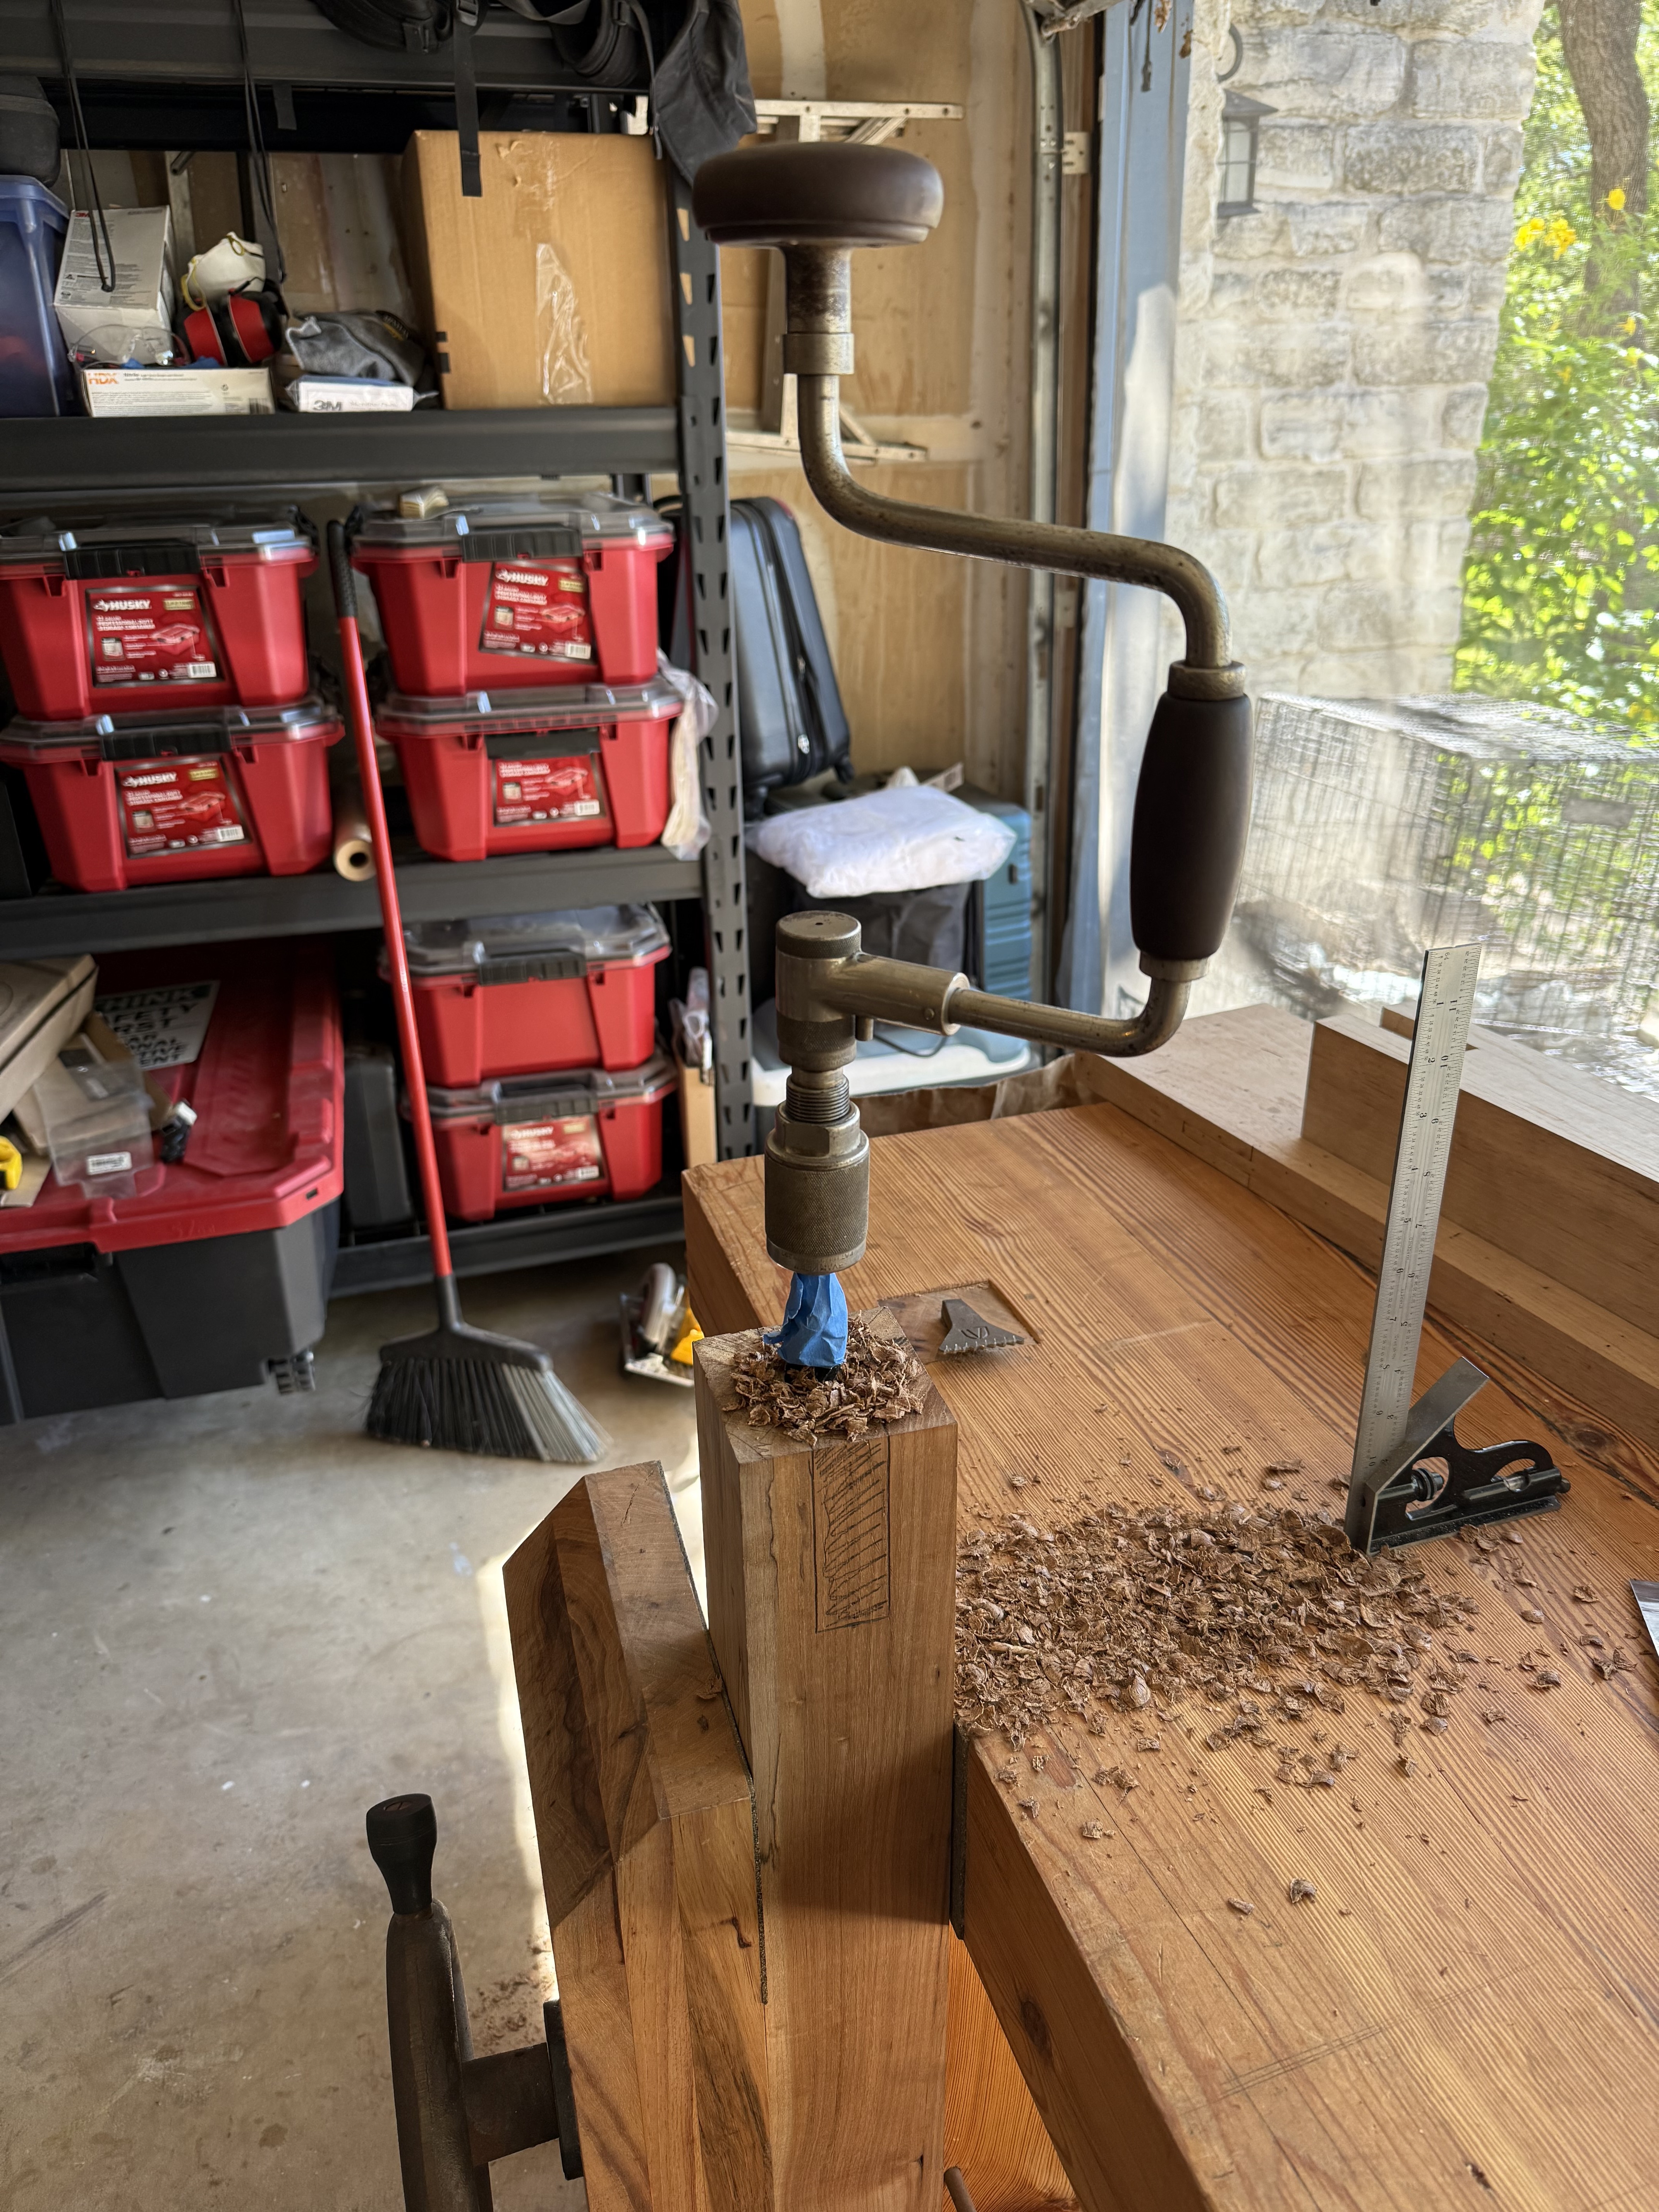
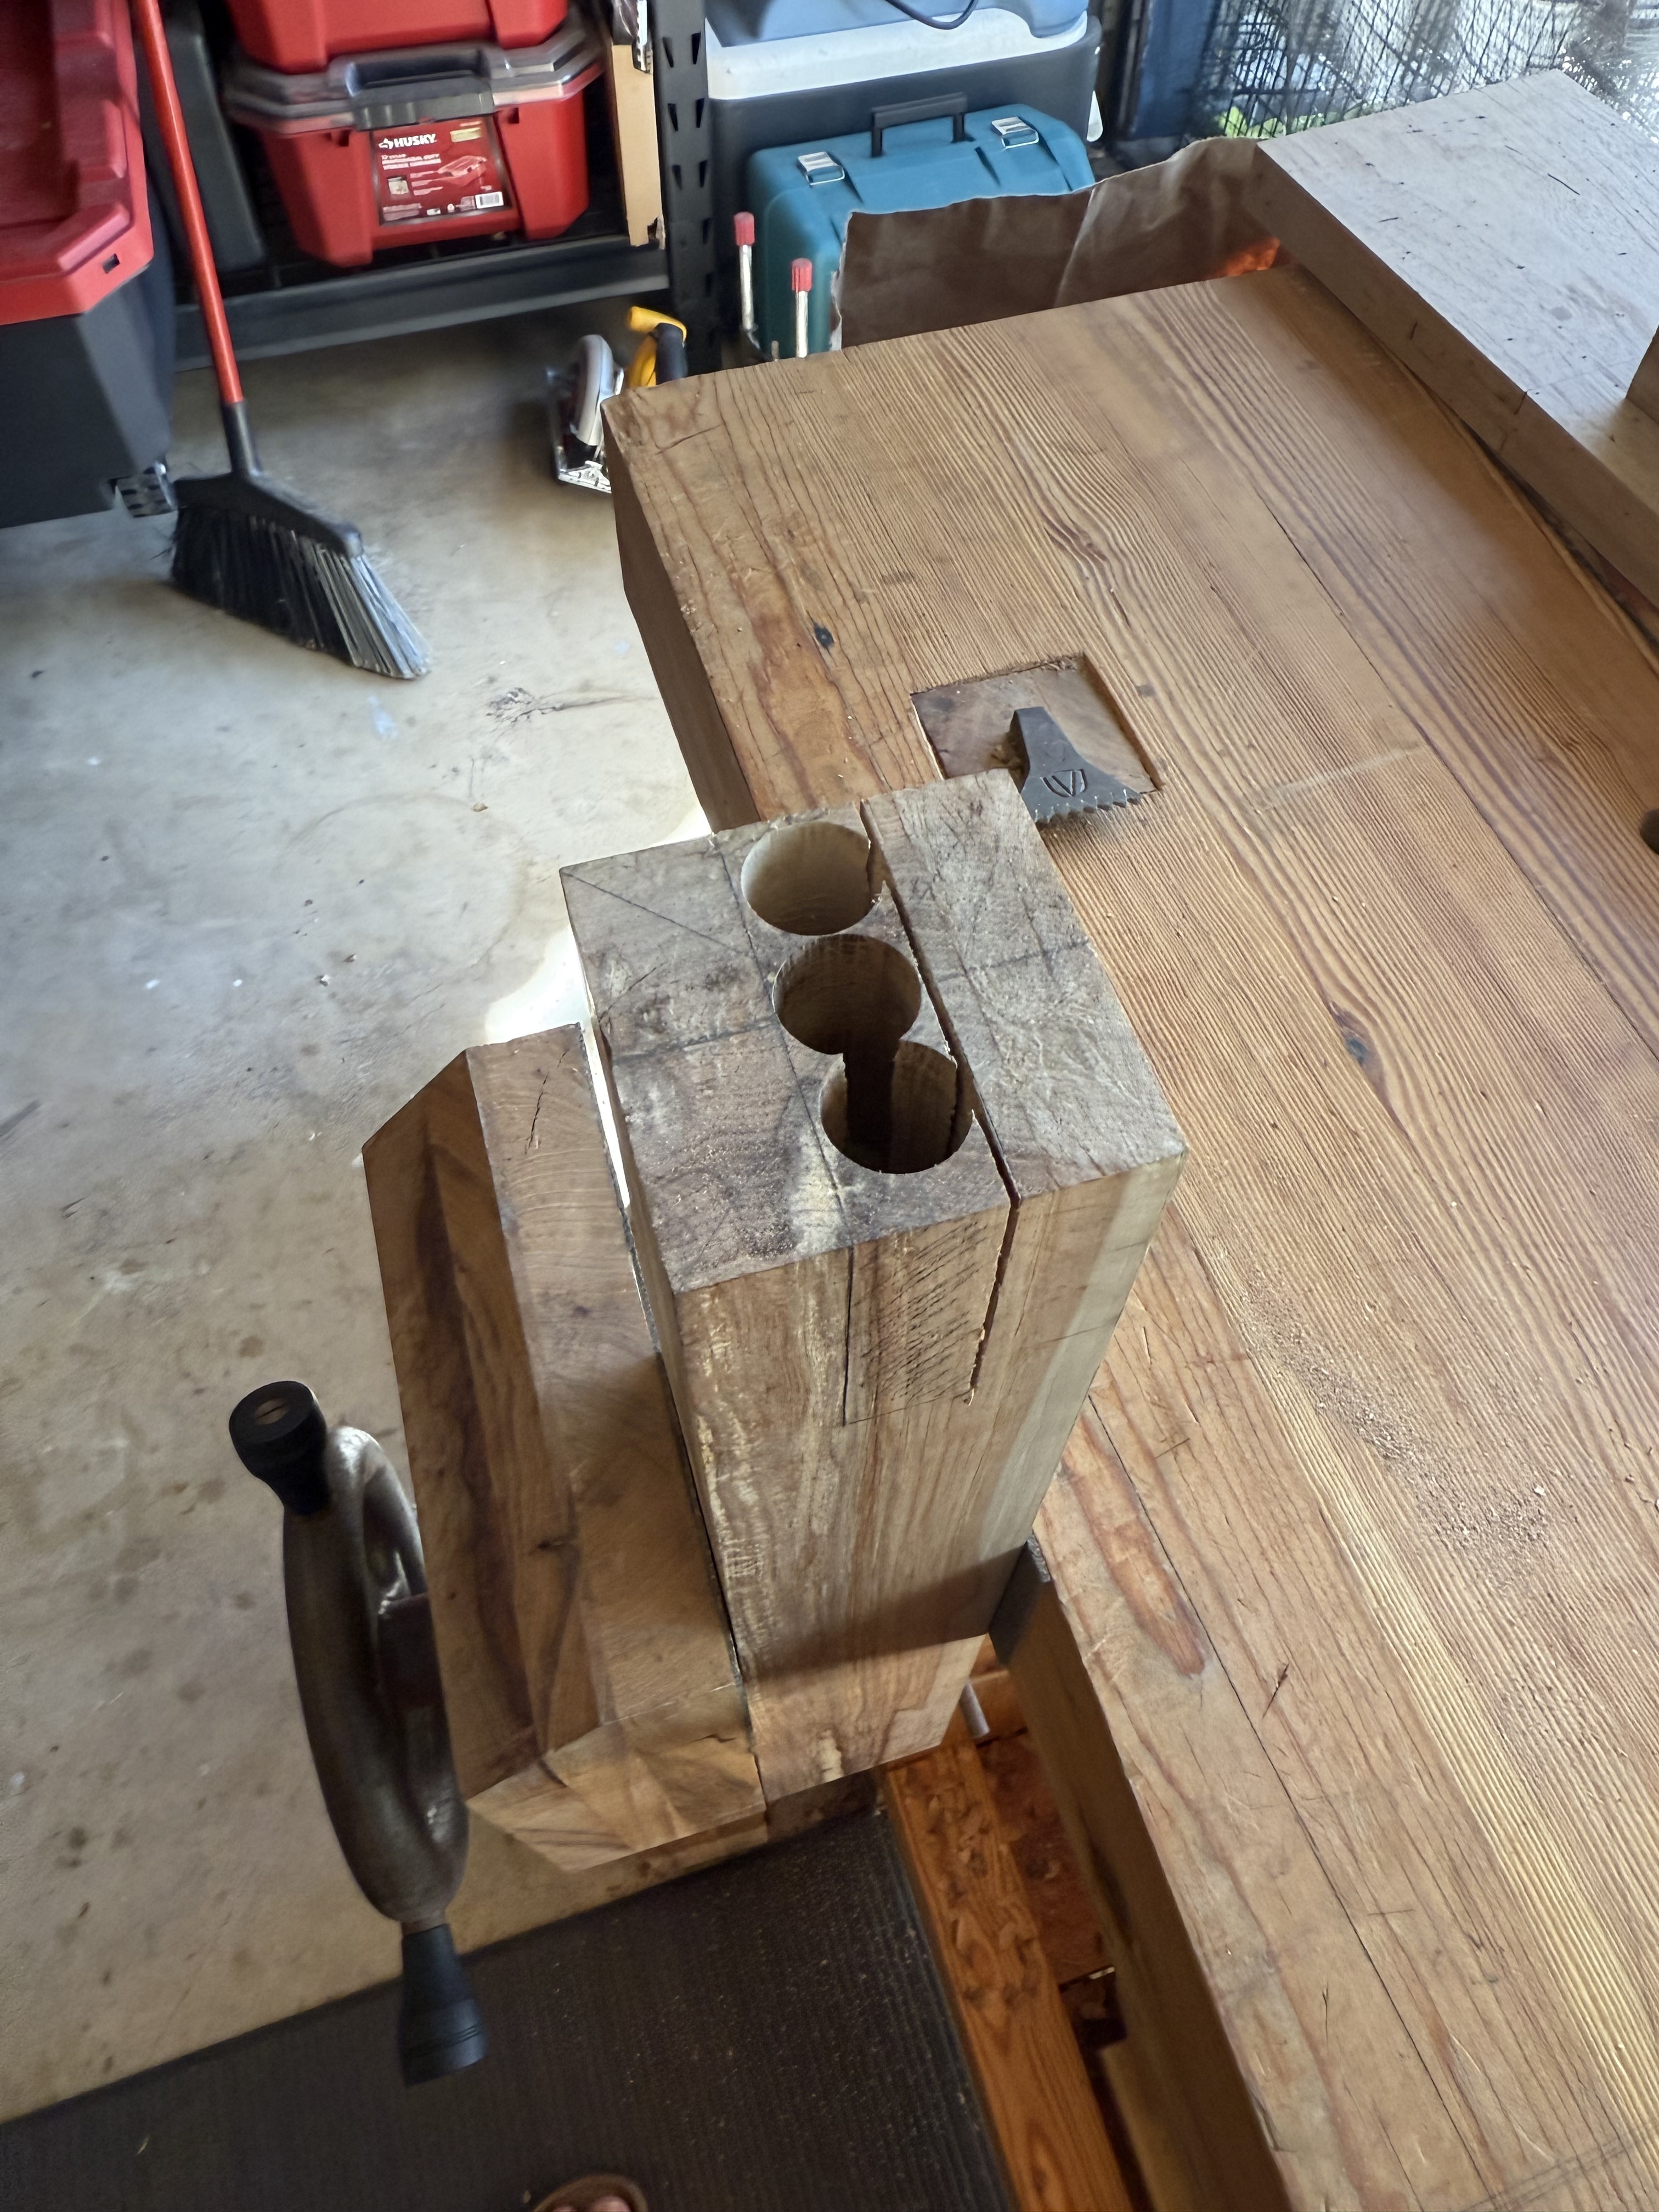
The deep groove joints were difficult to cut because they were so deep, tall, and thin that I after sawing the two walls the only way I could clear that middle waste out was by augering the middle out as much as I could then knocking the rest out with a mortise chisel.
Despite the mistake, the end result I think is quite pleasing as the bug became a feature because the joinery adds visual detail:
Cutting the brace joinery
For the braces I retained Schwarz’s pleasing angle design and a bridle joint with a draw-bored shagbark hickory pin.
The brace joints were slightly more difficult to cut by hand because so many pieces needed to be trimmed and squared where I hadn’t quite sawed or chiseled correctly.
Dry-fit and assembly
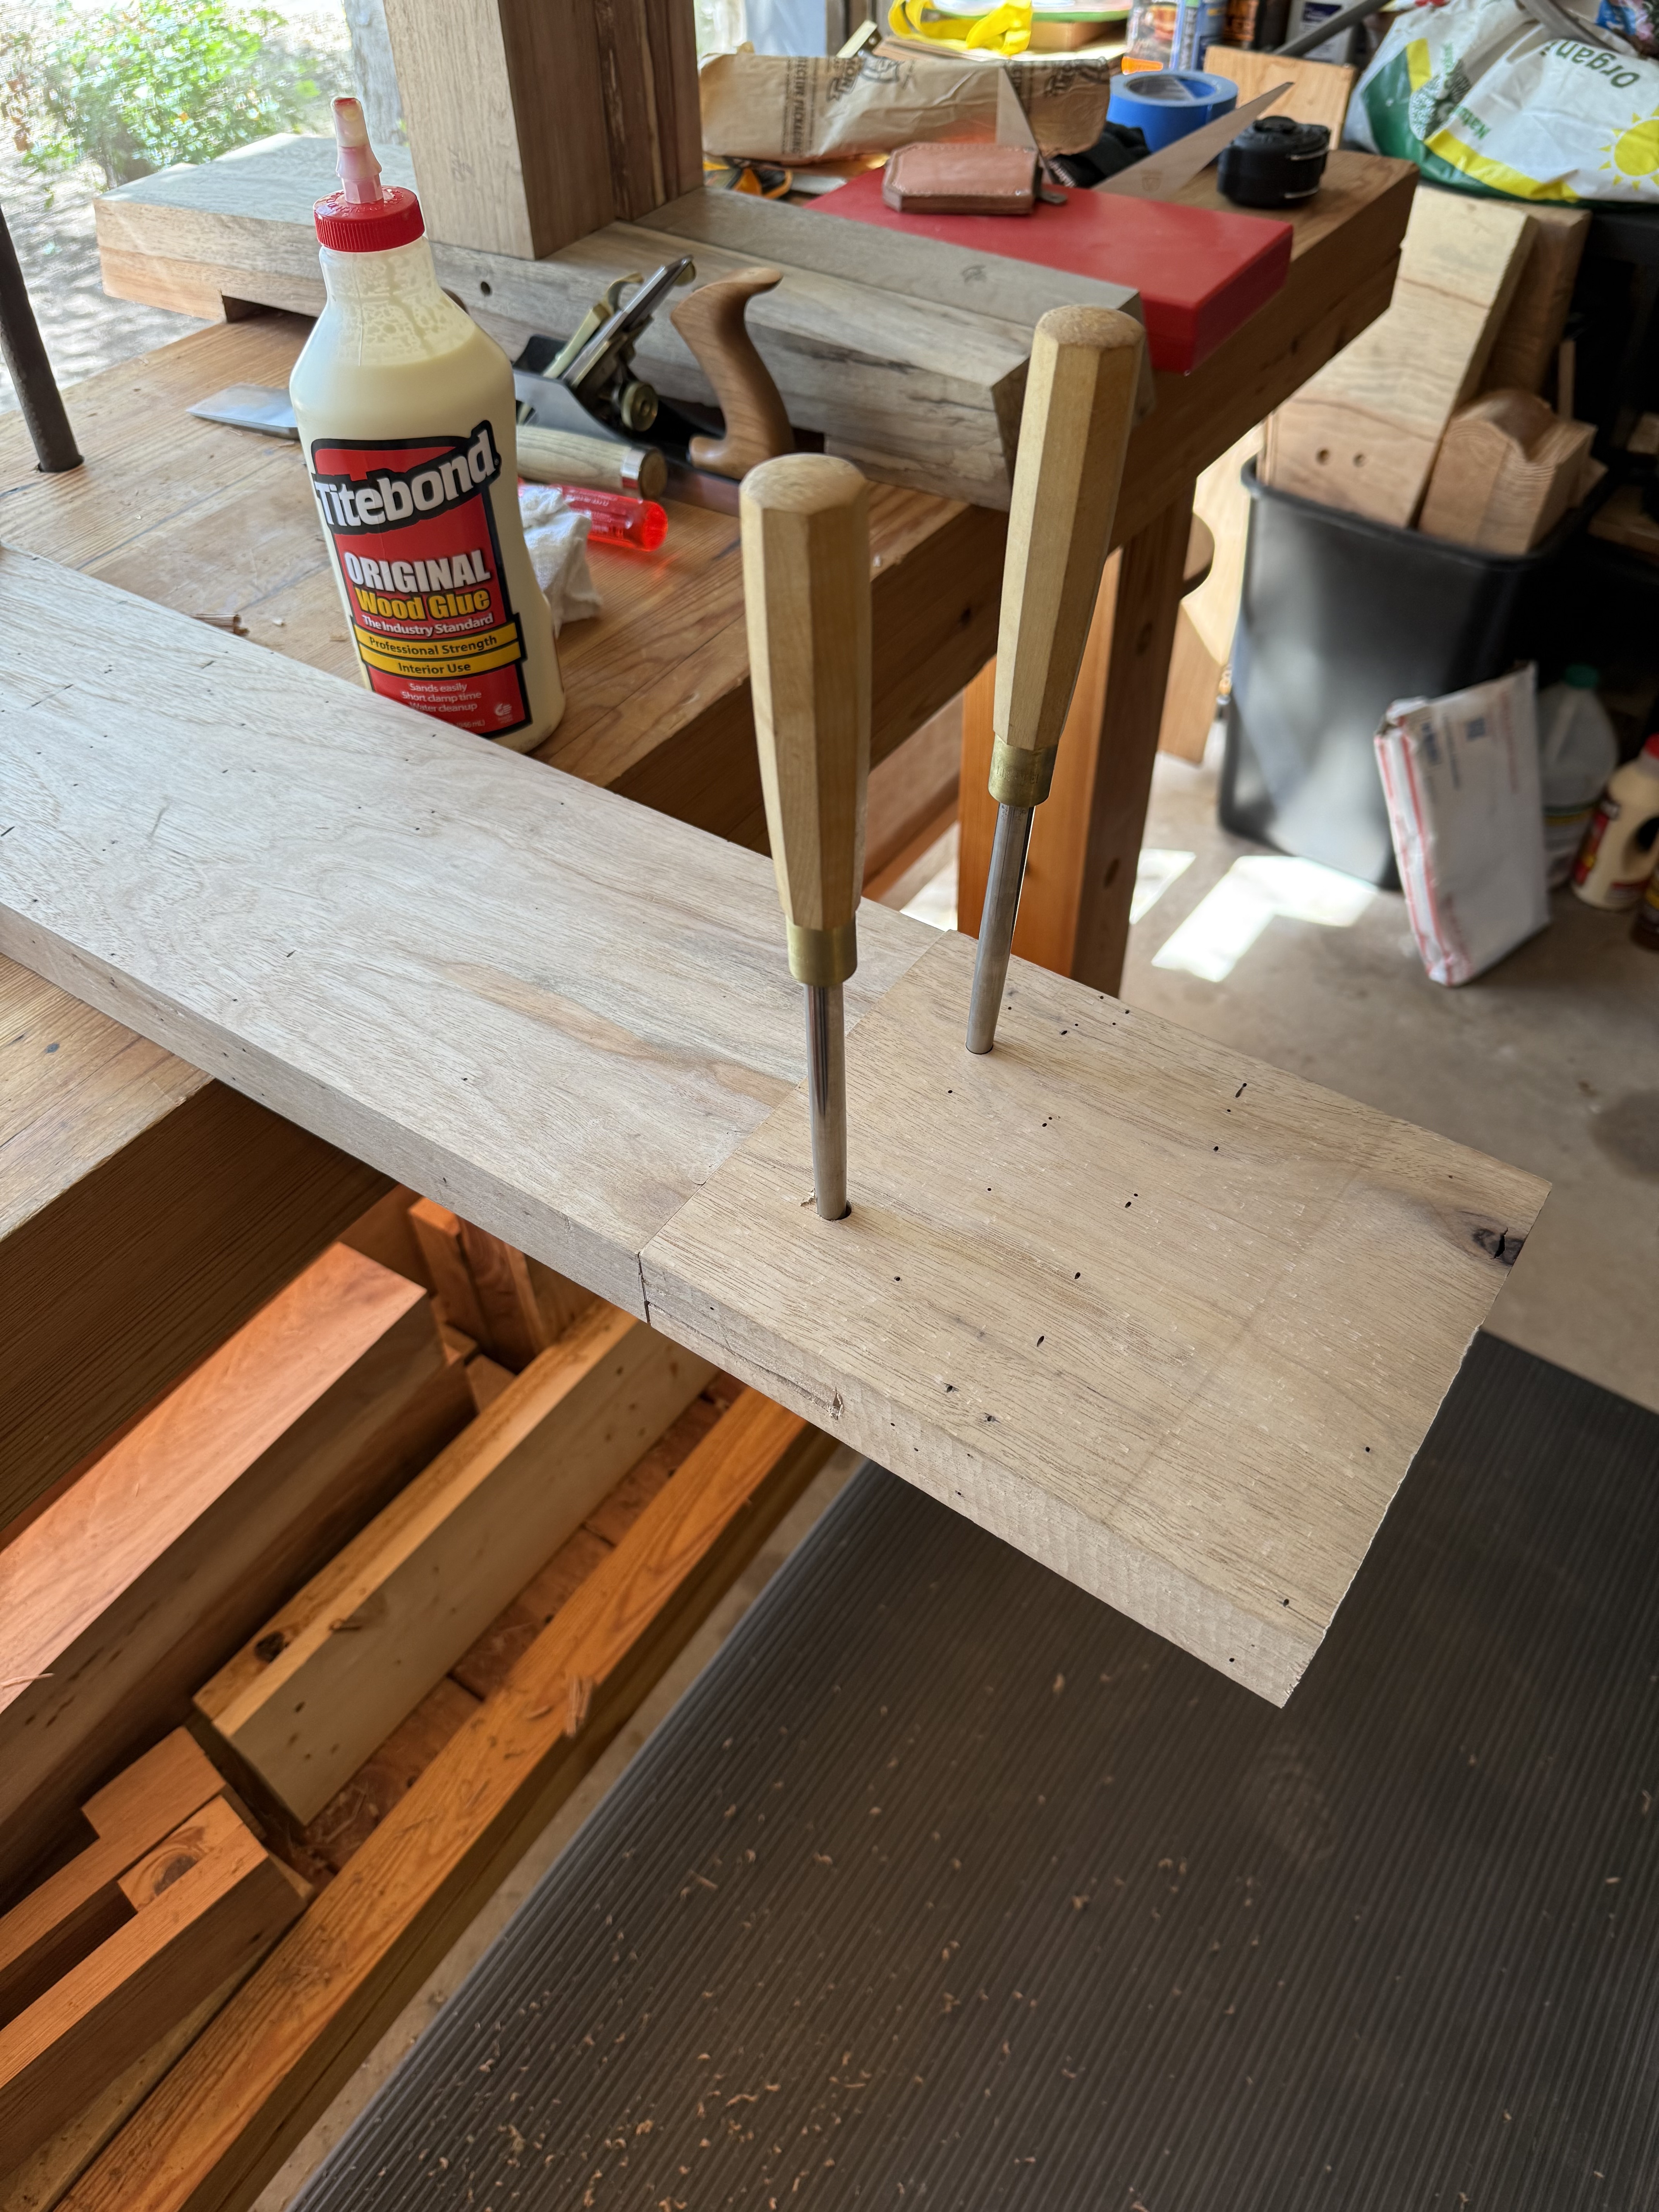
After cutting all the pieces, flattening all the surfaces, and fussing with each joint to ensure squareness during dry-fit, I glued and assembled and drove home the shagbark hickory pins:
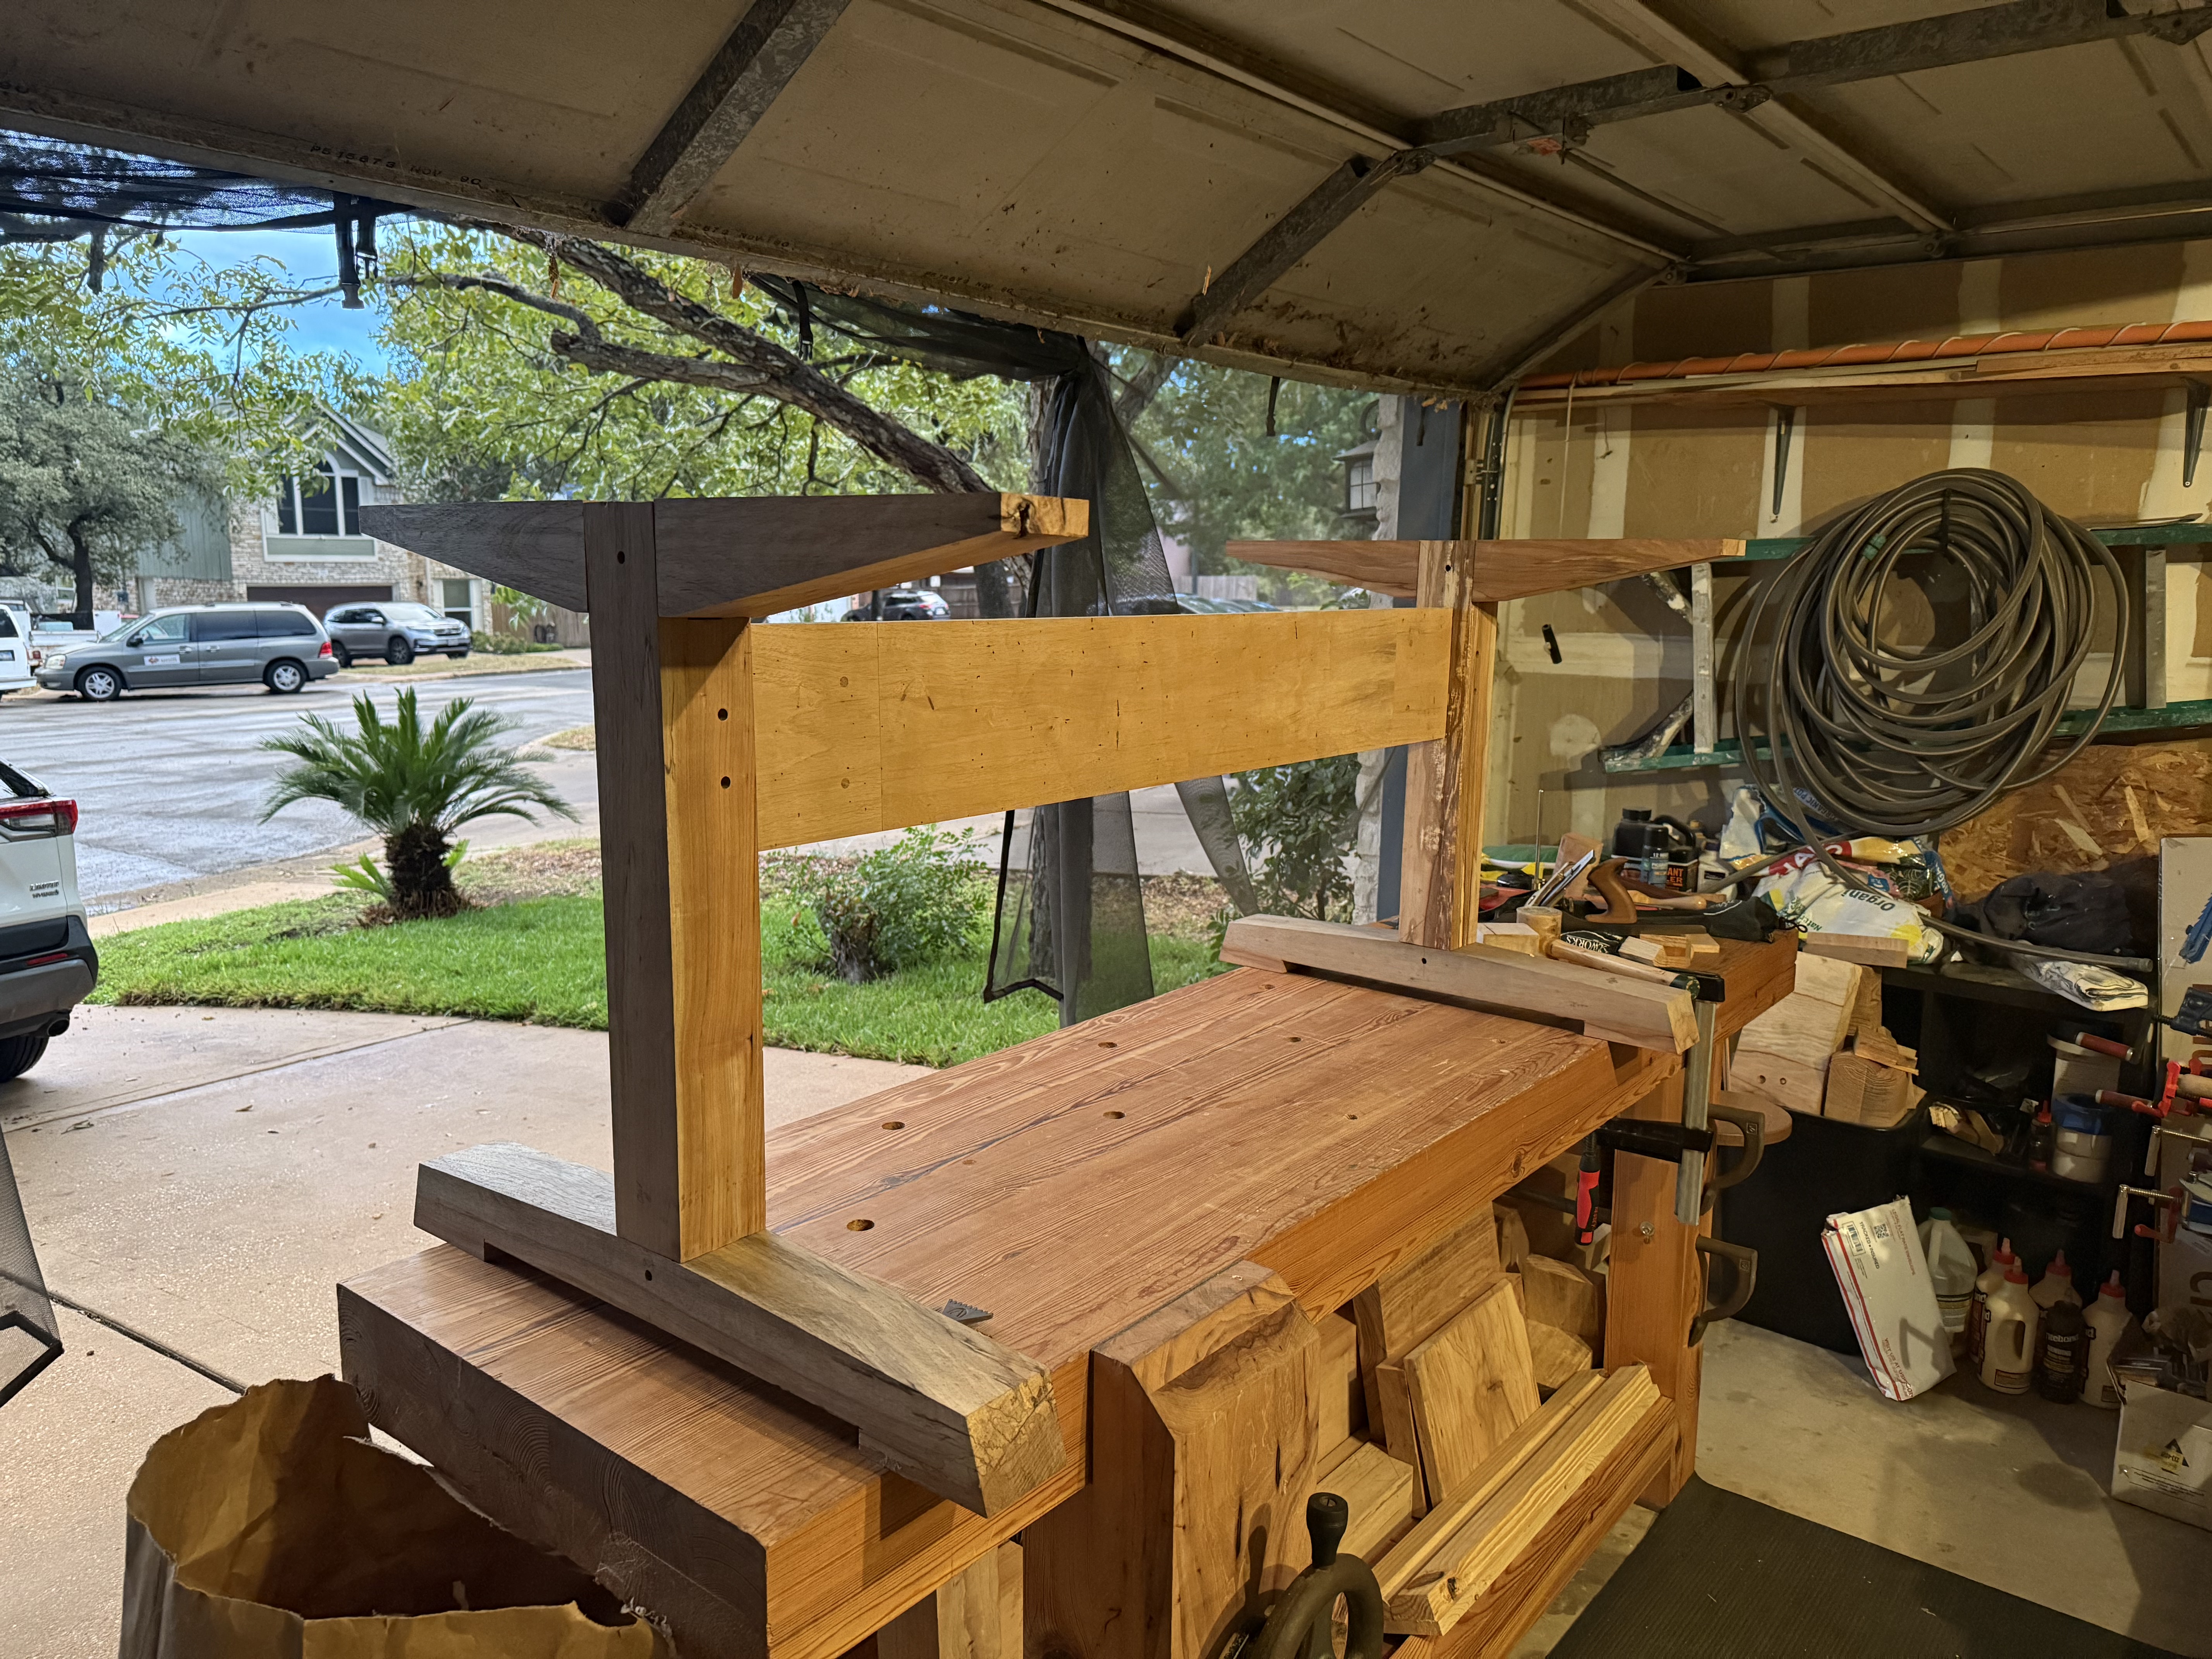
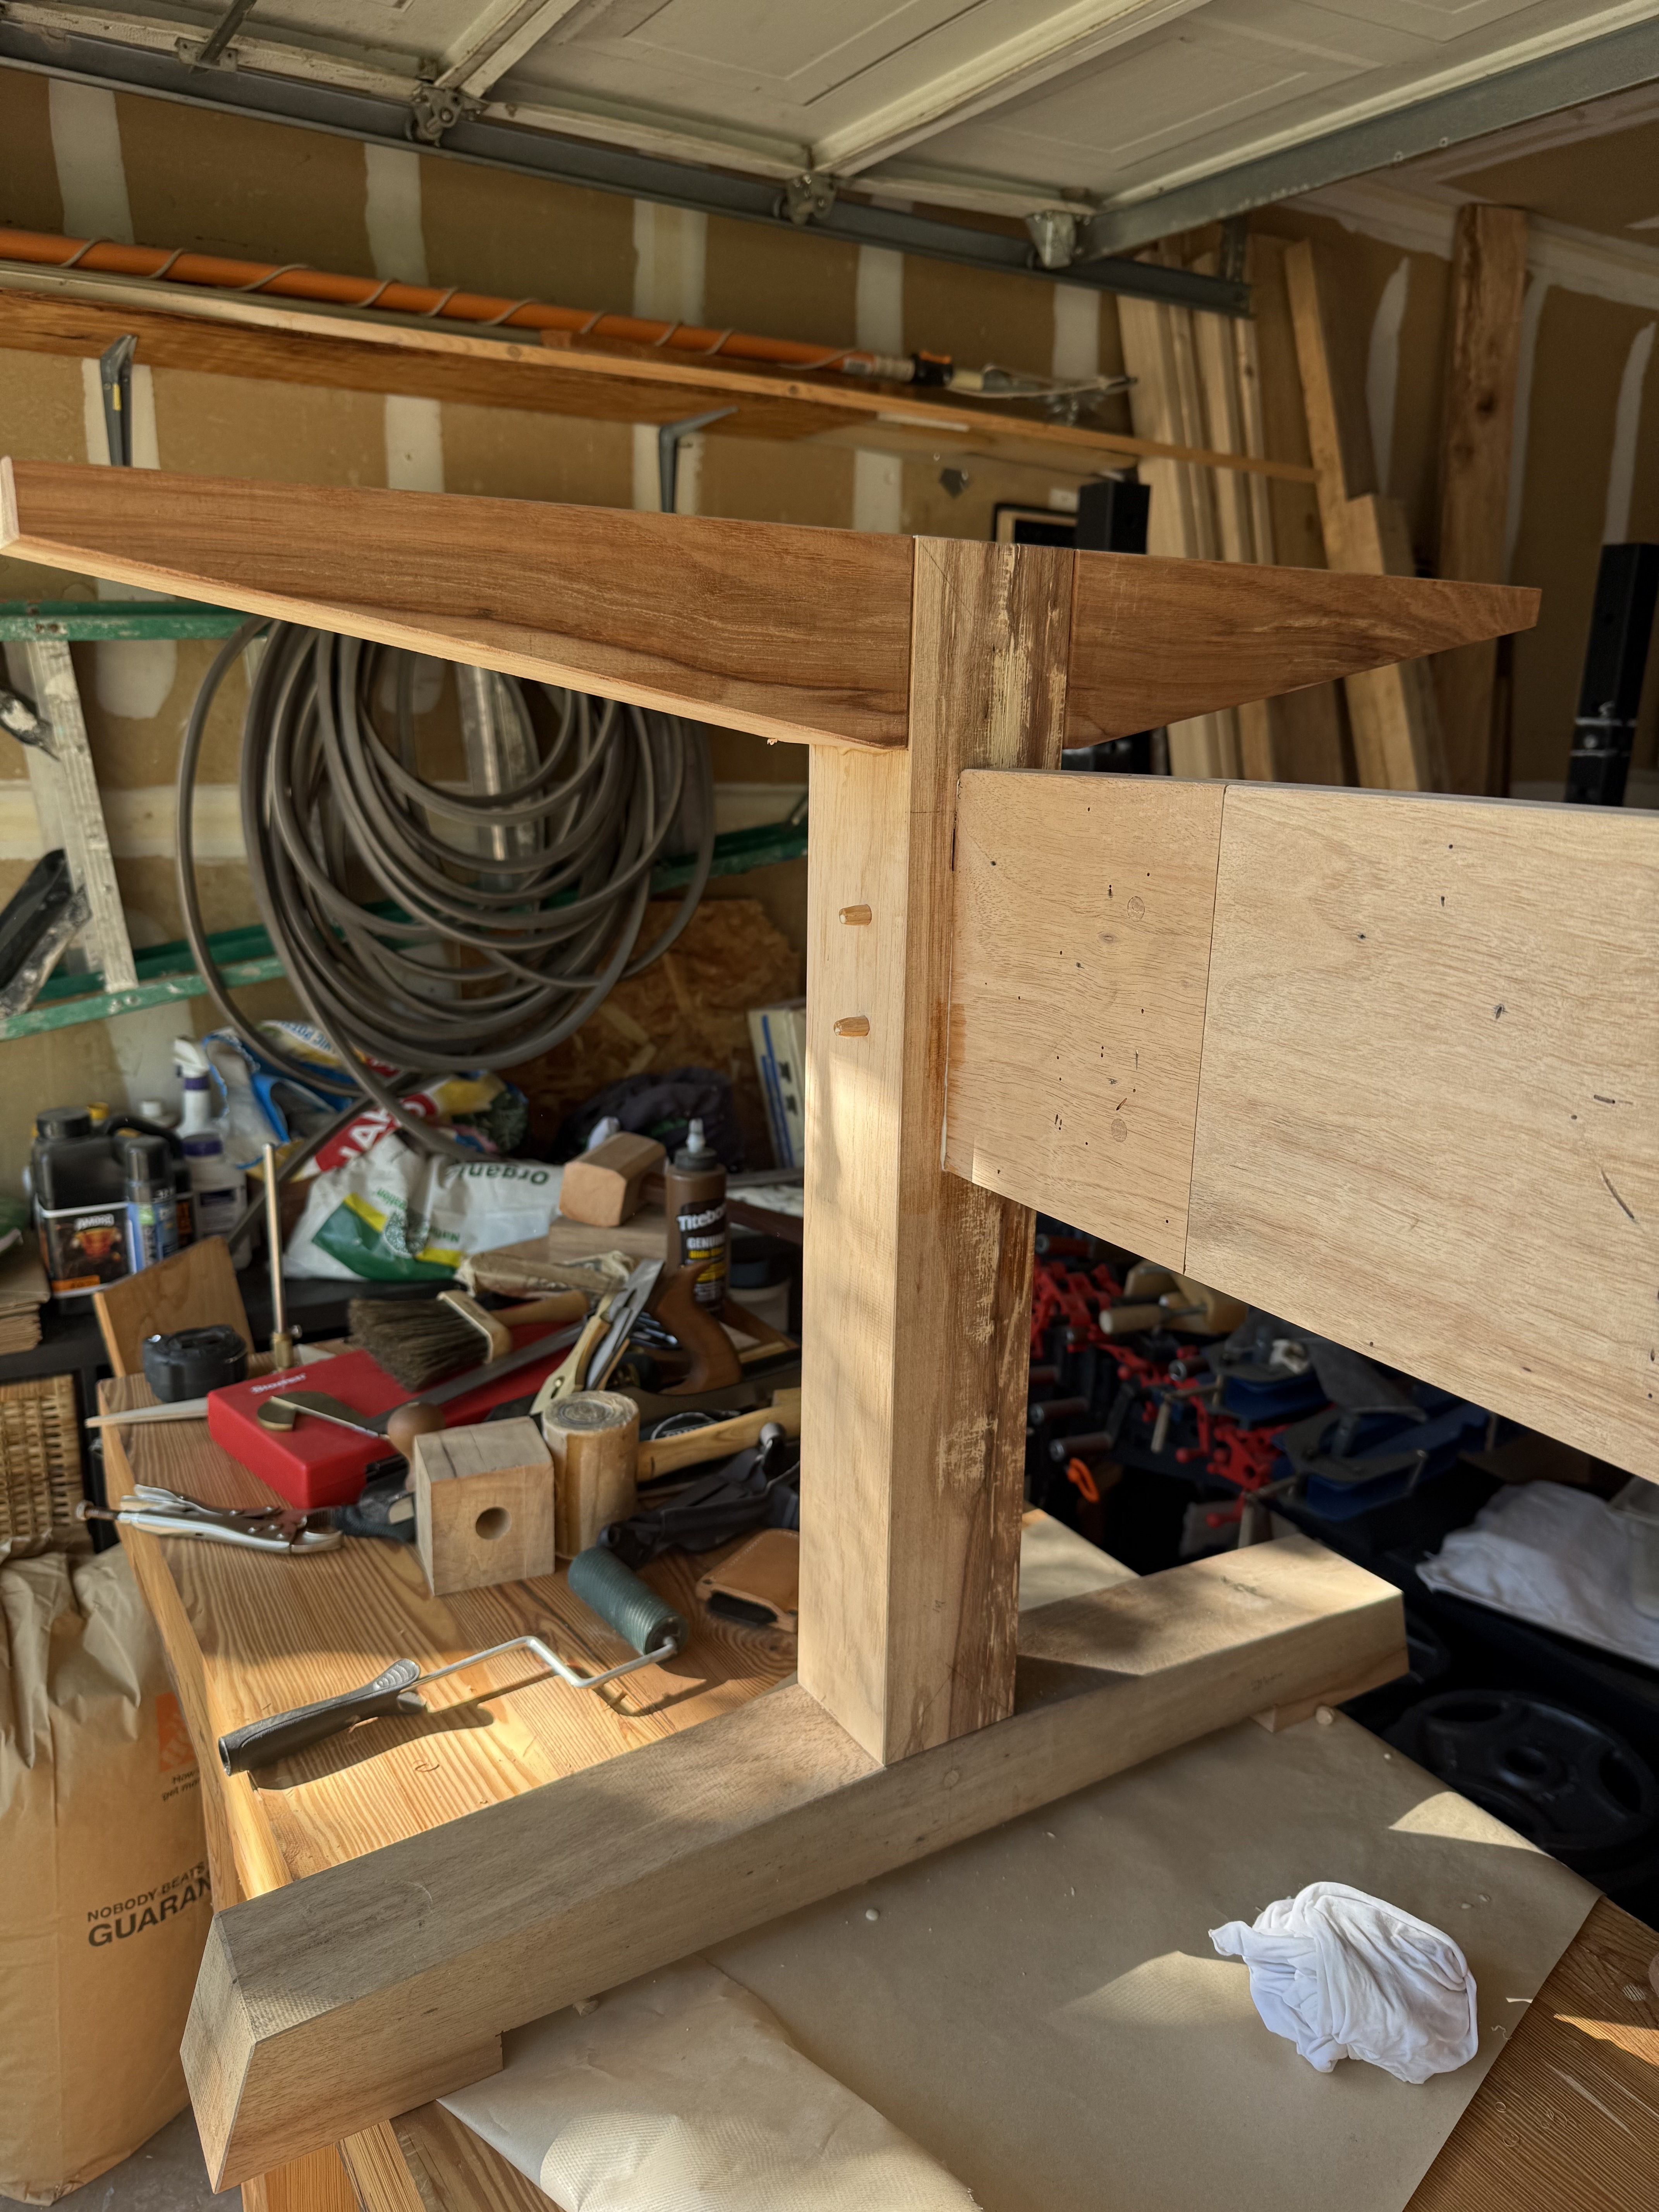
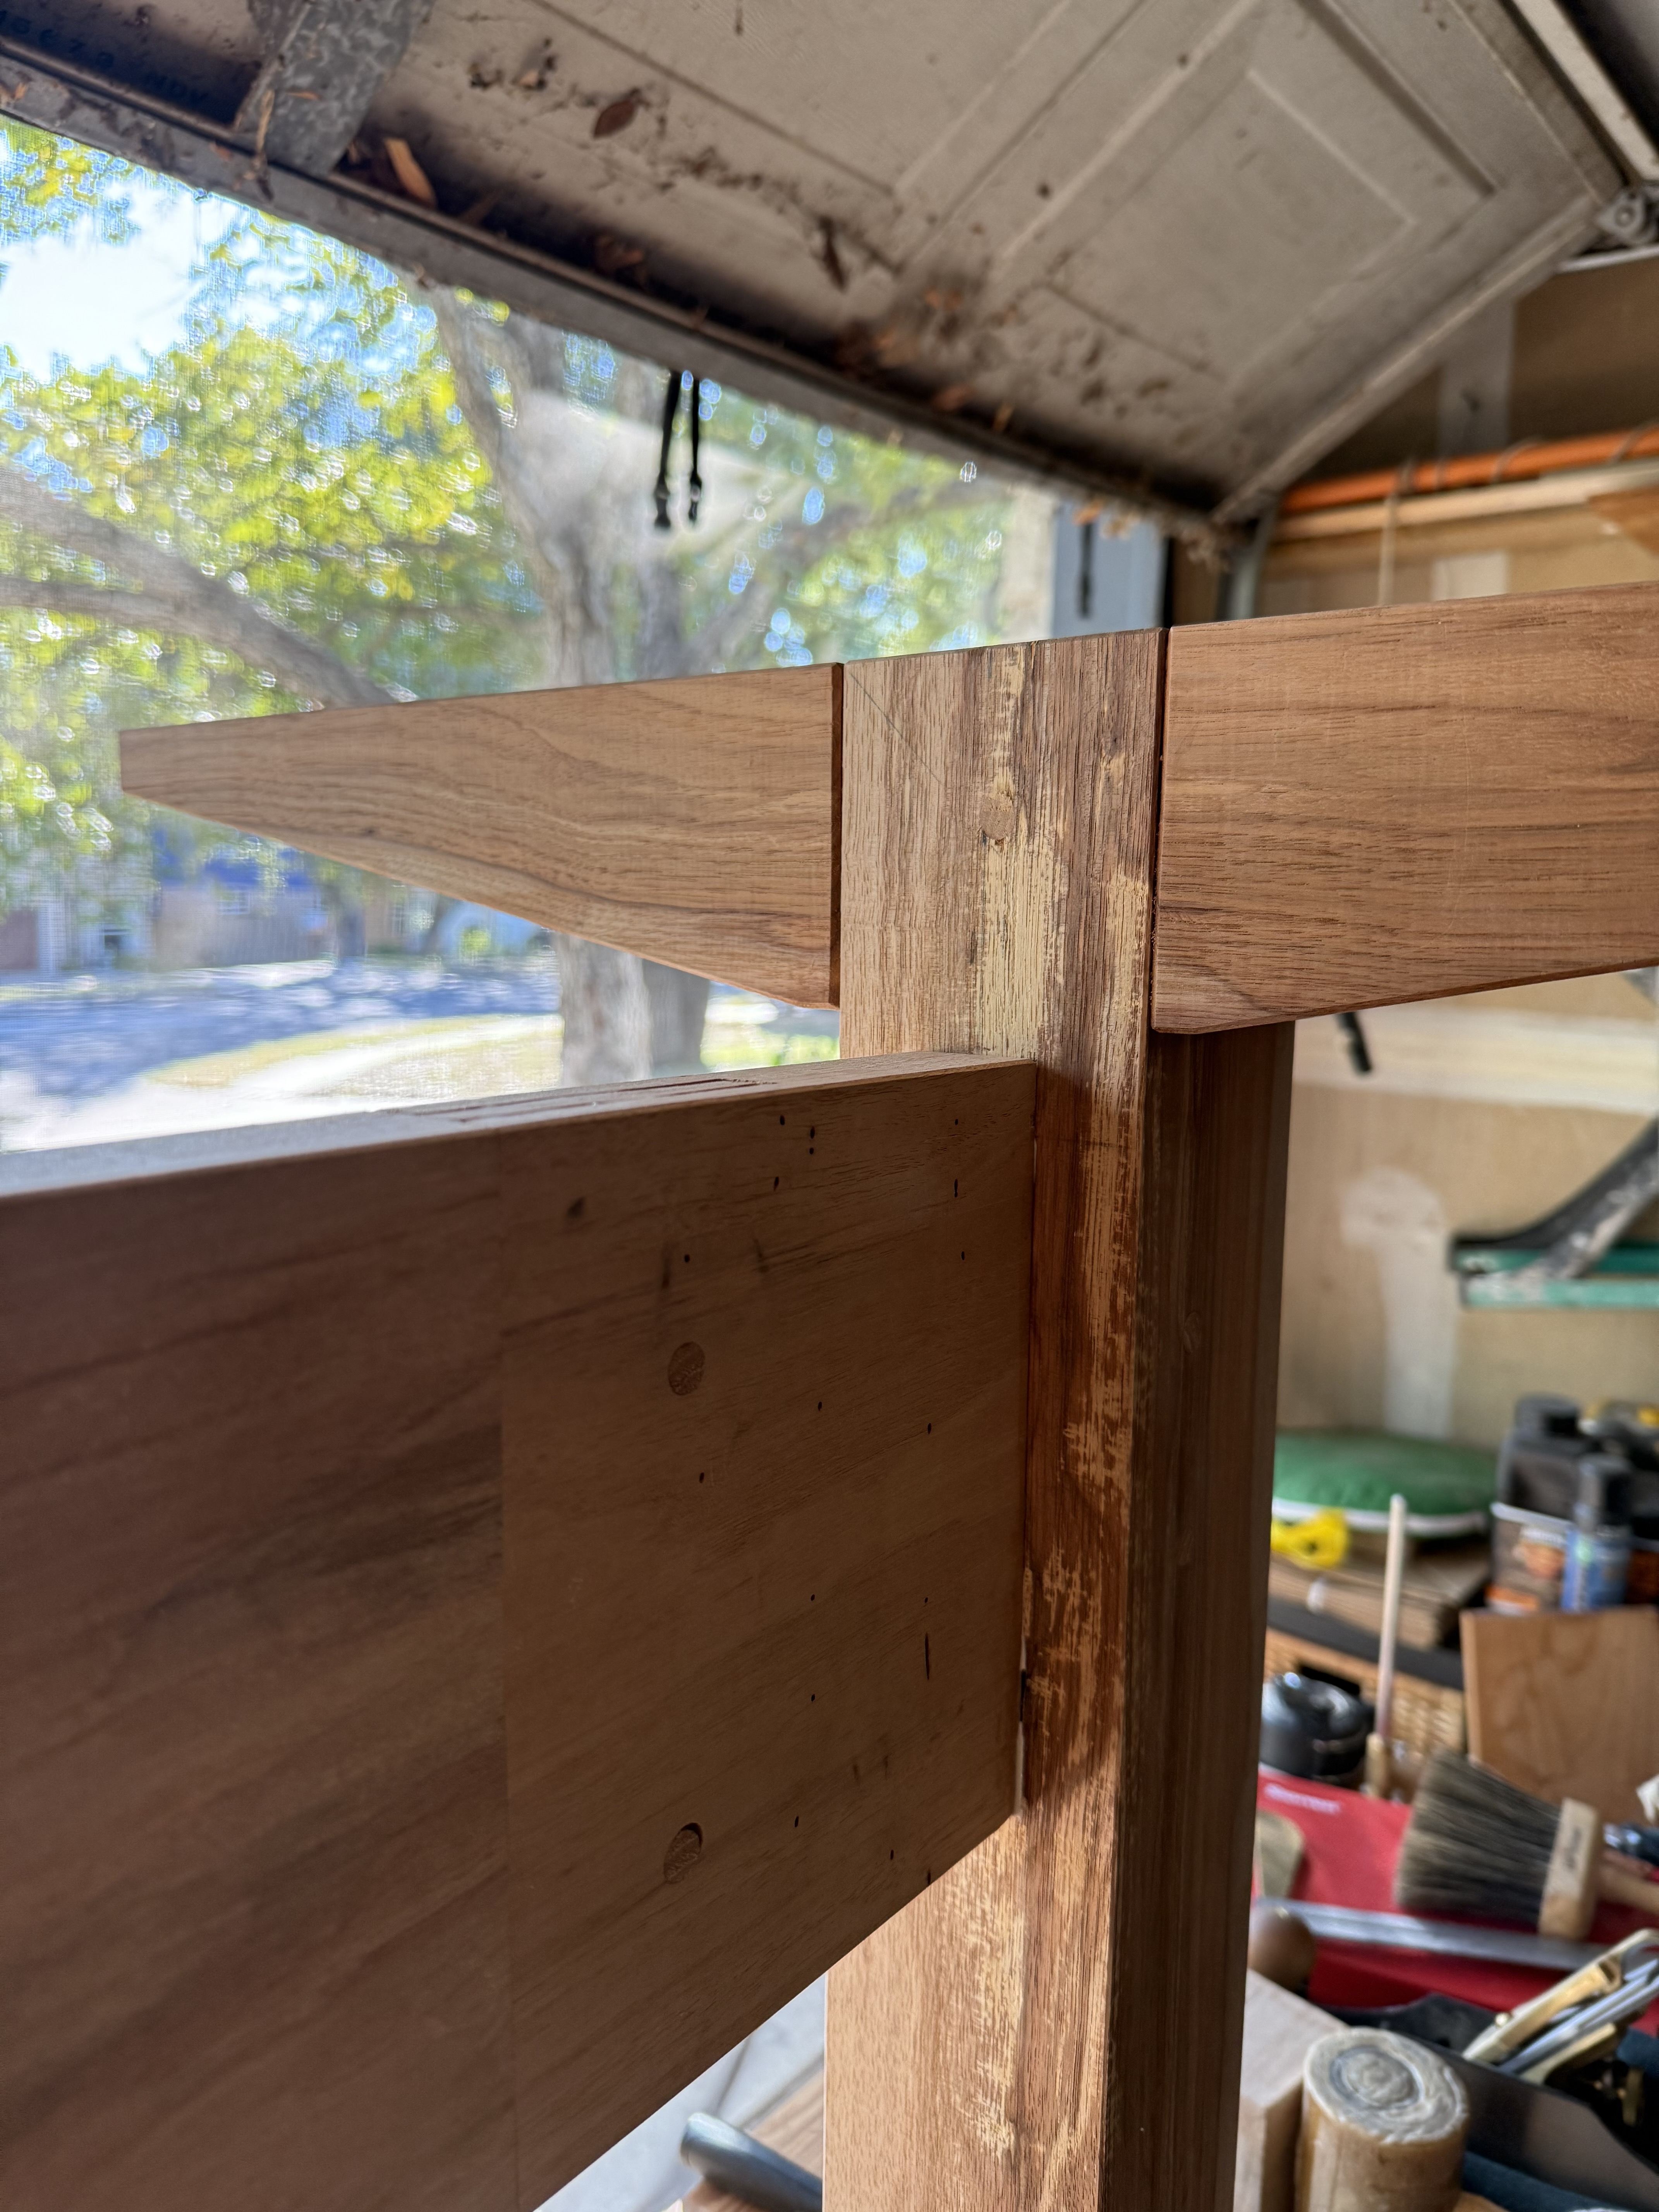
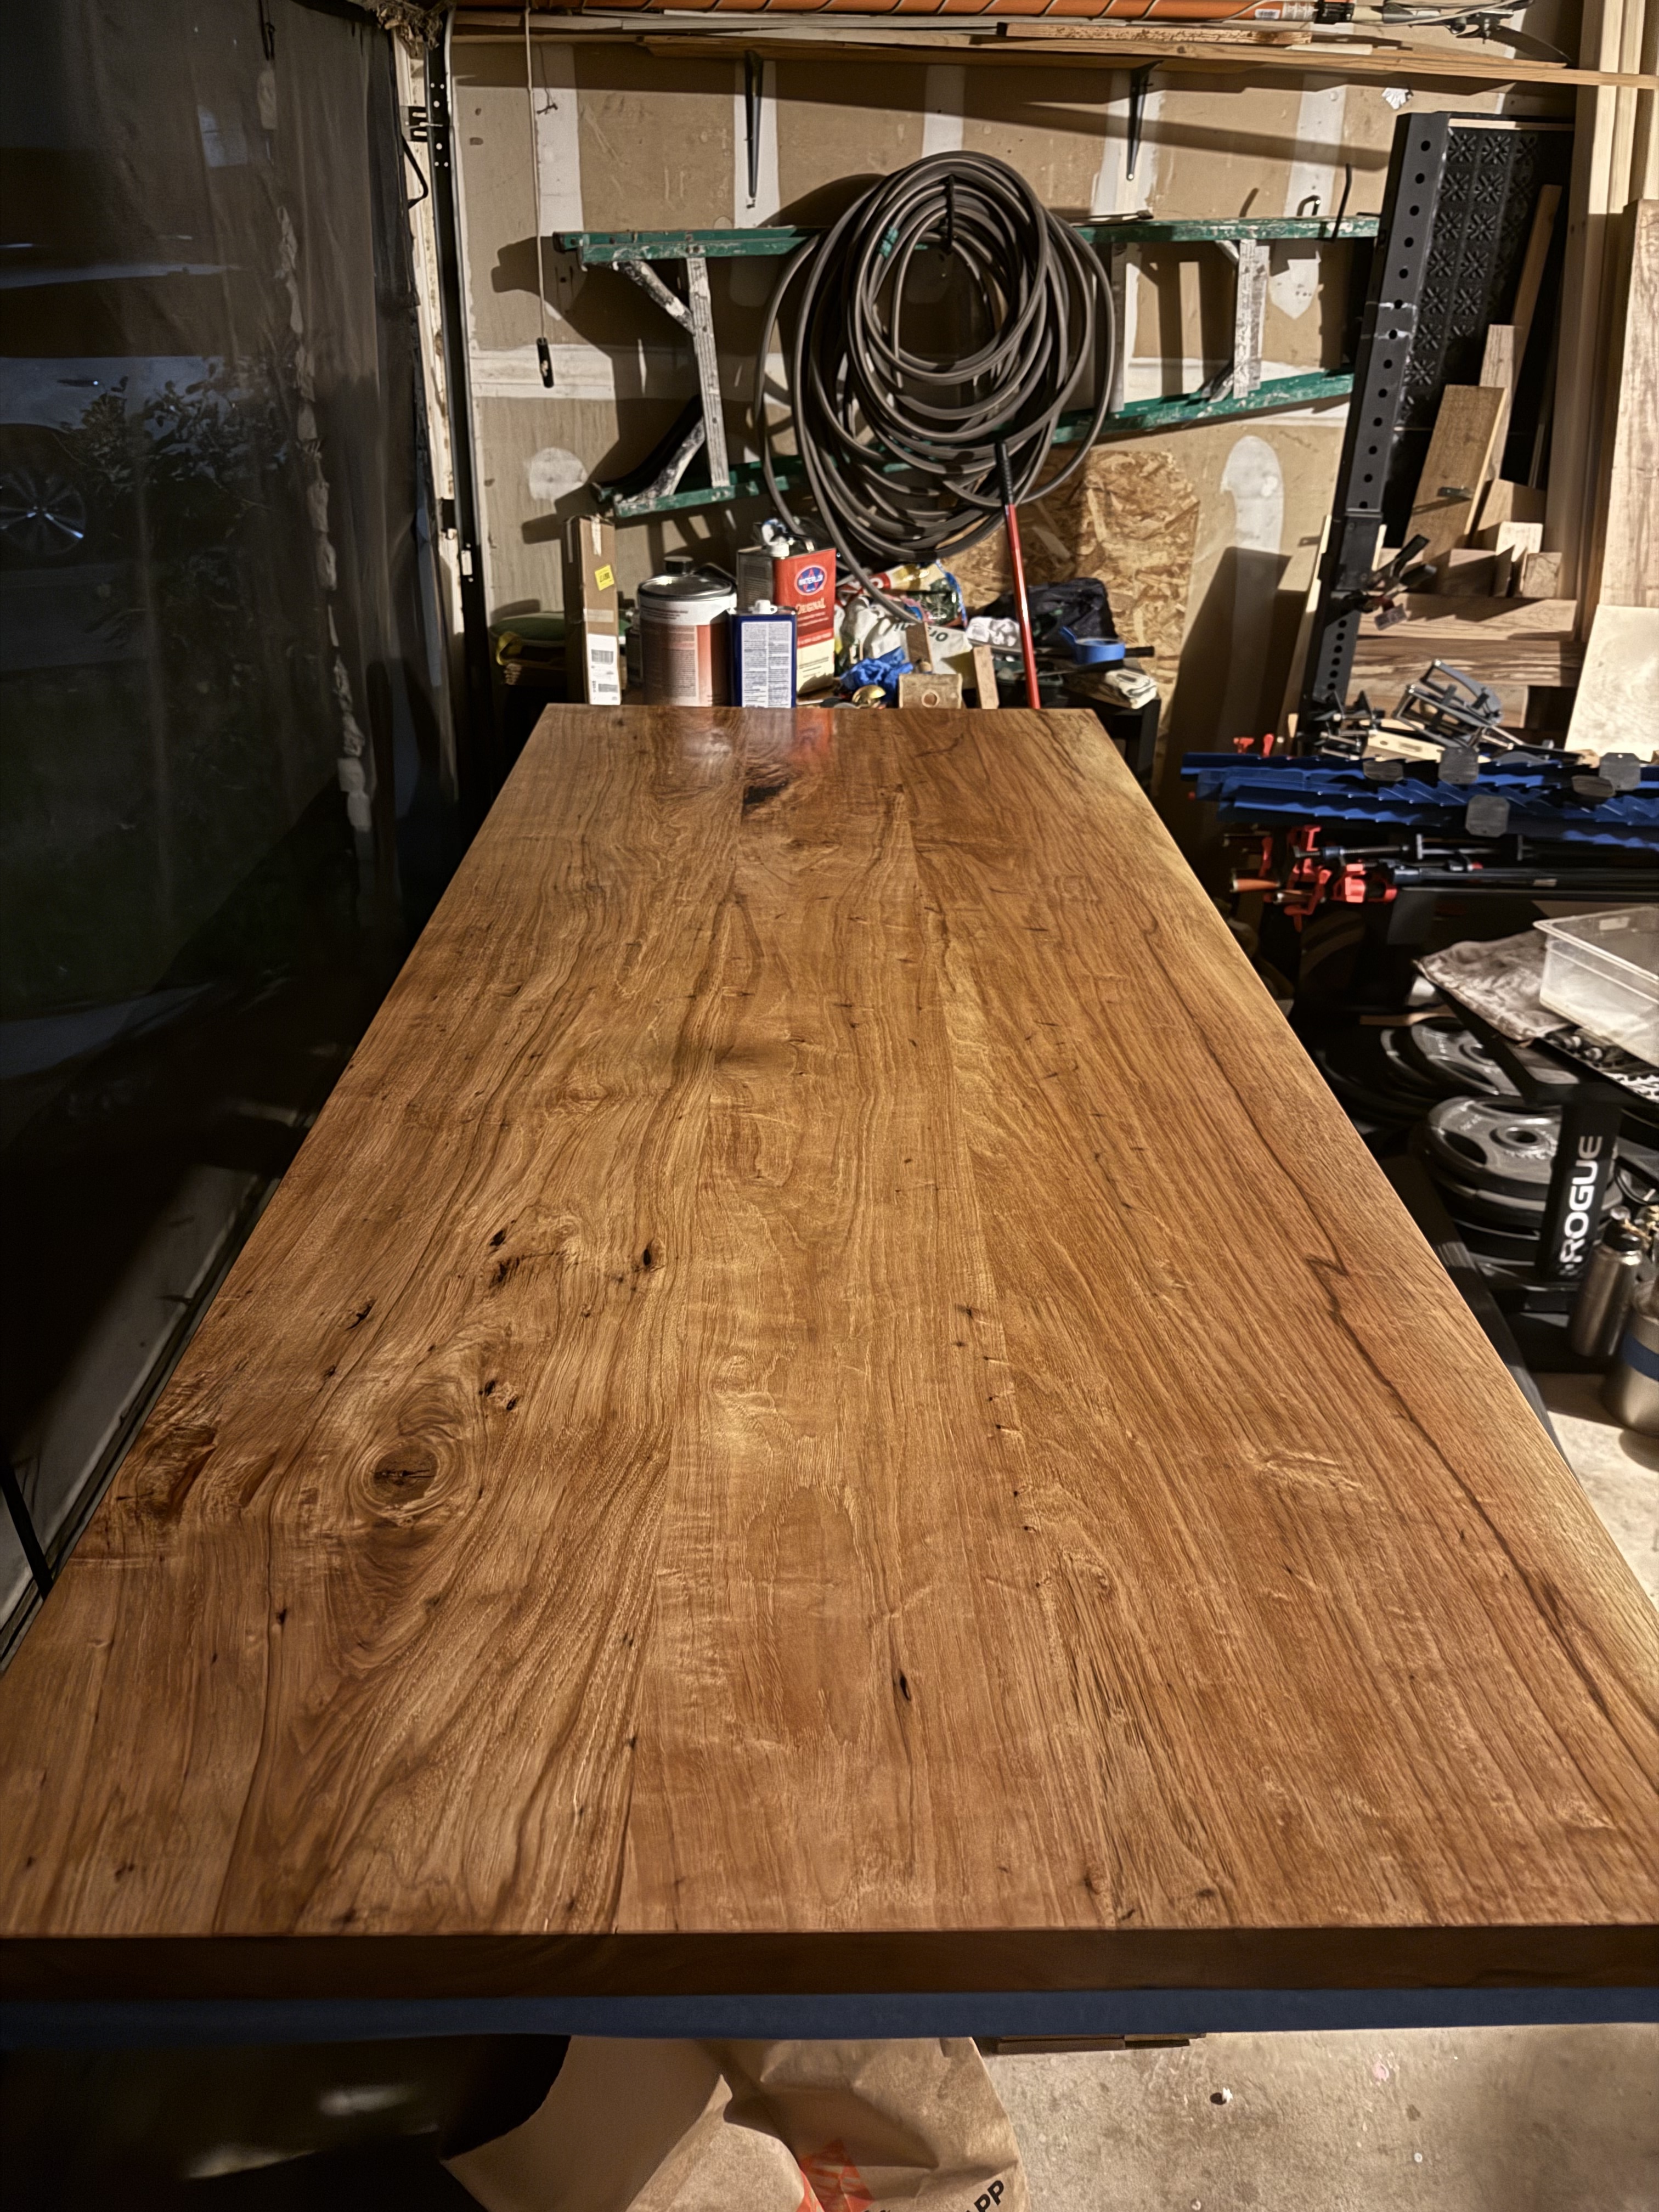
Table-top panel glue up and flattening
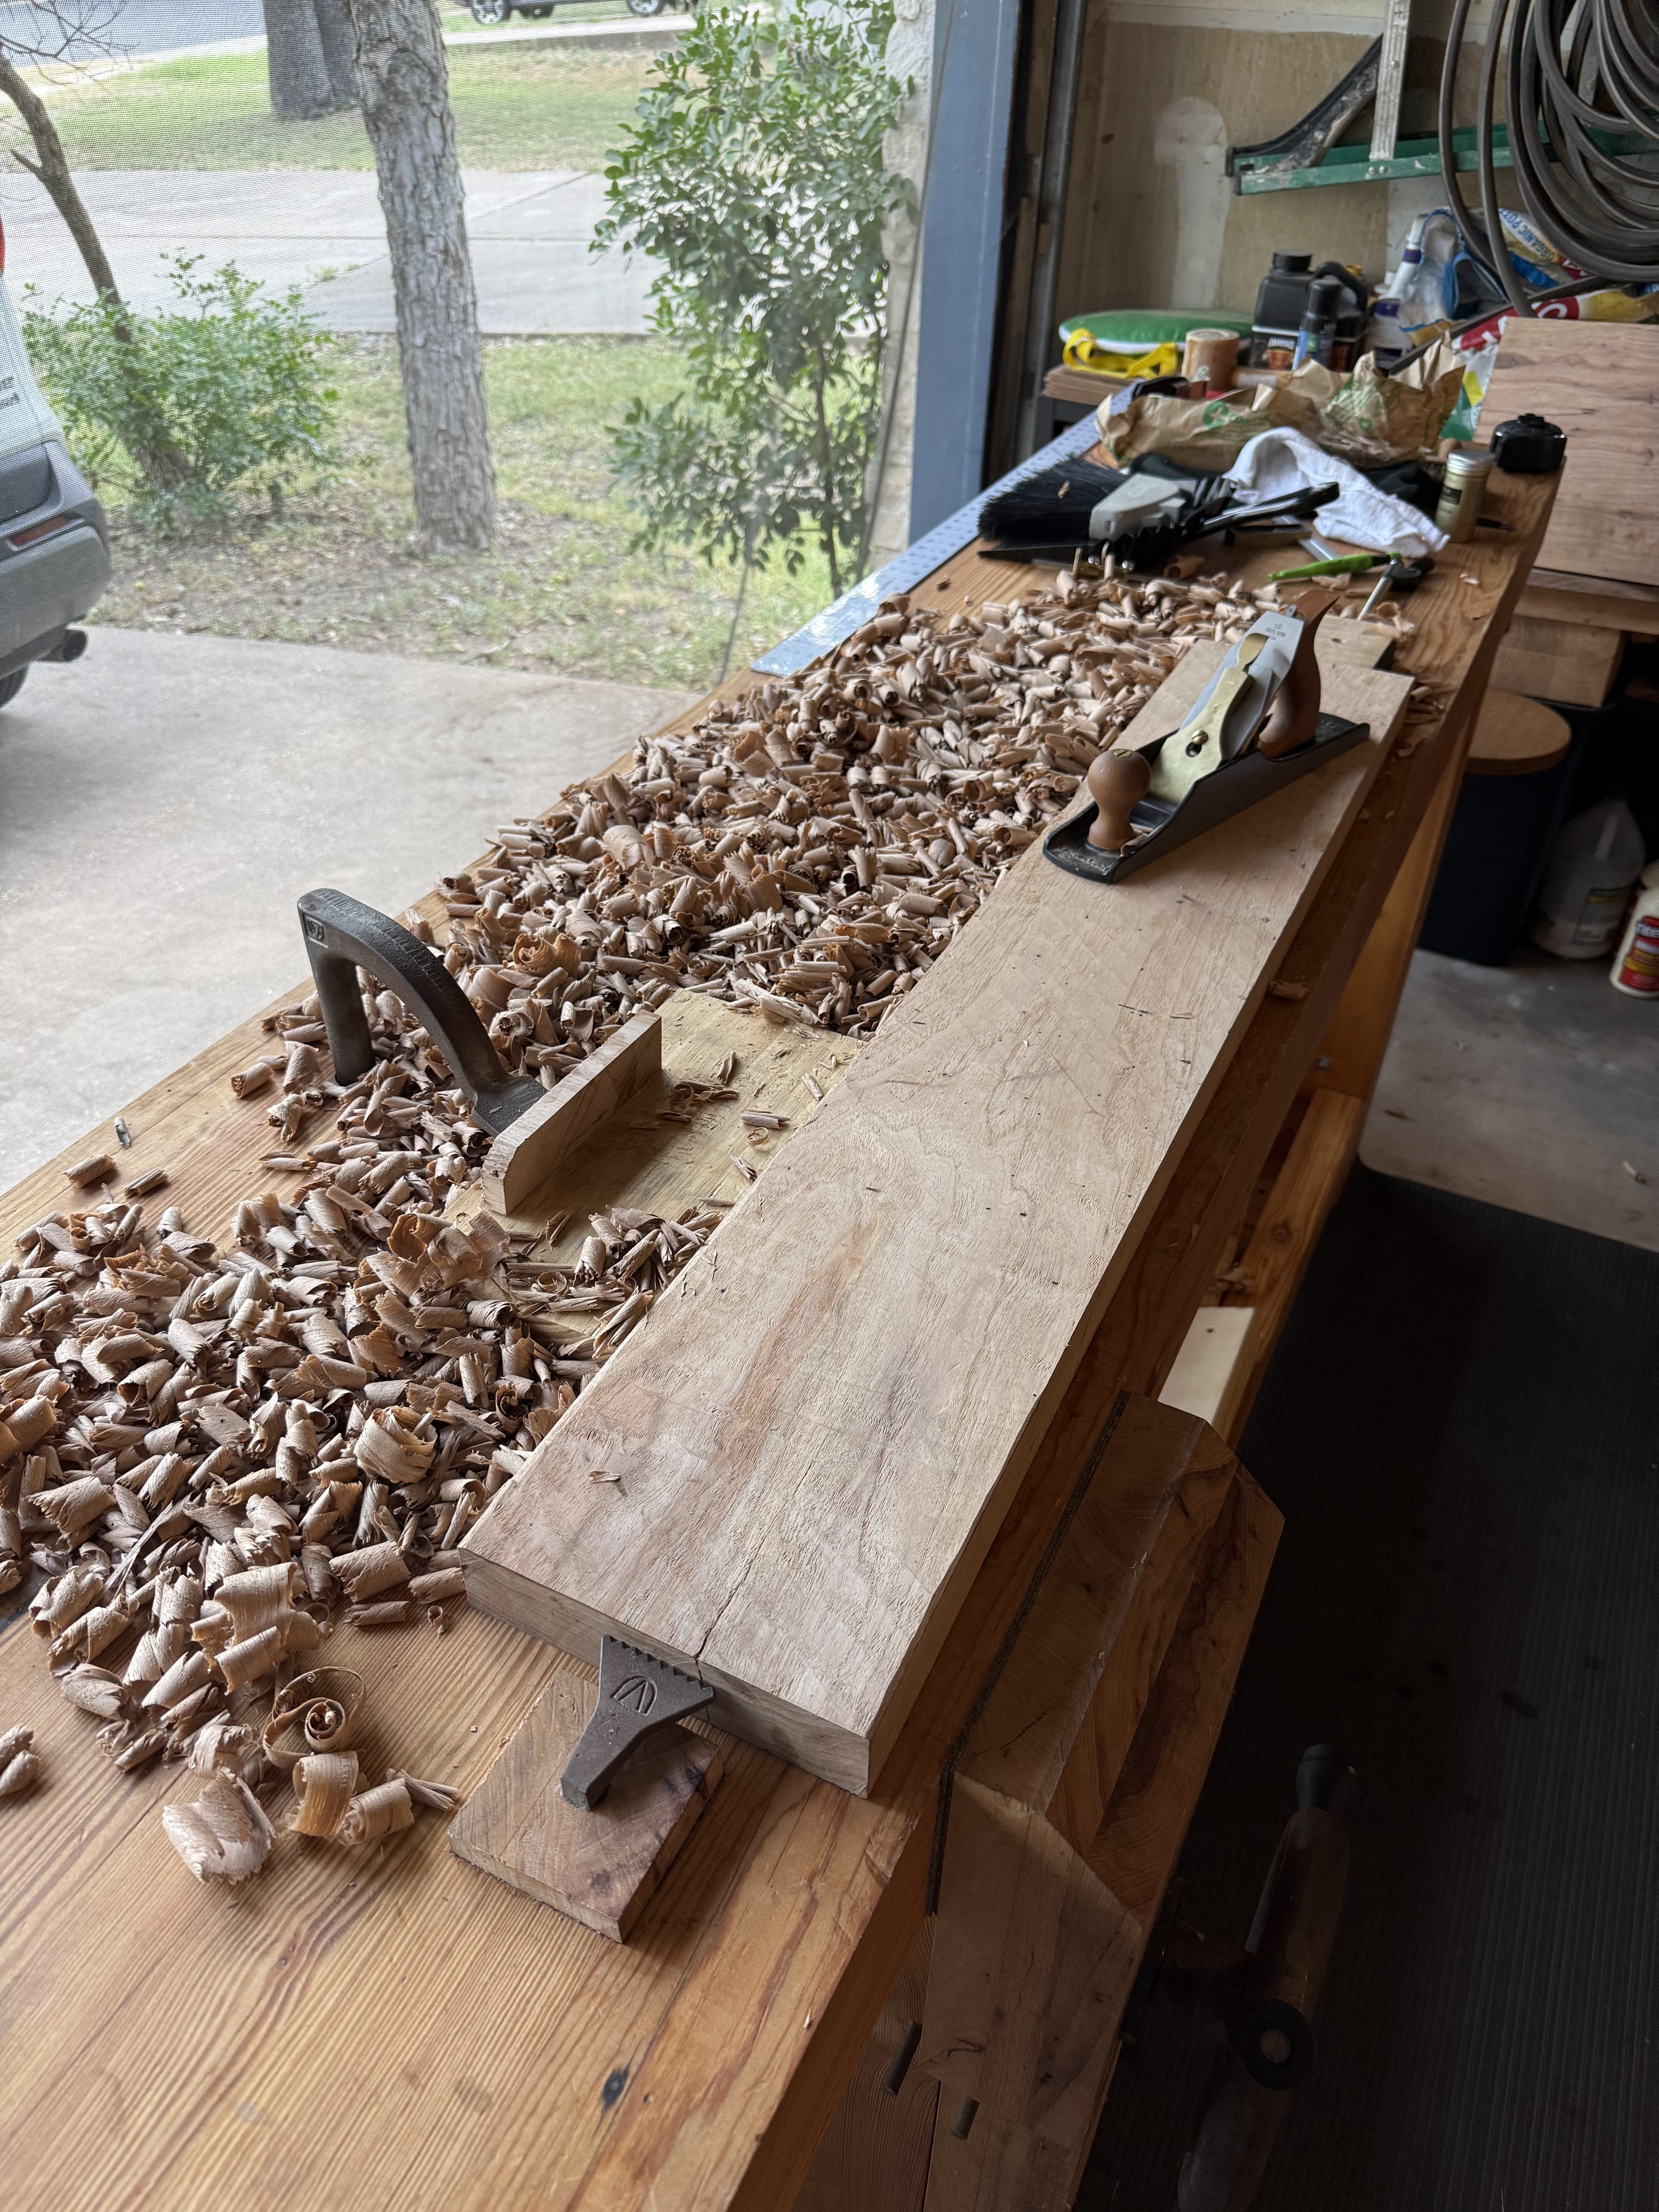
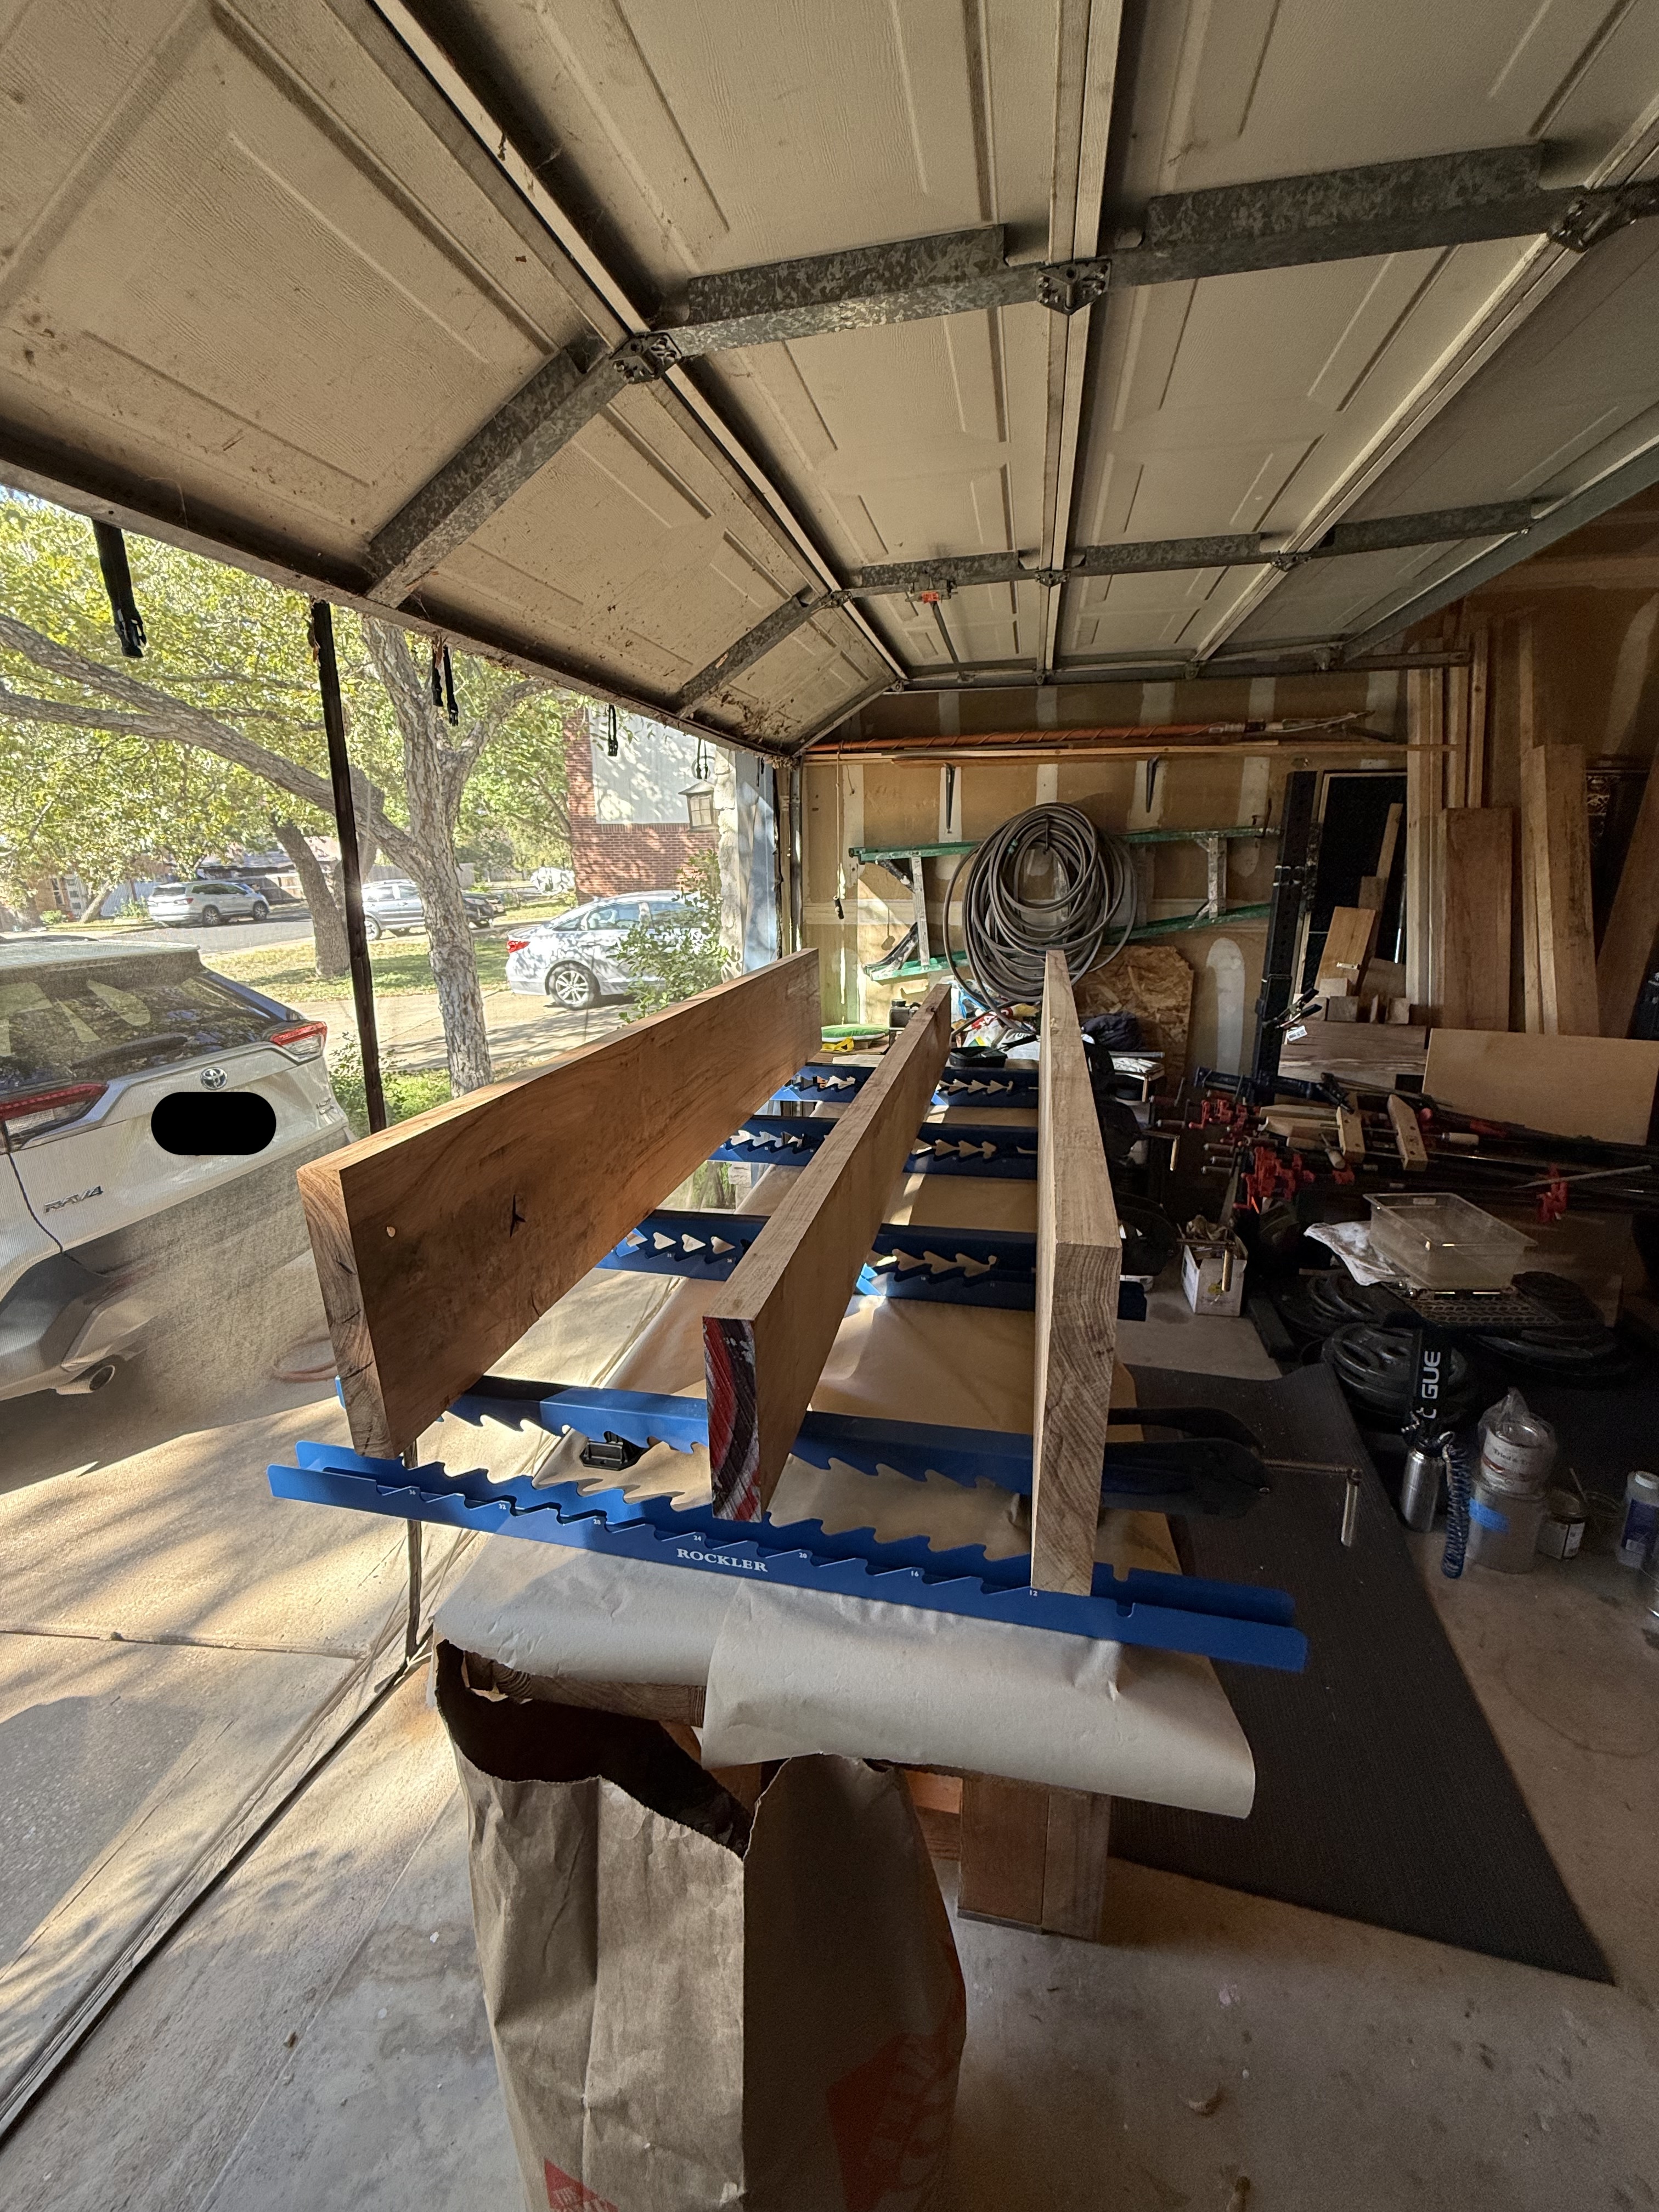
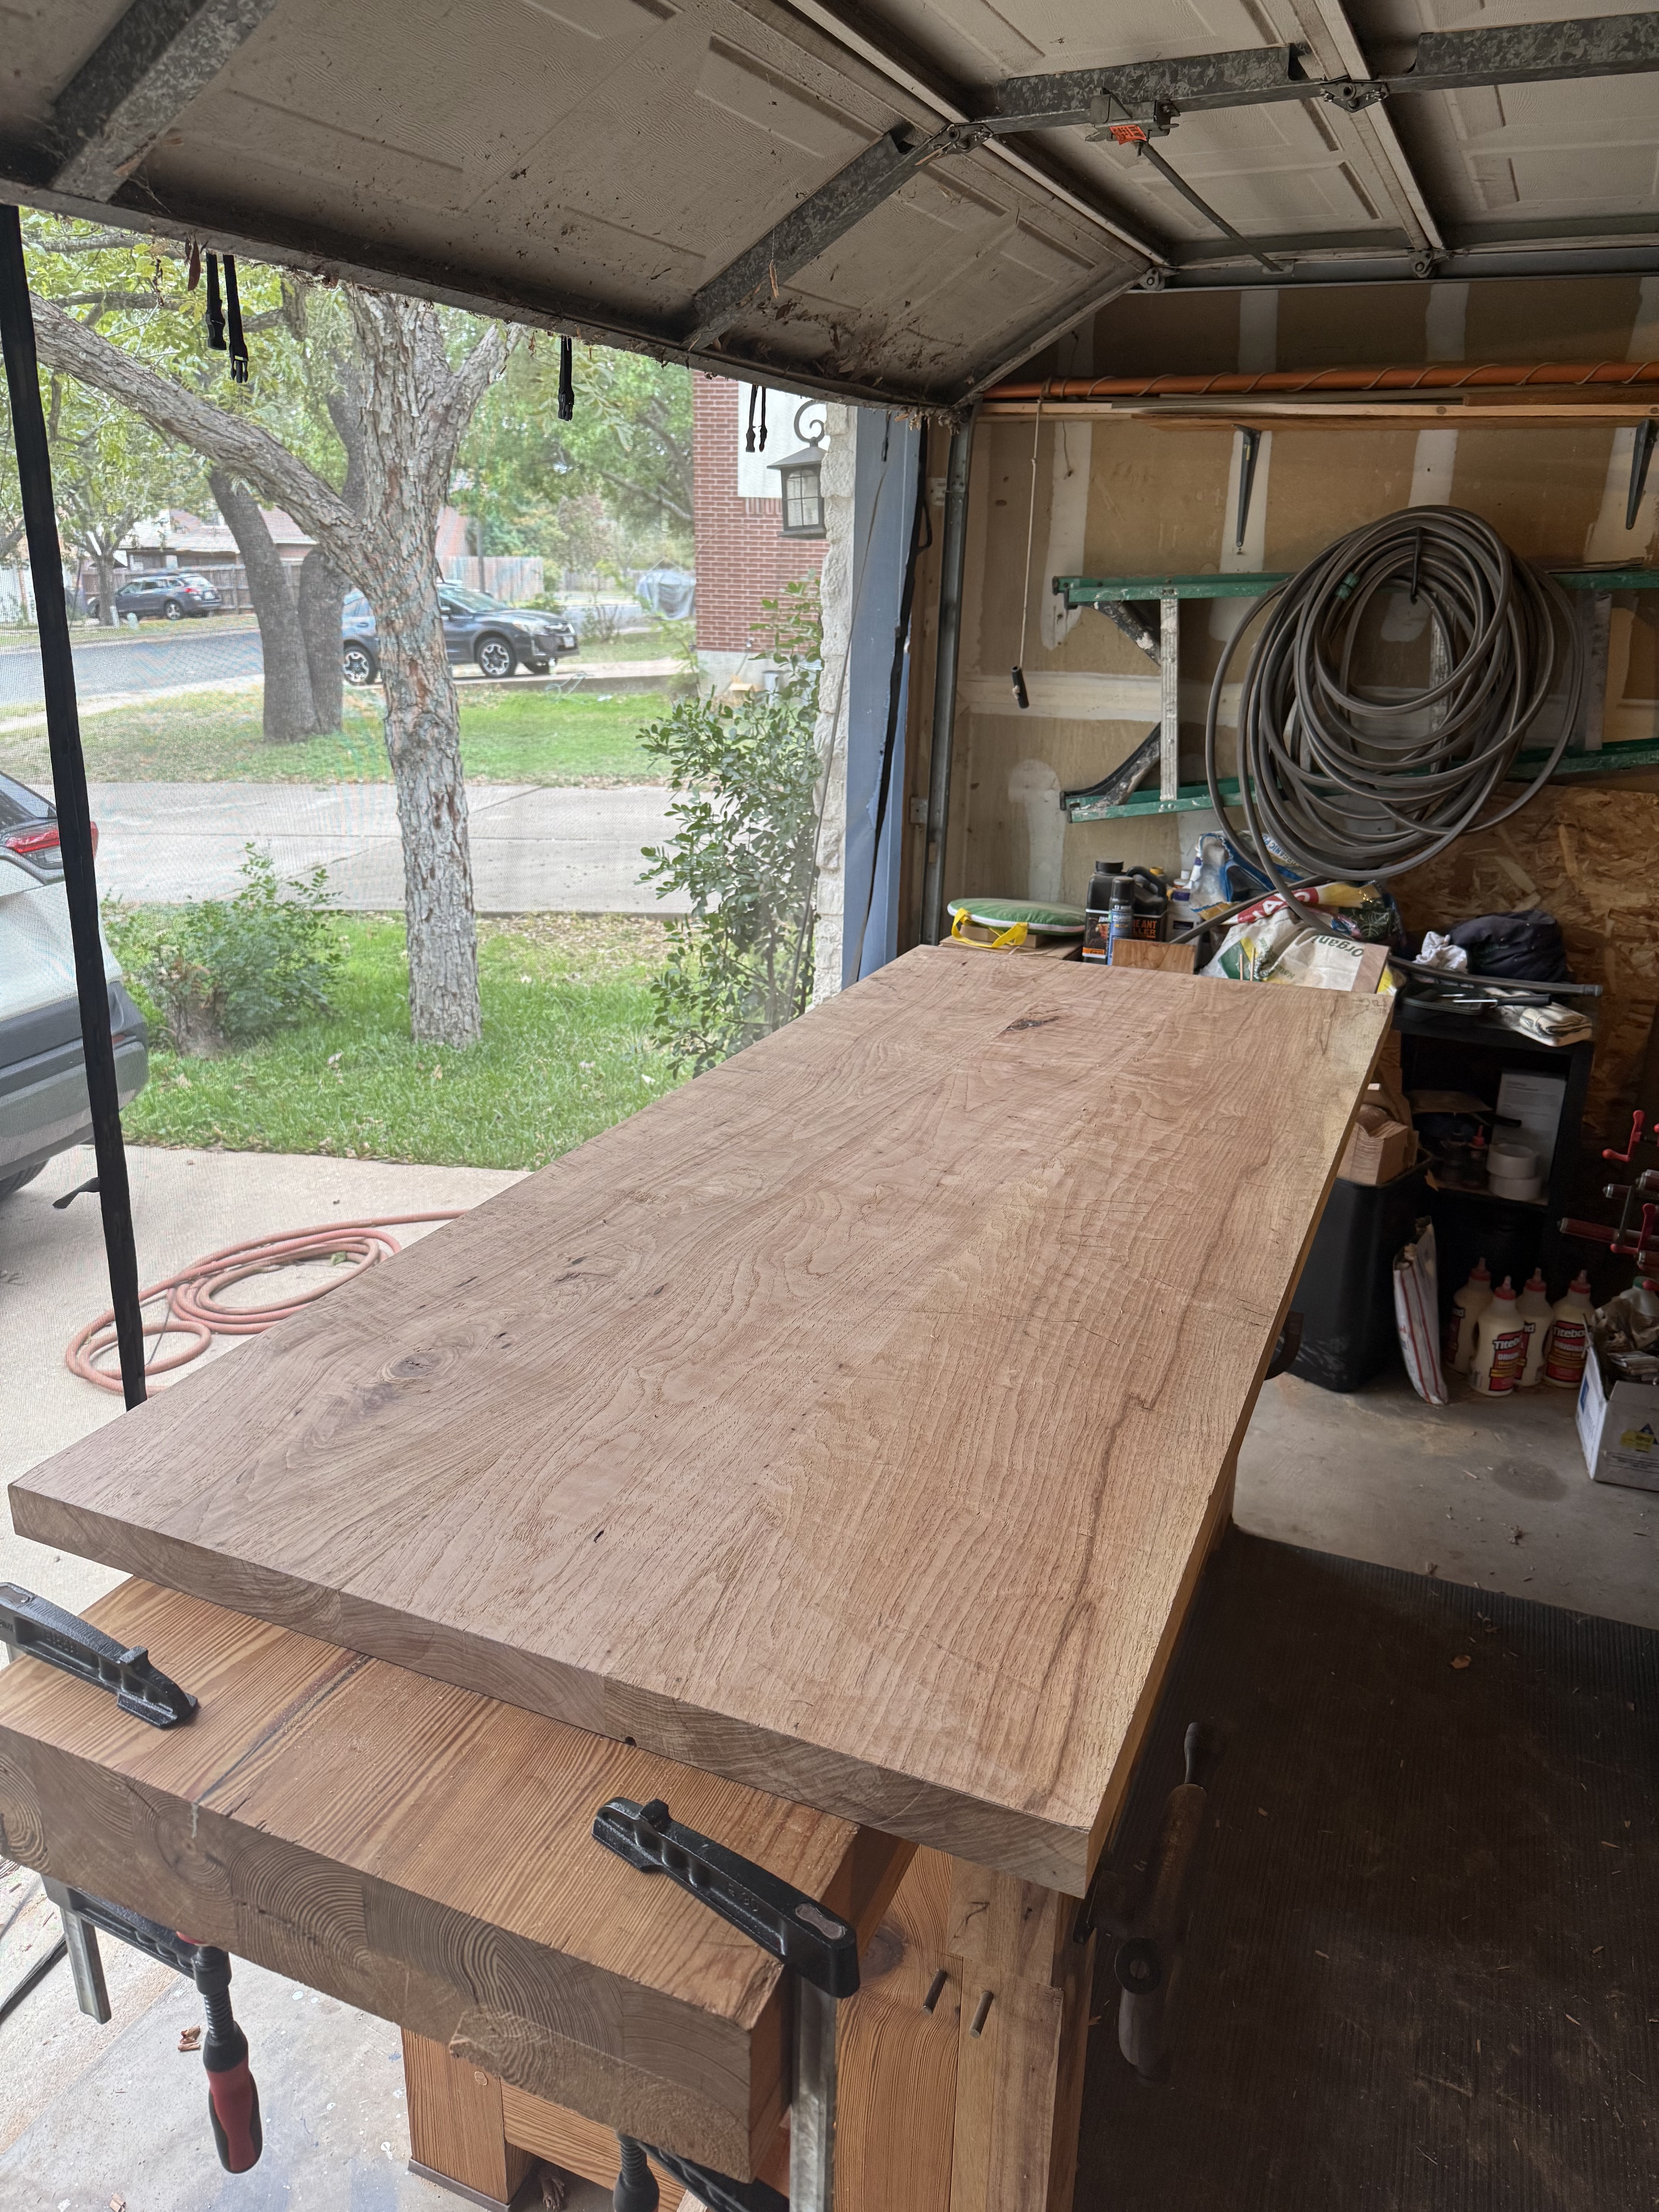
After finishing the base, the next project was to make the top.
I did a panel glue-up and used panel clamps and my Wilton I-bar clamps for this after what I learned from making the workbench top. Though, next time, I think I will go to the trouble to make clamping cauls anyway since the 8/4 boards were so stiff, I think they still bowed slightly in the middle and more even pressure in the center would probably have made things easier for me.
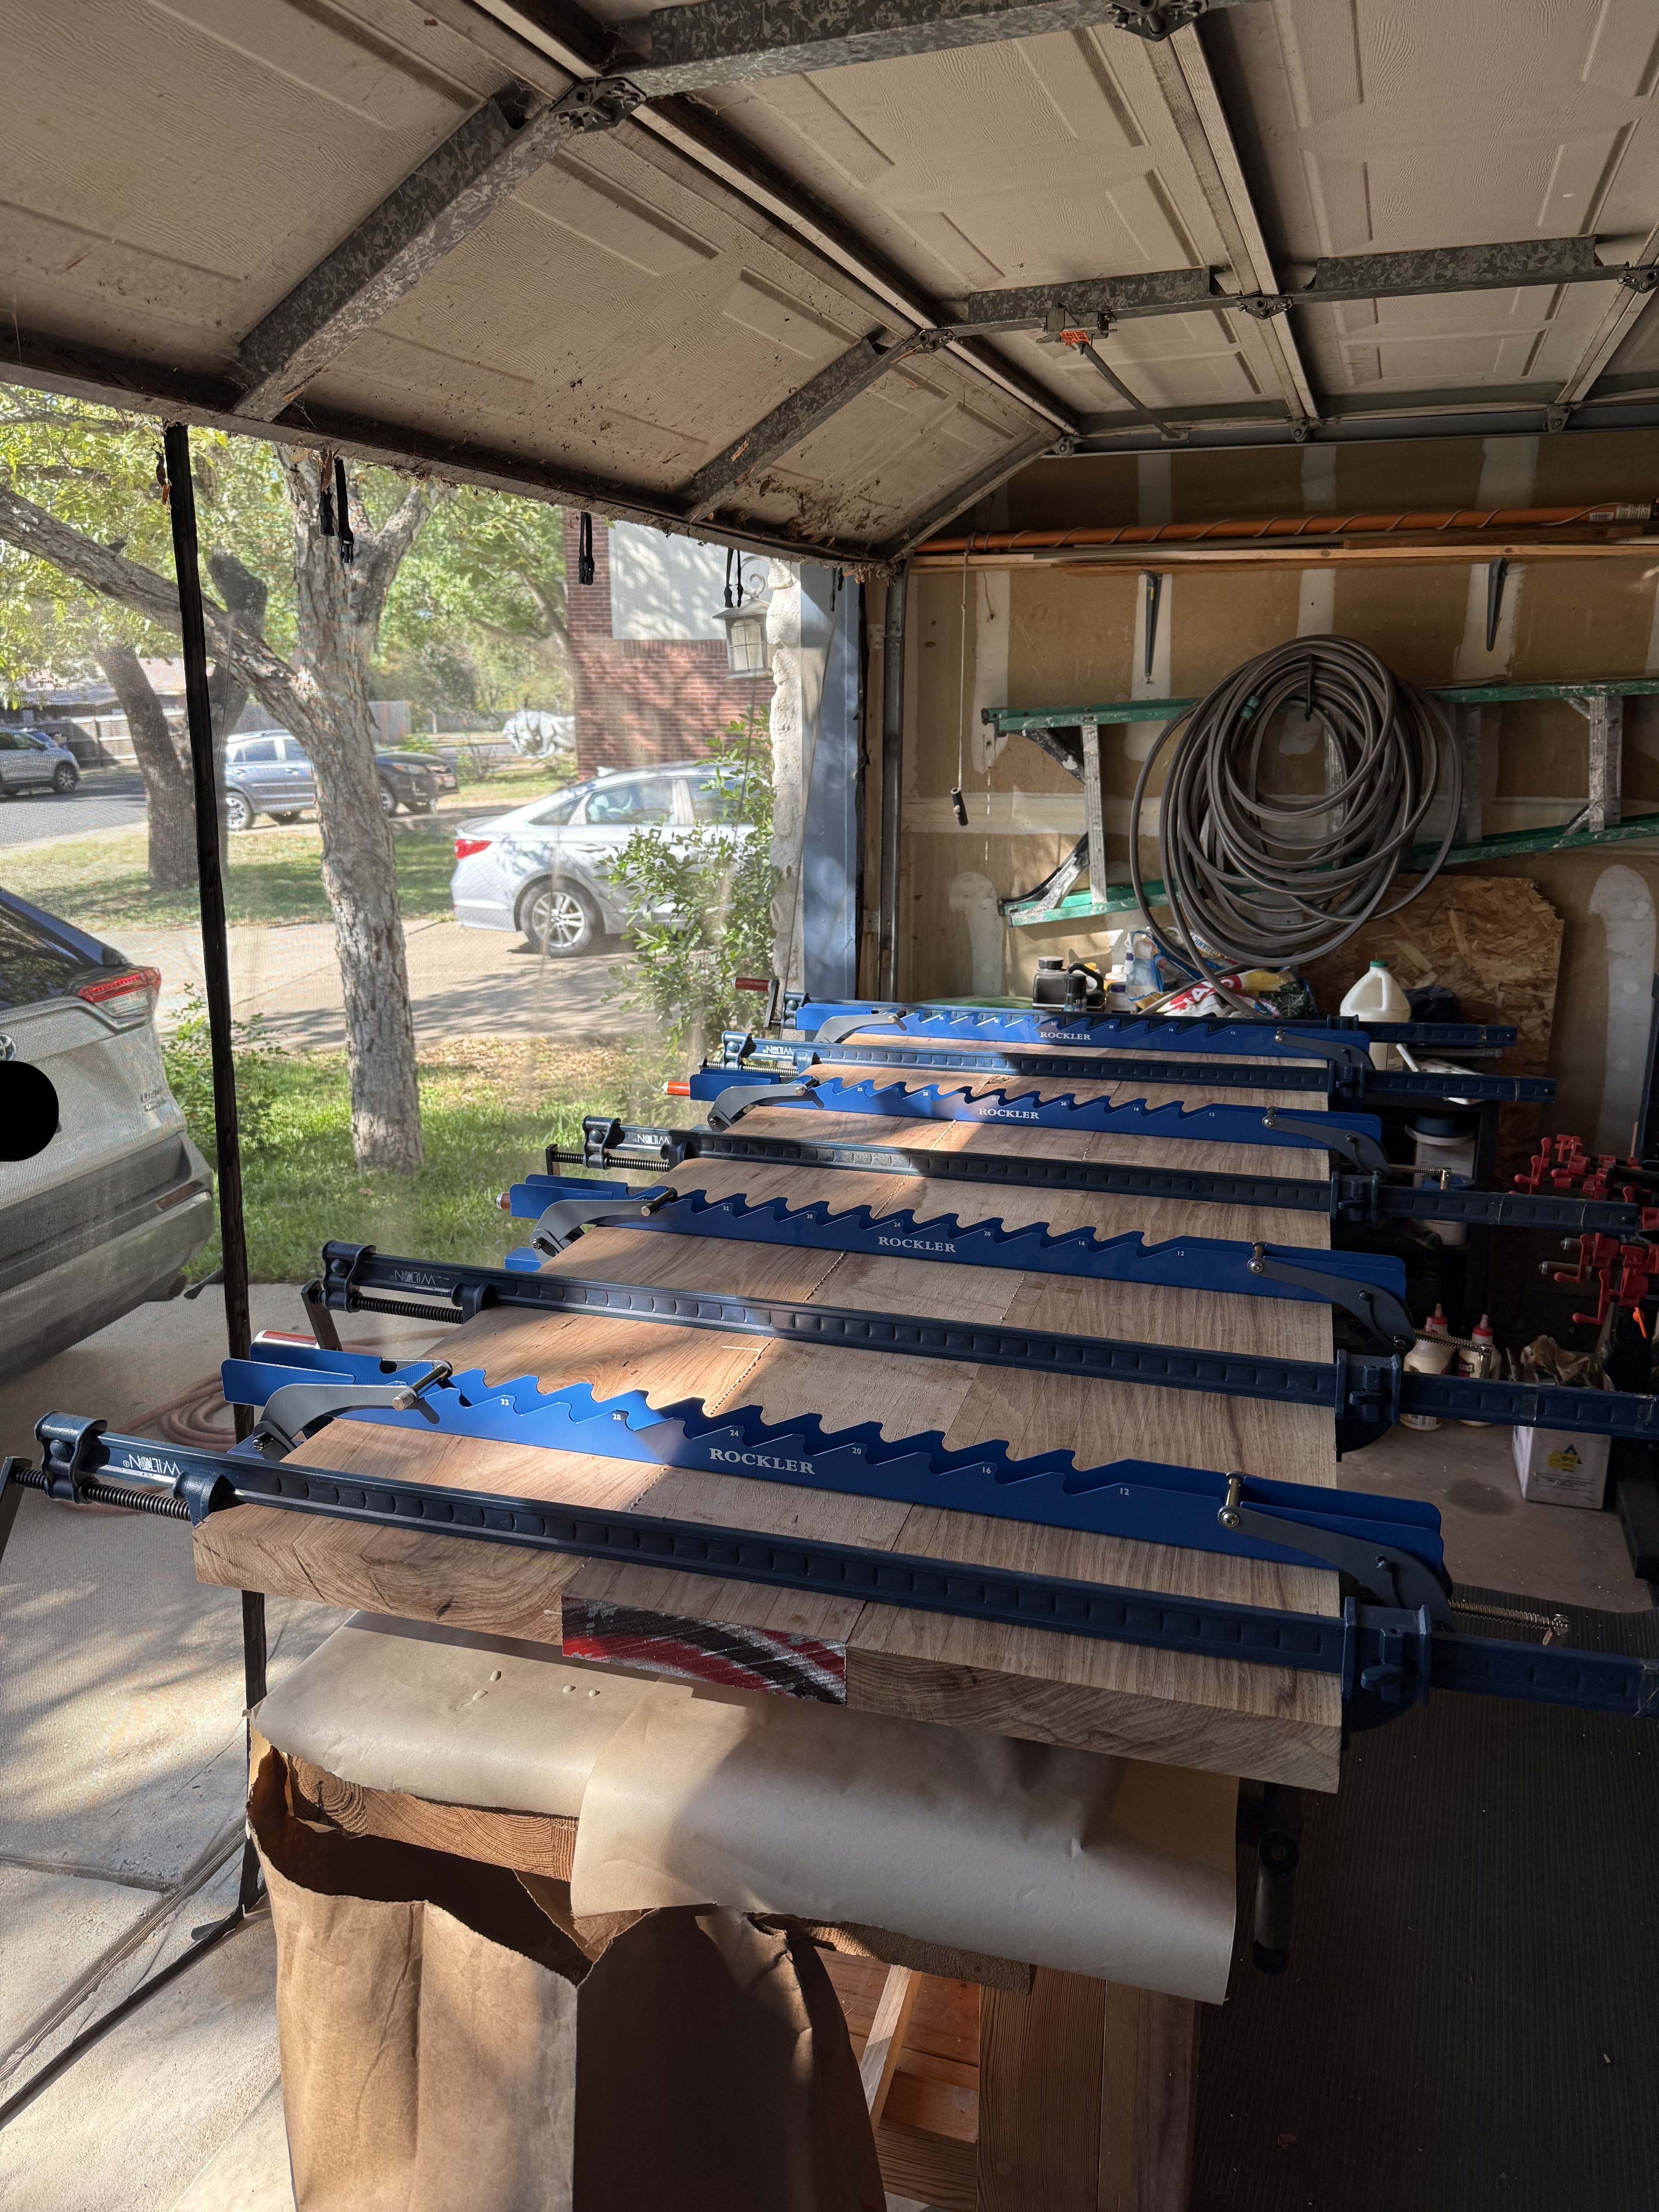
Despite a relatively flat panel glue up, the panel was moving a lot and required a significant flattening and jointing effort which I did by hand.
At first, I would tackle flattening one side and then take a break and flatten the other side the day after. However, I discovered the following weekend when I checked the panel with a straight edge, that it had come out of flat again!
I realized I was doing a few things wrong (exacerbated by the fact that my shop is in my garage and Austin was going through quite a few temperature and humidity changes during the time I was flattening):
- Flattening time per-side was too long, giving the panel too much time to absorb or release moisture between flattening sessions.
- Between sessions I was also laying the panel directly on the workbench which would cause uneven moisture exchange.
… to fix this, I decided I needed to do a single flattening session to get both sides flat and that I would then use dewaxed shellac to seal the panel immediately.
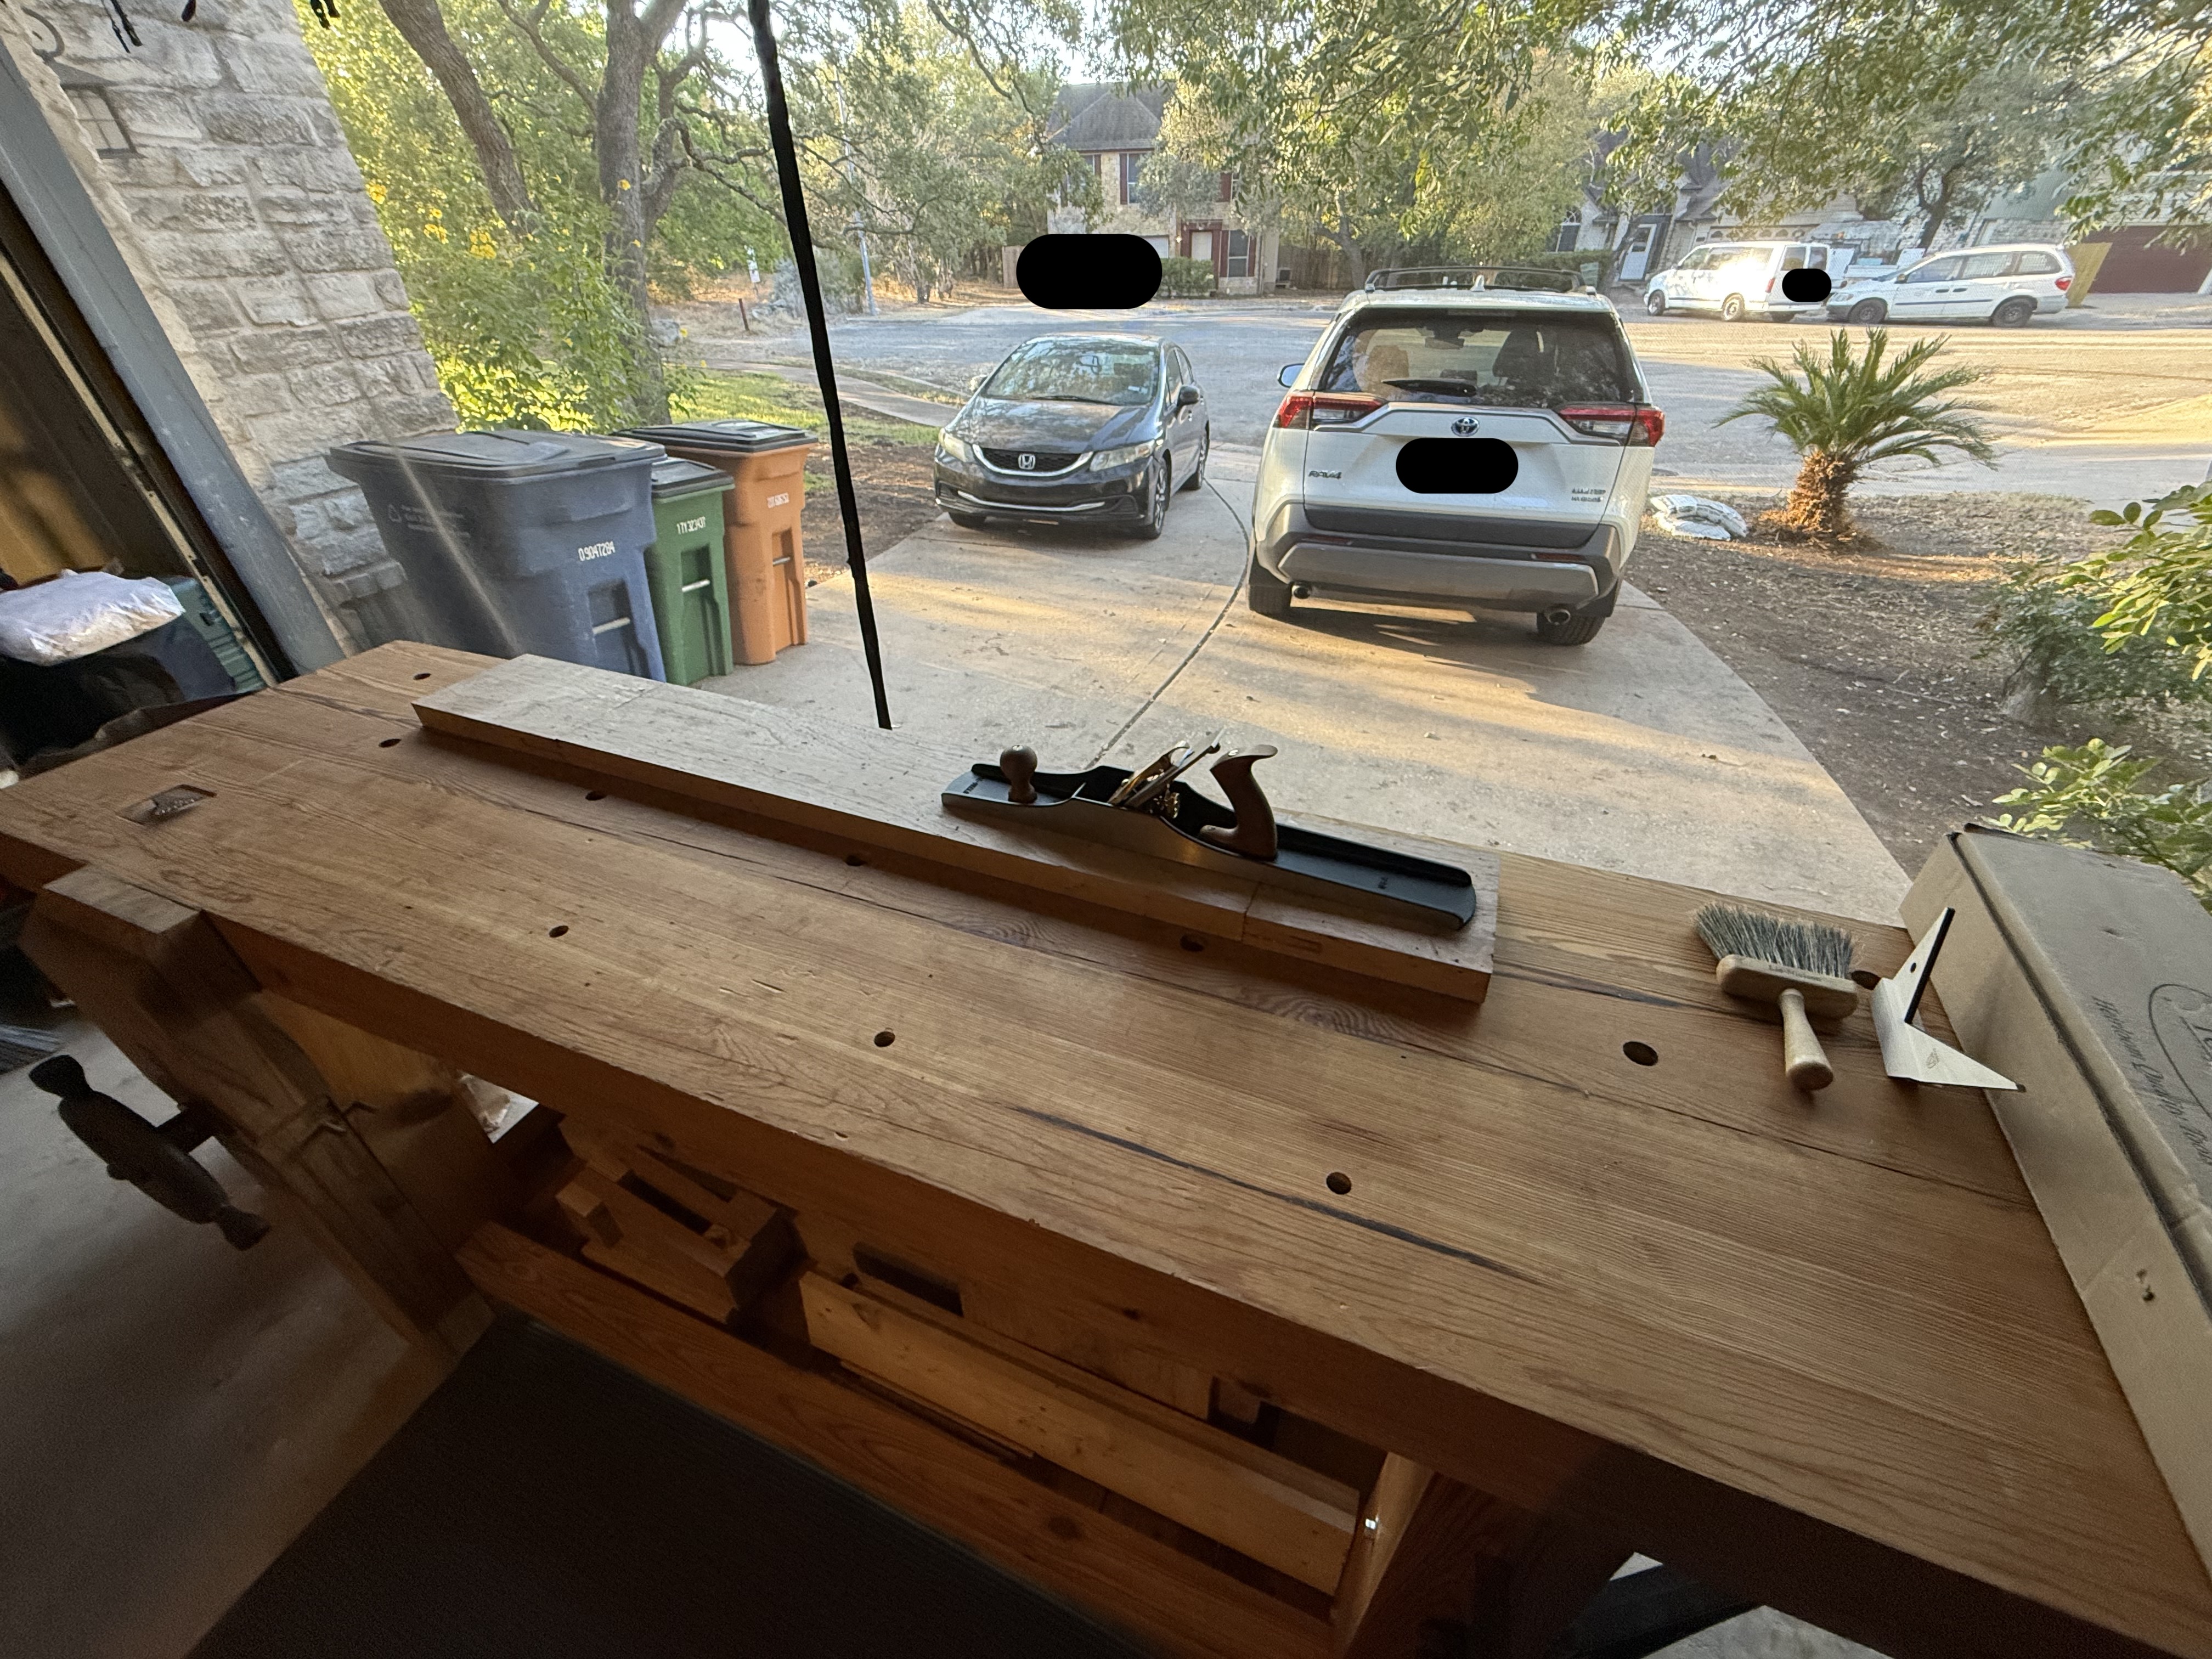
This flattening session, impressively, took 9 straight hours. The panel is large, so it was a lot of work and then on-top of that, Southern Texas Pecan is a beast to push planes through. I chose to flatten first with a heavily cambered No. 5 jack plane then I used my No. 8 jointer to make a perfectly flat top. For the bottom, I only used the No. 5.
I was also quite pleased with my approach to finding the peaks that needed to be brought down by the No. 5 before I could tackle it with the jointer. I used my long straight-edge but I covered it in graphite with a pencil and dragged the straight-edge down the length of the panel. This revealed the peaks effortlessly and saved me the obnoxious chore of checking every inch or so visually.
With this method I got right to illuminating the peaks and knocking them down until it produced a roughly even amount of graphite across the width of the panel.
Then I used the diagonal cross-hatch technique with my No. 8 jointer to “average out” the peaks and valleys left by the heavily cambered No. 5.
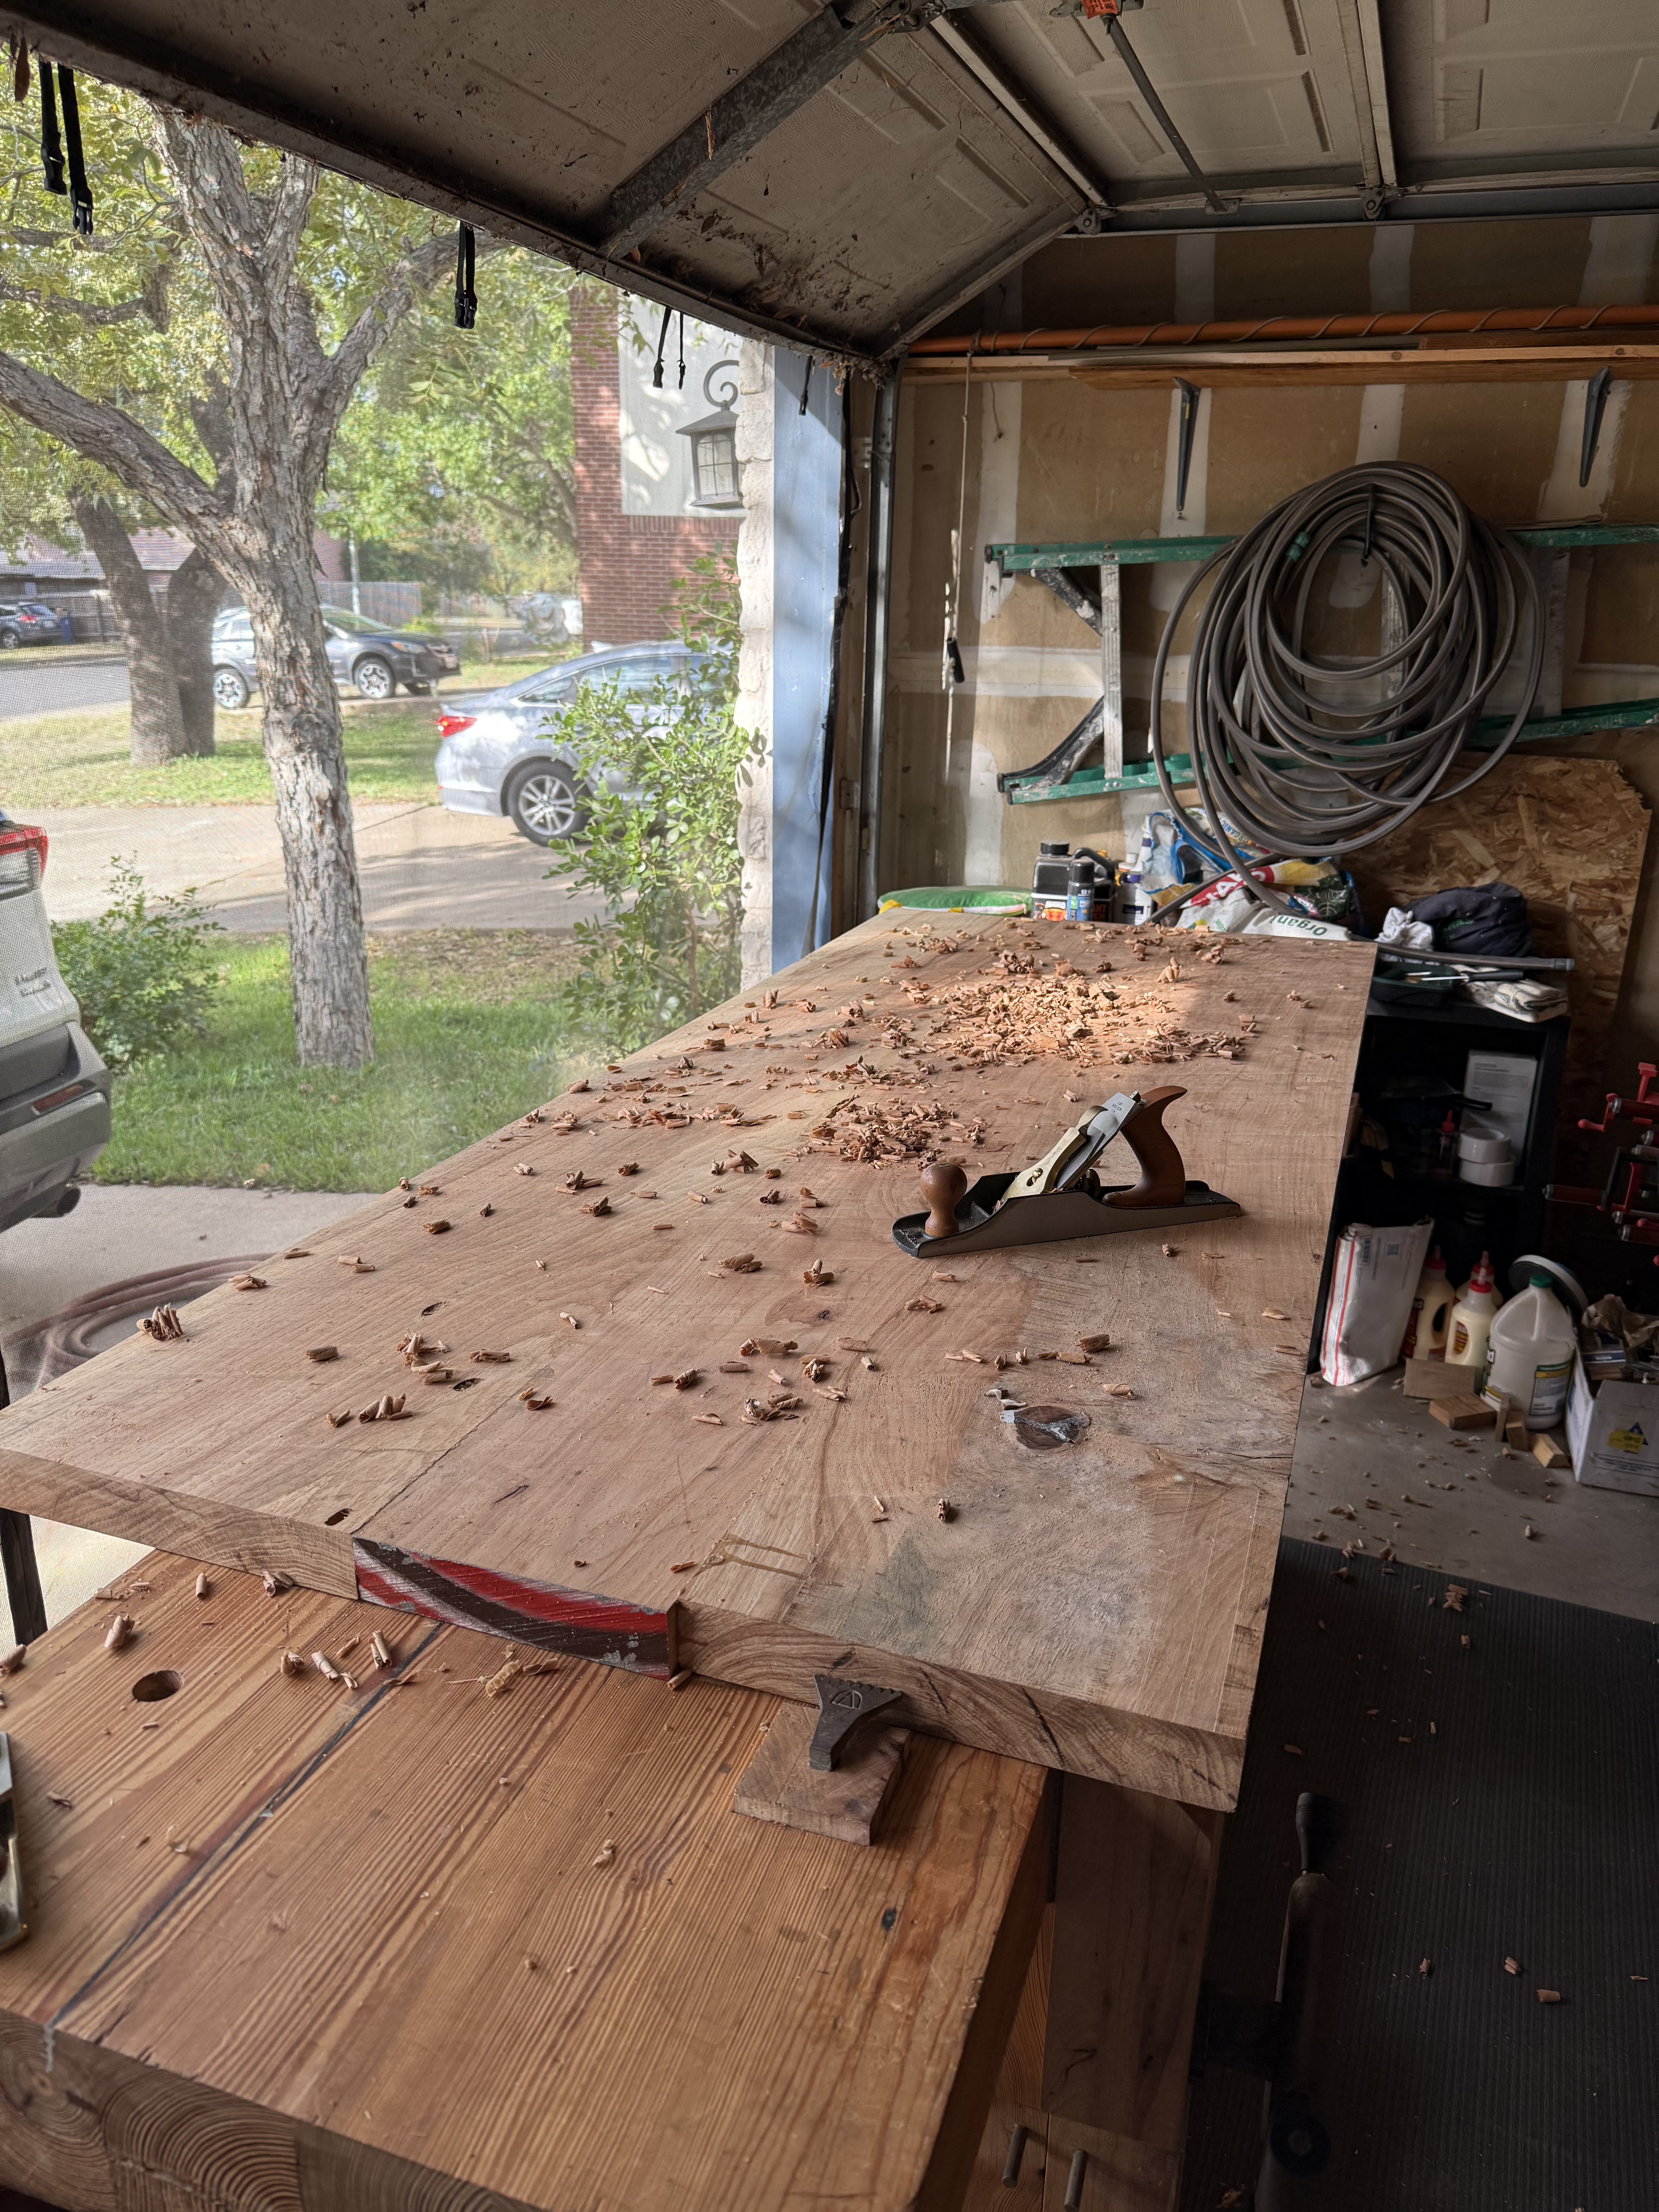

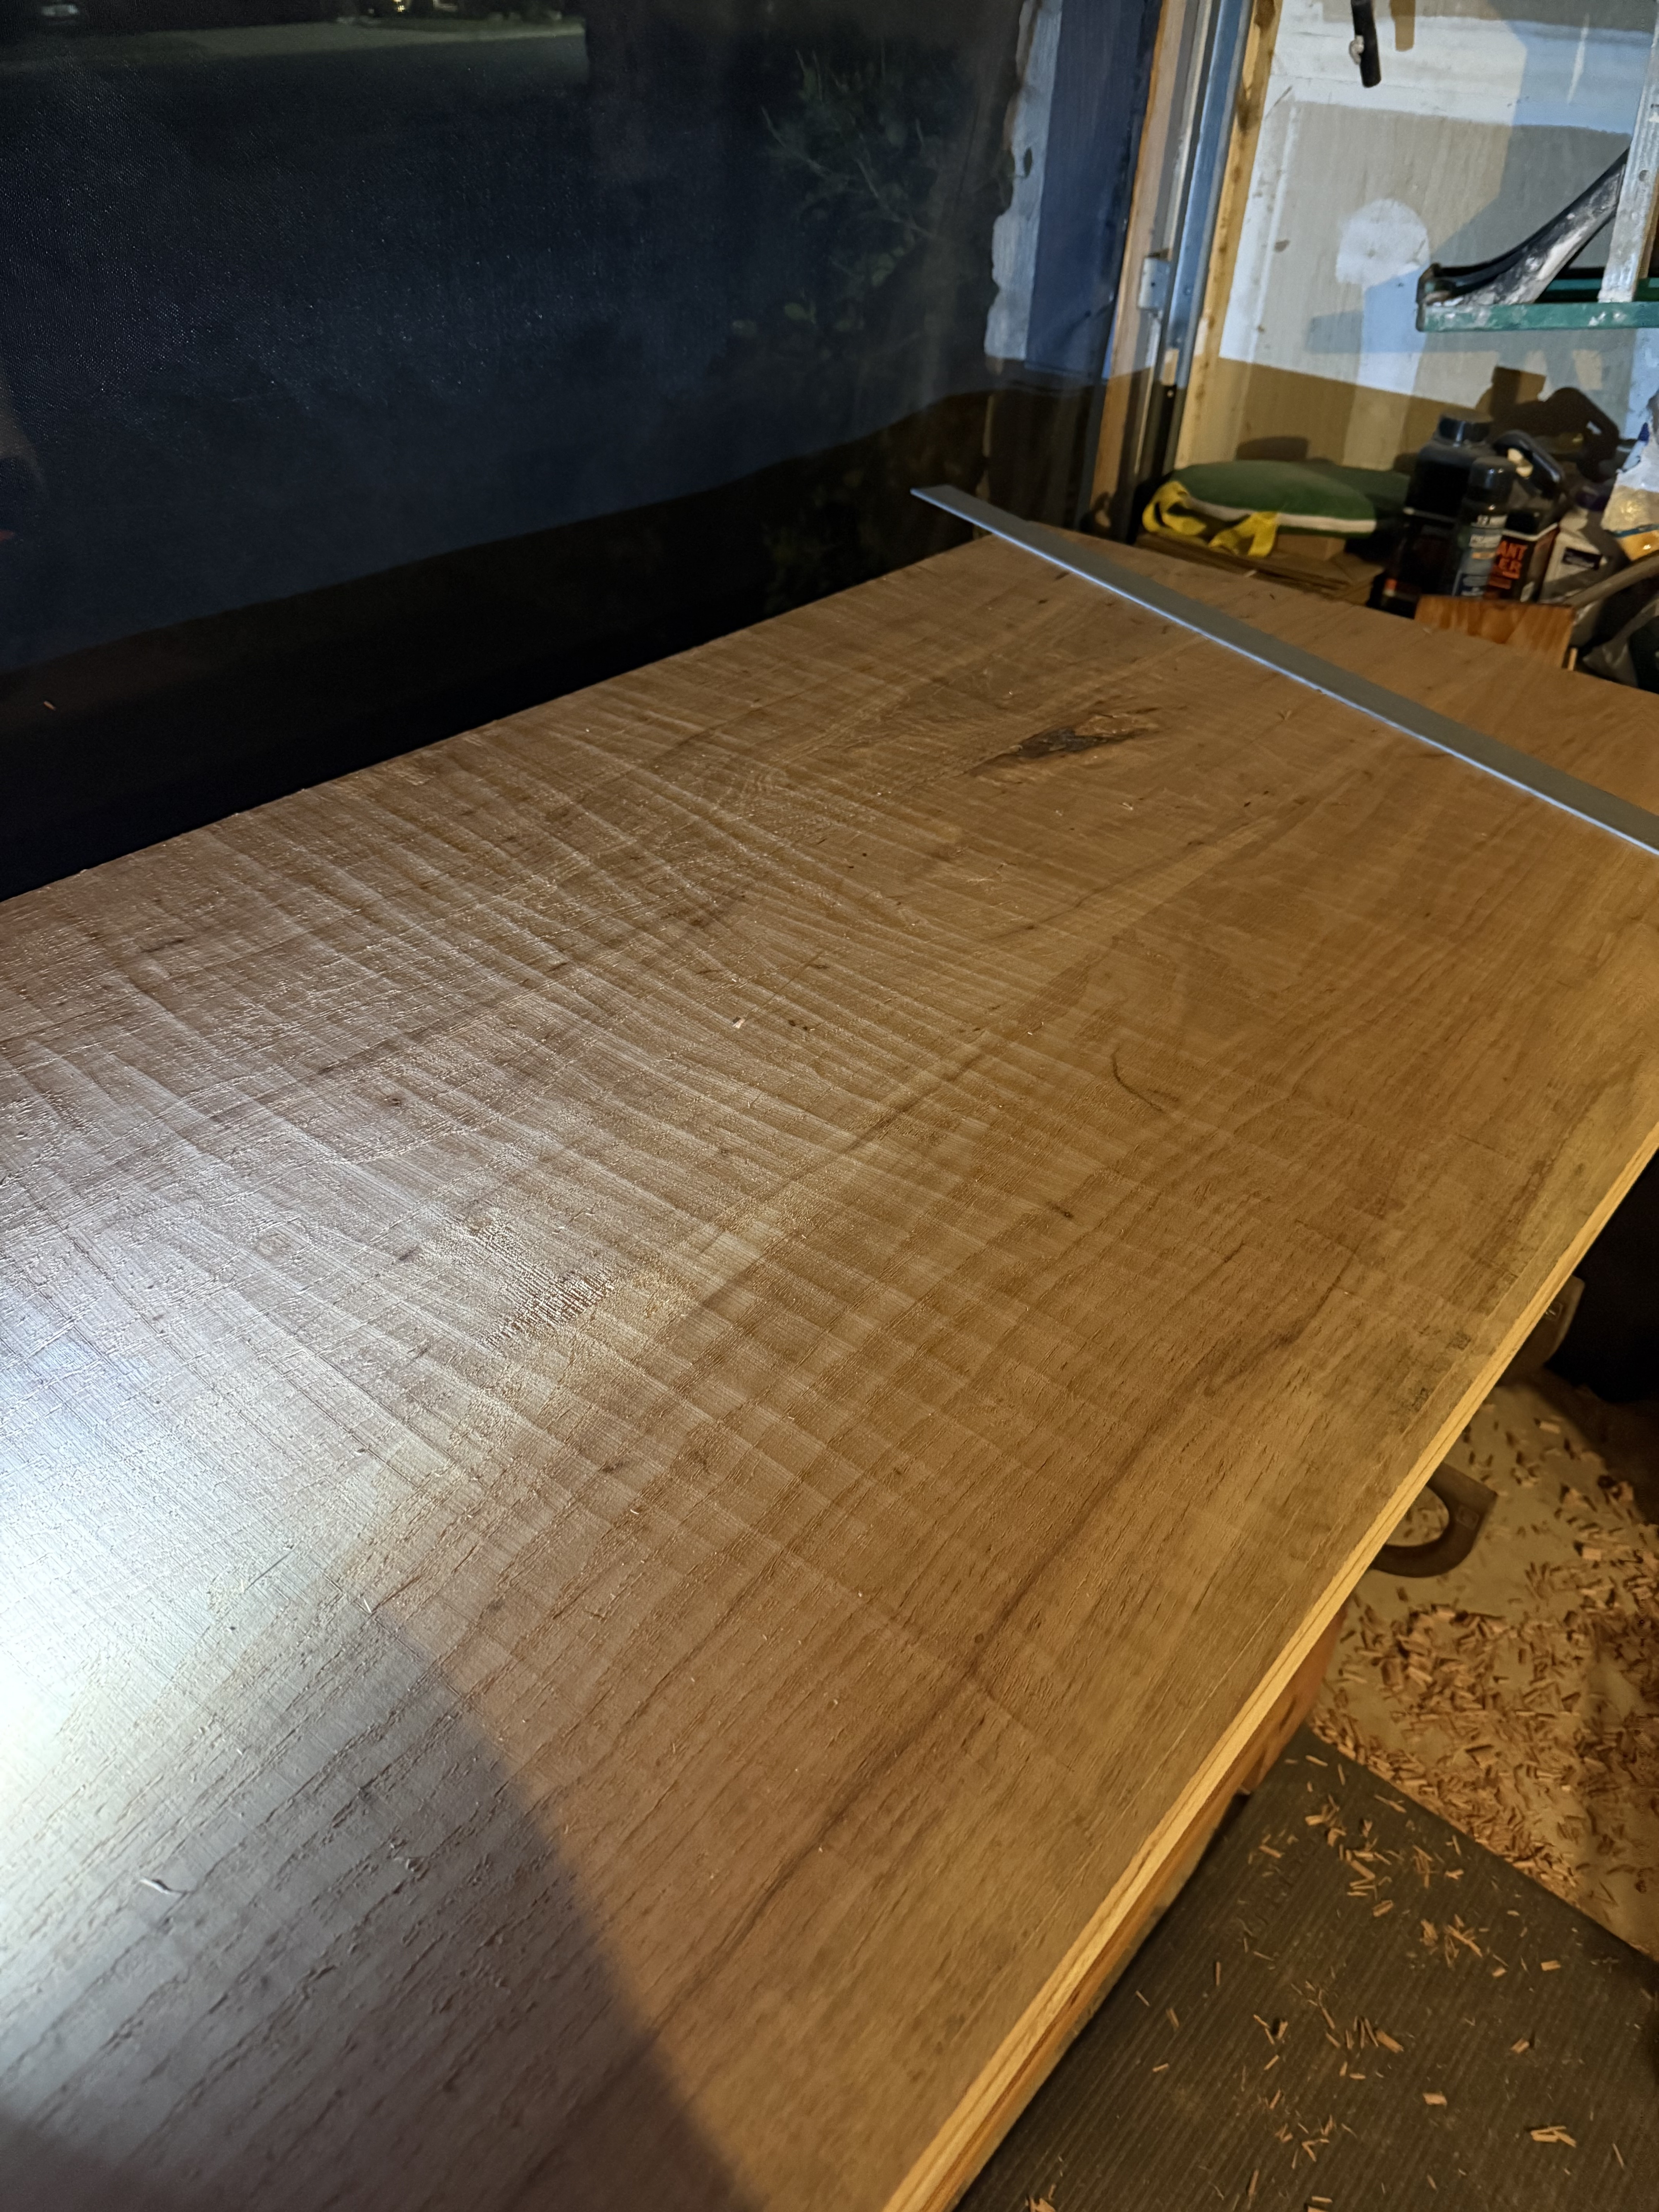
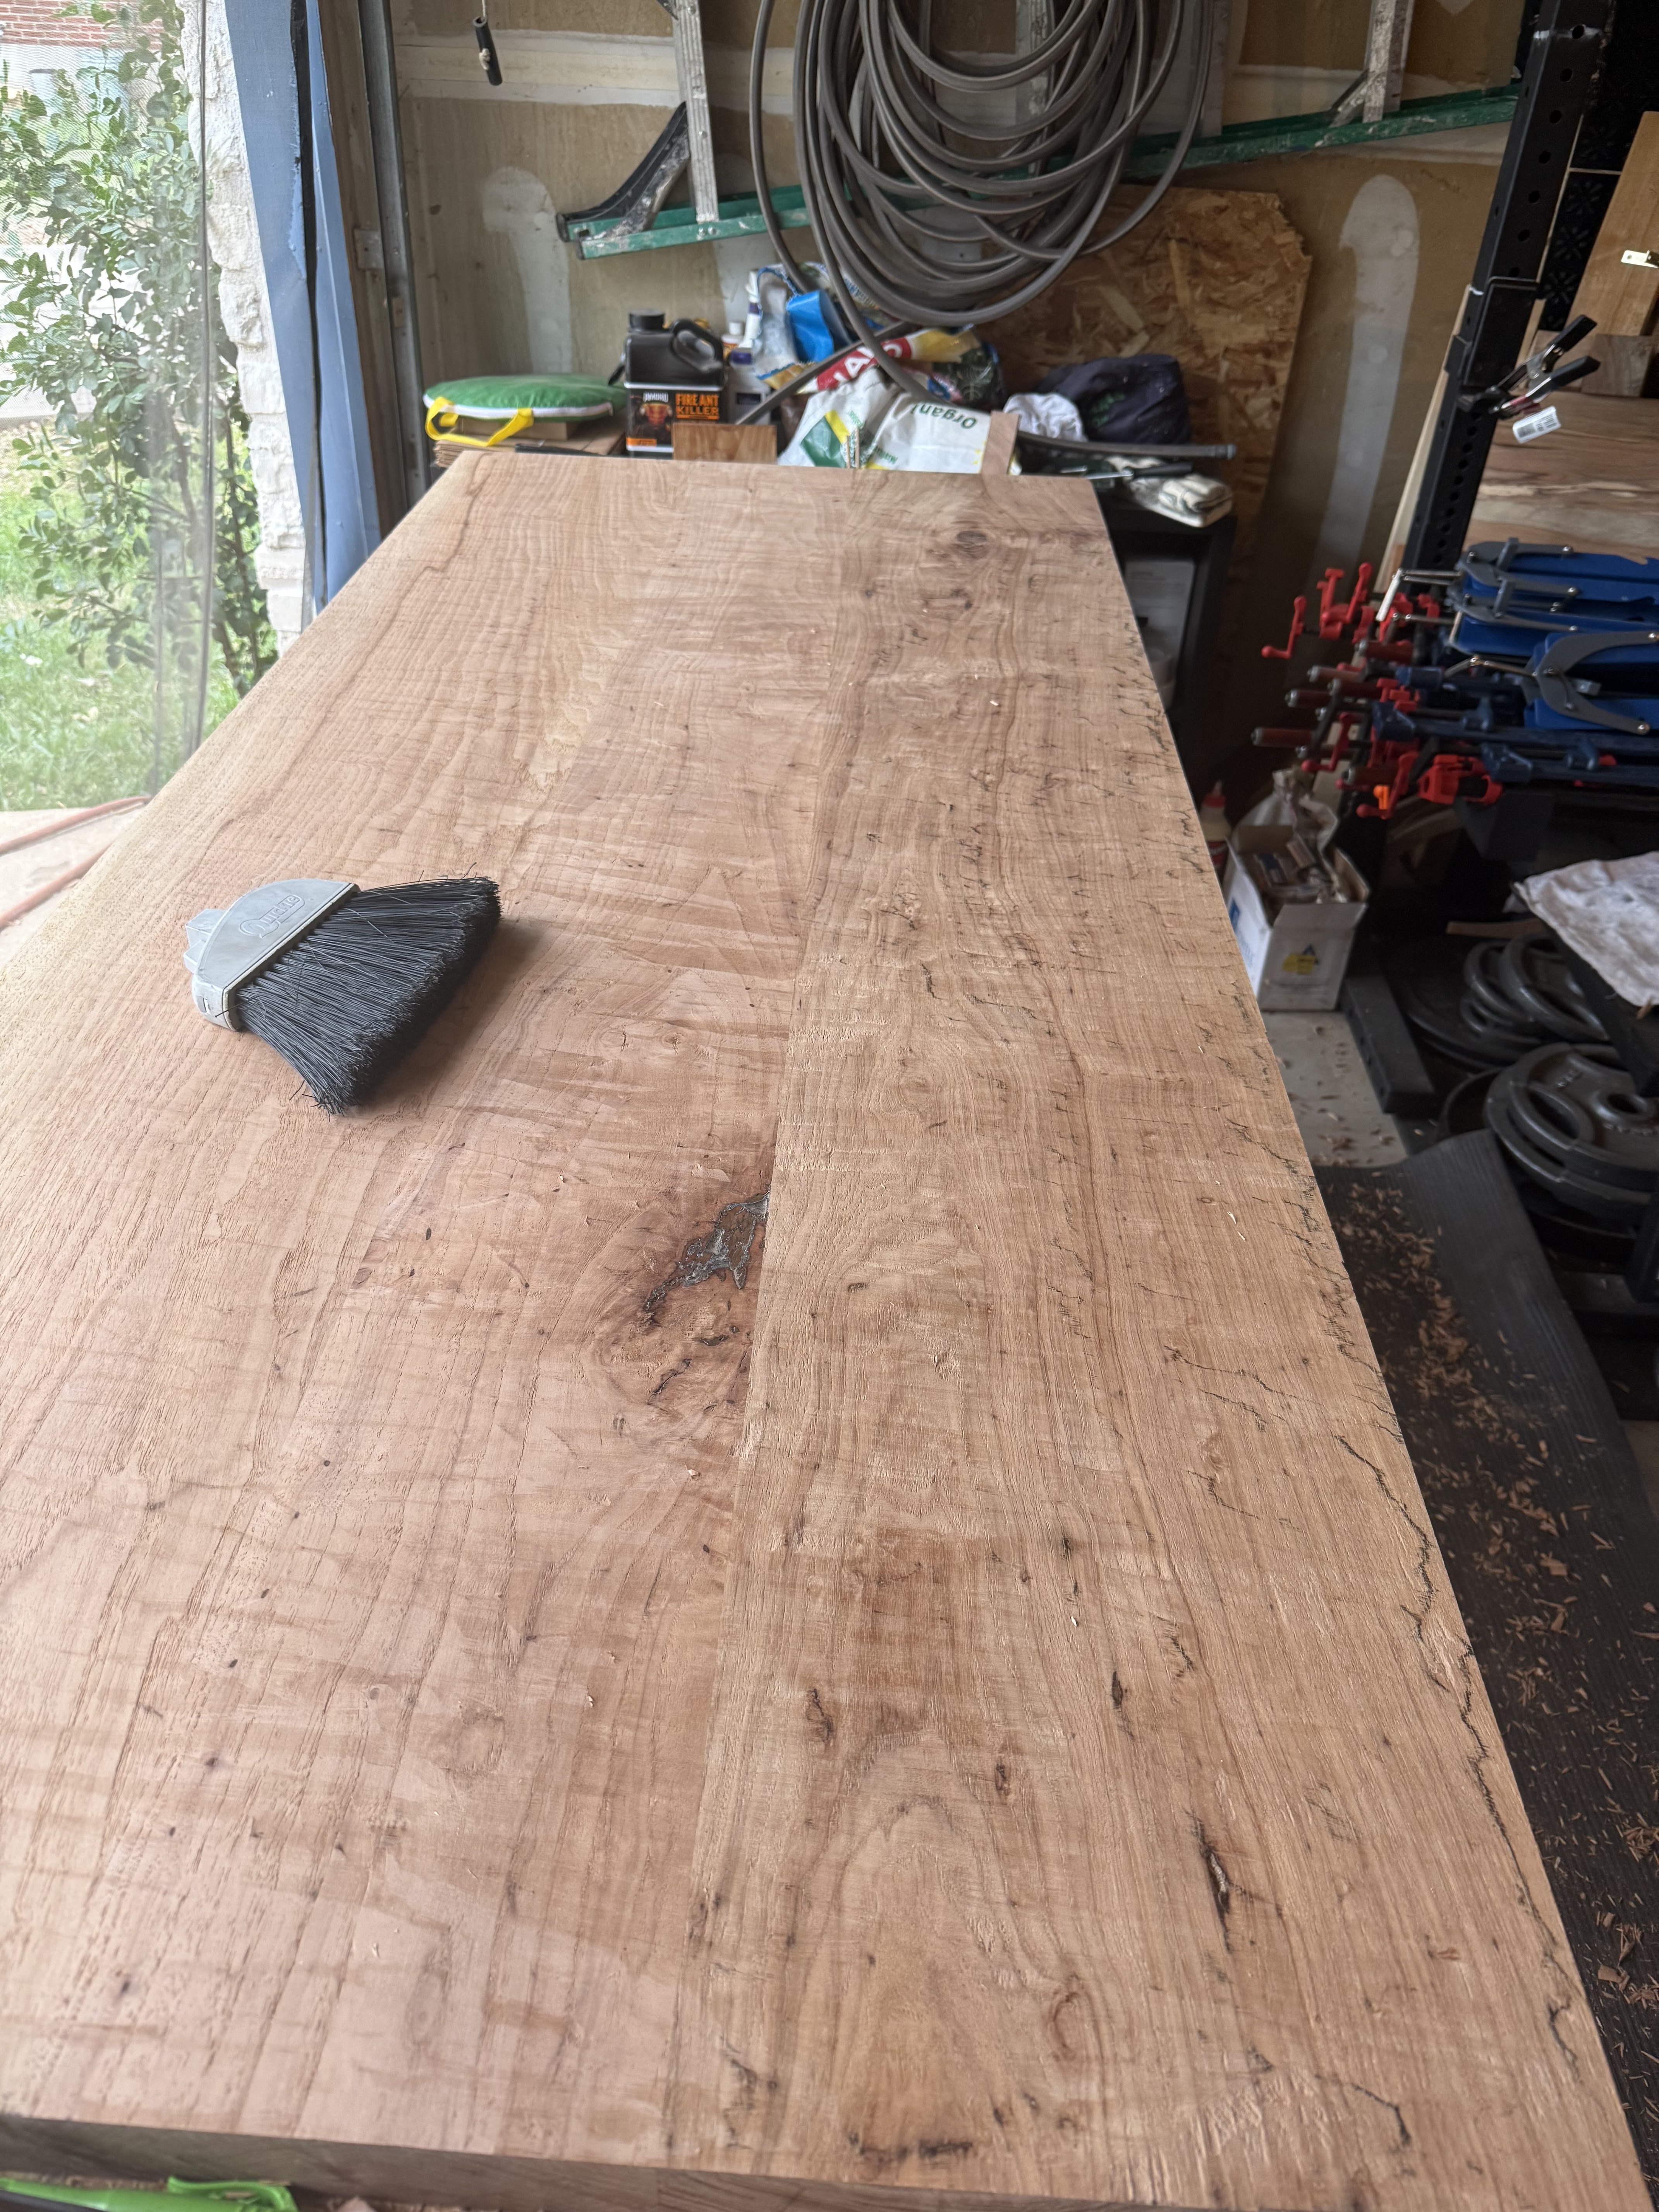
… finally, after all of that flattening and also sanding down the top, bottom, and all sides with a random orbital sander progressing through 80, 120, 220, then 320 grits I sealed the whole thing with Zinsser SealCoat to lock in the flatness:
Finish and final assembly
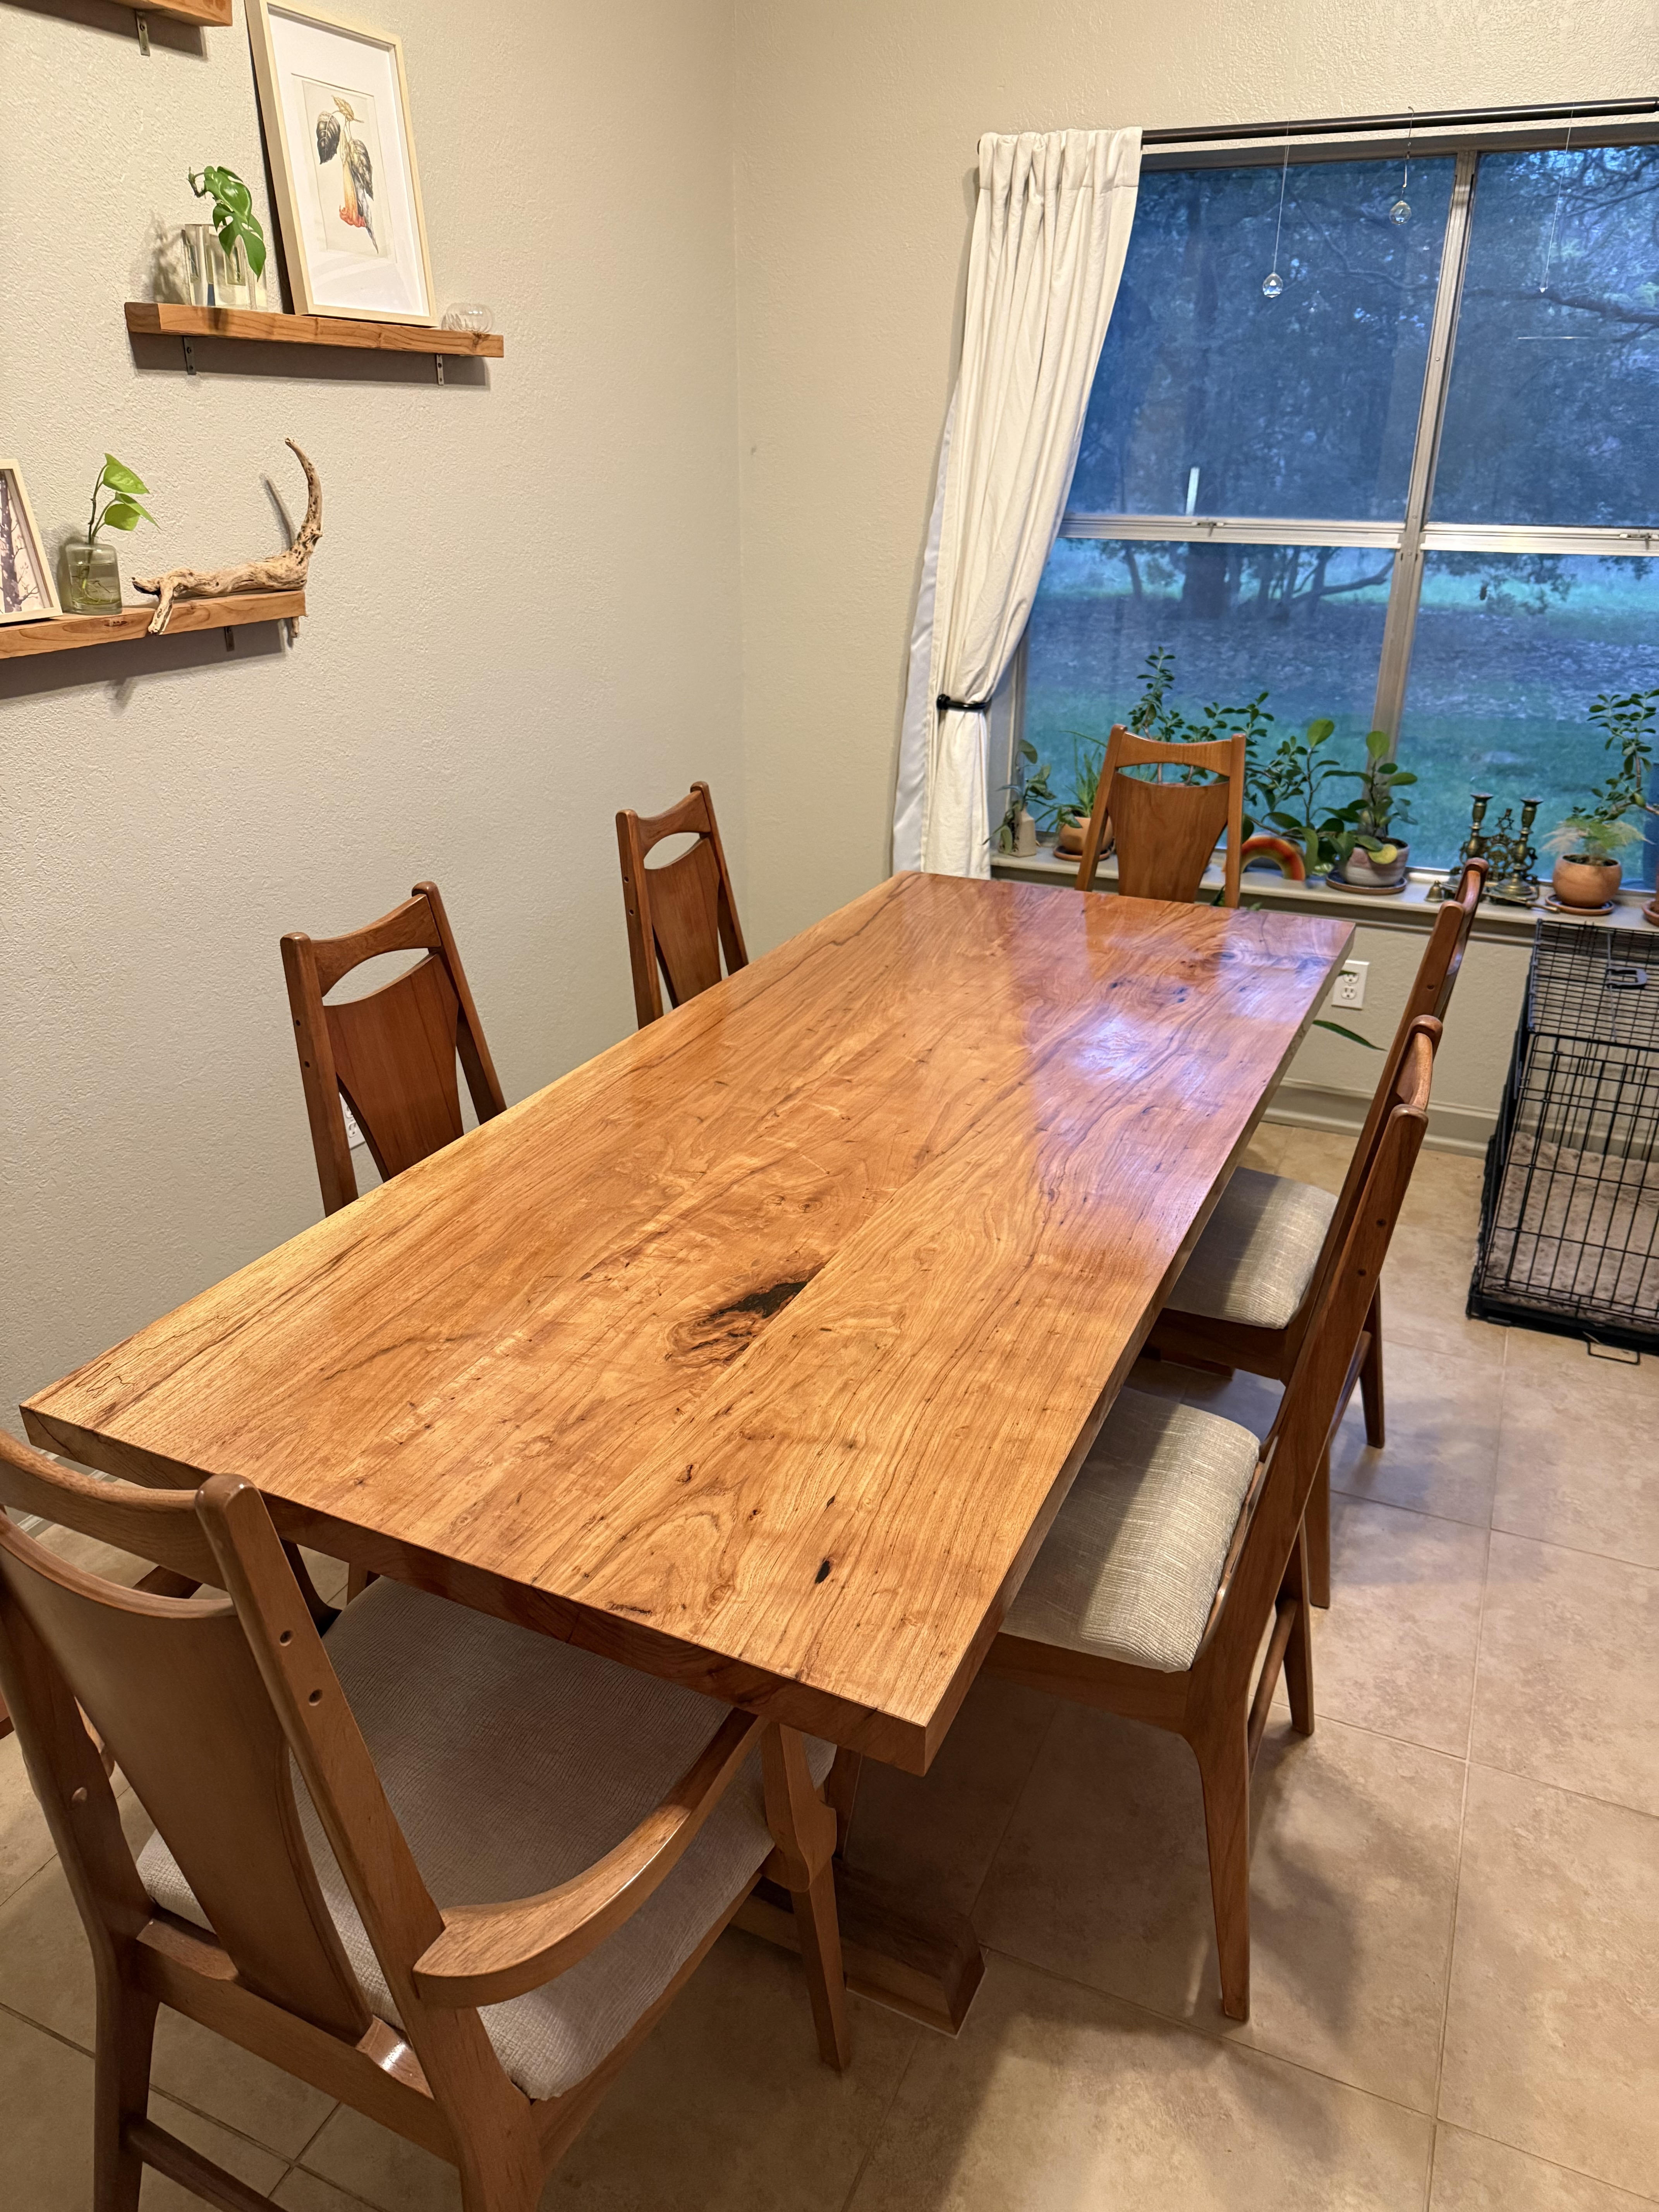
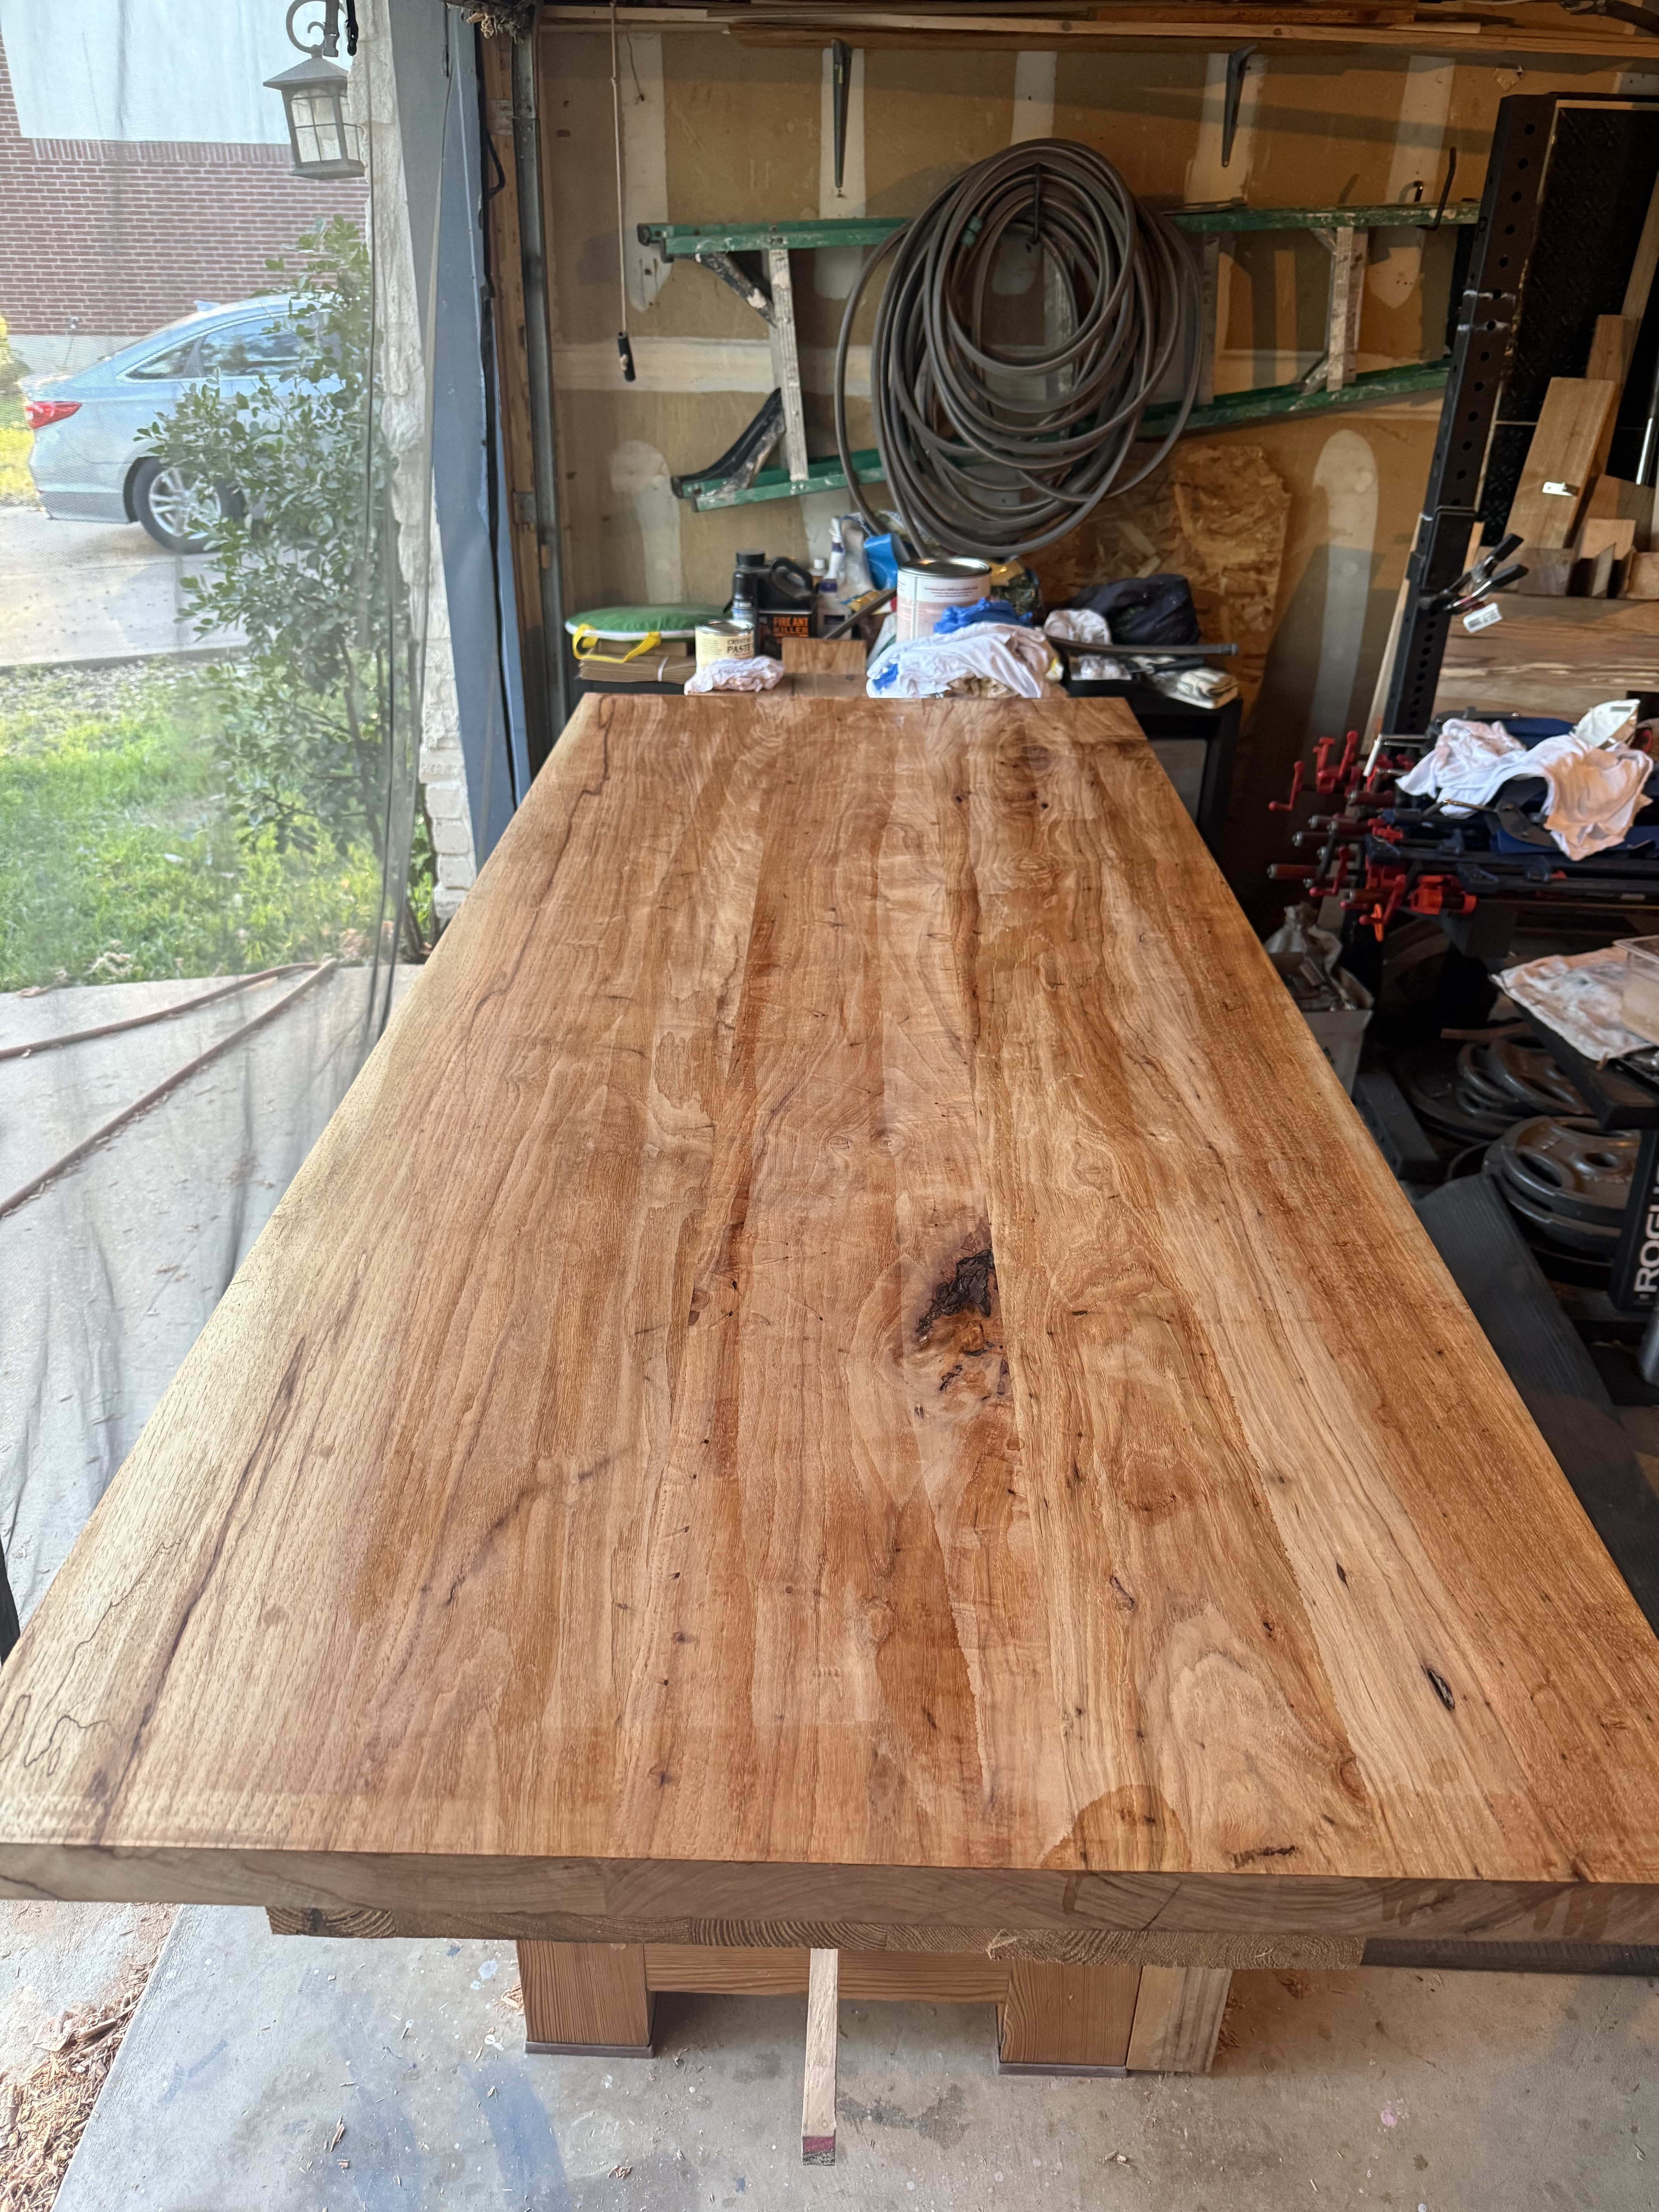
Then, finally, over the Thanksgiving holiday break I sanded down some of the shellac to eliminate the streaks and began applying finish. I decided to use Waterlox Original Varnish which is a resin-modified tung-oil varnish. I found tung-oil to be particularly pretty and highlight the colors and tones of the natural pecan wood best with previous projects so I really wanted to use tung oil for the table.
I chose to do thin wipe-on coats which took 24 hours to cure between coats. I chose to do 4 coats on the top and sides, 2 coats on the bottom, and 2 coats on the base of the table.
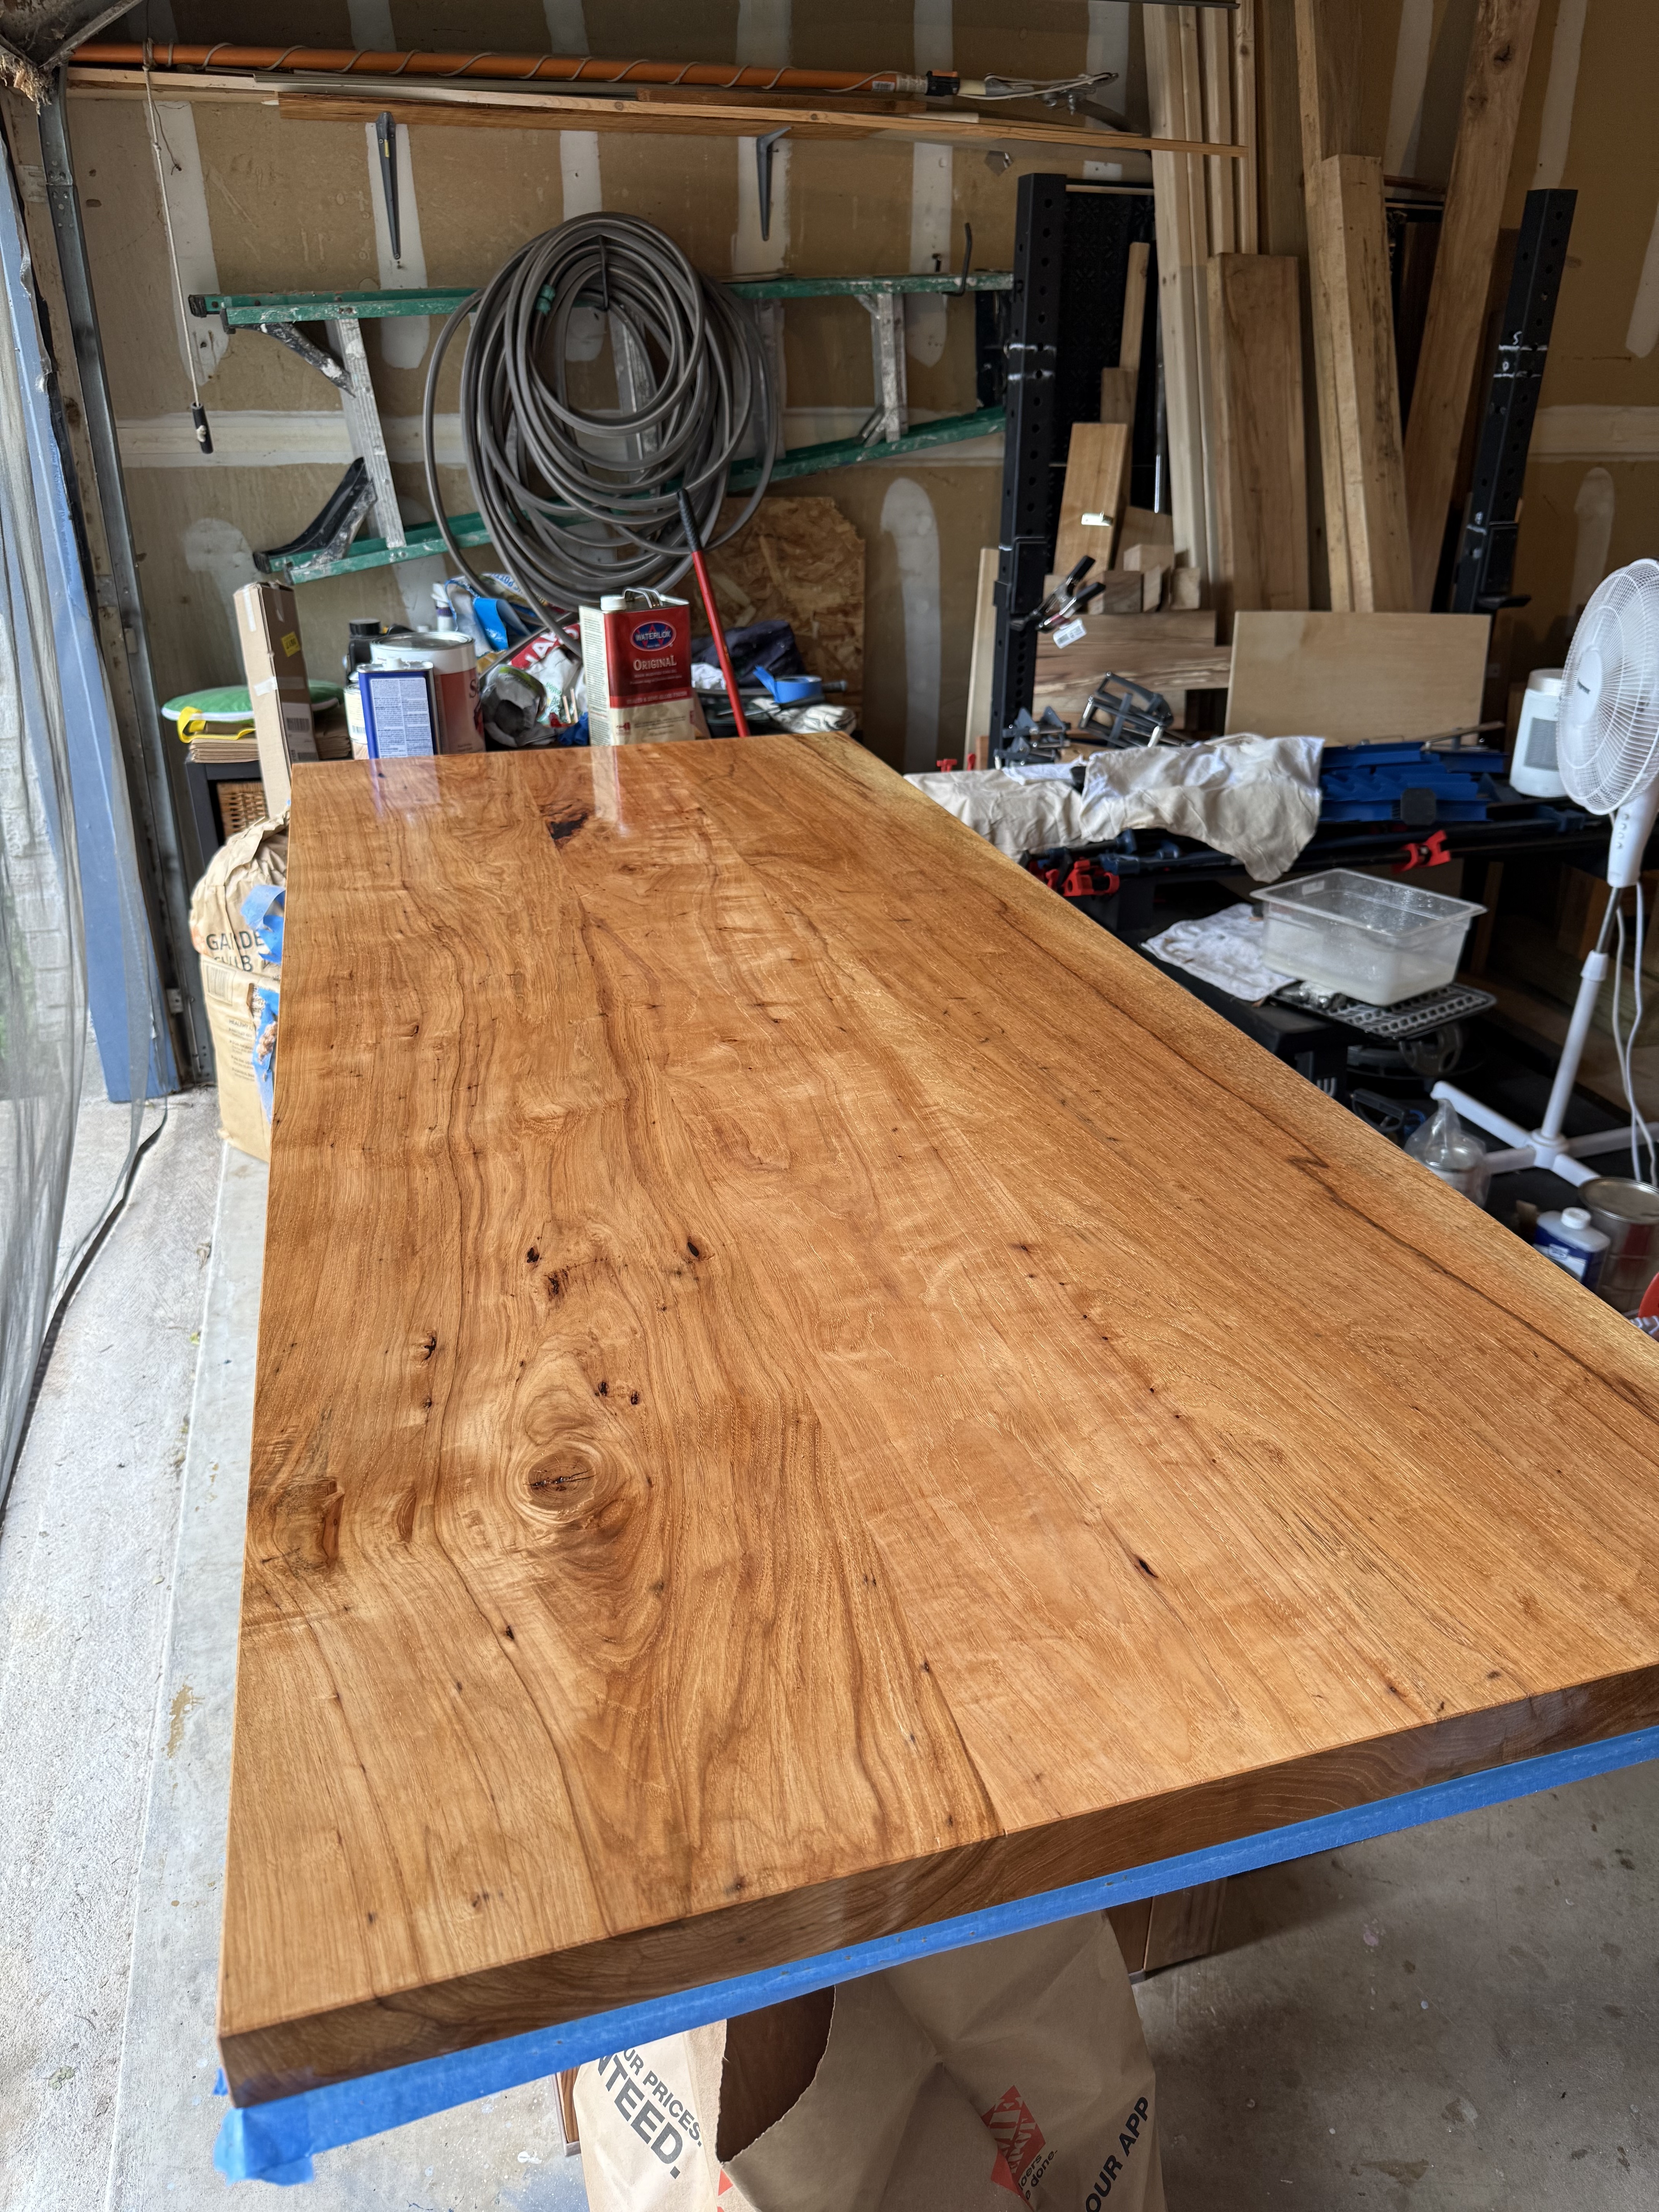
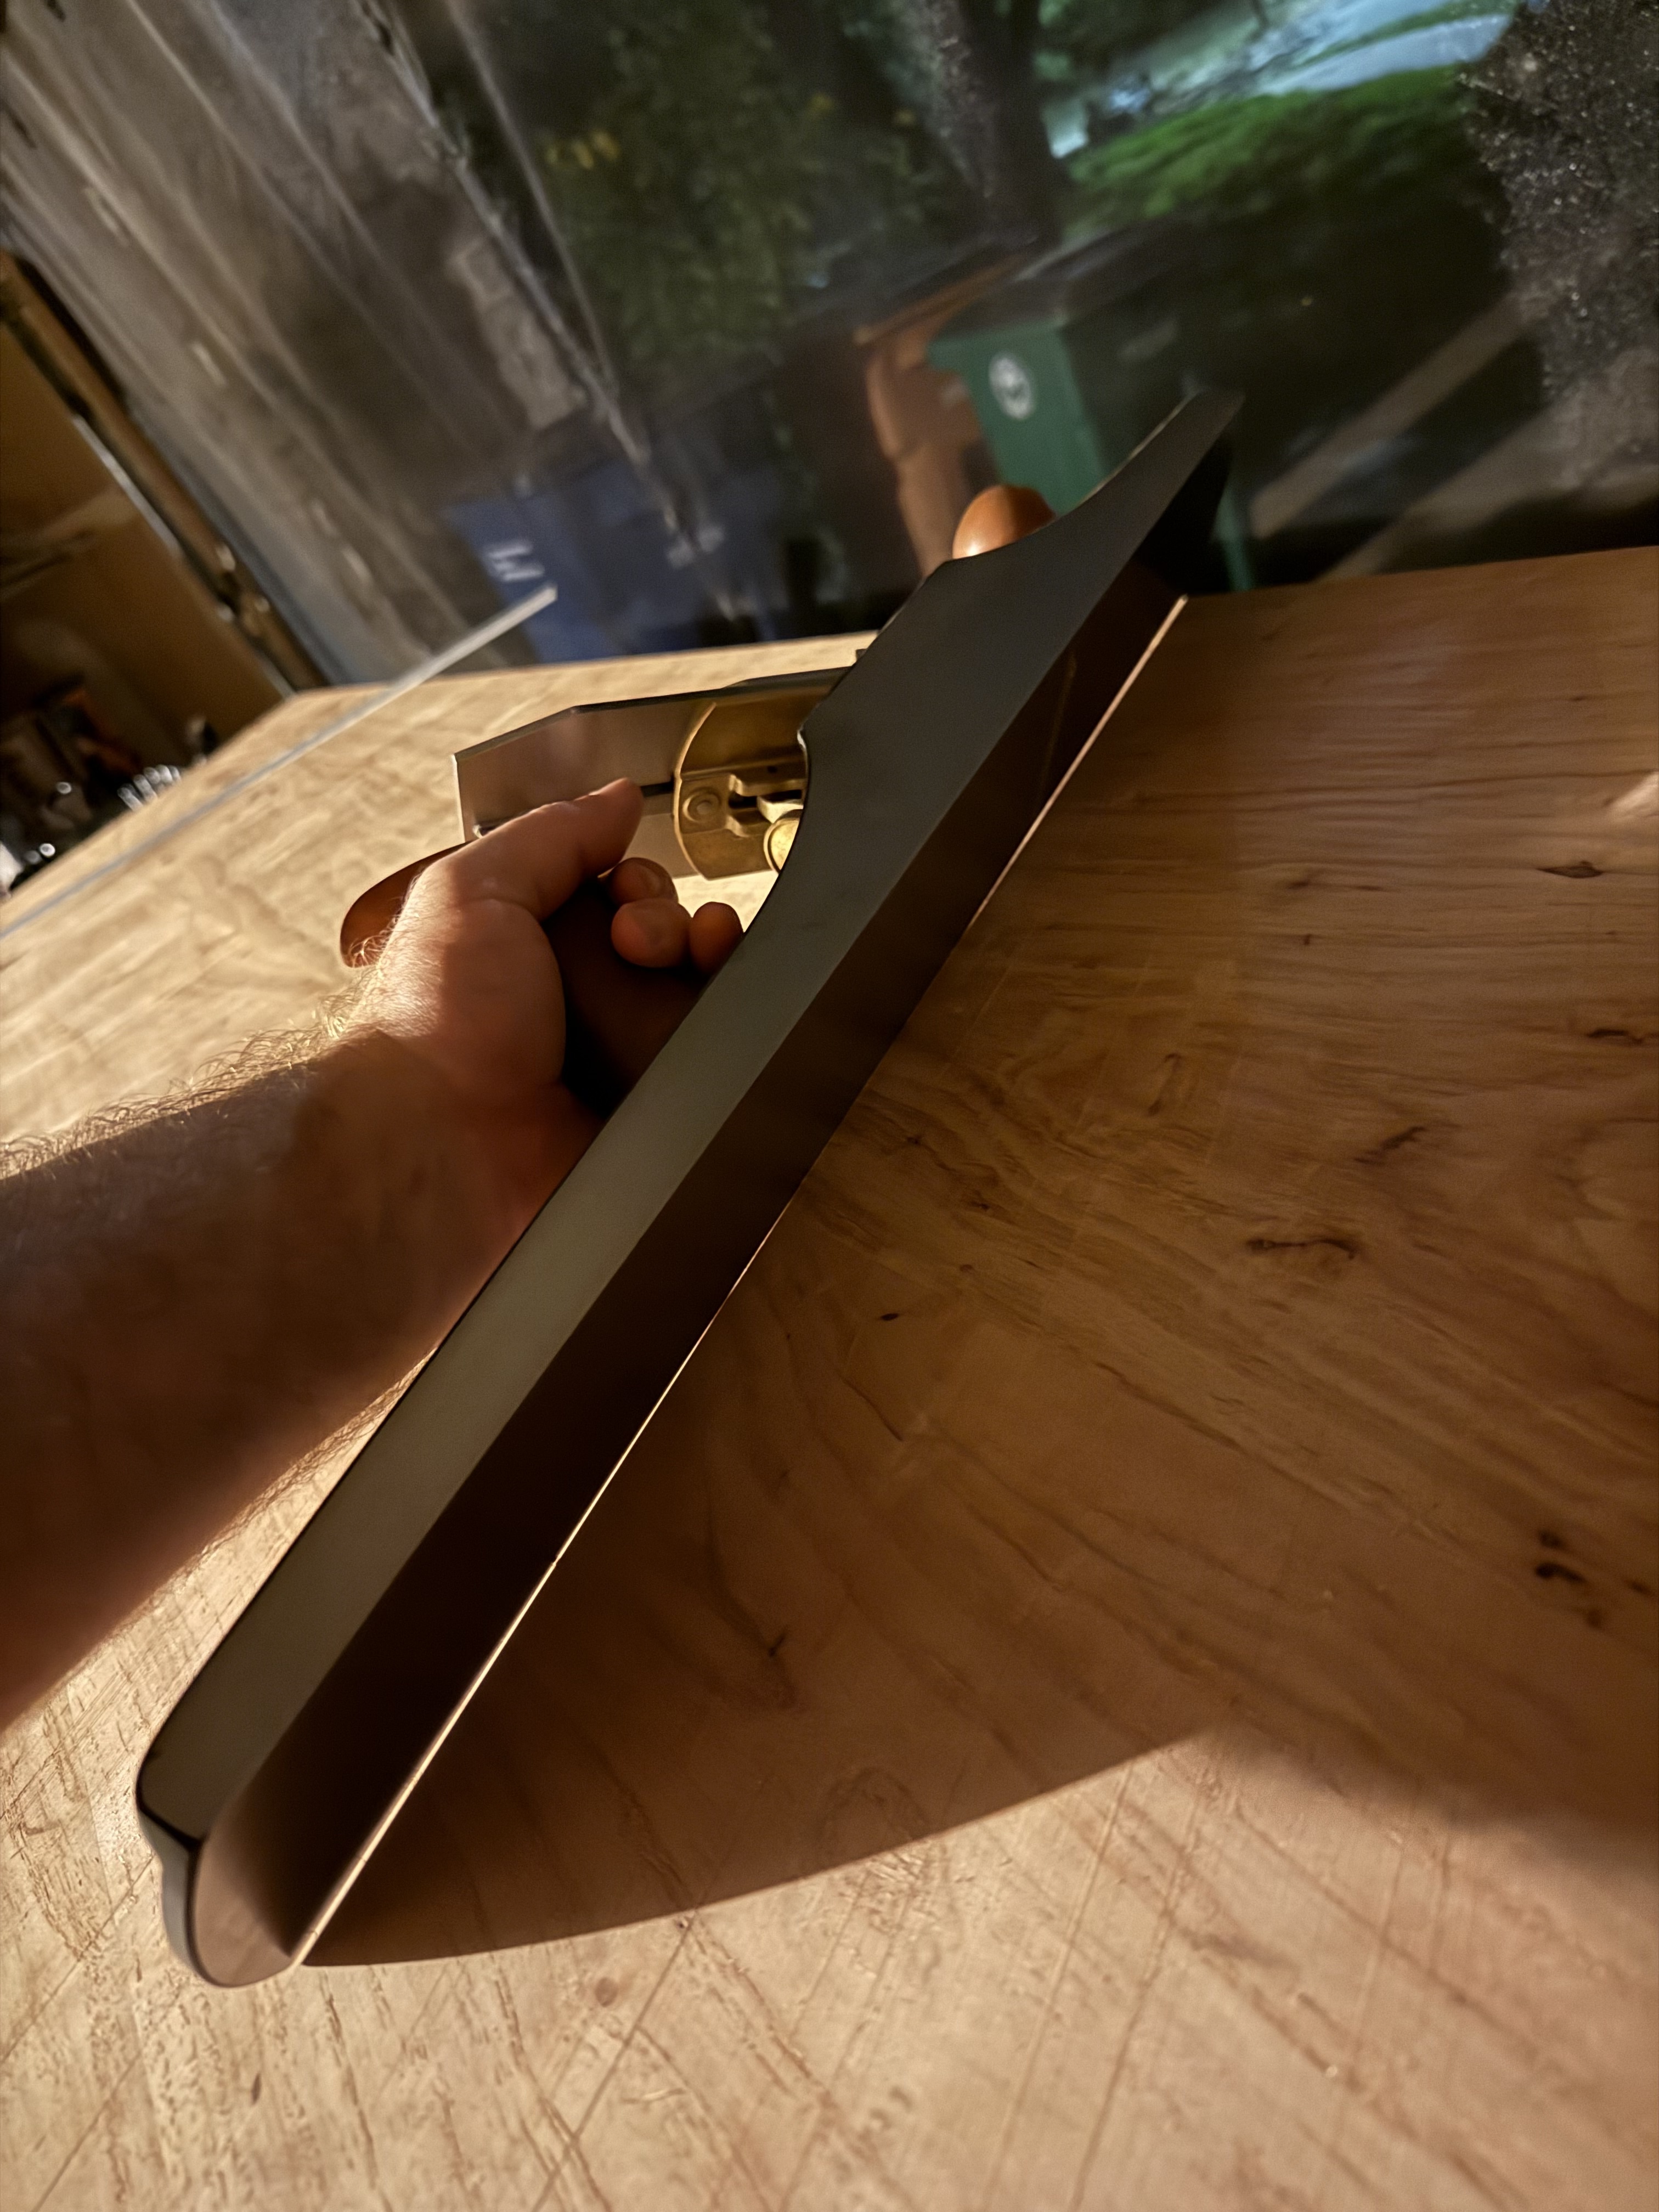
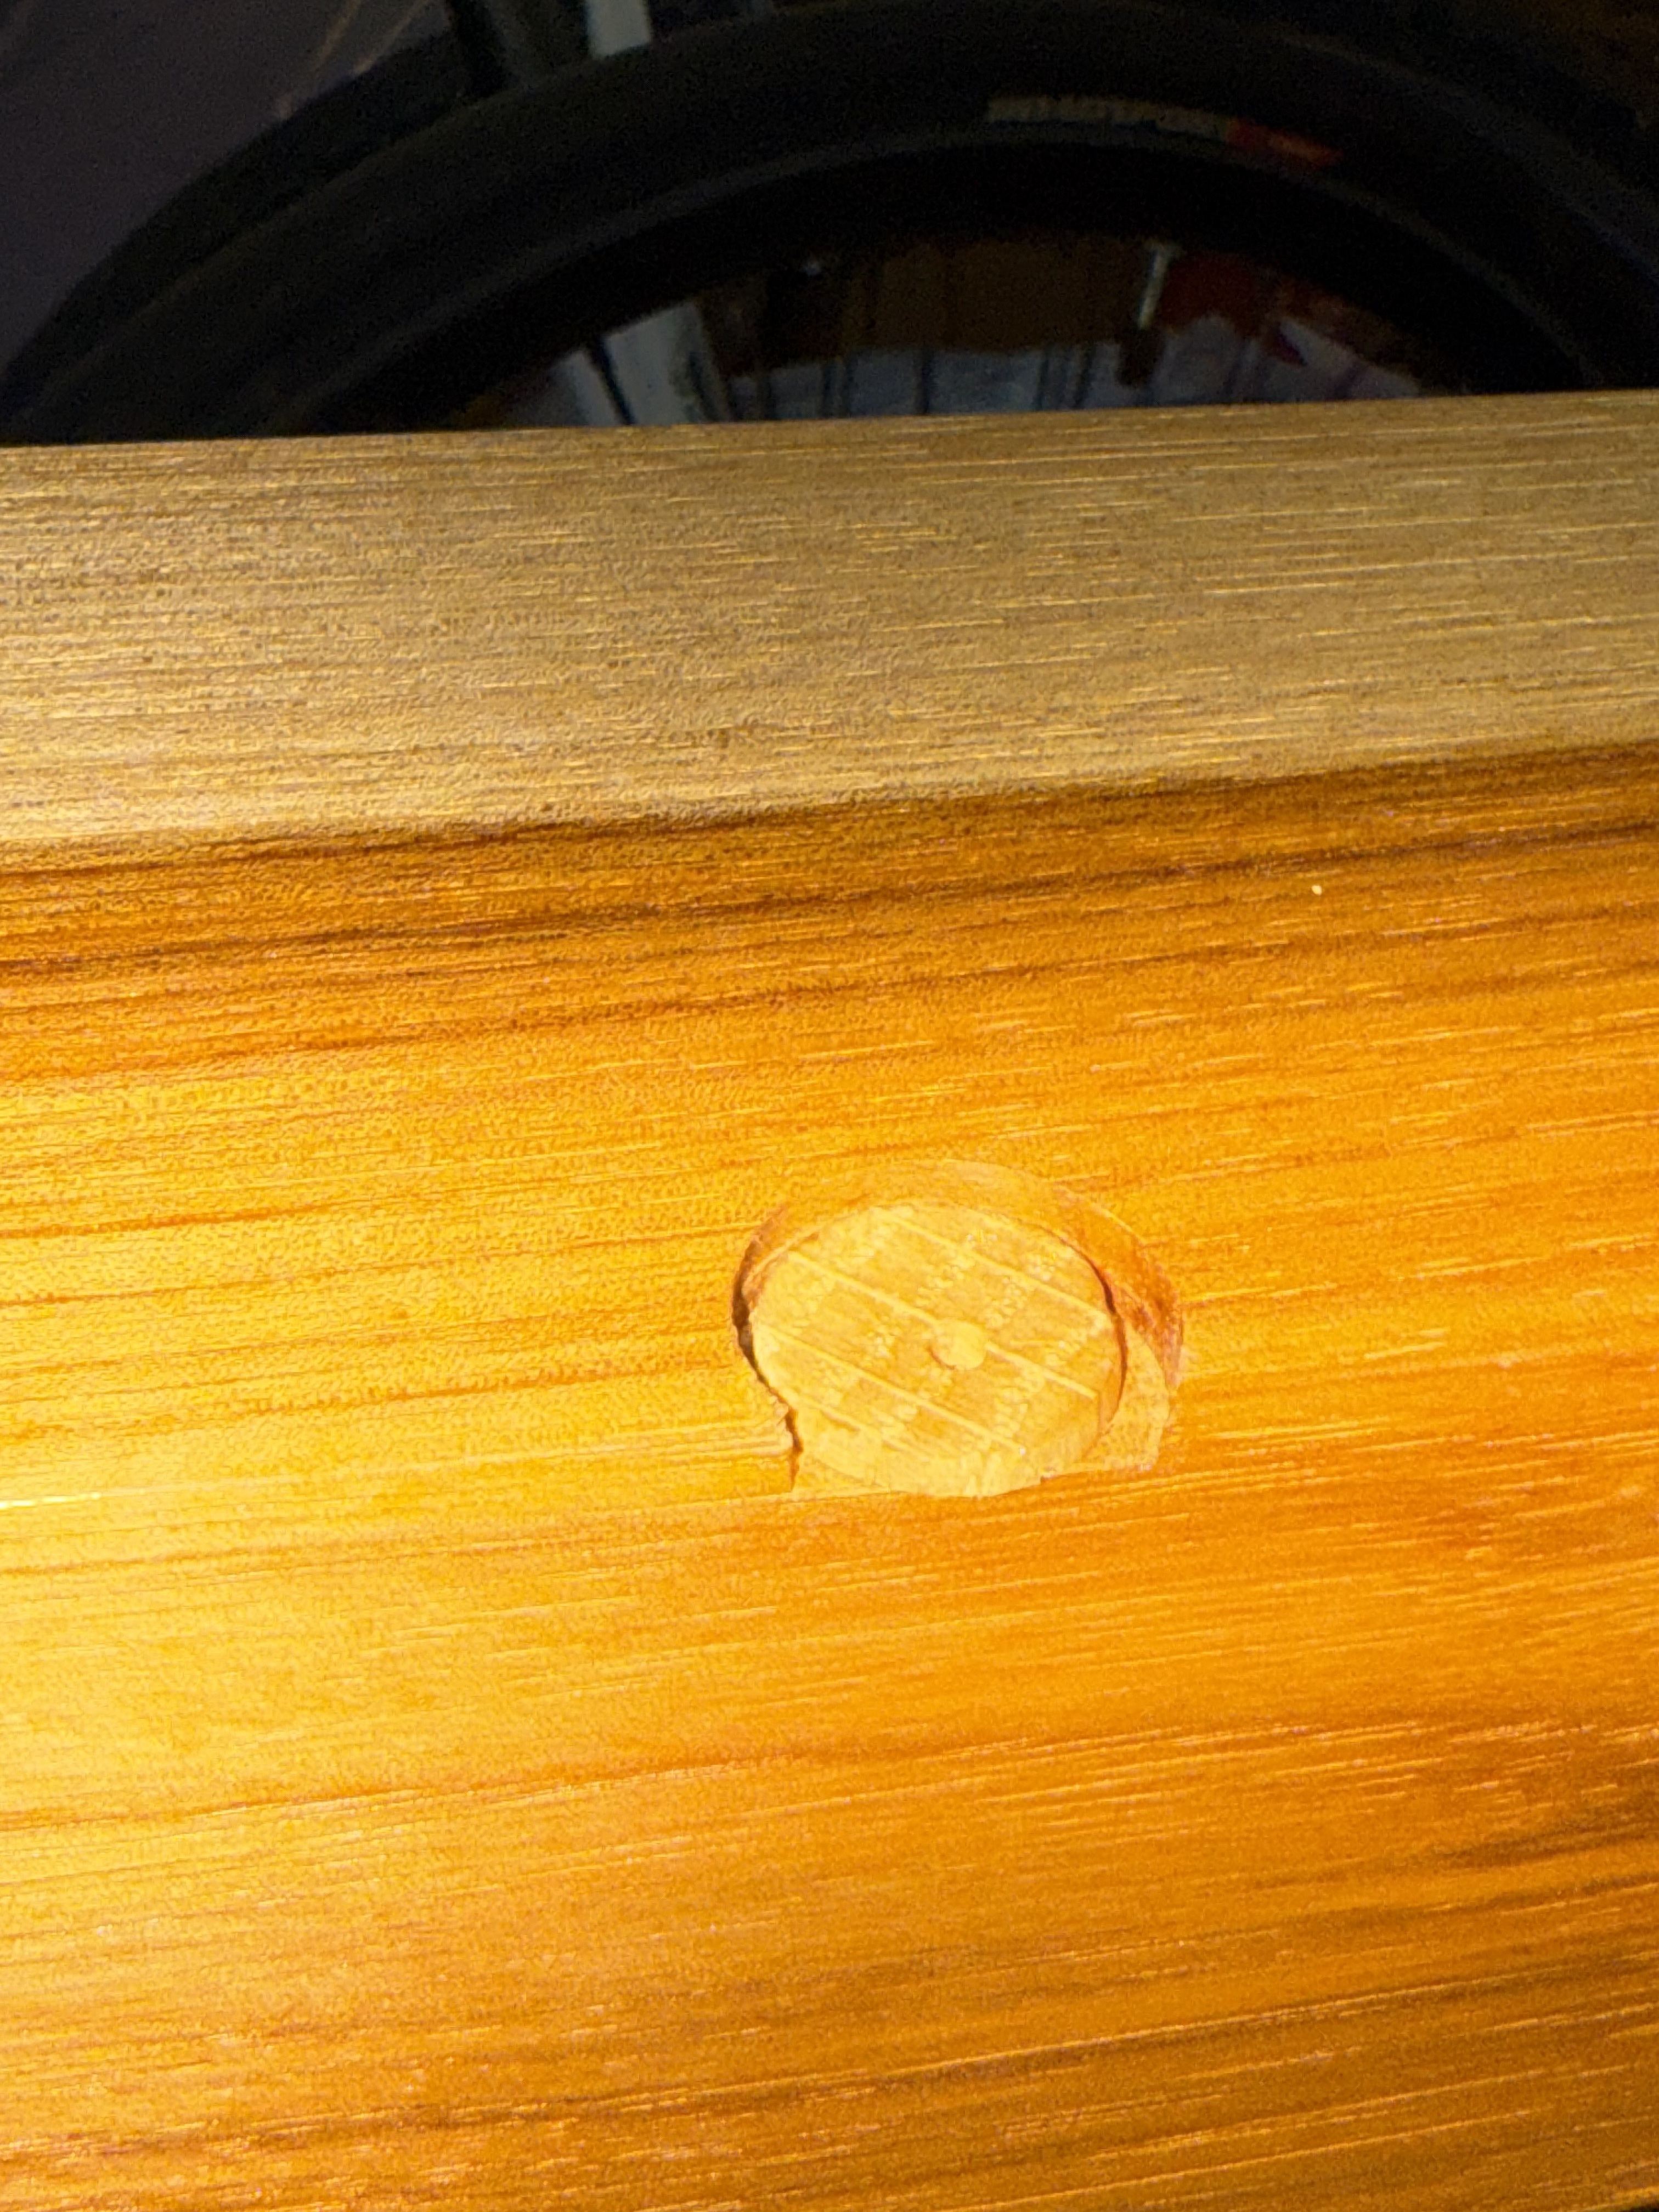
To join the top to the base, I decided to use figure-eight fasteners which allow for seasonal expansion of the top. I wanted to do something fancy with a french-cleat-like stopped, blind dovetail to join the top to the base but decided against it as that is a joint I will likely need to practice. In retrospect this was a good choice because I was wholly unprepared for the amount of work that would go into flattening the top and I think cutting that joinery, making the panel, then flattening the whole thing would have introduced all sorts of risk of mistakes and I wanted to get to a finished table sooner rather than later!
I had one little mishap while cutting the mortises for the figure eight fasteners: on one of them I thought I’d go just a little deeper than I had gone but I ended up over-cutting too much so I needed to cut a small washer from an oak peg and shave it down to the right size to match the other mortises.
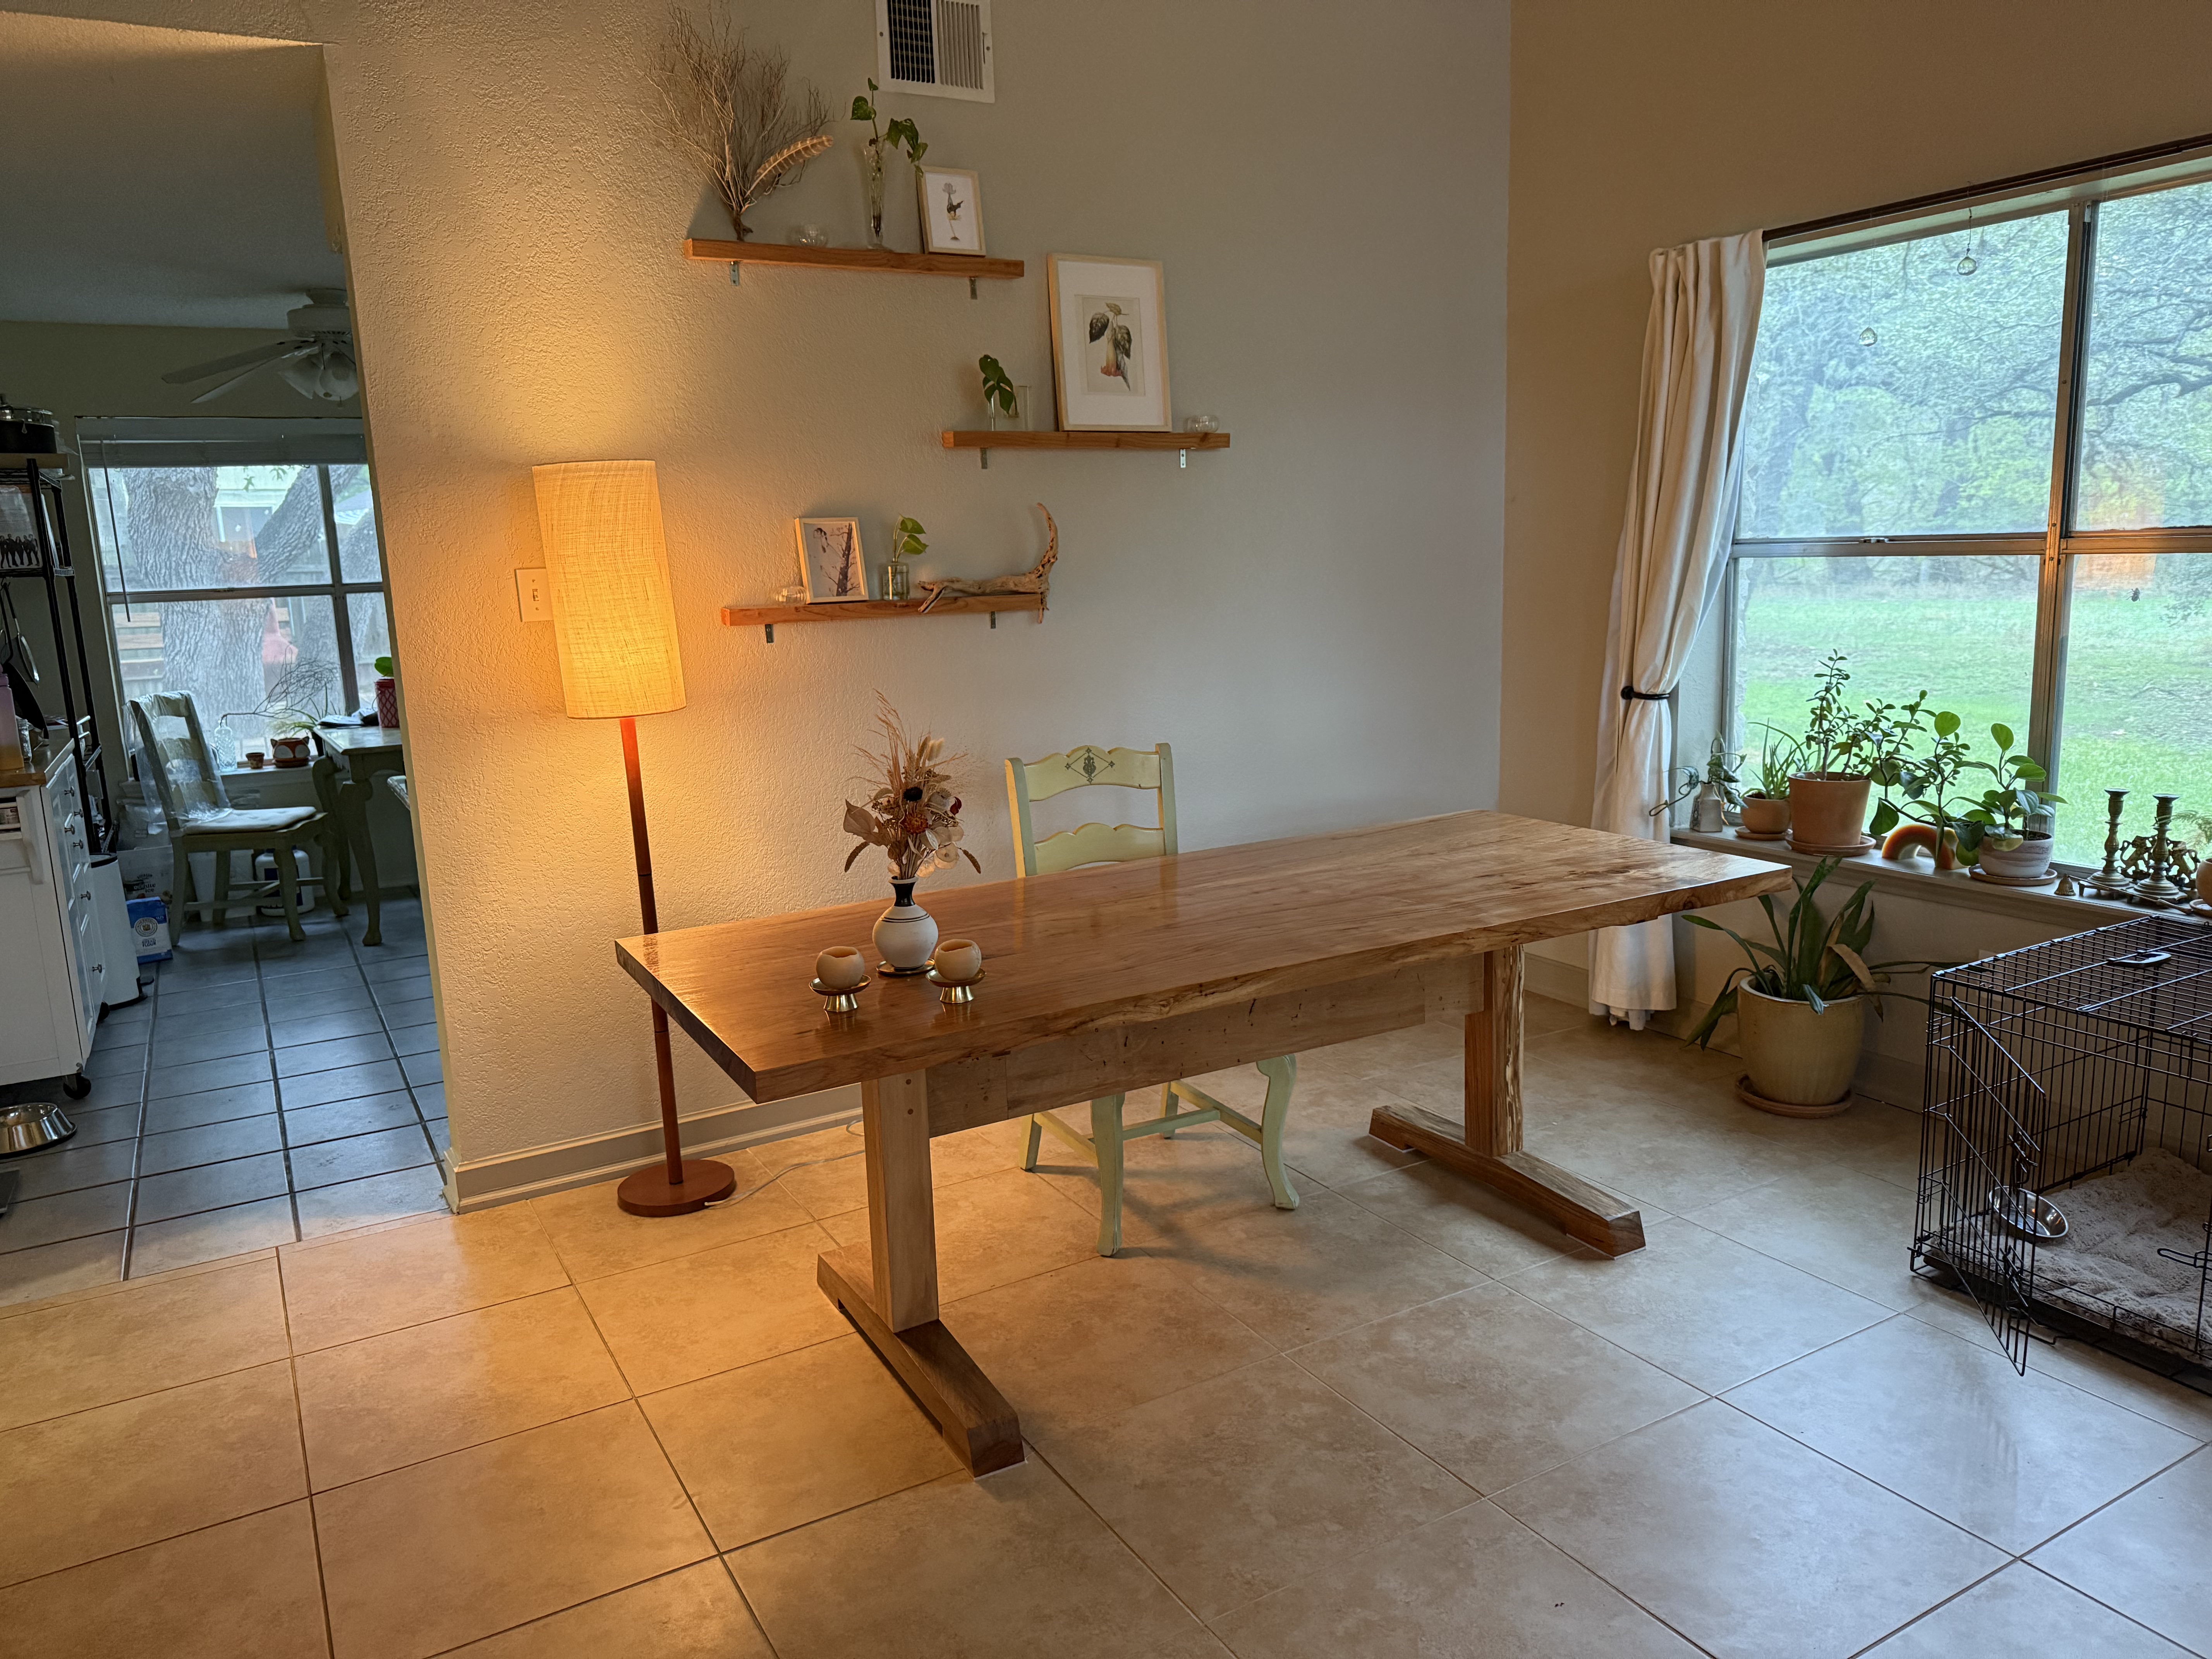
After cutting the figure eight fastener mortises and letting the final coat of finish dry, it was time to move the table into the house!! The most satisfying part of the project, getting to use it and see it!