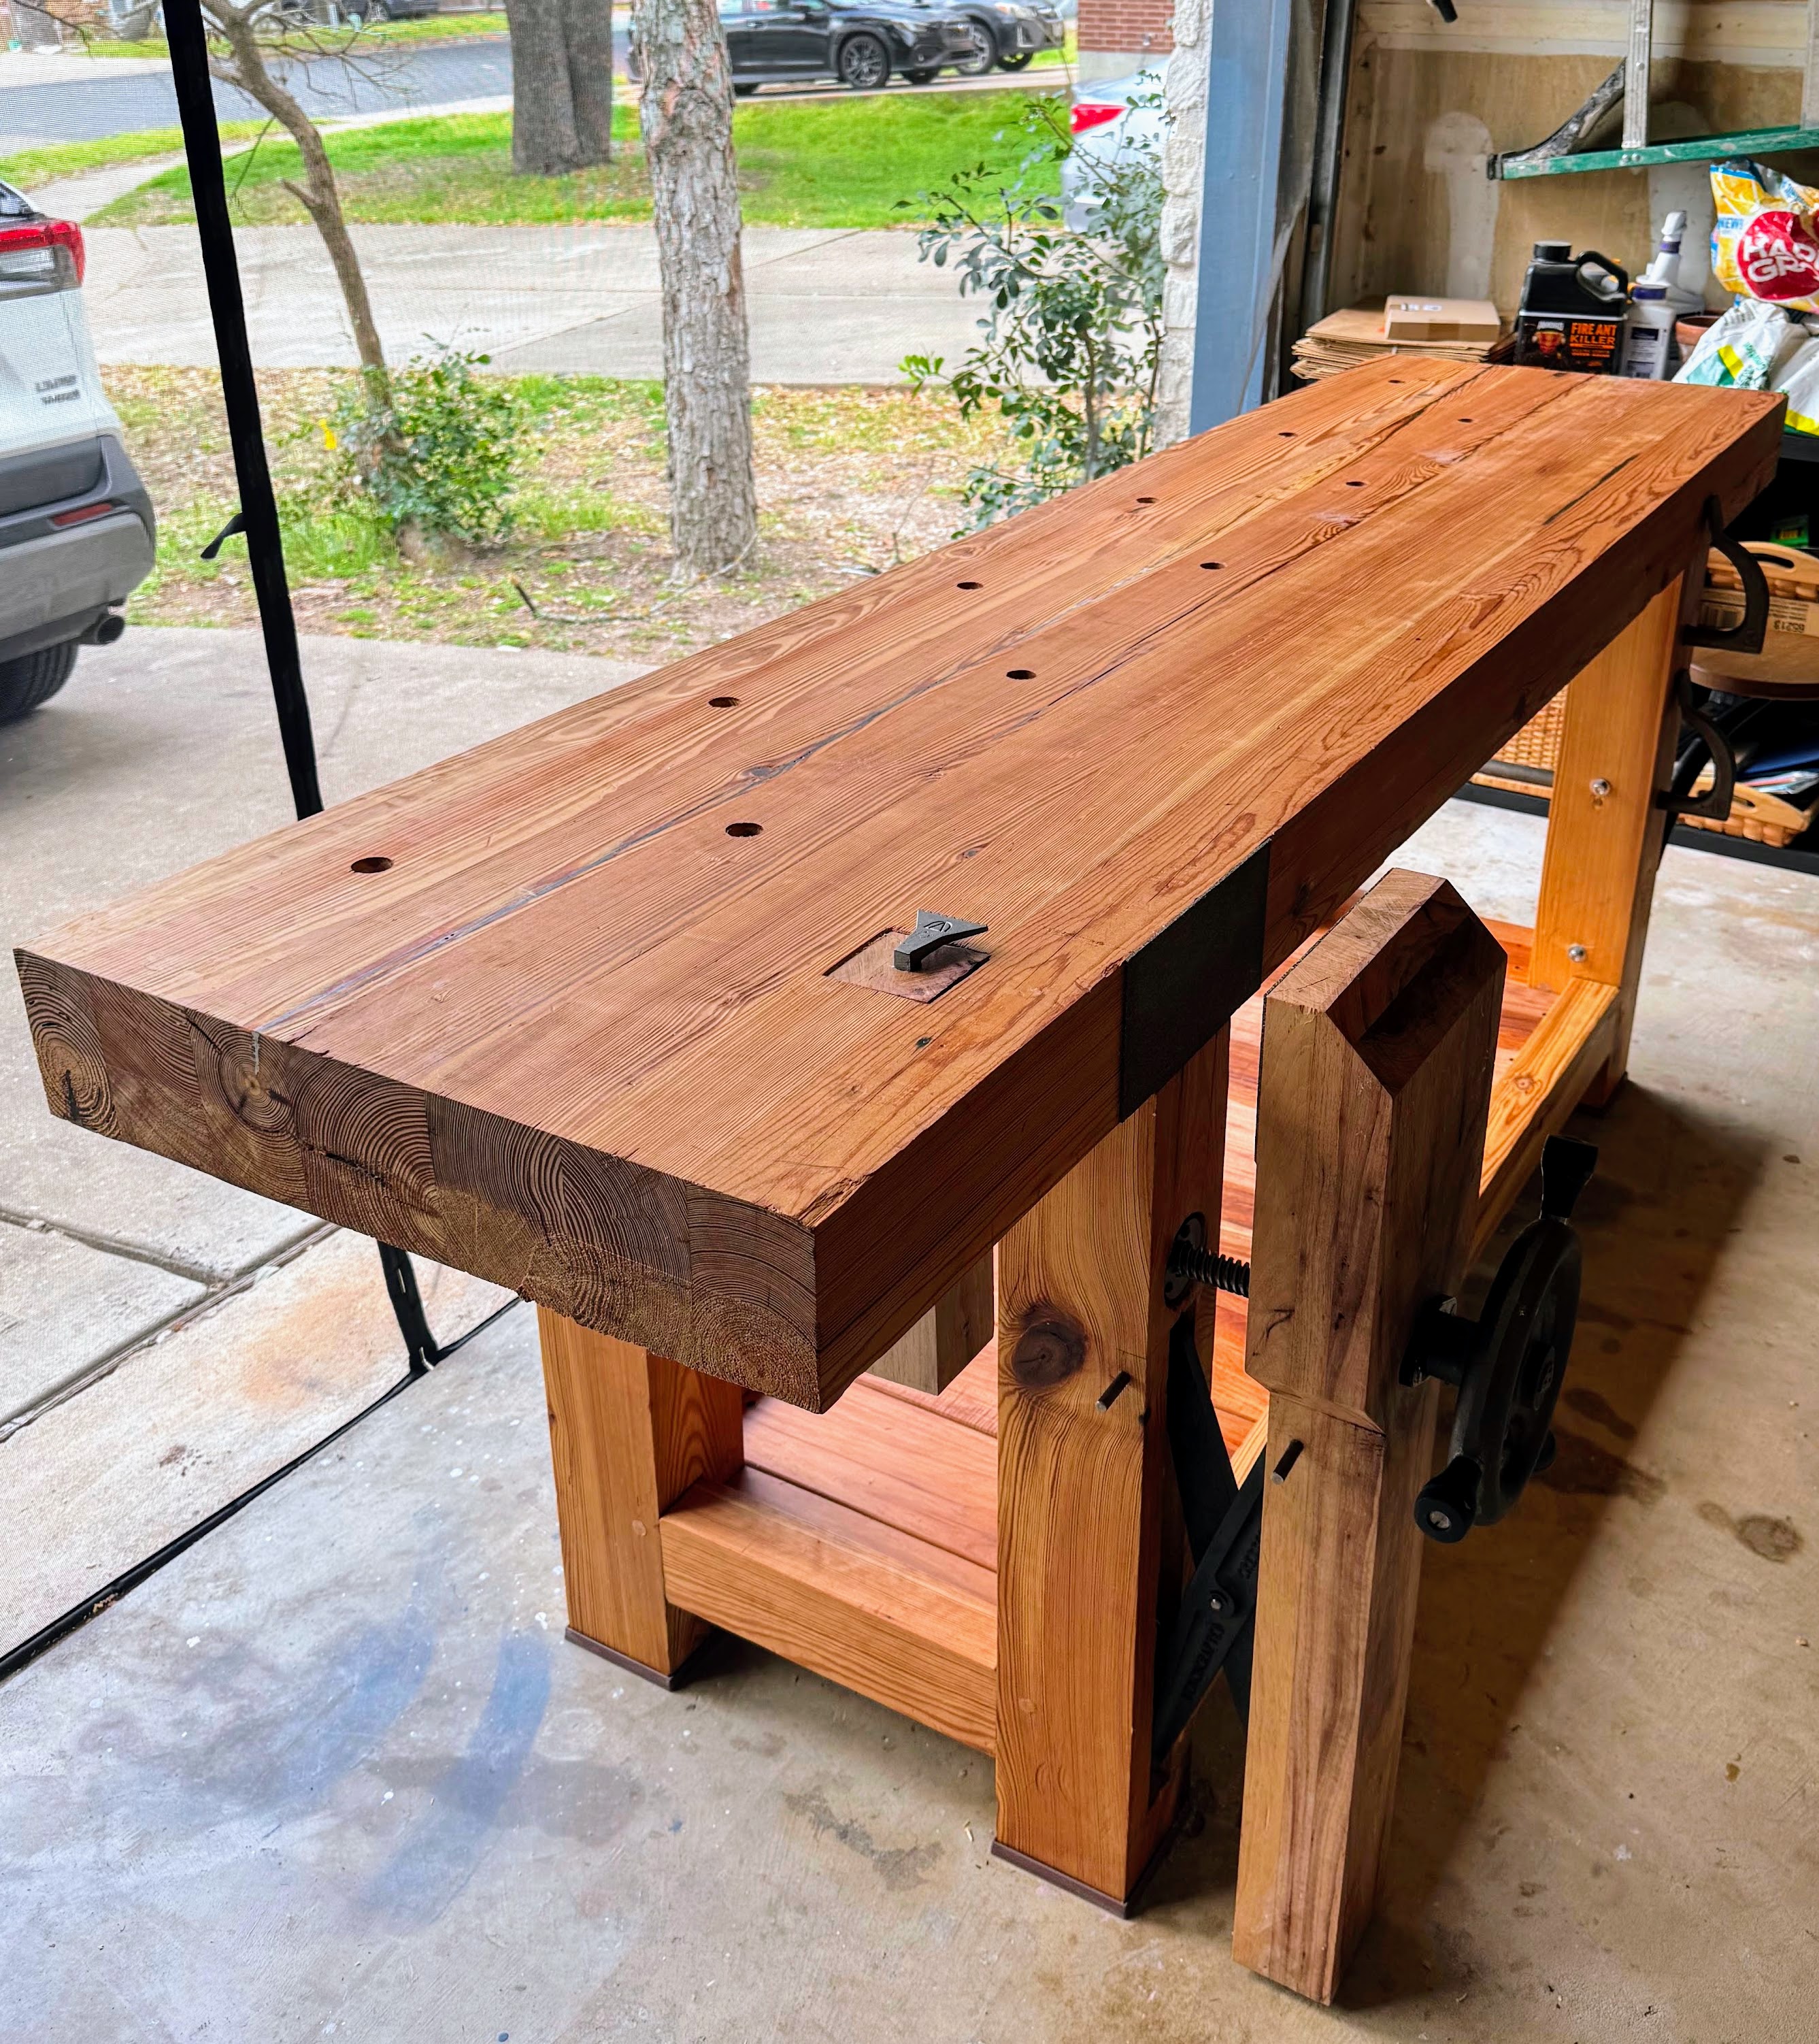
My Anarchist's Workbench
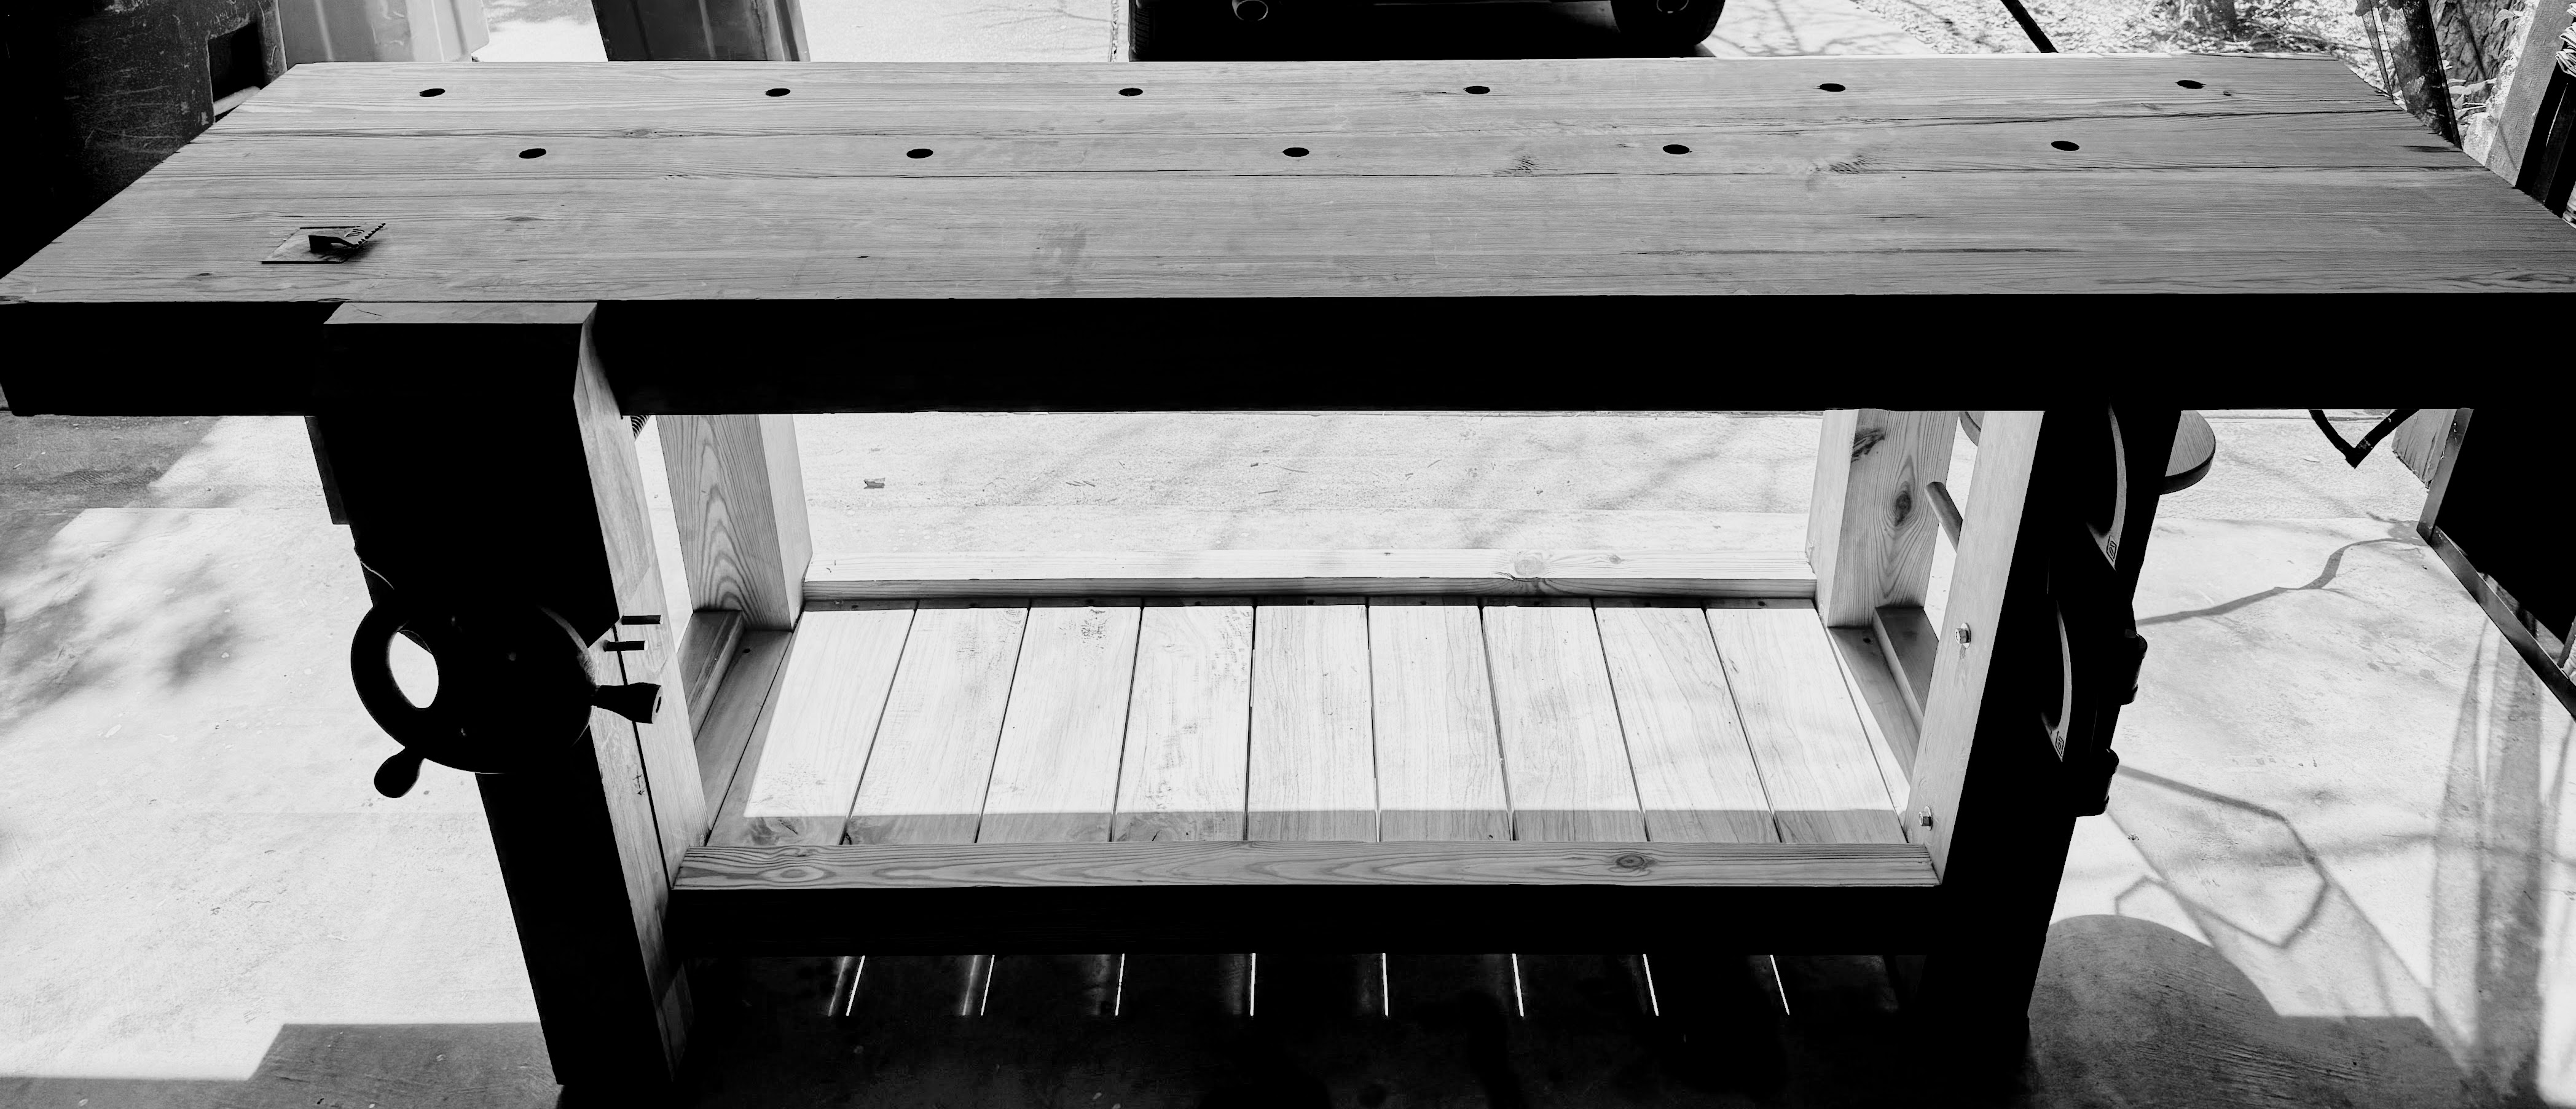
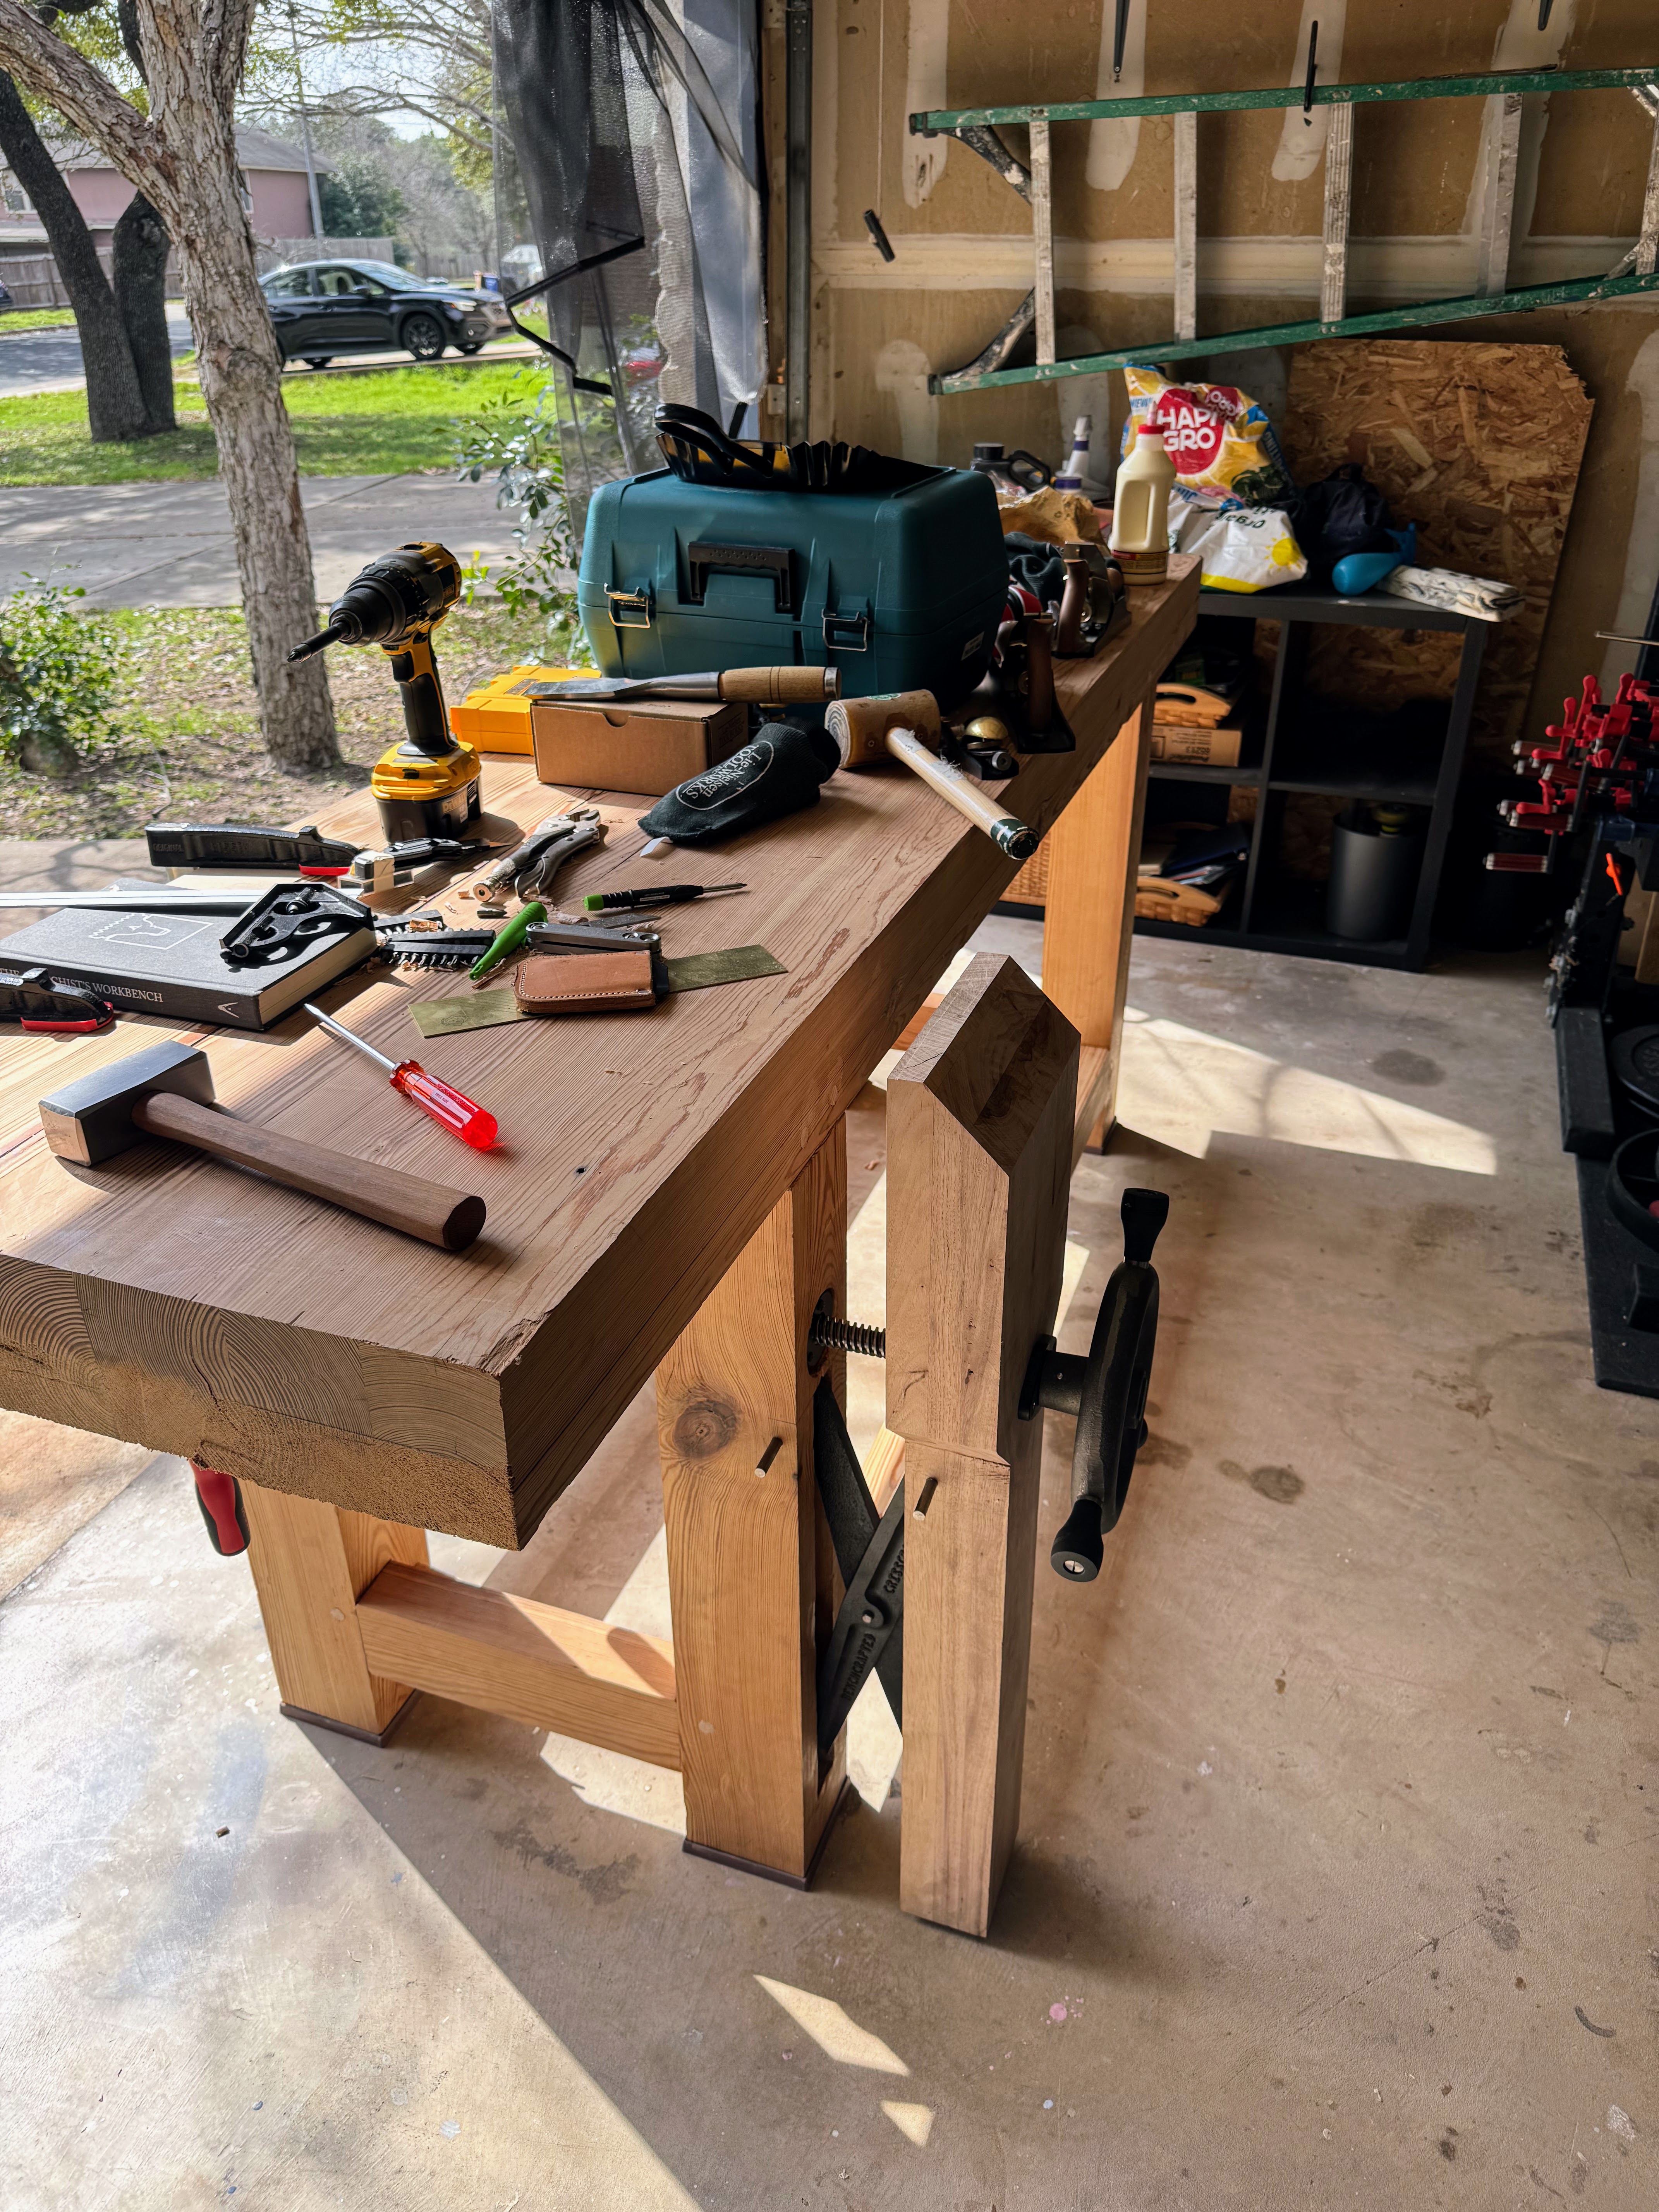
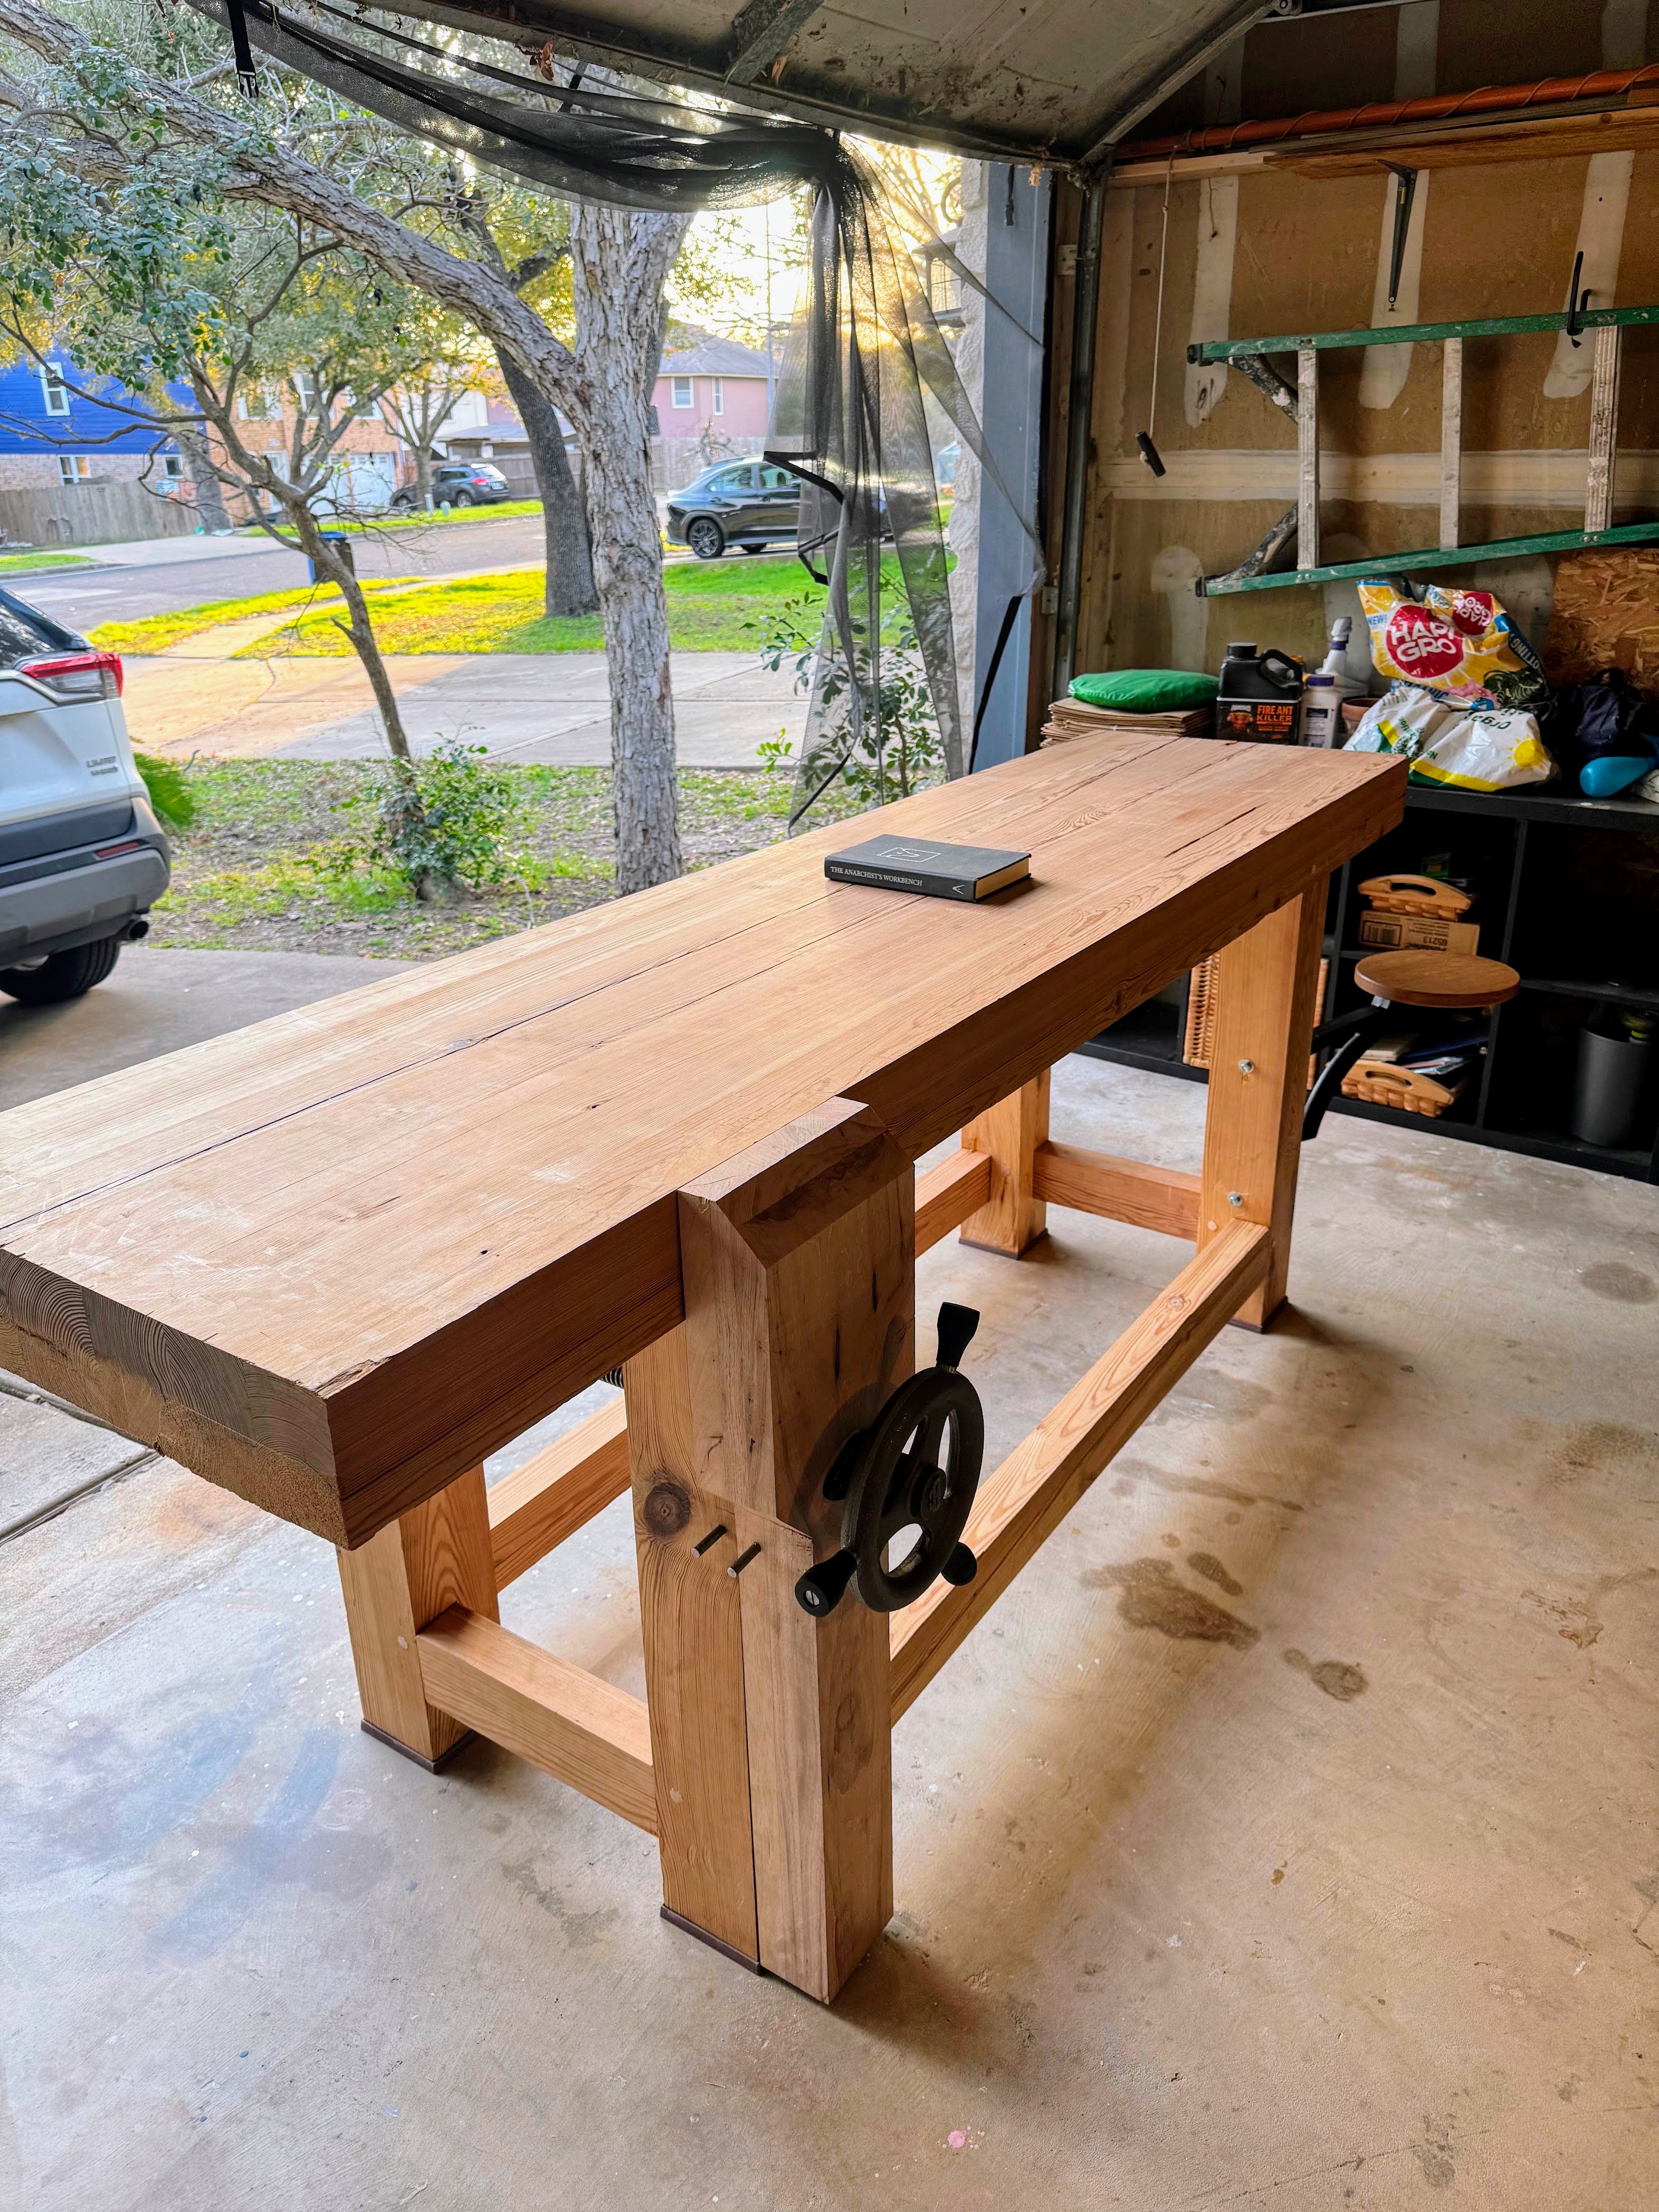
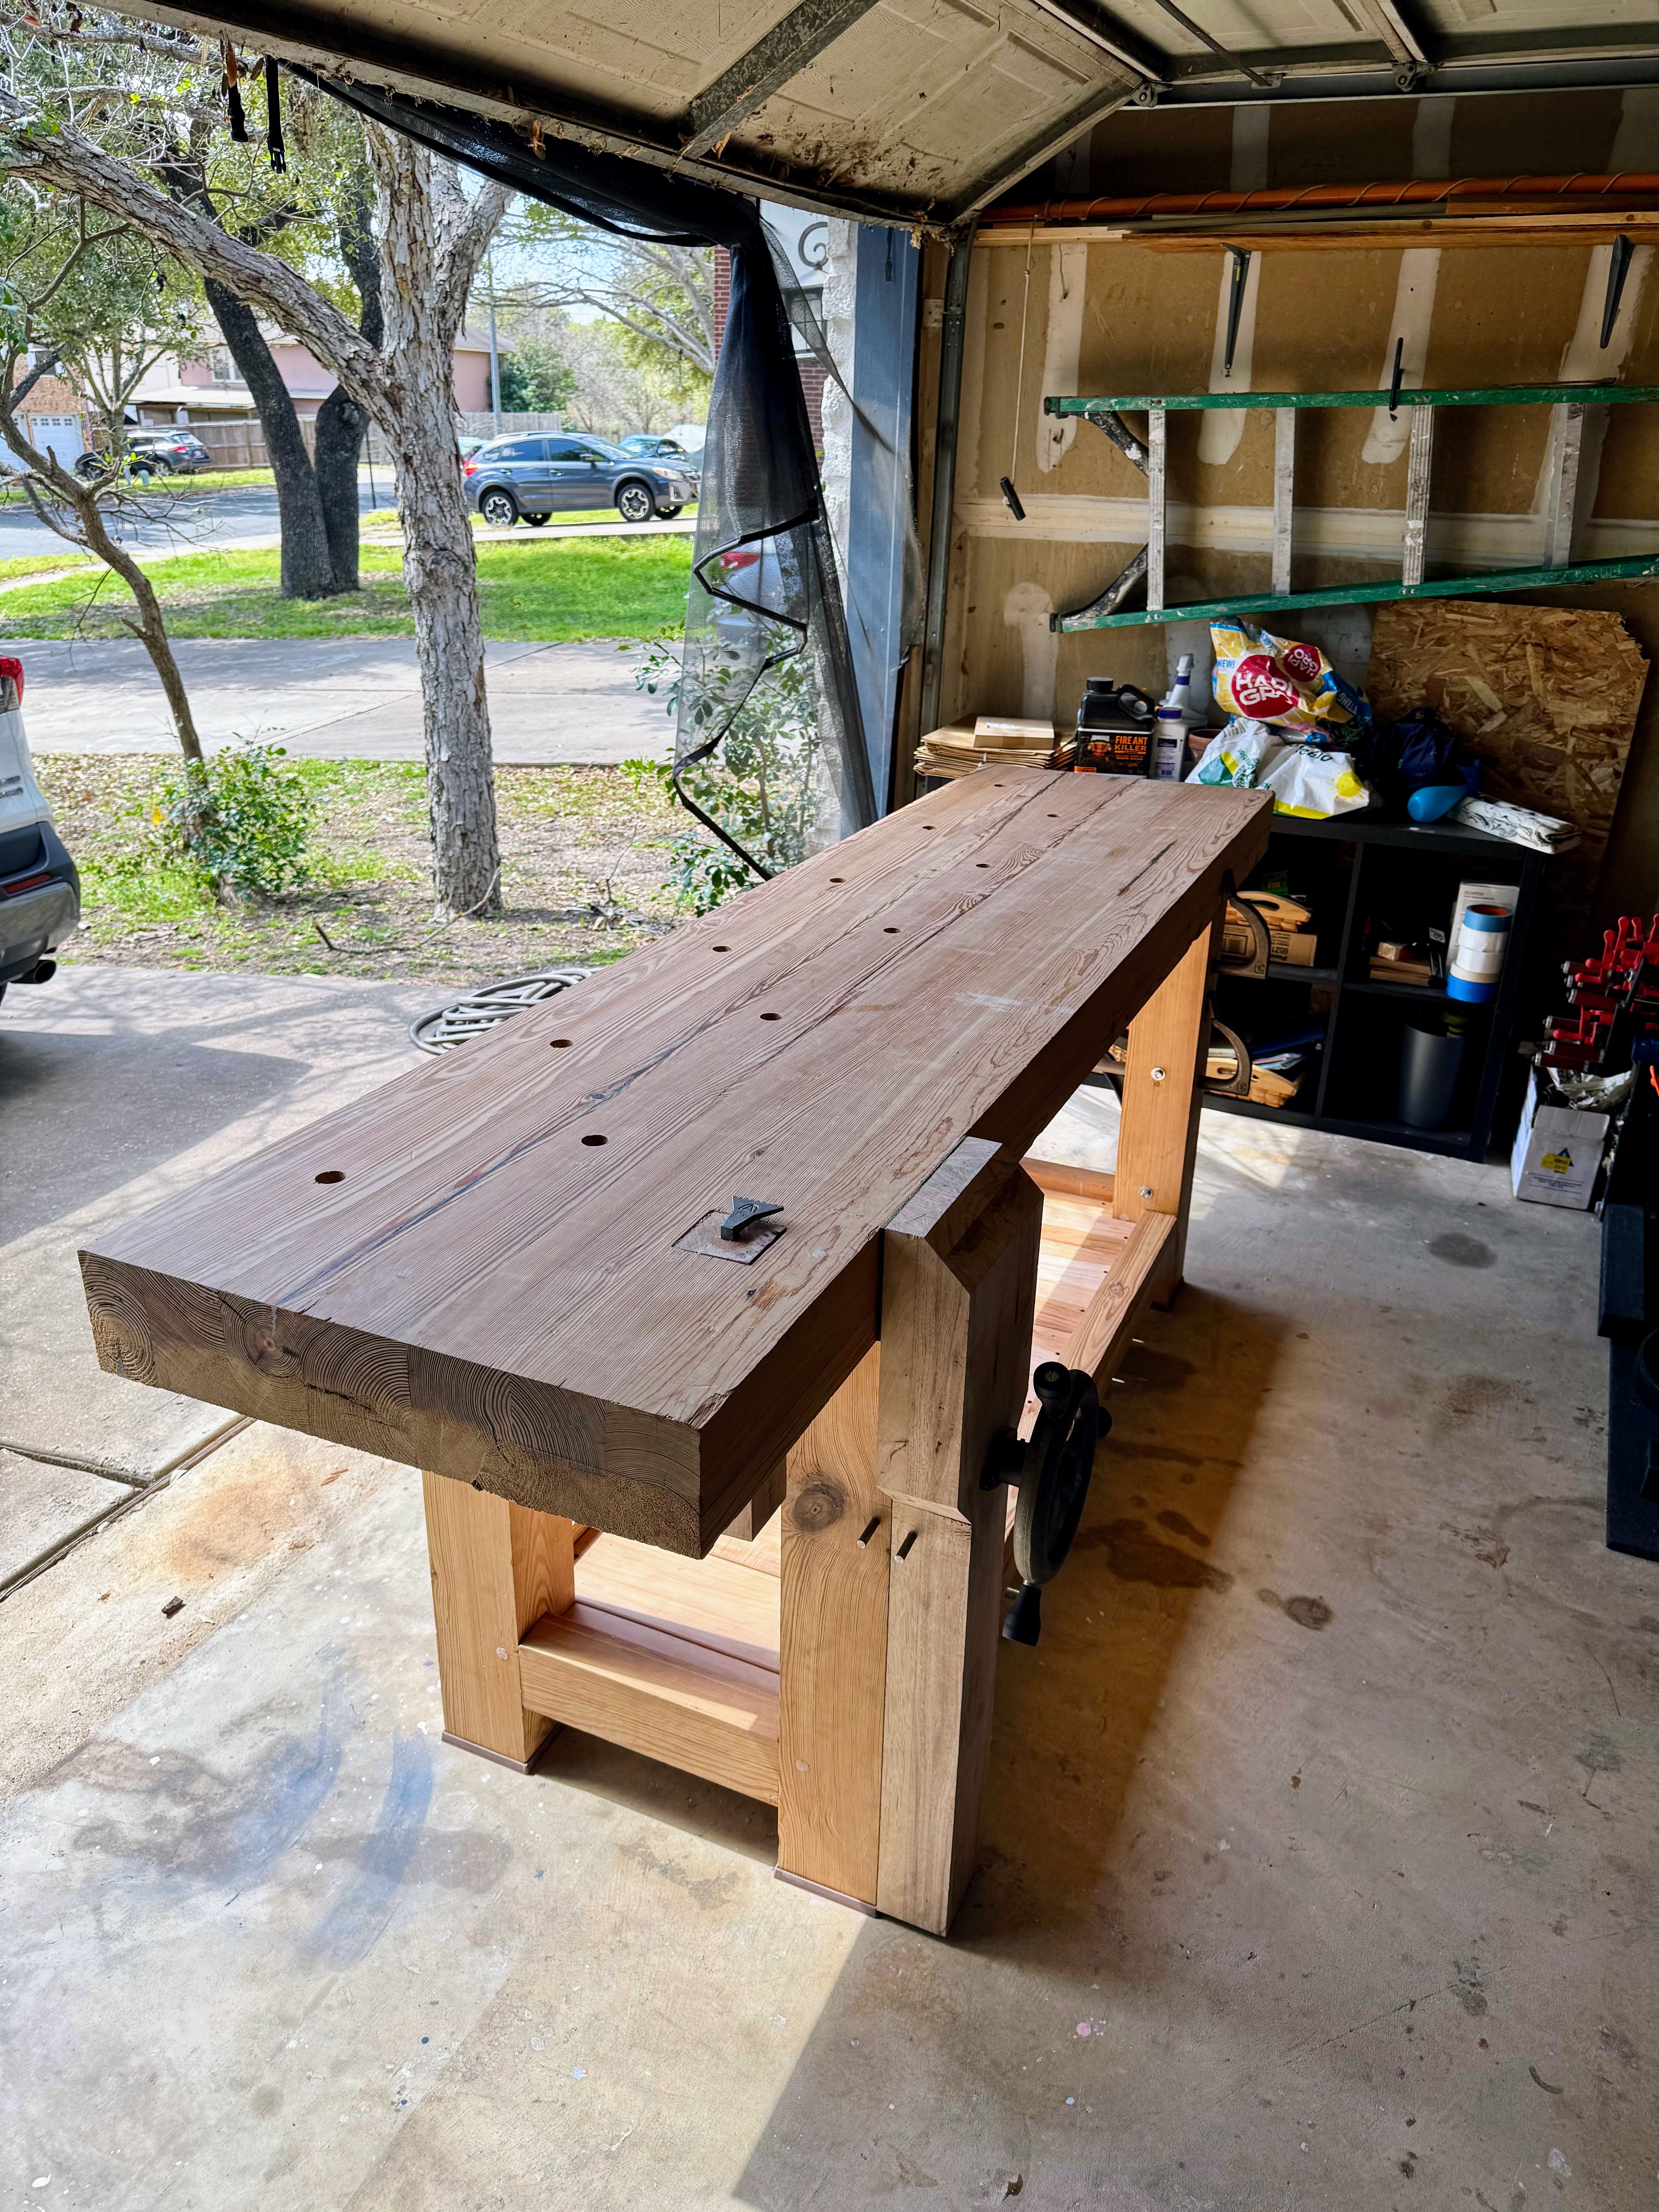
From October 2024 to February 2025, I constructed and subsequently flipped over my woodworking workbench — a \(464.77\ \text{lb}\) hand-tool woodworking appliance 8 feet long, 24 inches wide, 5 inches thick, and 36 inches tall with a swing away seat and a powerful leg vise. Built using reclaimed old-growth Long Leaf Pine and locally reclaimed Pecan for the vise chop and under-shelf.
I performed a structural analysis of the workbench here: Structural Analysis of My Anarchist’s Workbench.
The project originated from a visit to my parents in Northwoods Wisconsin; the setting inspired an ambition to timber frame a cabin for them.
This goal related to a 2018 intensive, hand-tools-only timberframing course I attended in Latvia with my friend Brian. The sixteen-day program, hosted by the Northmen guild, provided instruction in traditional timberframing techniques. (Our partners joined us to explore Riga before the course.)
The course was held at Ratnieki and included traditional Latvian meals. Our instructor, Jacob, organized excursions to an open-air wood architecture museum, a traditional pirts (sauna), and a final meal using foraged ingredients. During the course, Jacob had a book from Lost Art Press. This was my first introduction to the publisher, which later influenced this workbench project.
The cabin project renewed my interest in hand-tool woodworking, and a proper workbench became the logical starting point. The Lost Art Press introduction then led me to Christopher Schwarz and his book, The Anarchist’s Workbench. Schwarz’s encouraging, informed, and philosophical writing resonated with me. His writing instills confidence for ambitious projects, and his arguments for this particular stable, simple, and efficient hand-tool workbench design felt compelling. Lacking a functional workbench and certain tools had long hindered pursuing my hobby. This workbench was key to getting started and I became obsessed with the idea of building one.
So, having anointed myself a woodworker I began acquiring hand tools, following the “buy once, cry once” philosophy. A crucial preliminary project, detailed in the next section, was timberframing the sawhorses that would support the workbench construction.
Part 1: Building the Sawhorses
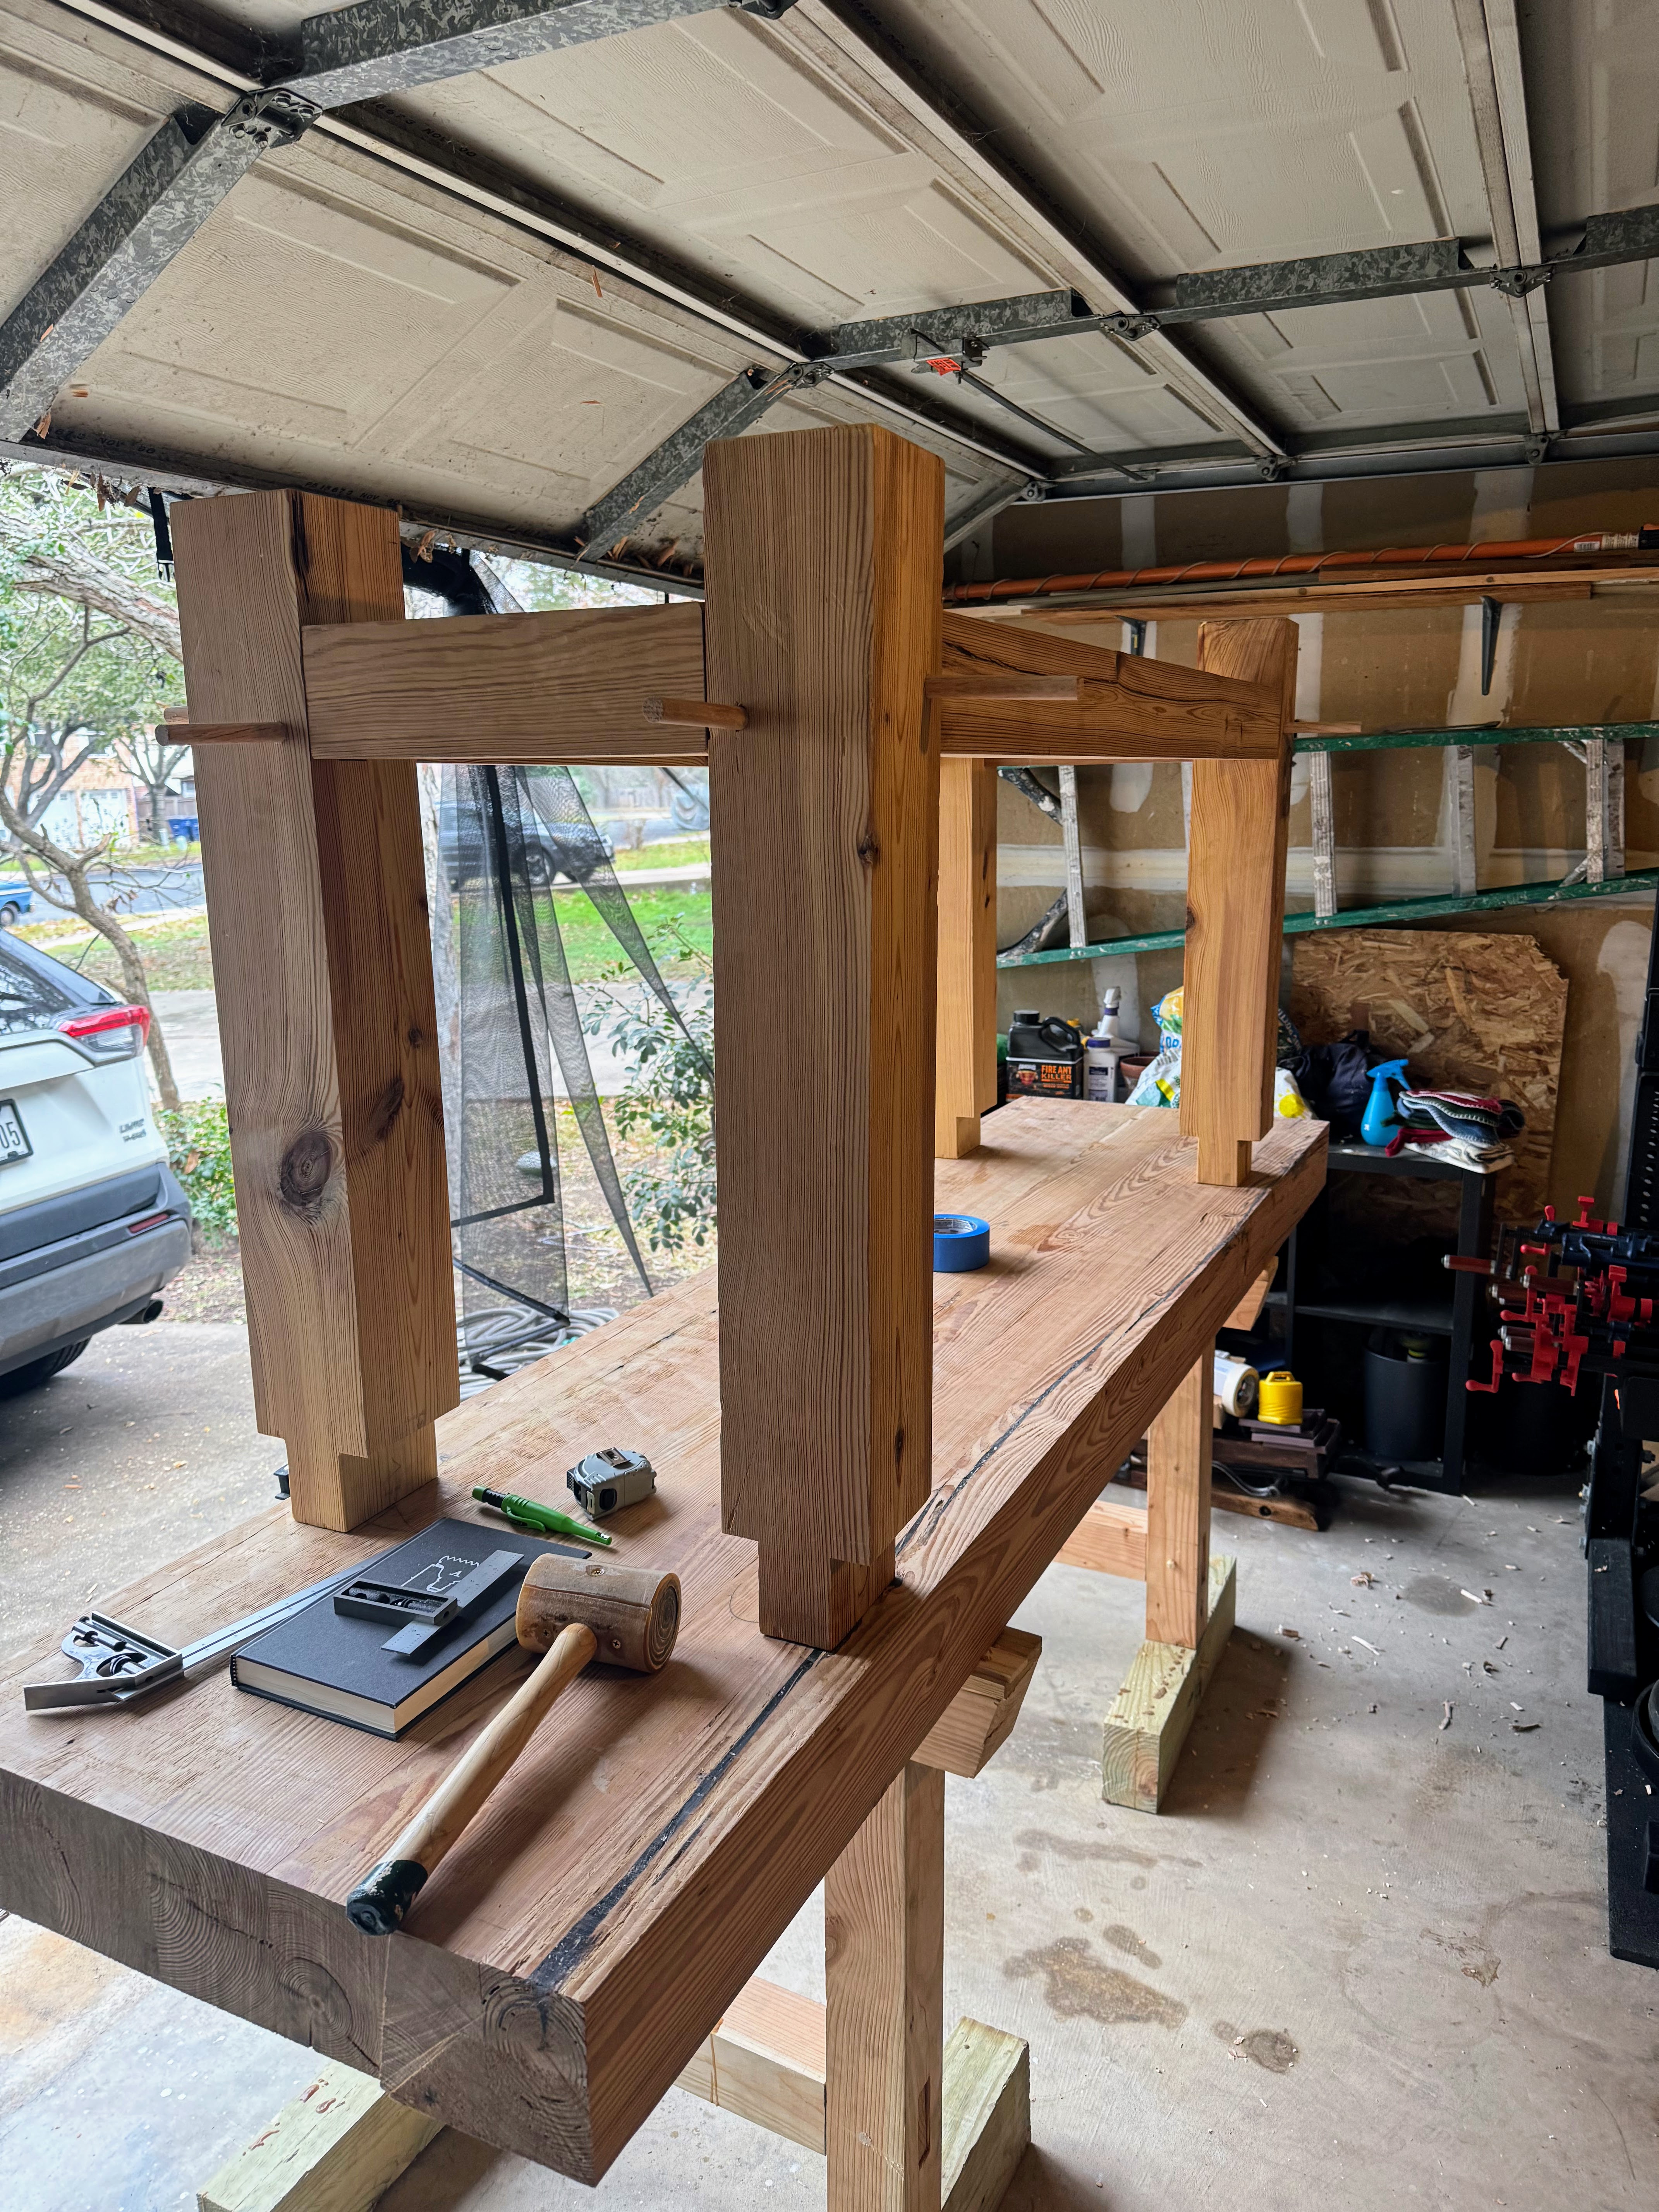
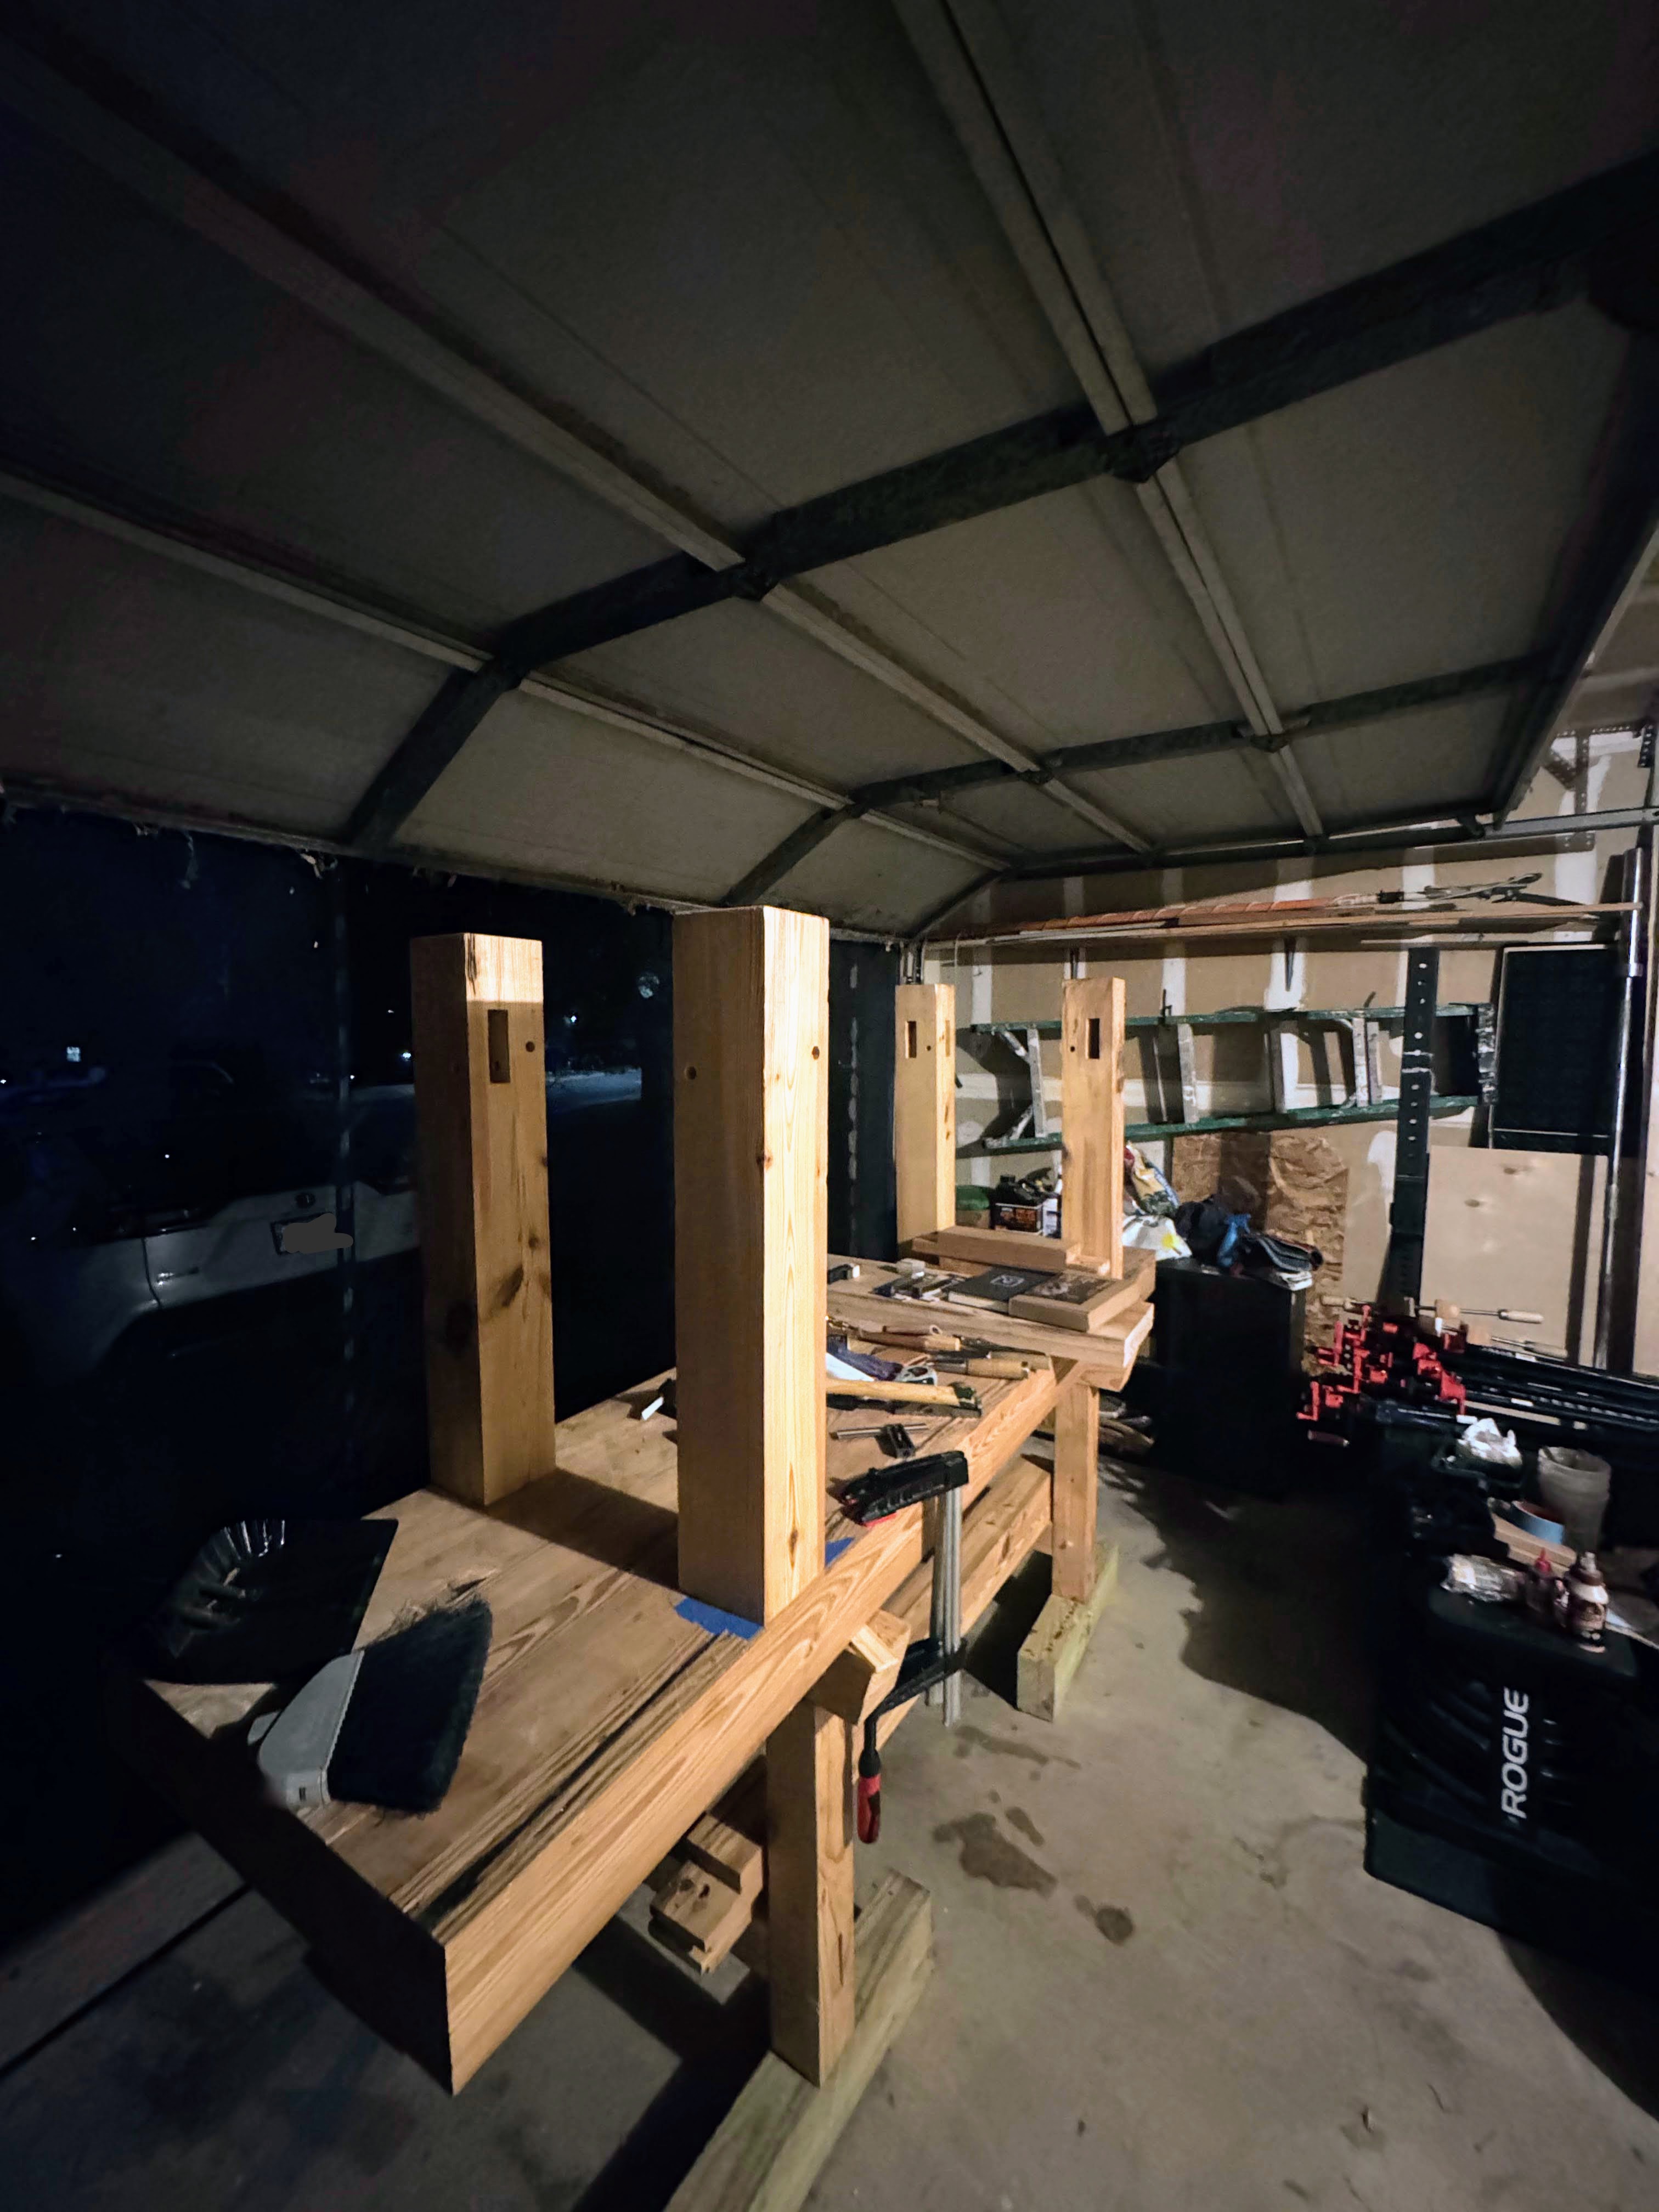
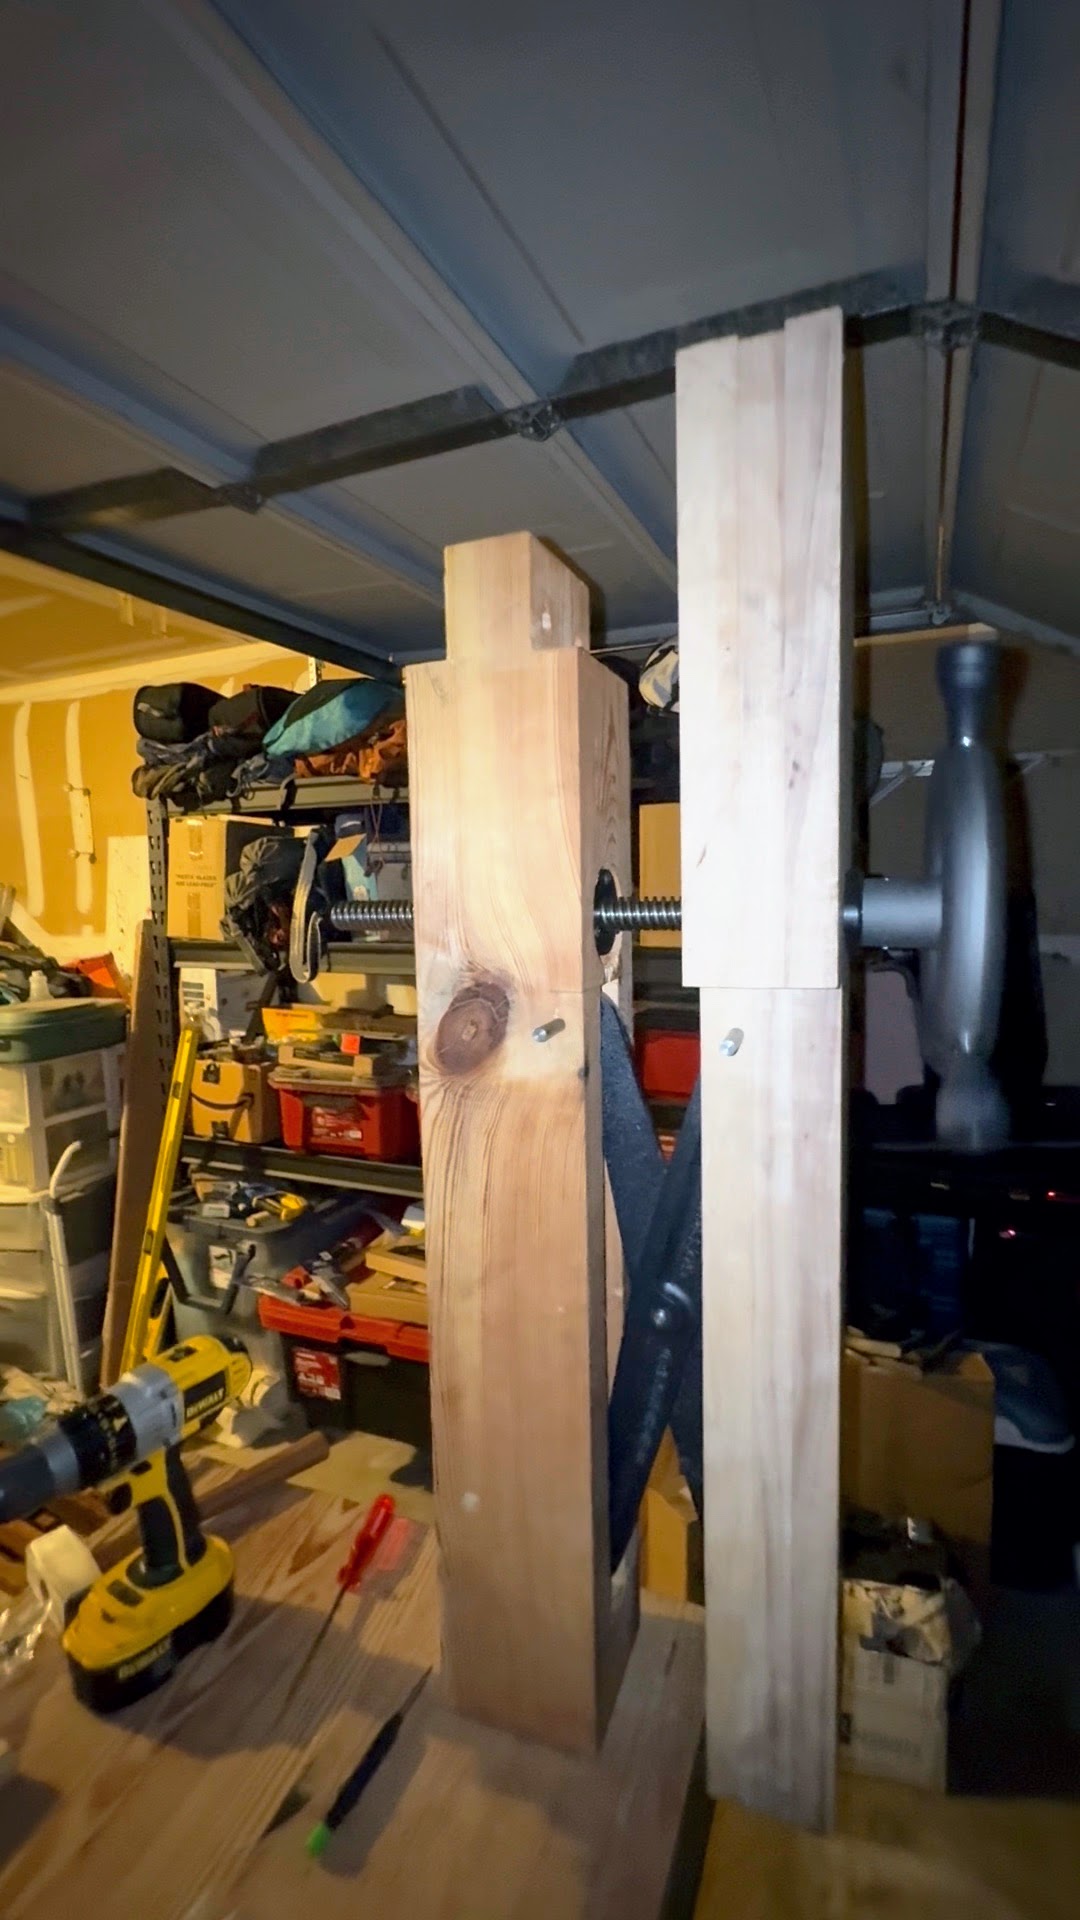
To start the anarchist’s workbench, I needed a solid base. First up: timber-framed sawhorses, built by hand (I needed the practice, it had been a while since my course). This warm-up took about two months, as life was busy with work and training for a powerlifting meet.
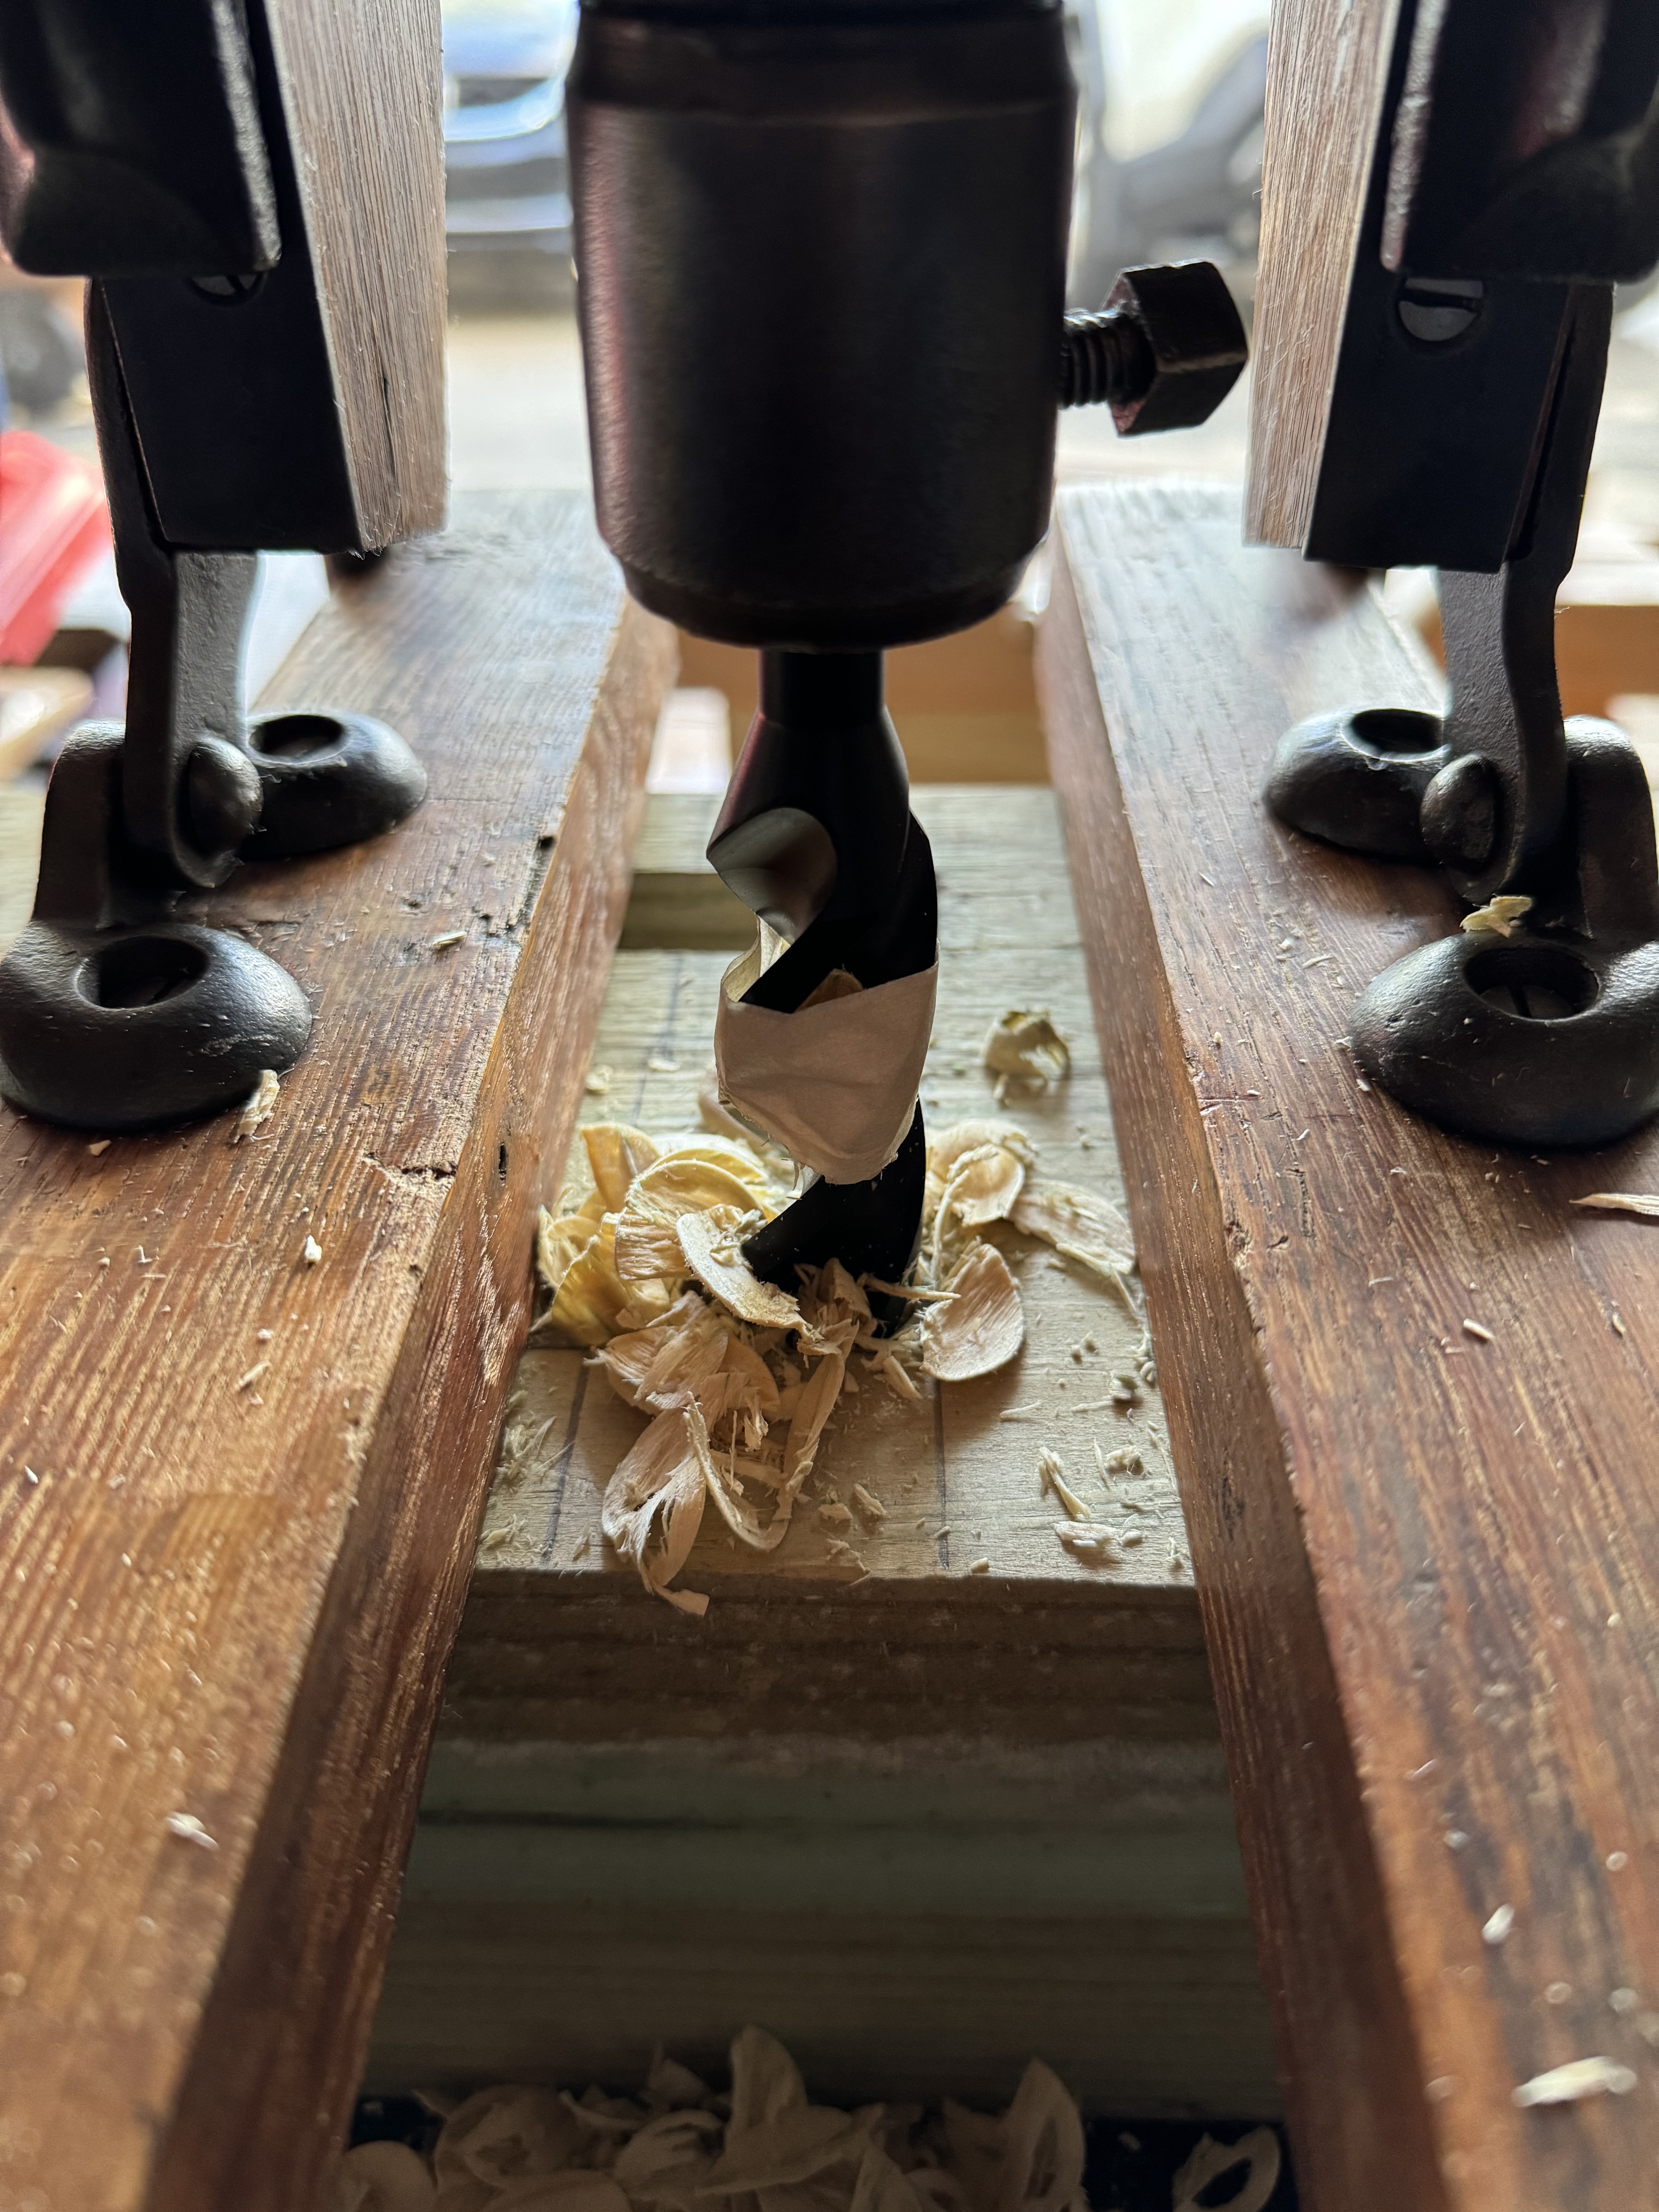
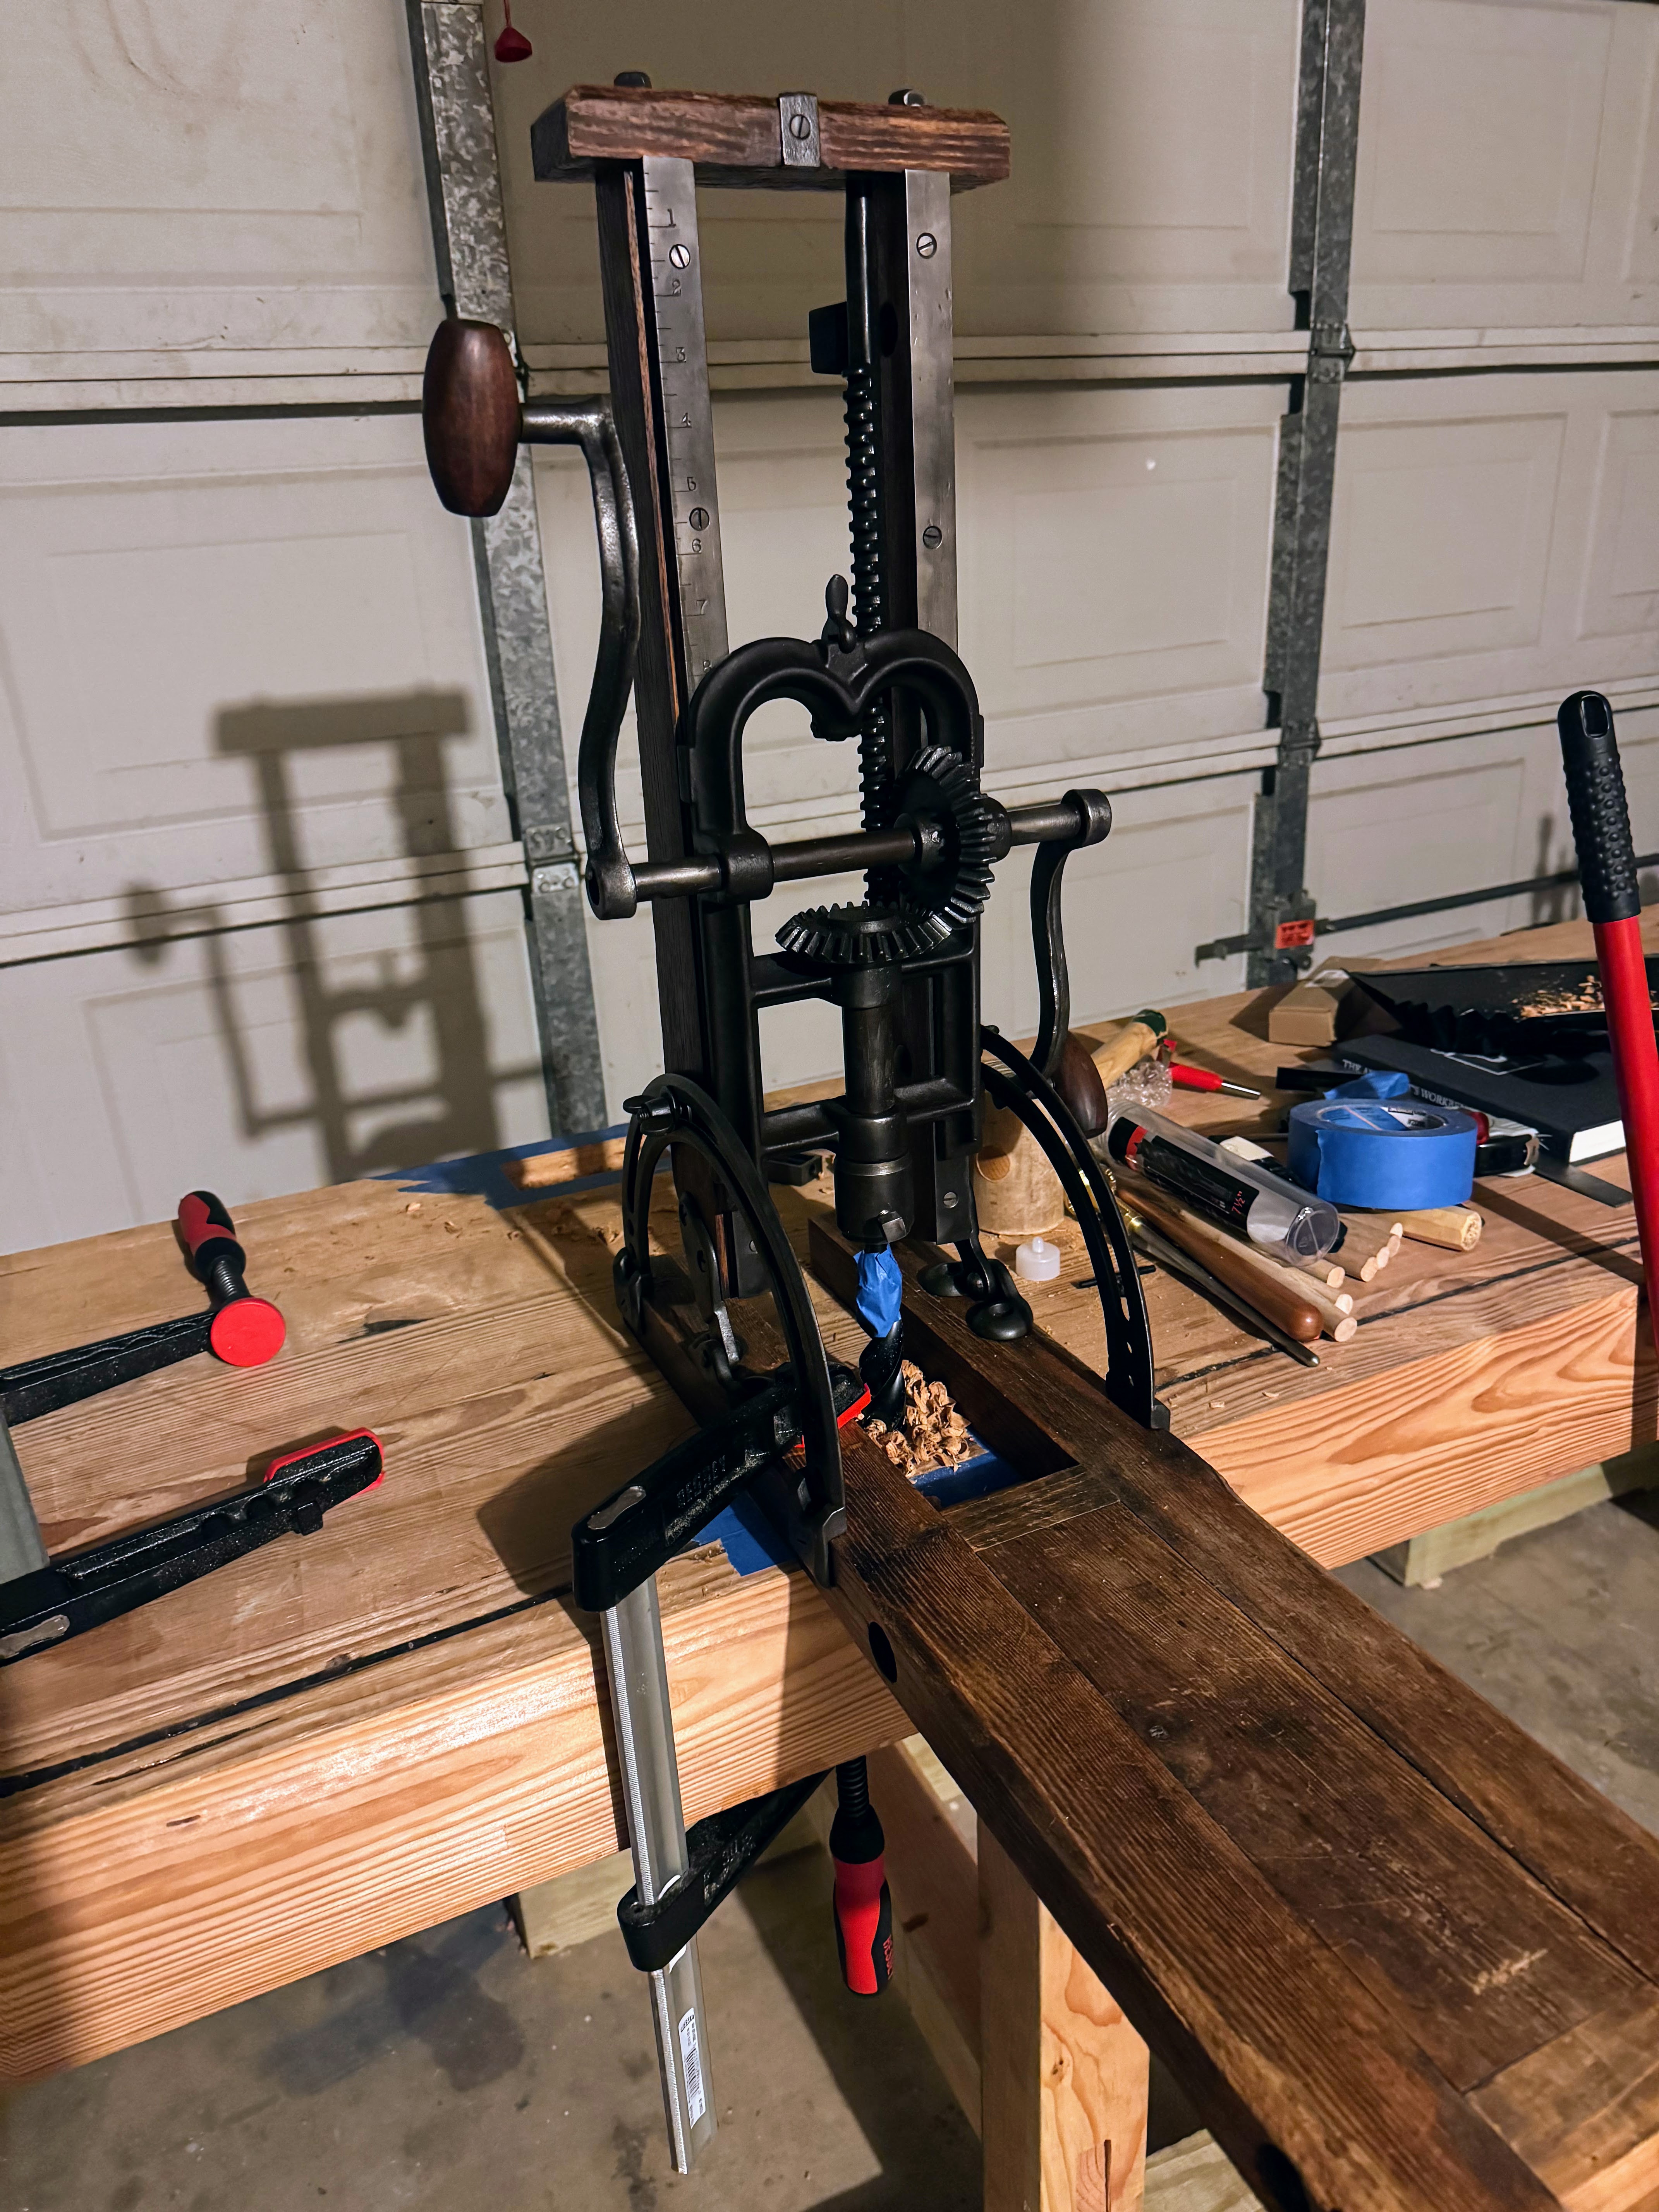
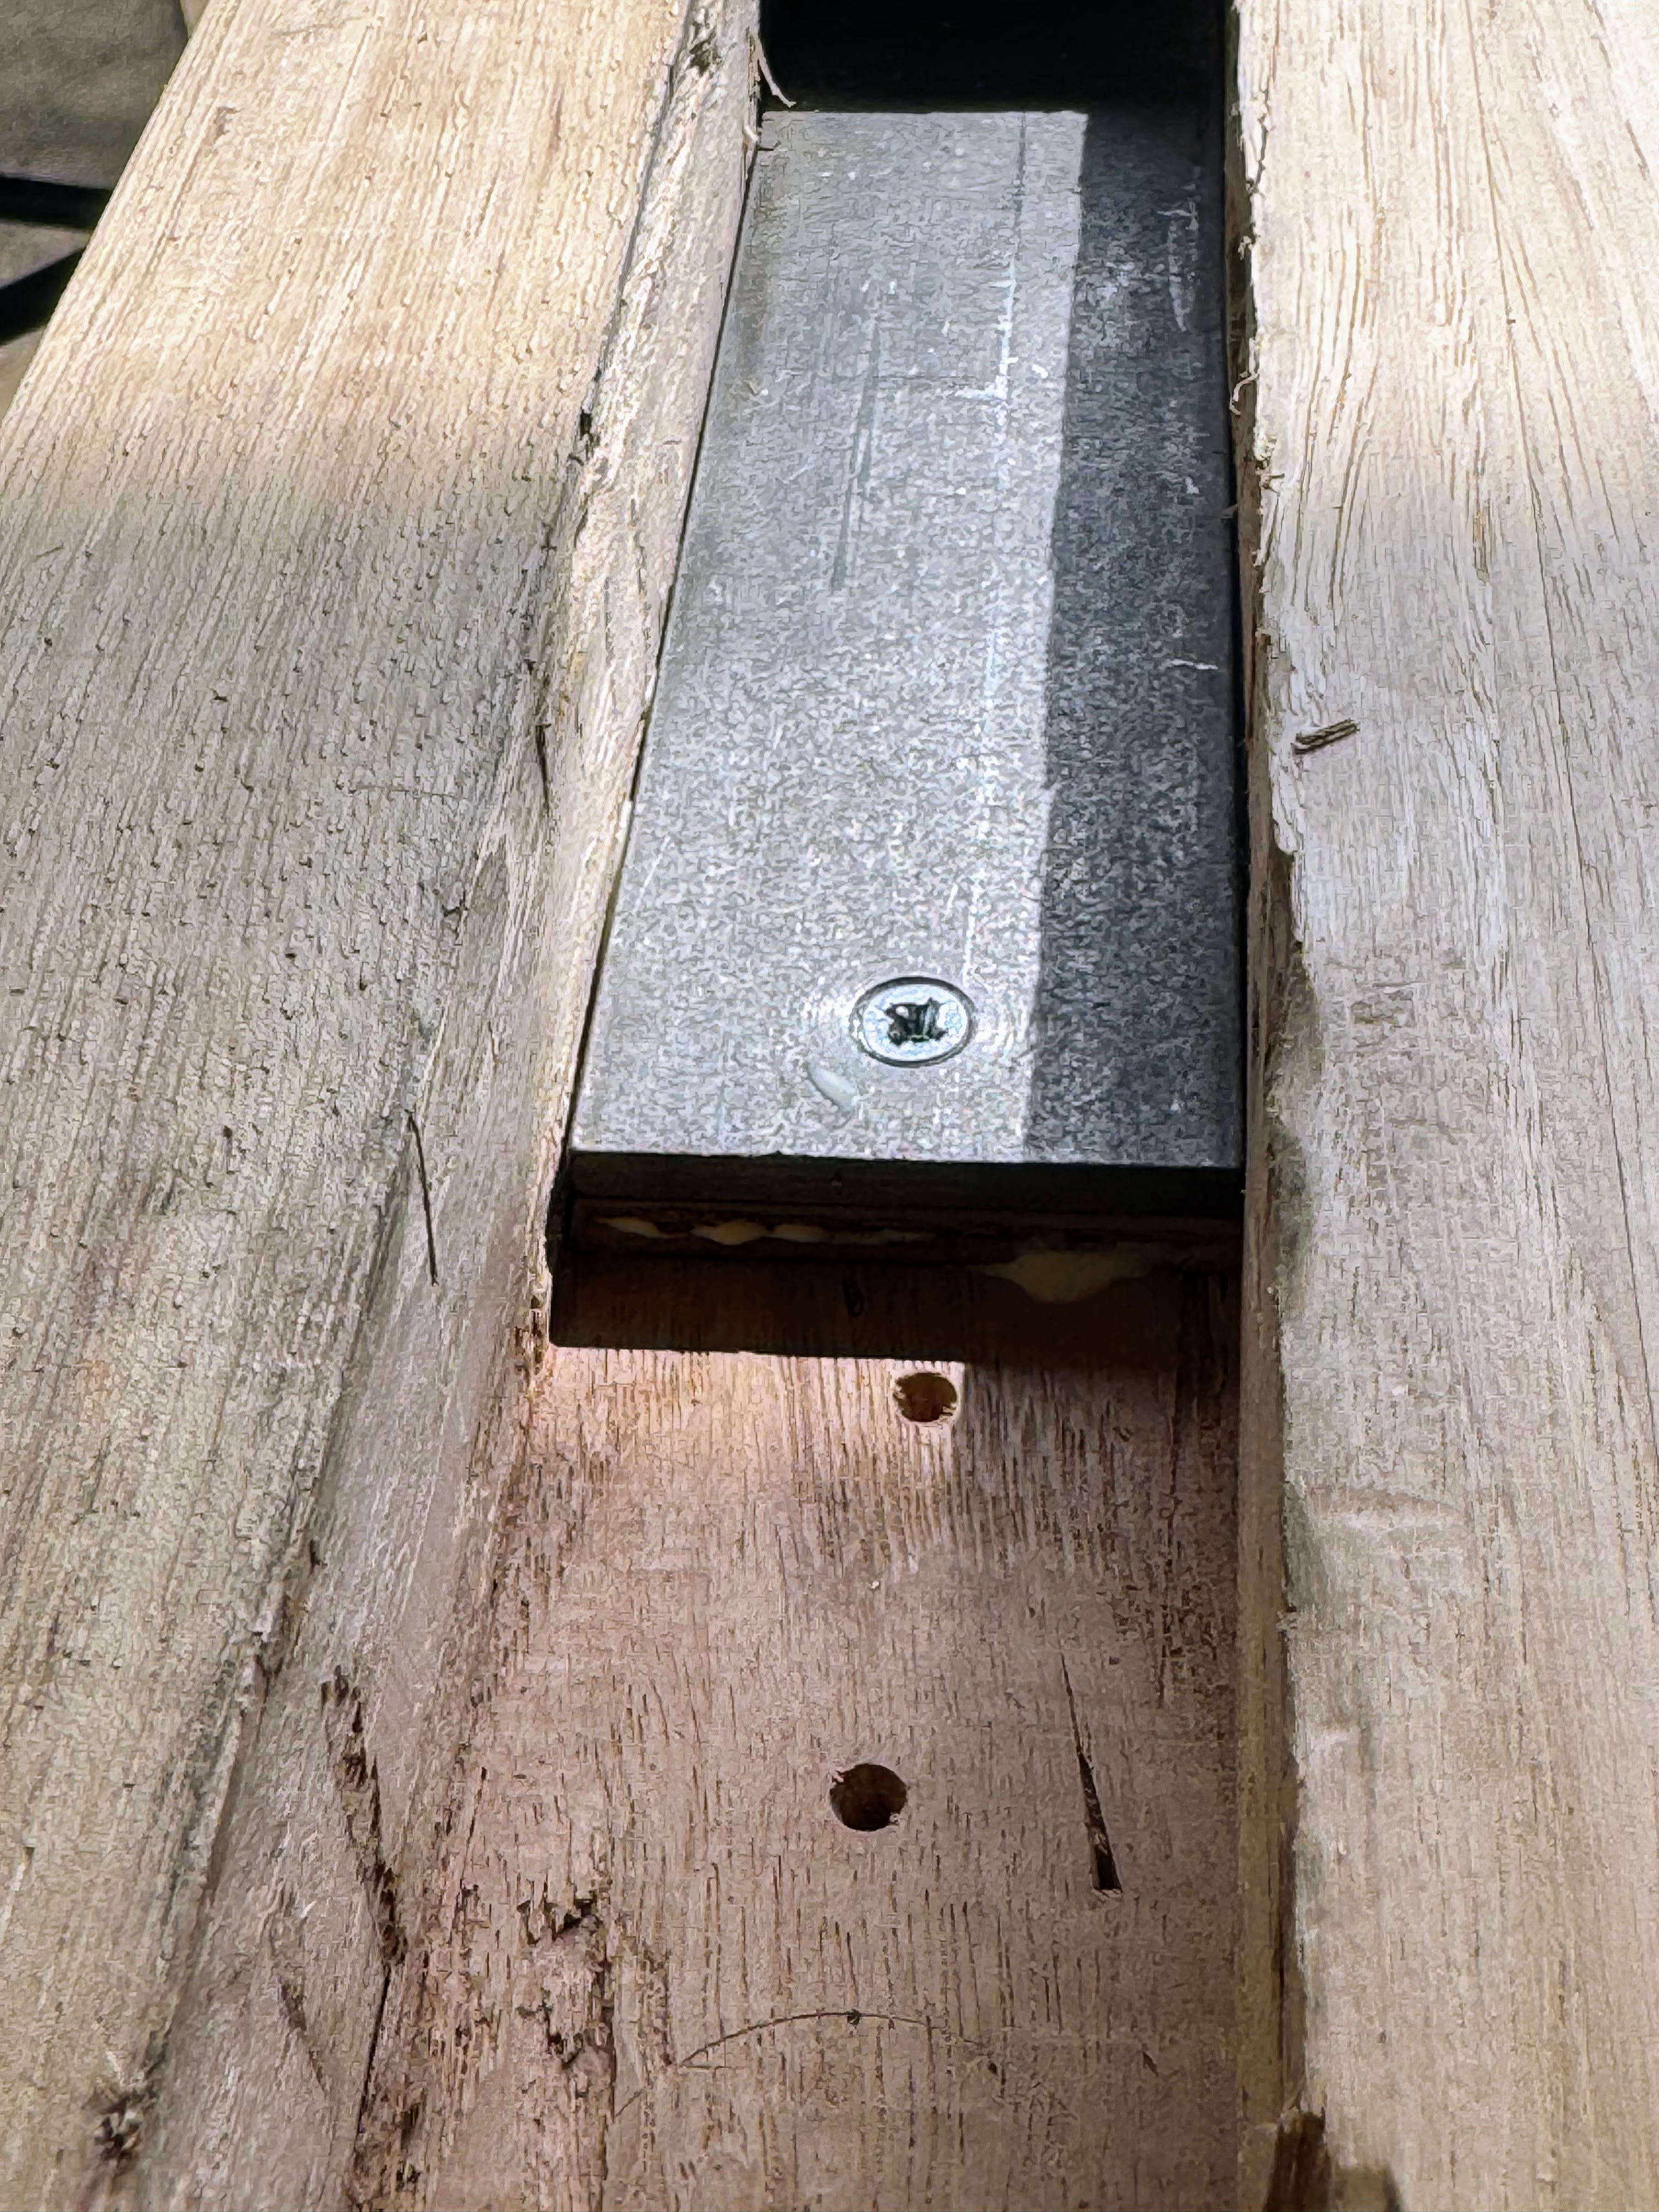
I used strong mortise and tenon joints. For the mortises, the above image shows my vintage beam borer making the initial mortise holes. It’s a lovely old tool, though a bit rickety, but still satisfying to use and more accurate boring perpendicular holes than the hand-drill guide I have.
After drilling, I cleared out the waste, squaring for the tenons.
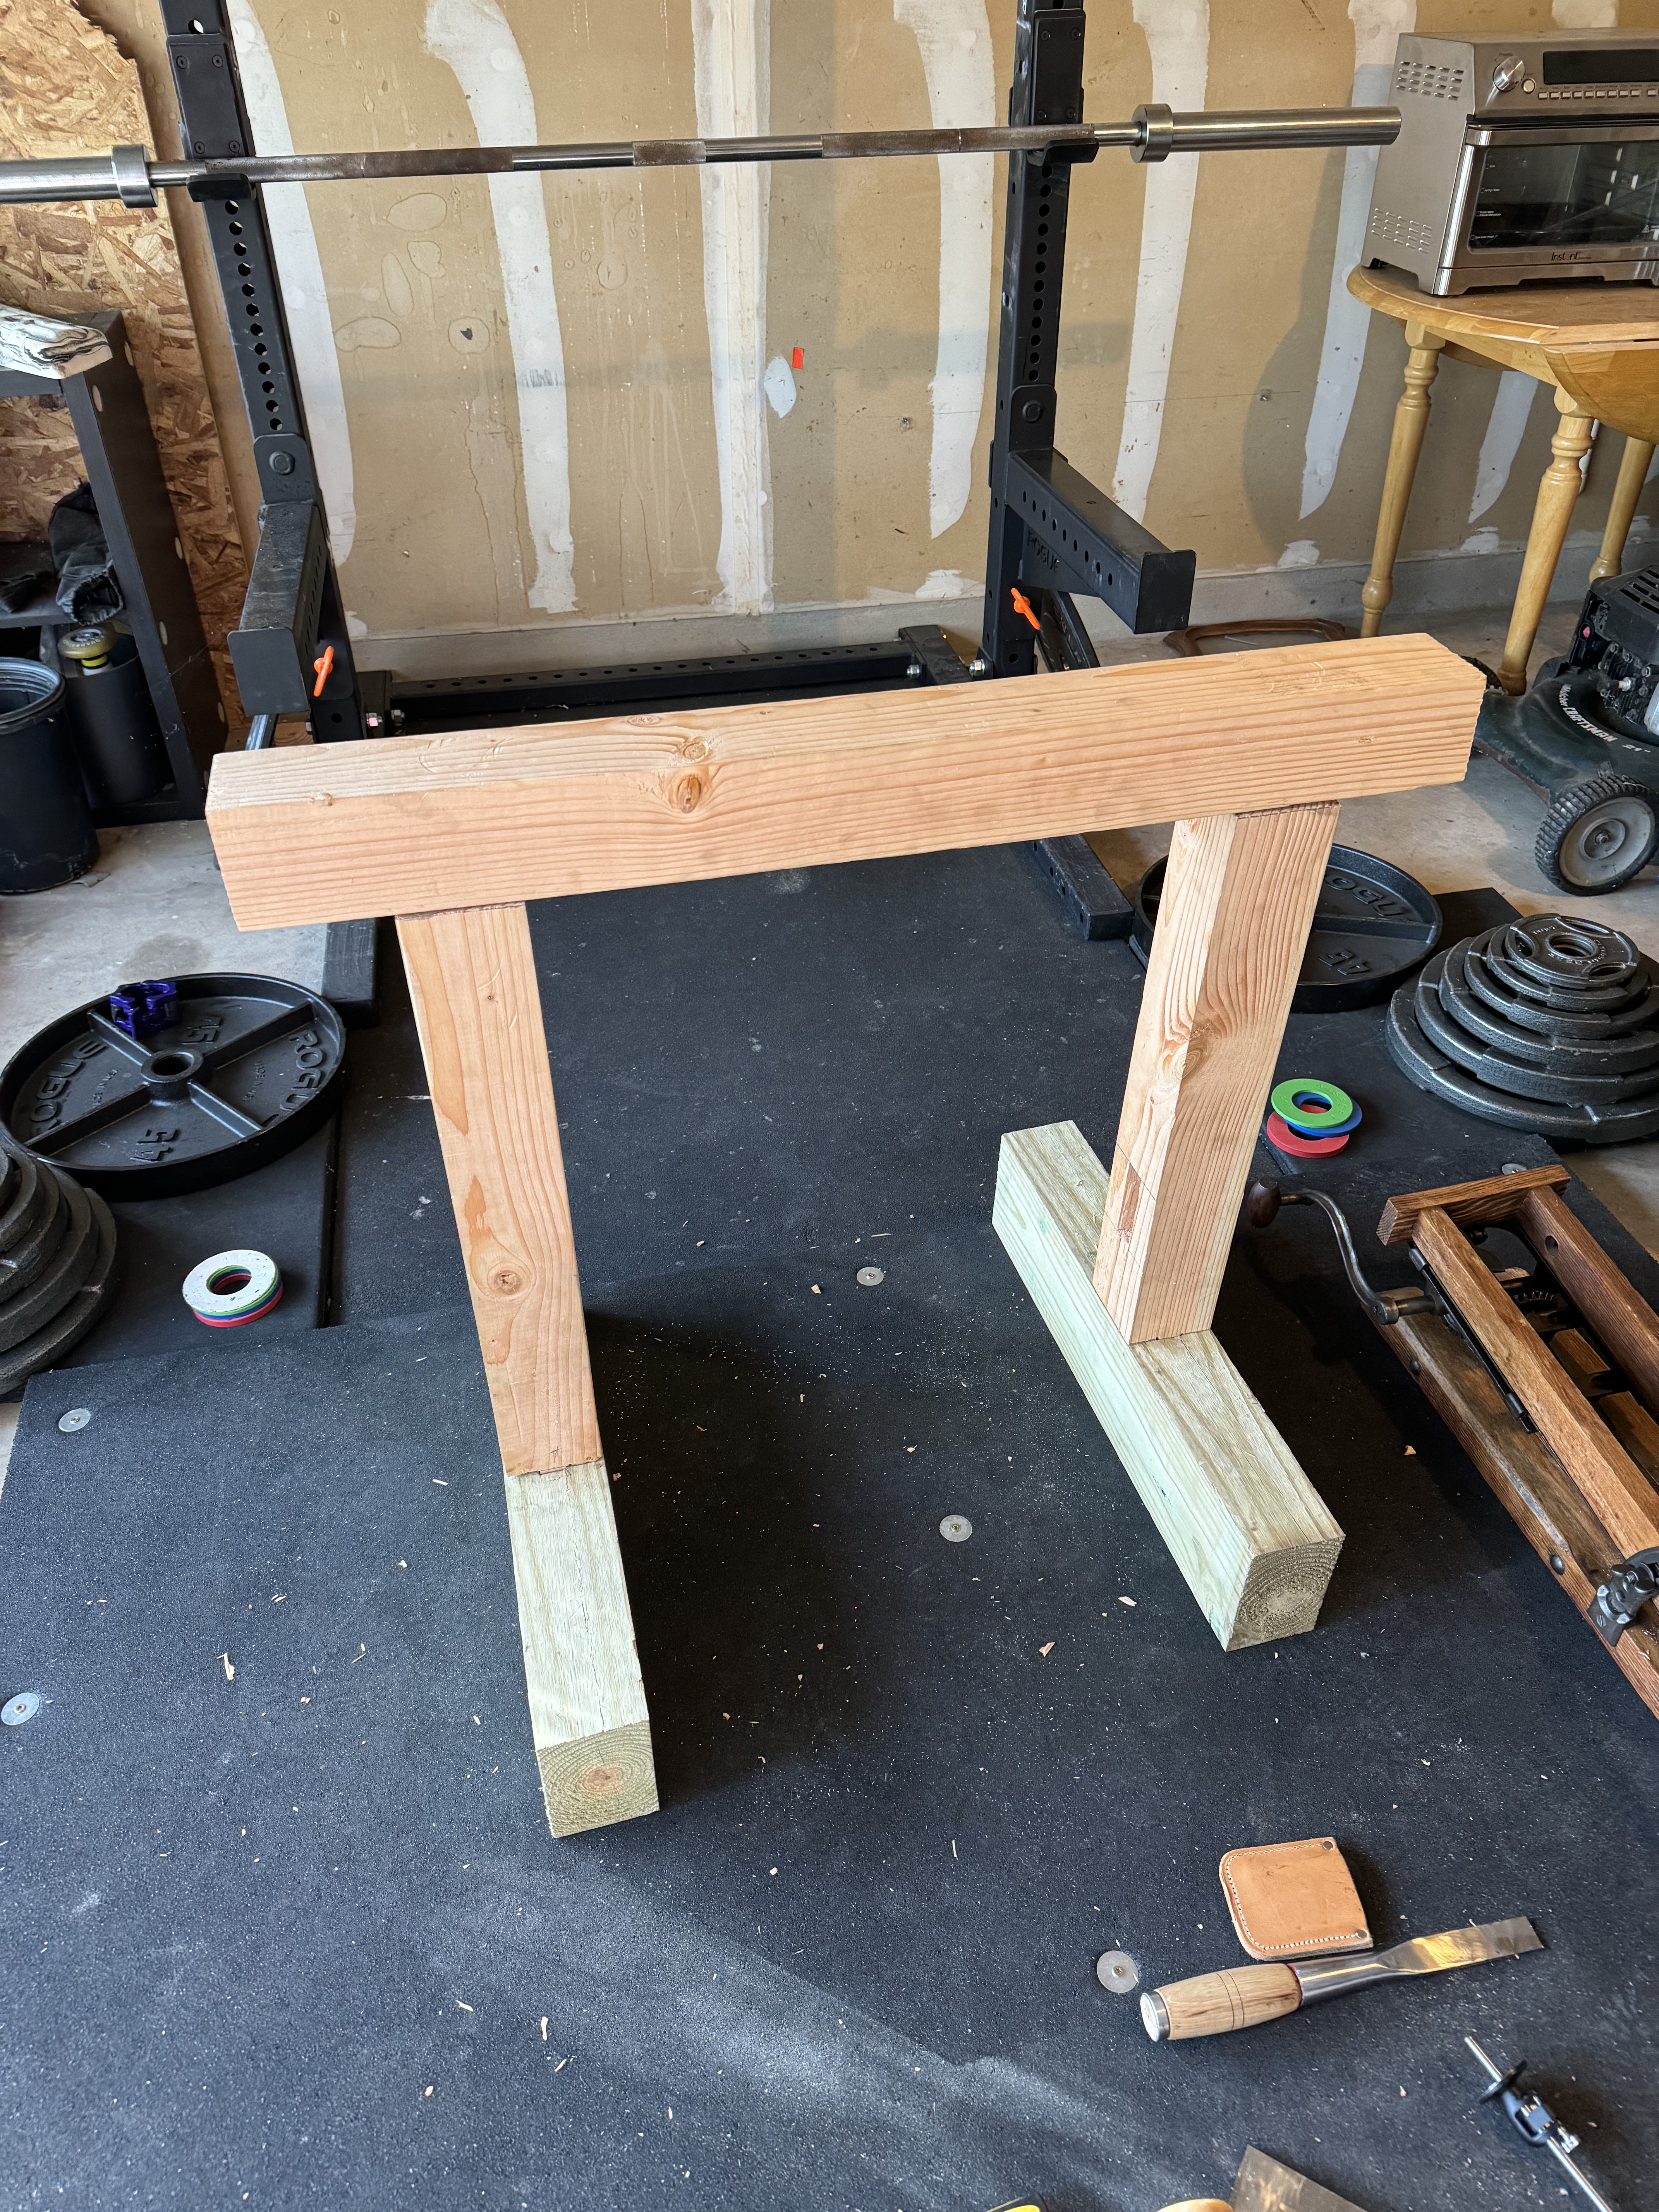
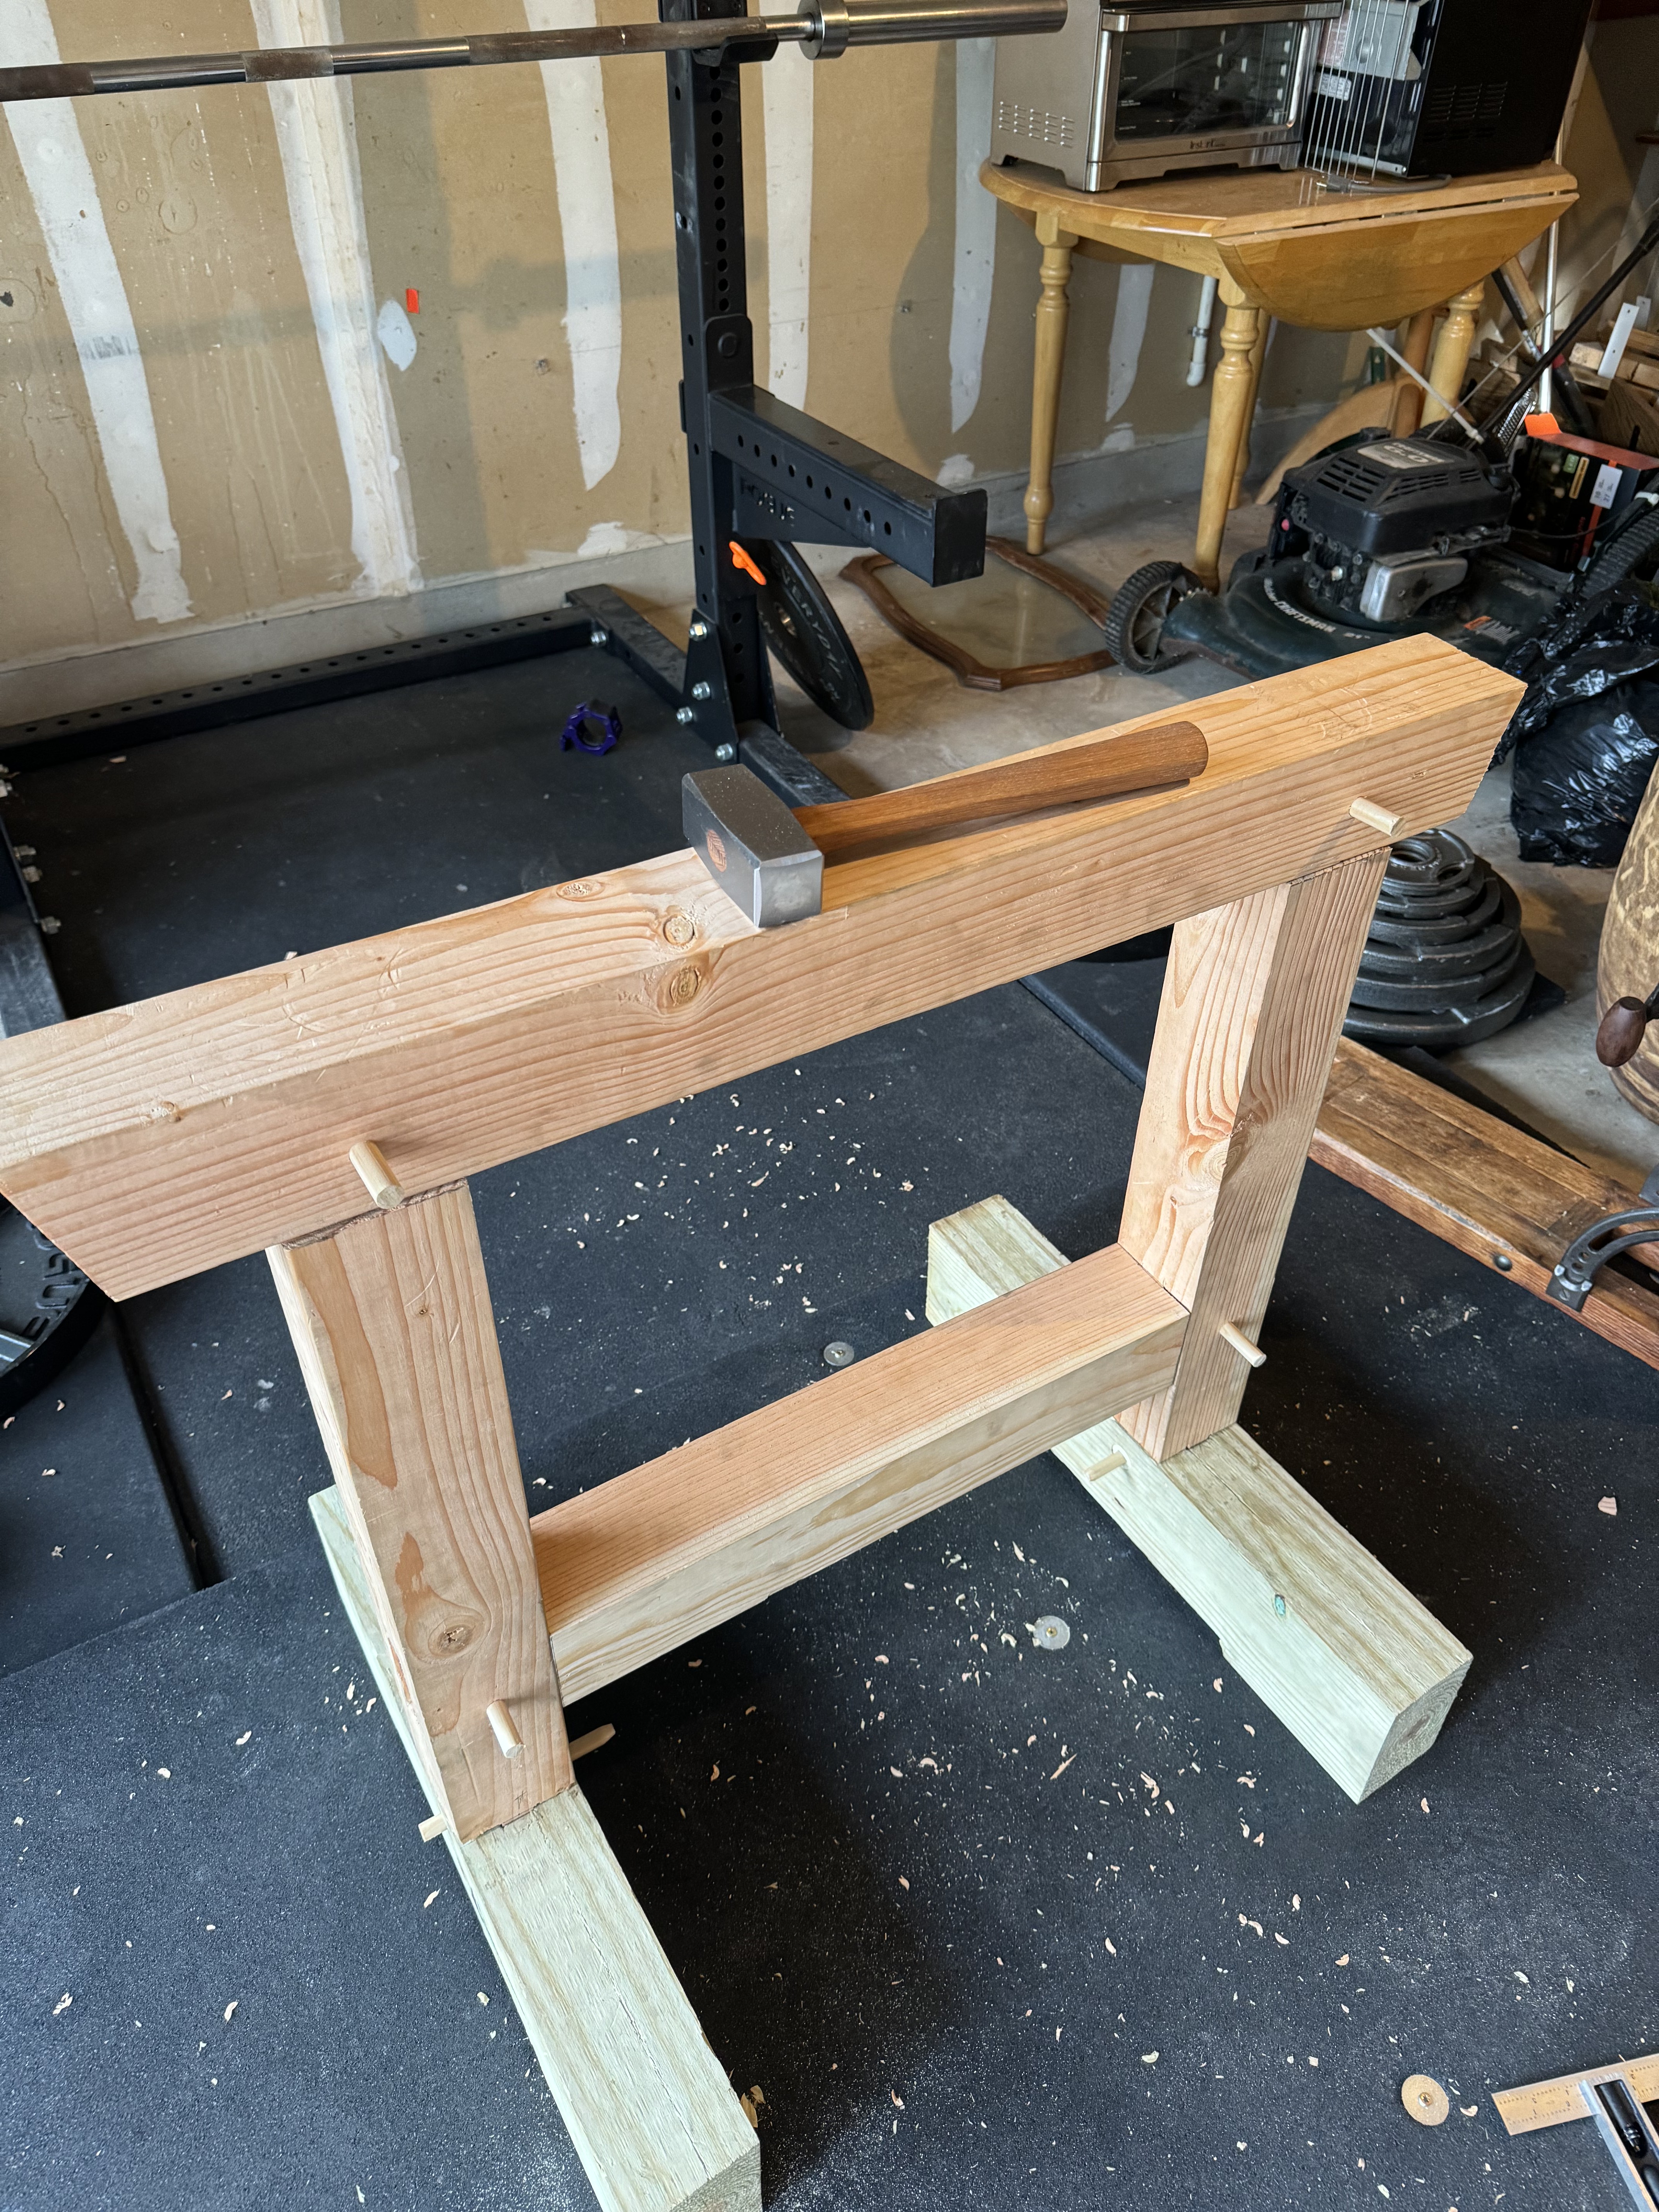
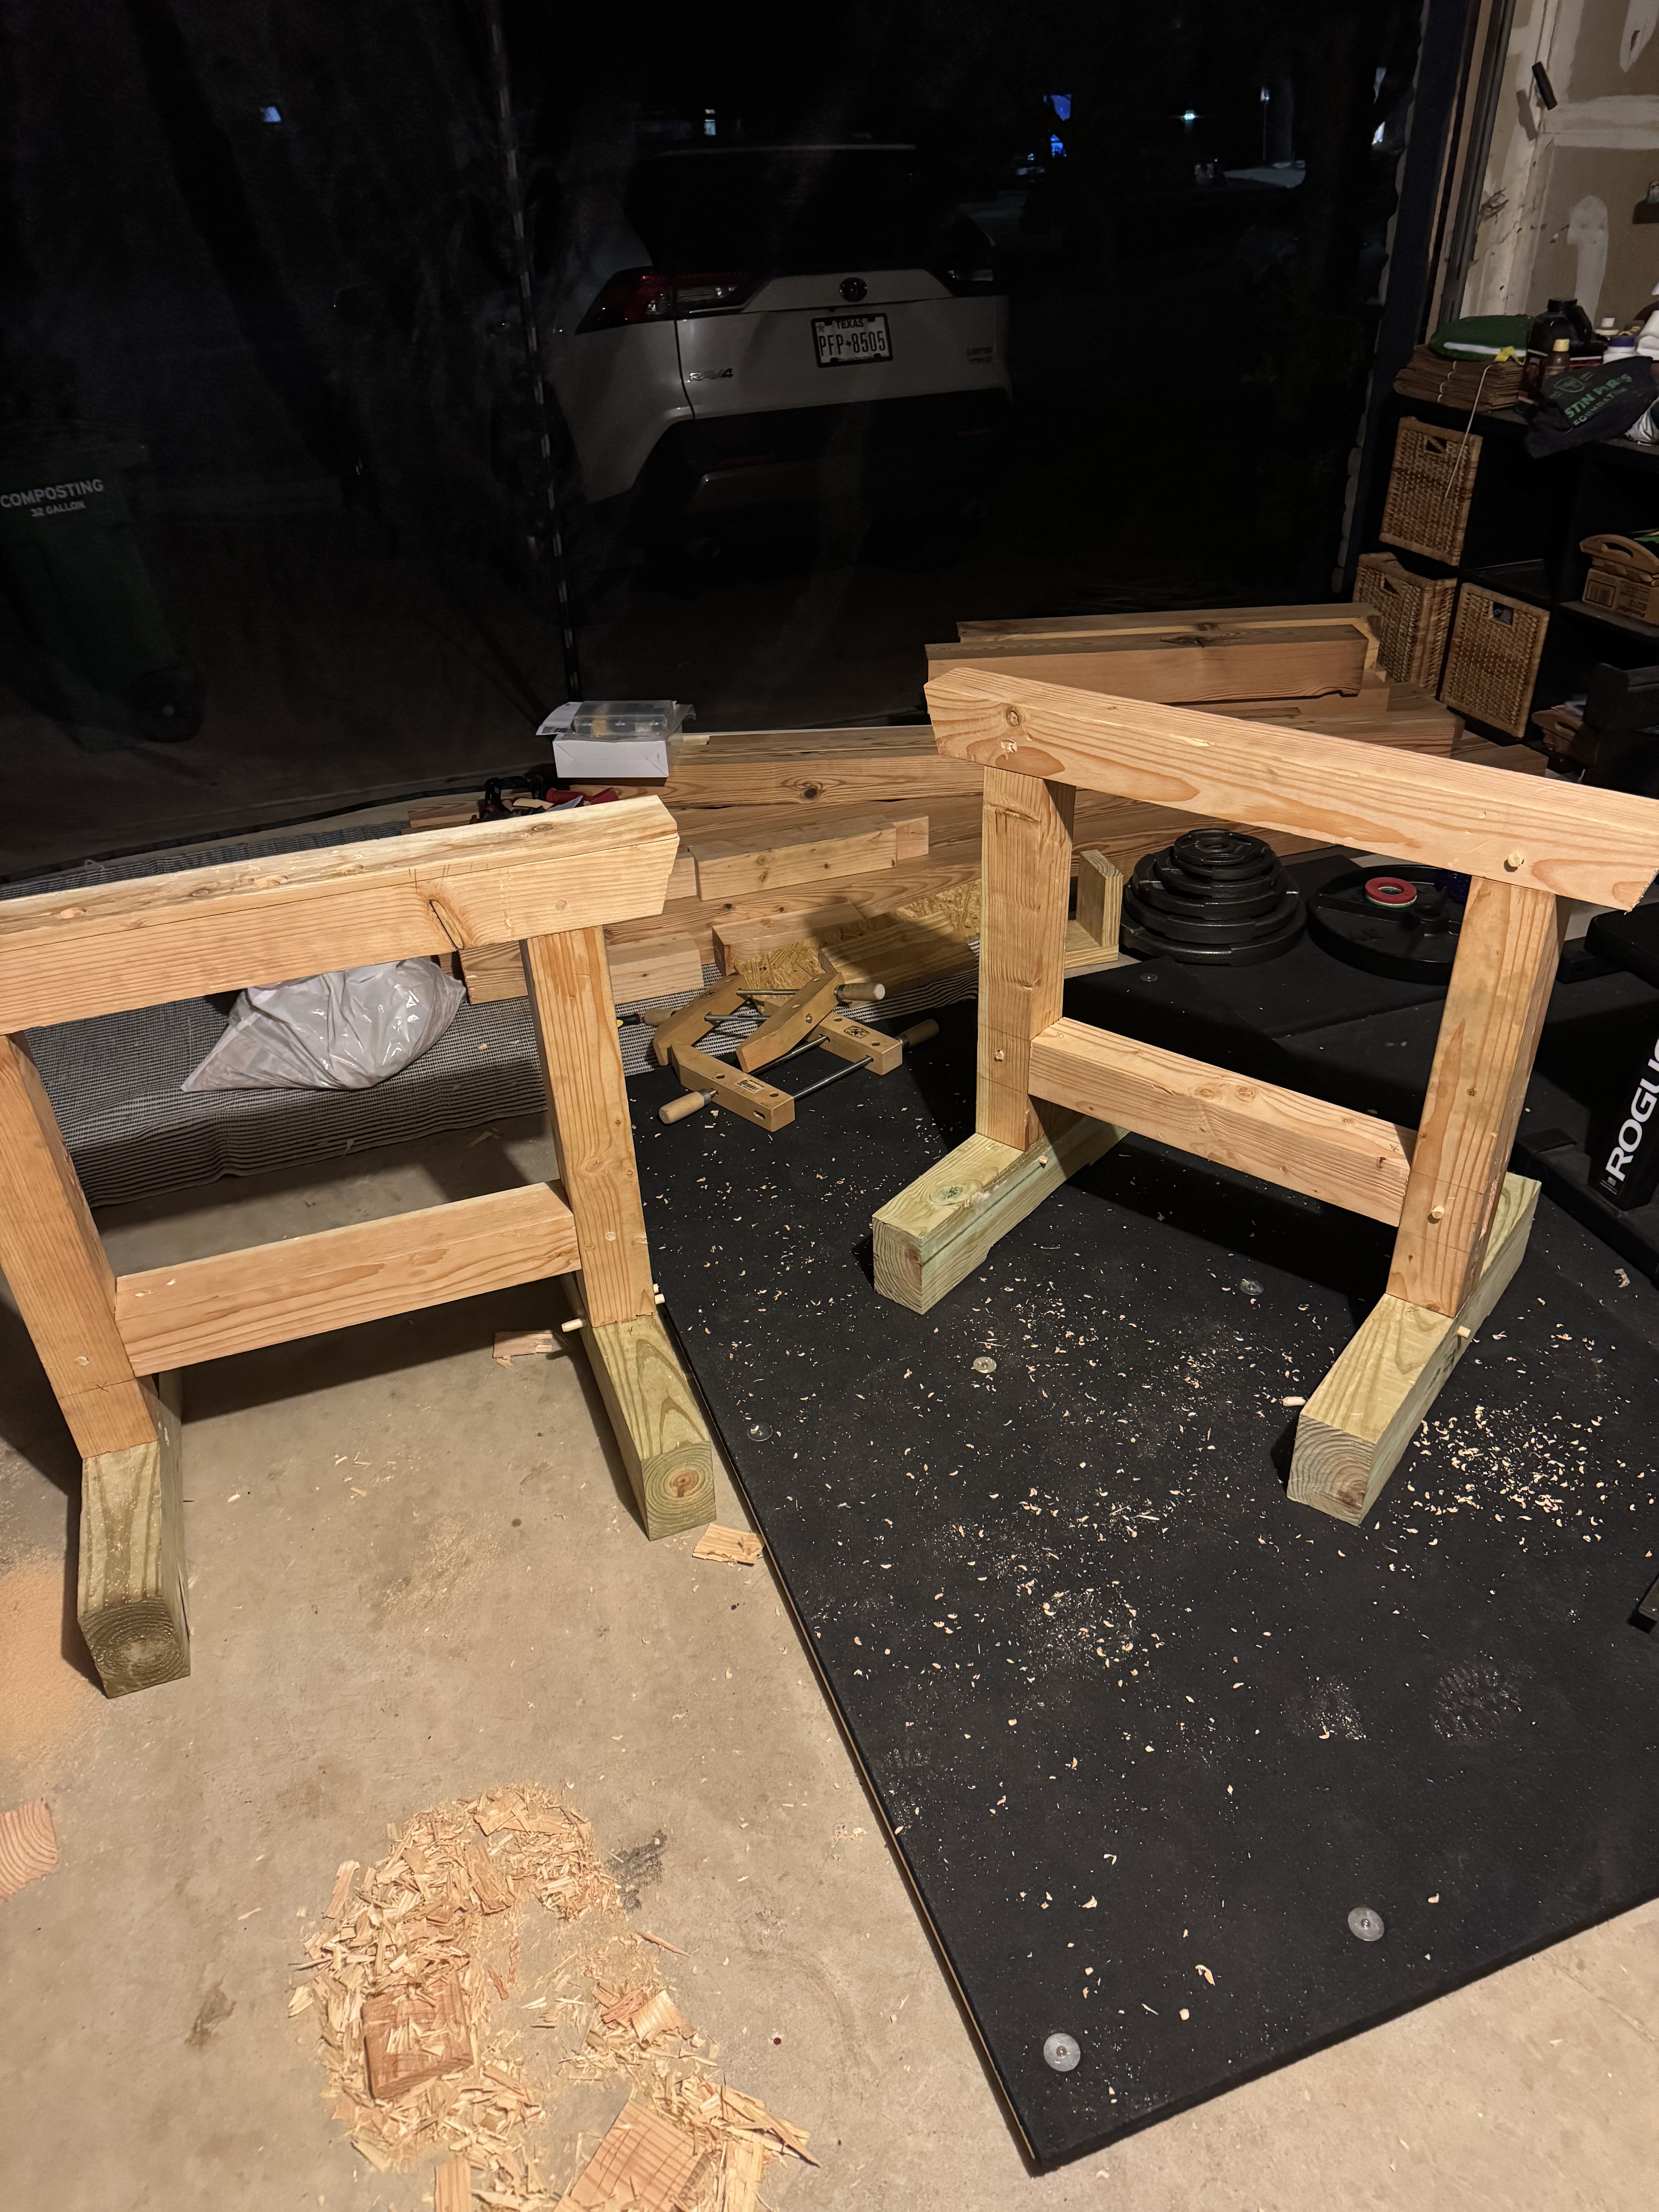
Initial assembly. The Douglas Fir beams and legs were what I could get; feet are pressure-treated for durability on the garage floor.
To lock the joints, I used poplar drawbore pegs. The beam borer simplified drilling the offset holes; getting the offset right was key. Poplar wasn’t a good peg choice because I shattered a peg on the second horse.
Part 2: Sourcing the Lumber – Reclaimed Longleaf Pine
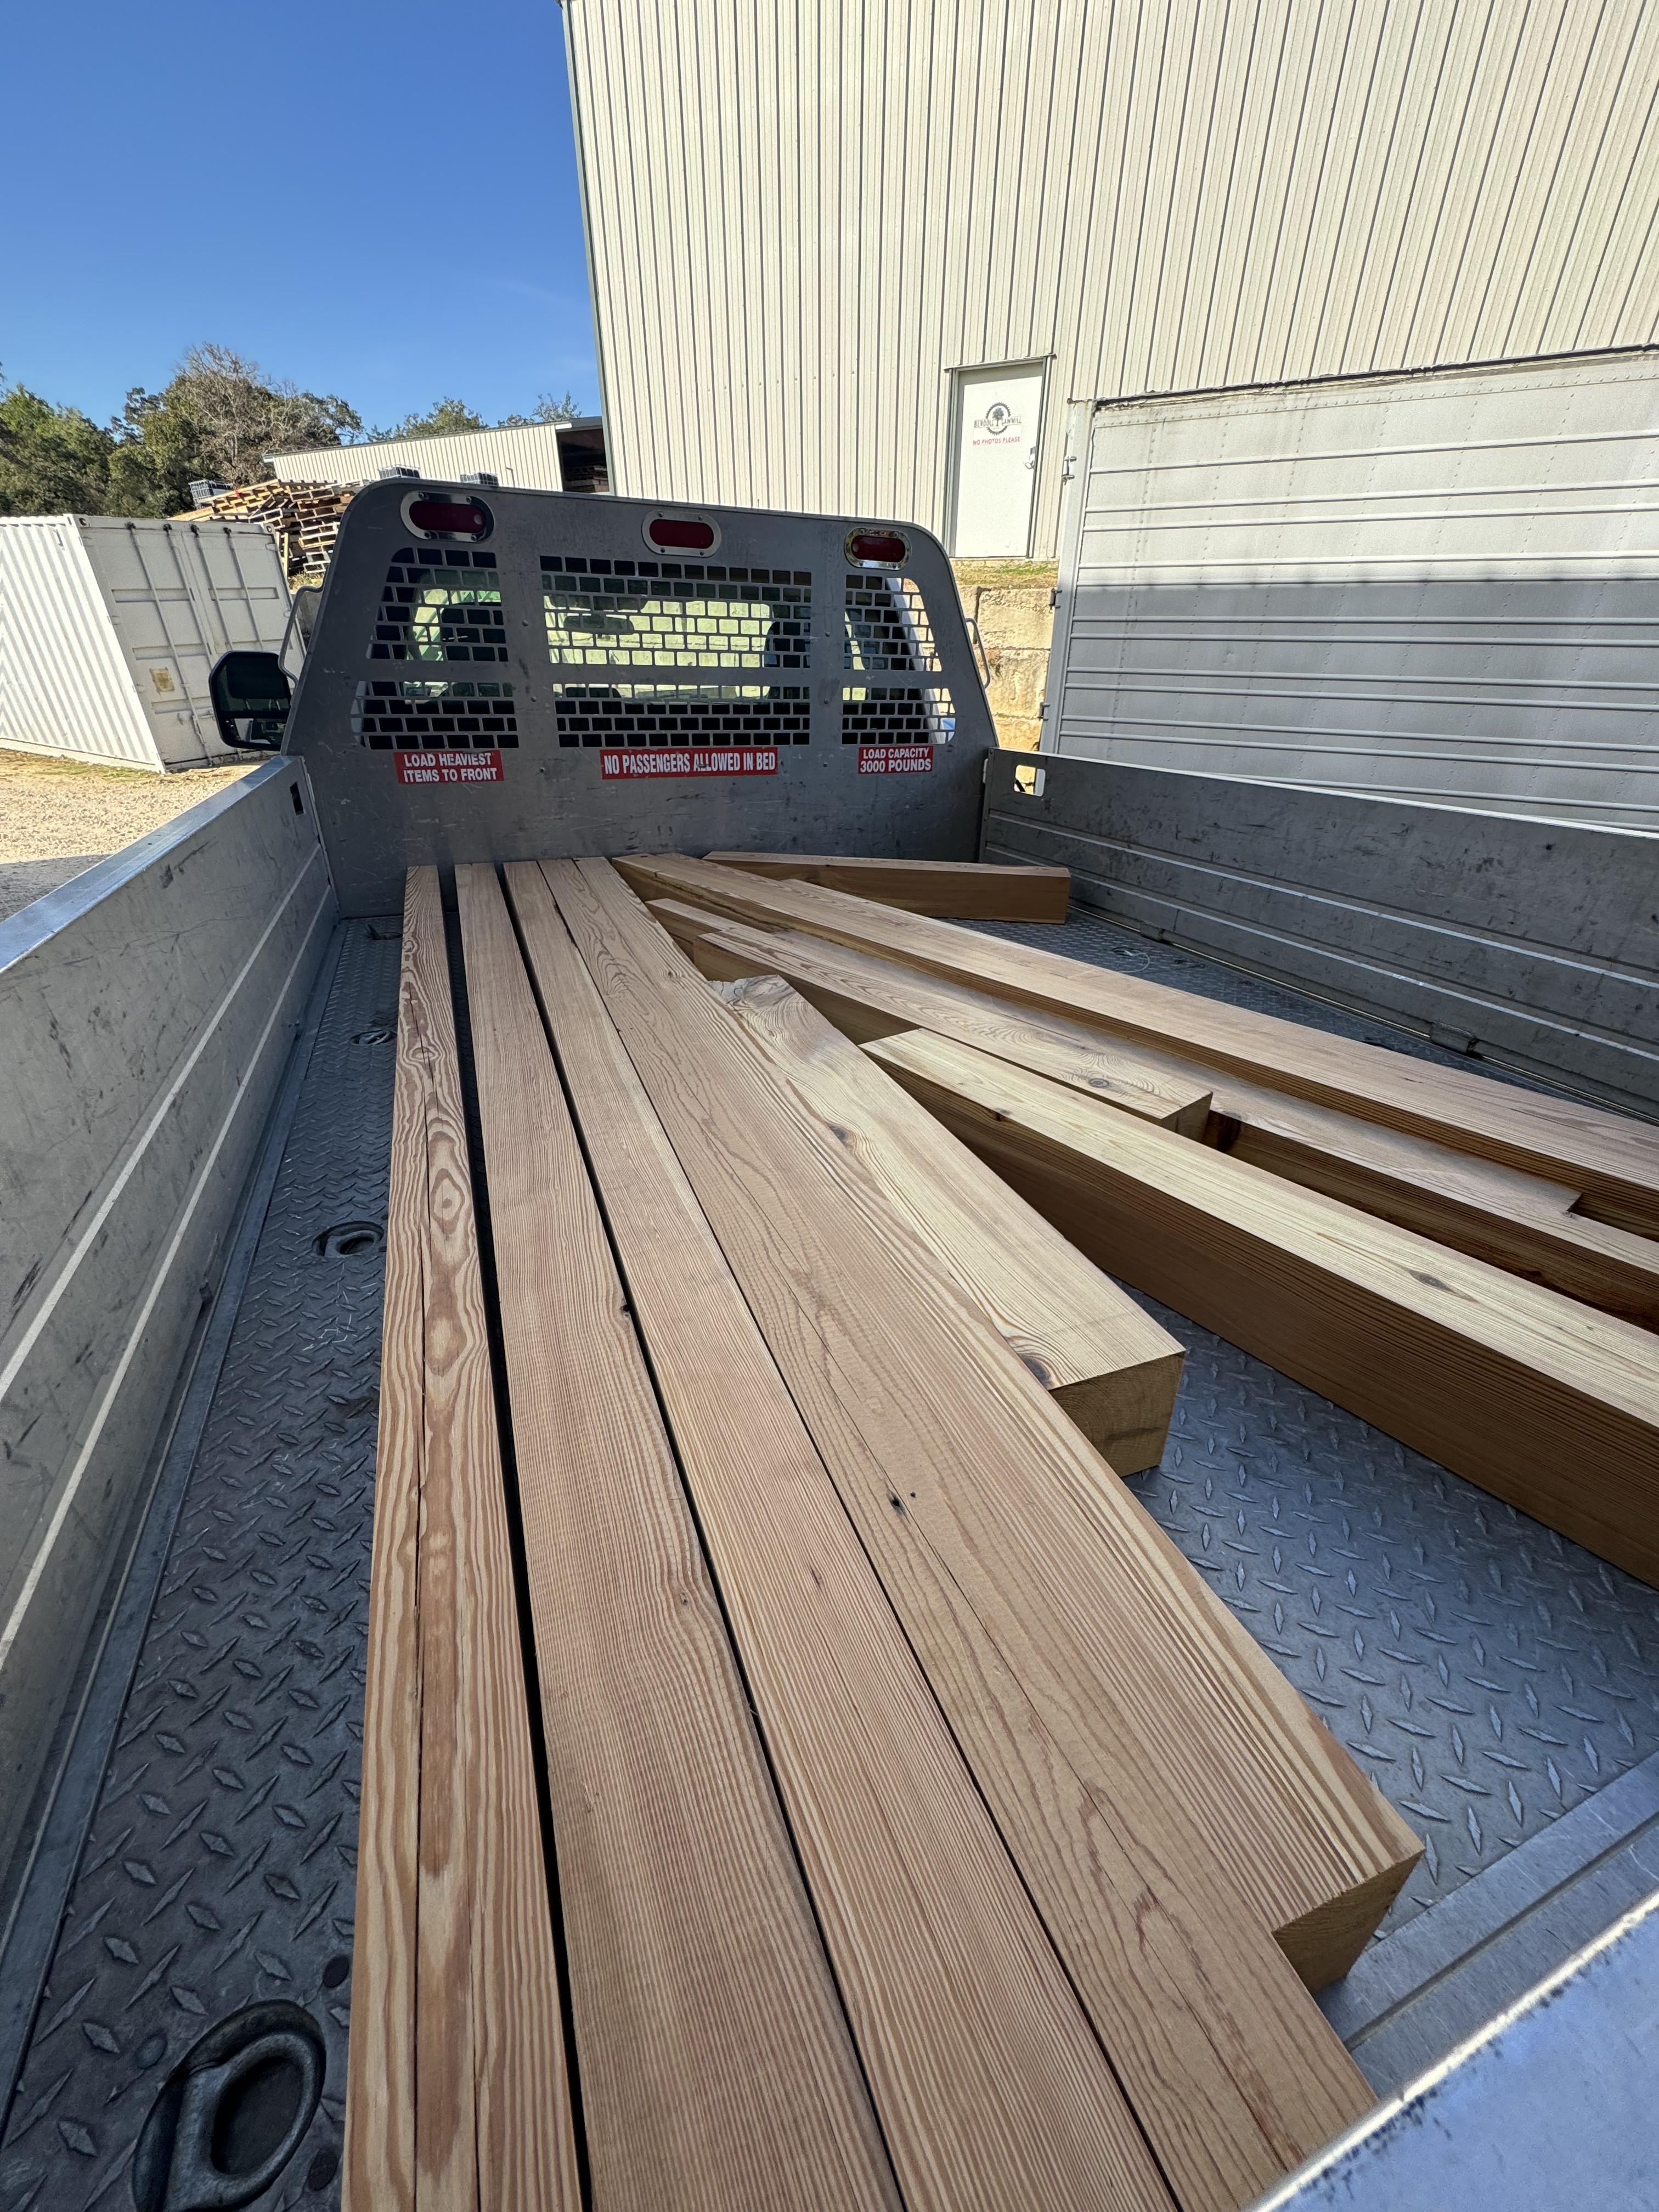
With the sawhorses built, I acquired lumber for the workbench. Christopher Schwarz’s recommends Southern Yellow Pine (SYP) or Douglas Fir; I chose reclaimed old-growth Longleaf Pine, a type of SYP, from Berdoll Sawmill (yes, this was much more expensive, probably an order of magnitude more so but I really wanted to put old growth trees into my workbench).
As I use only hand tools and have limited time, I bought the lumber dimensioned (I missed out on the right-of-passage it other woodworkers go through to flatten and thickness their SYP boards). The 8-foot top required a seven-piece glue-up, as full-width slabs of that length were unavailable. Legs, stringers, and stretchers were solid slabs.
Transporting the hundreds of pounds of dense pine myself was nerve-wracking and this marked the project’s official start.
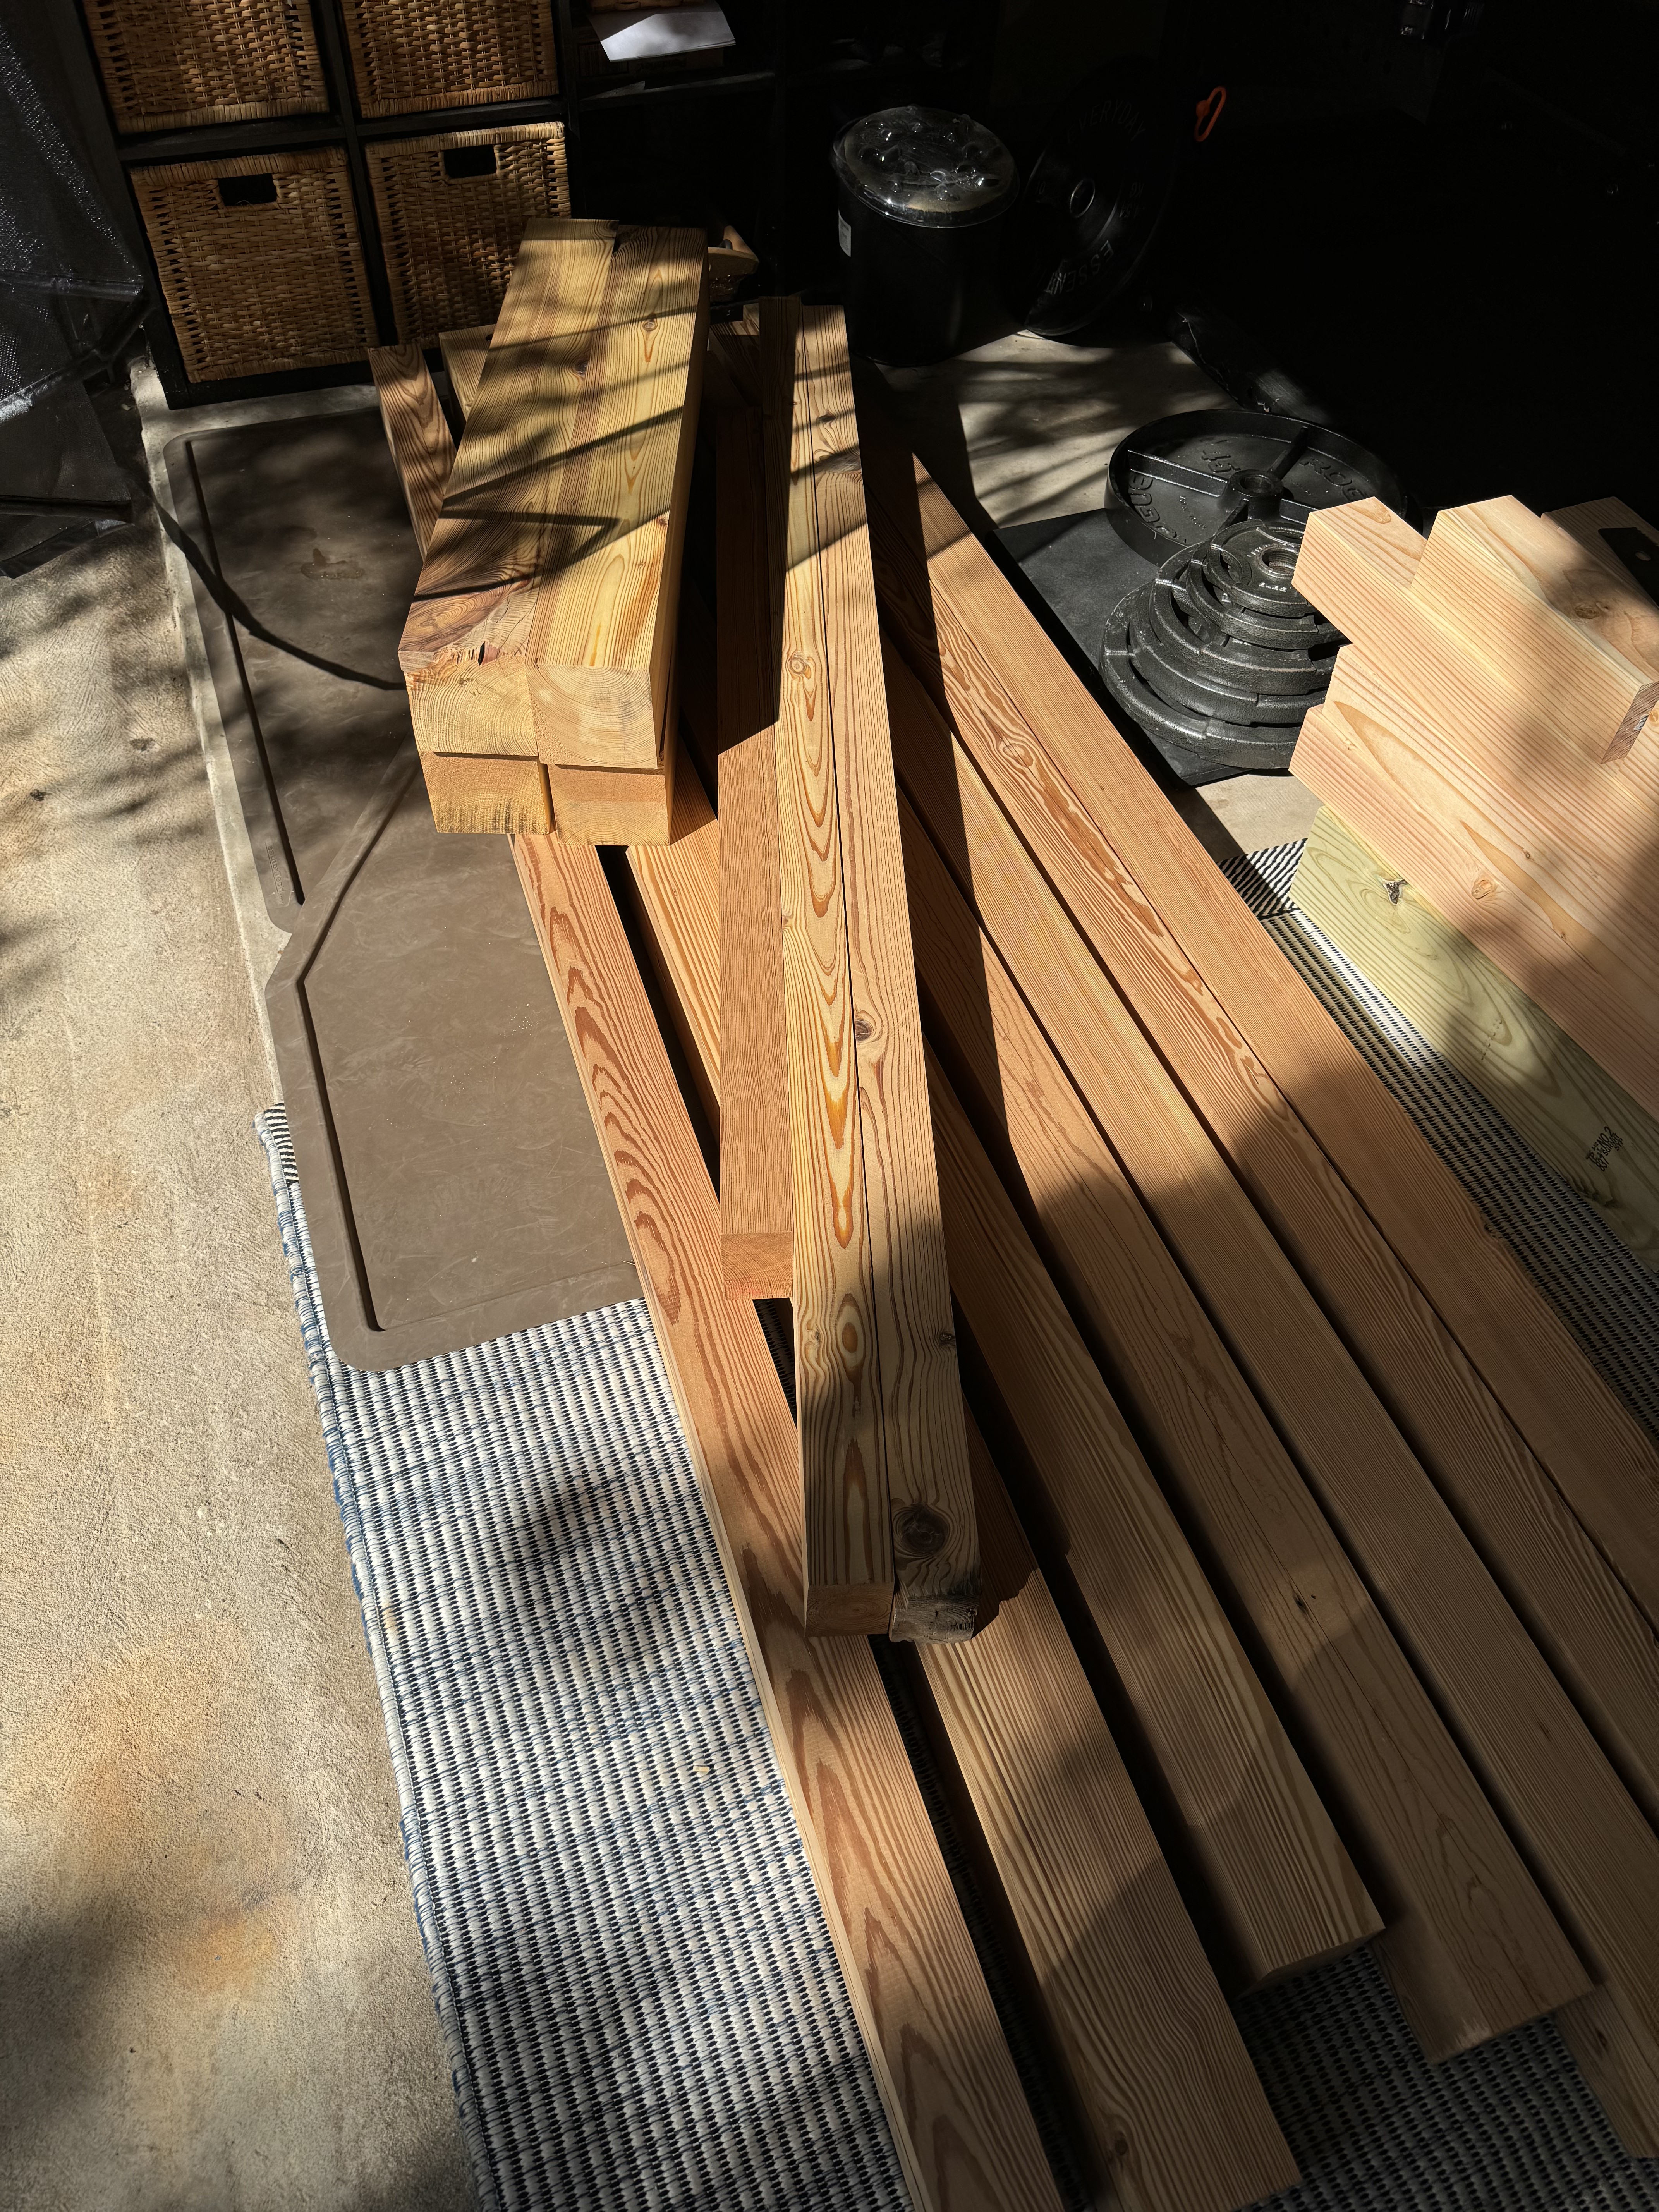
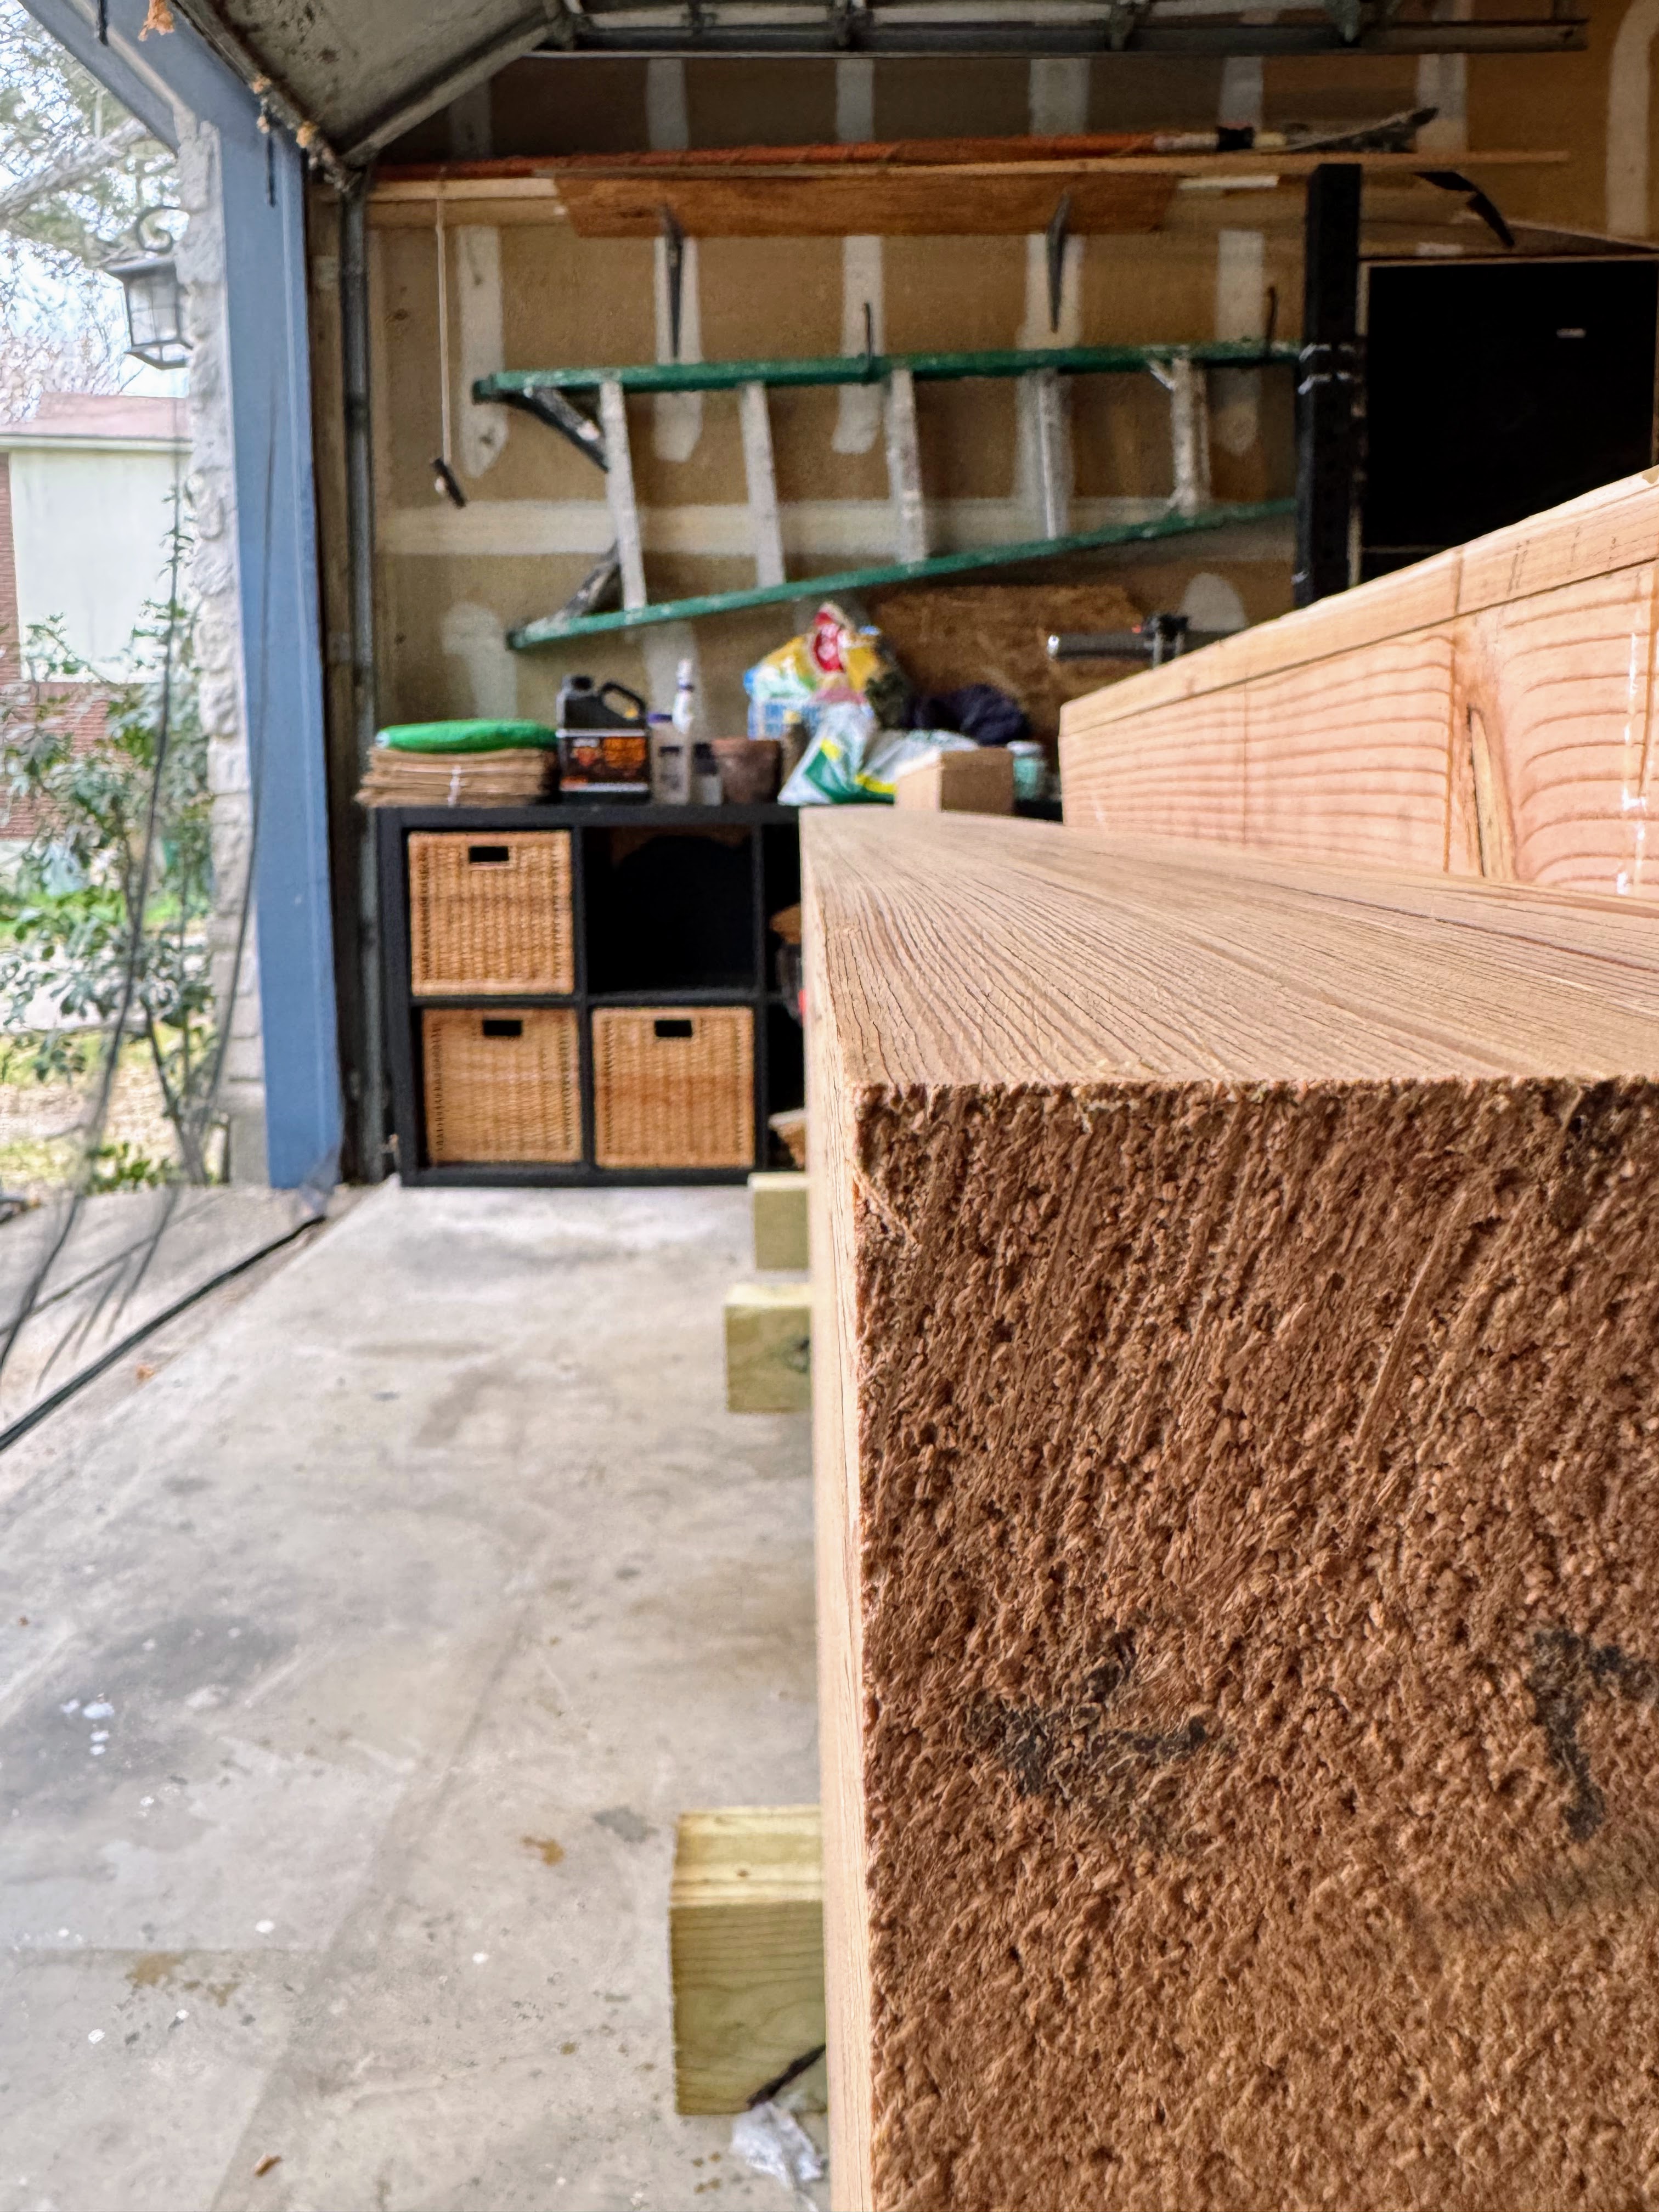
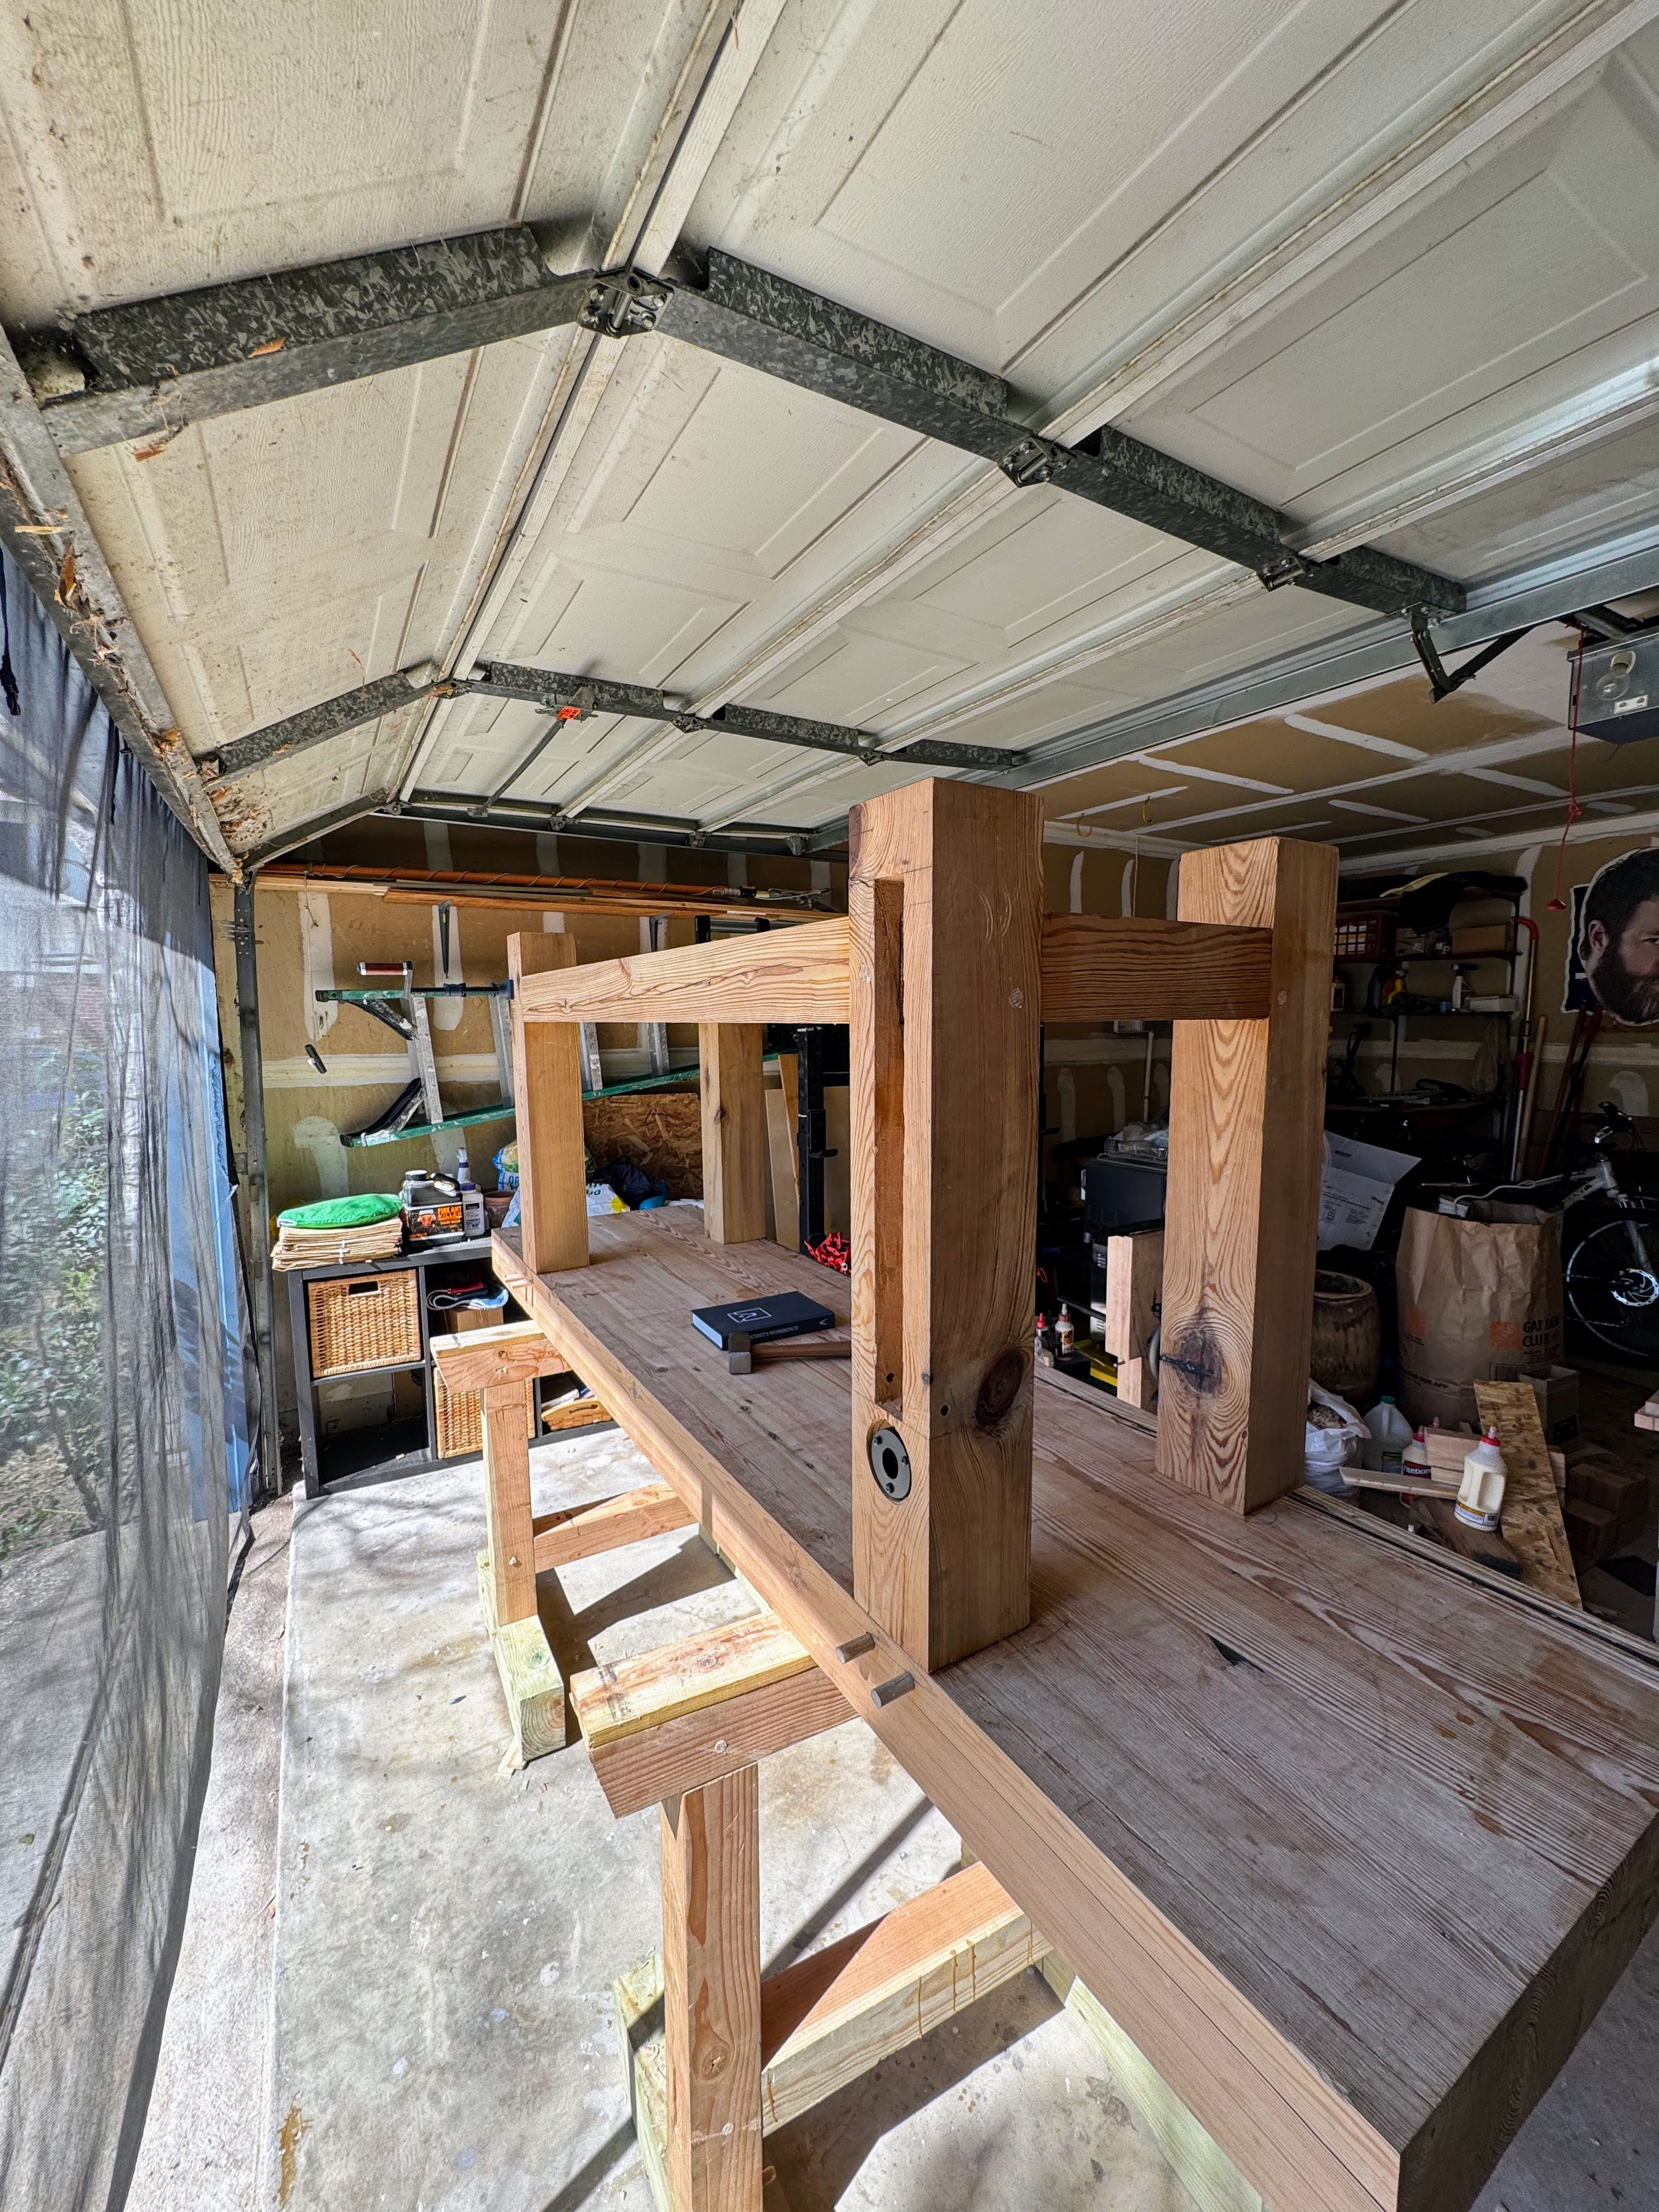
In the garage, I organized the lumber on the sawhorses.

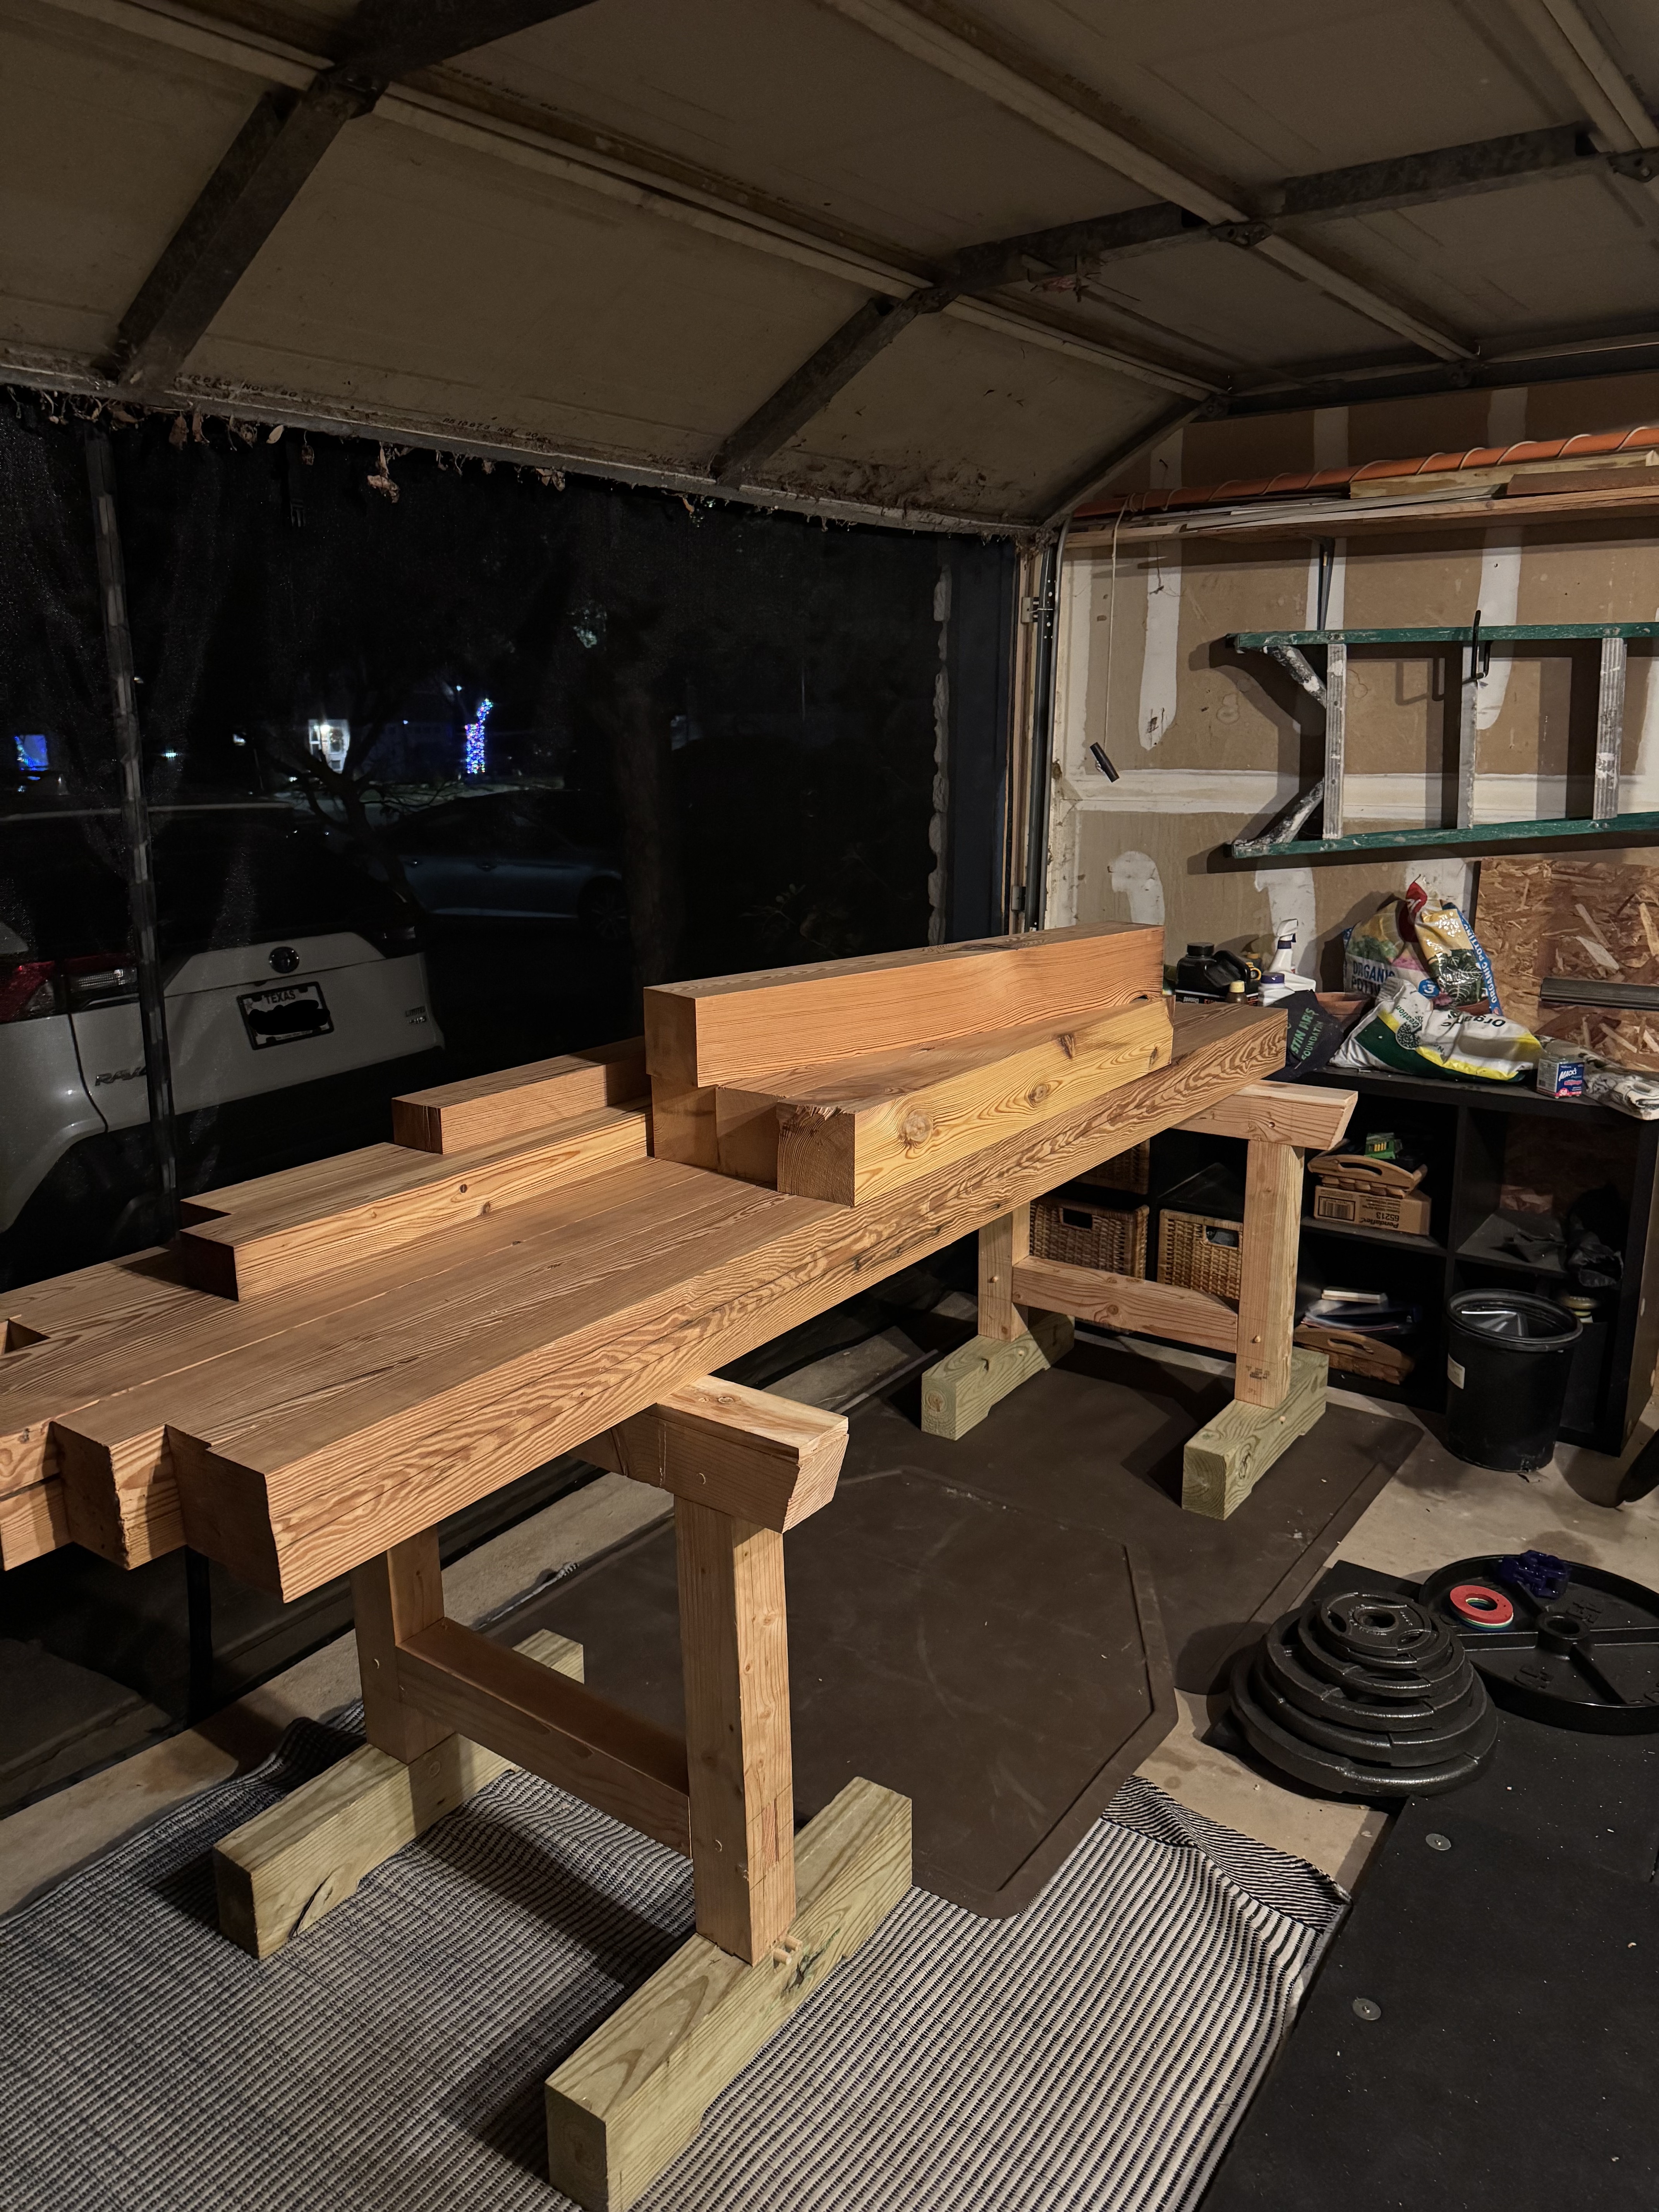
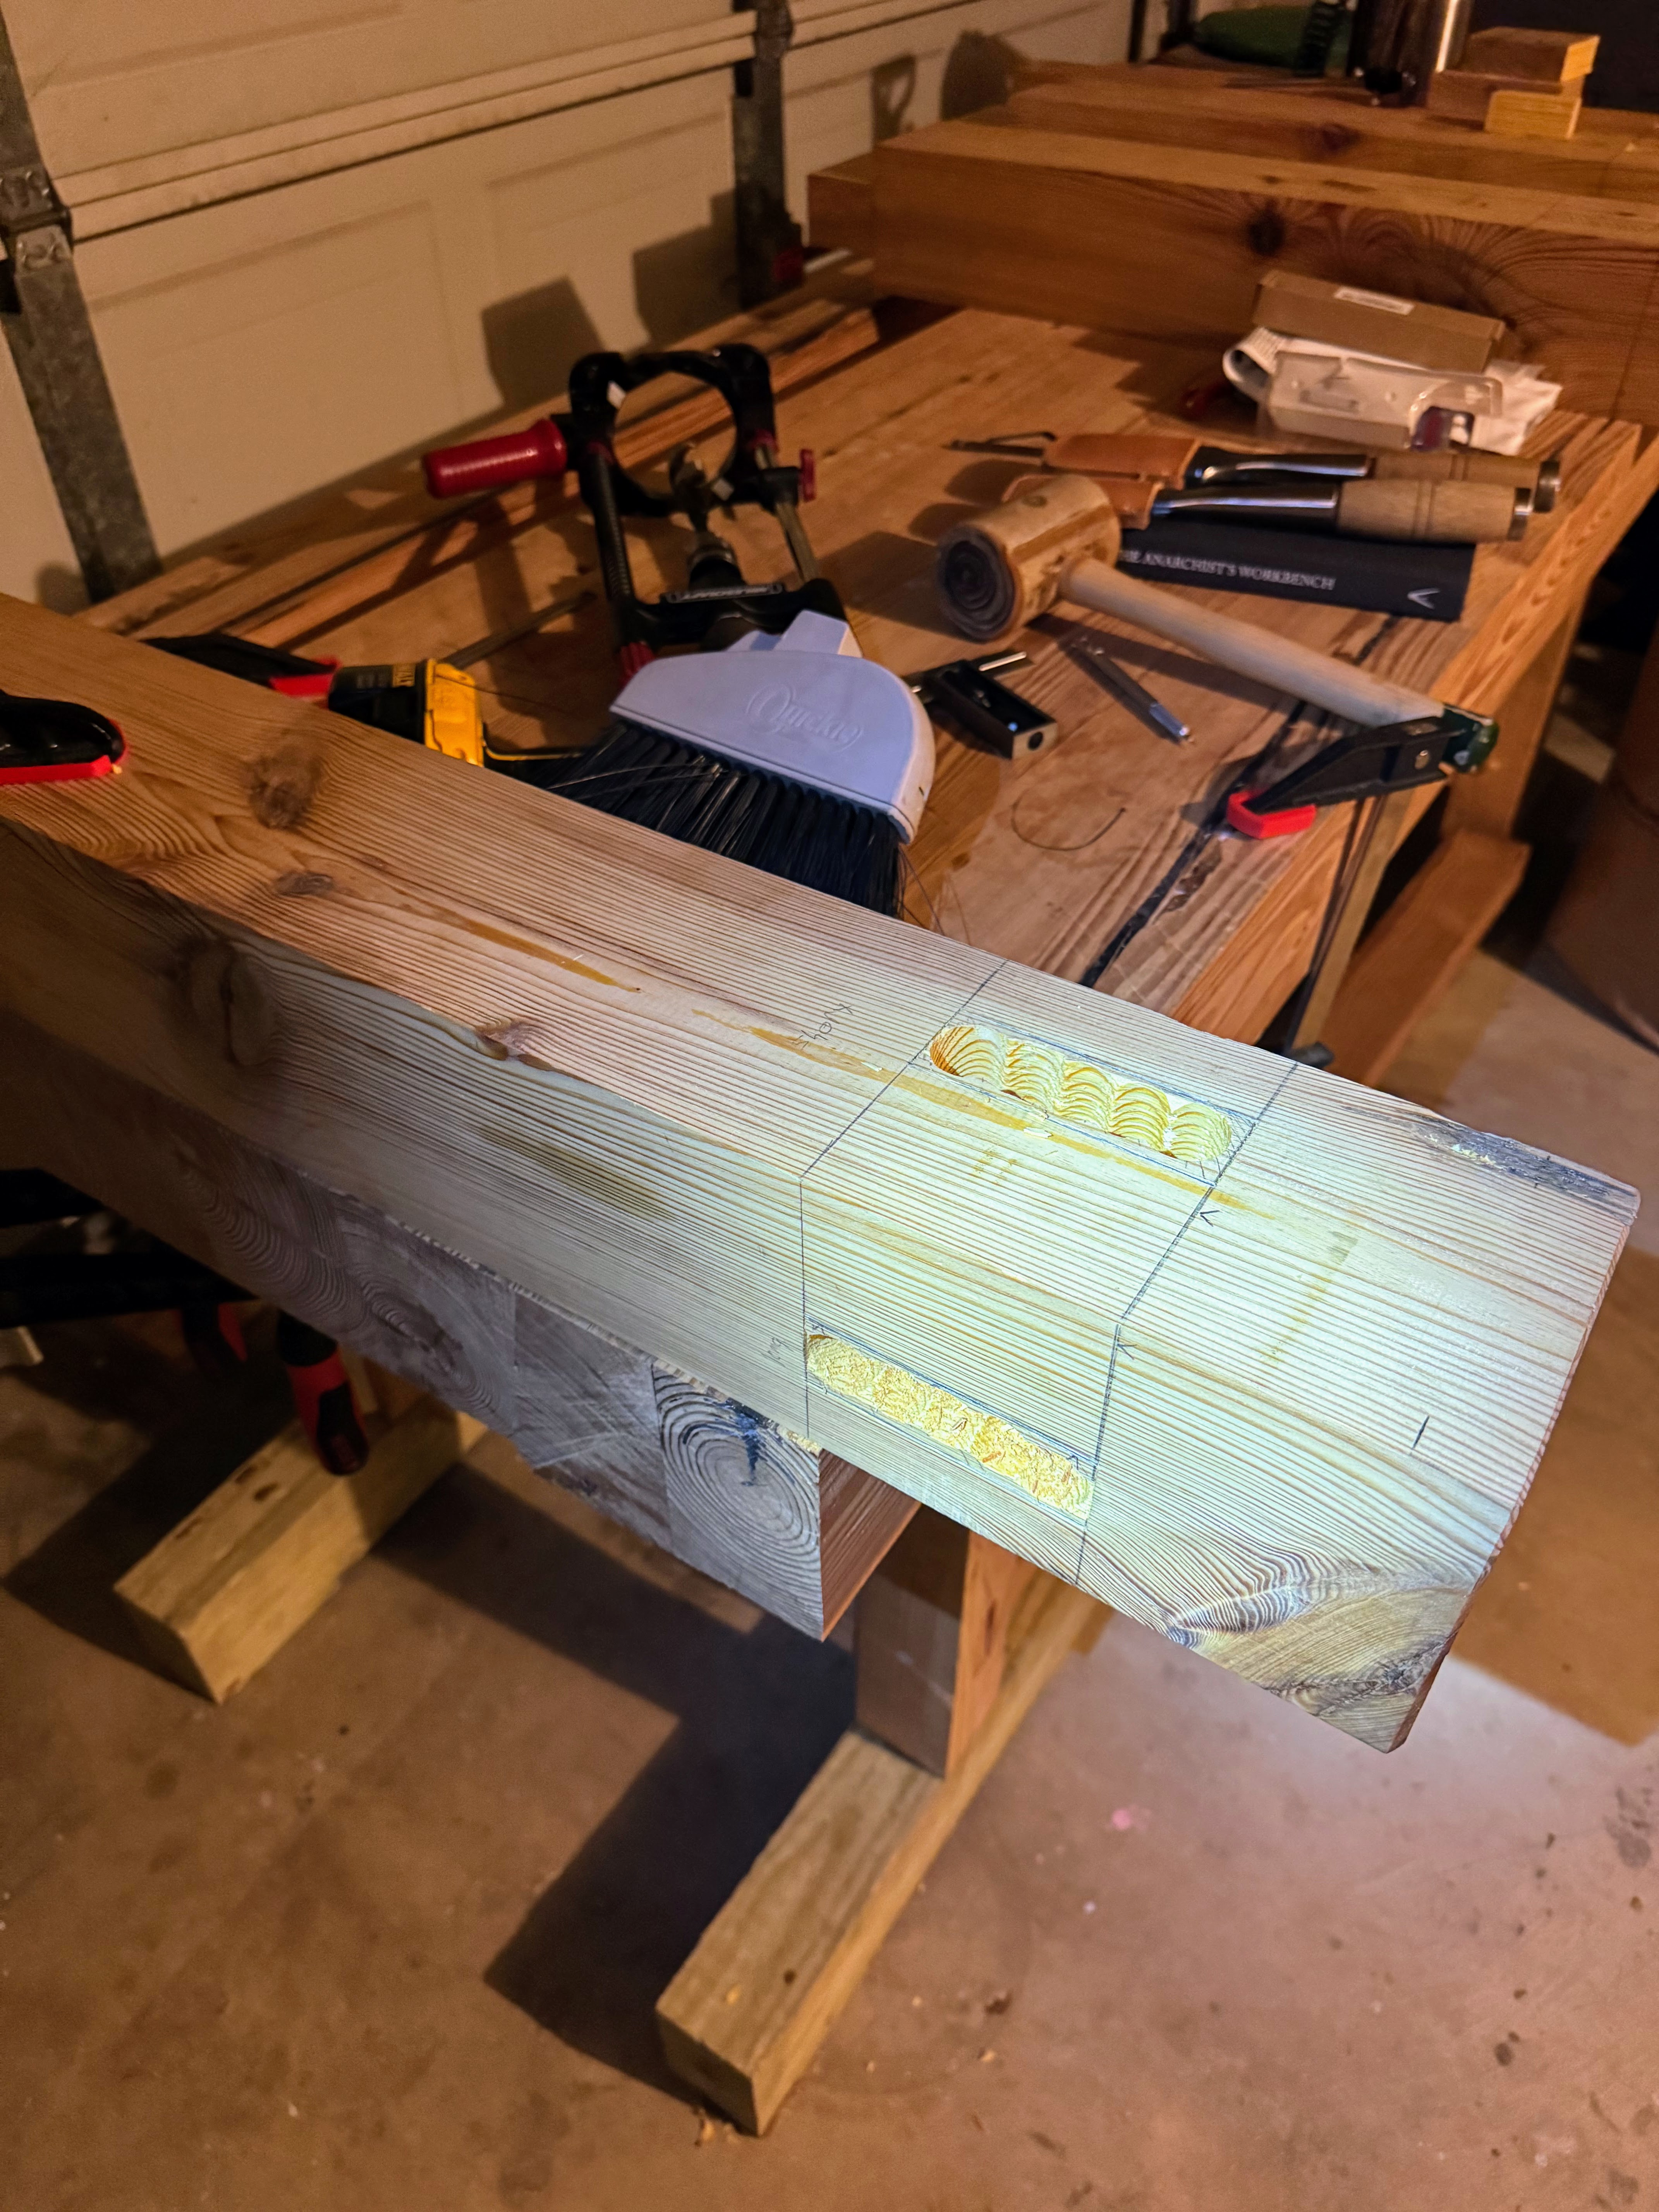
Part 3: Preparing the Top Beams
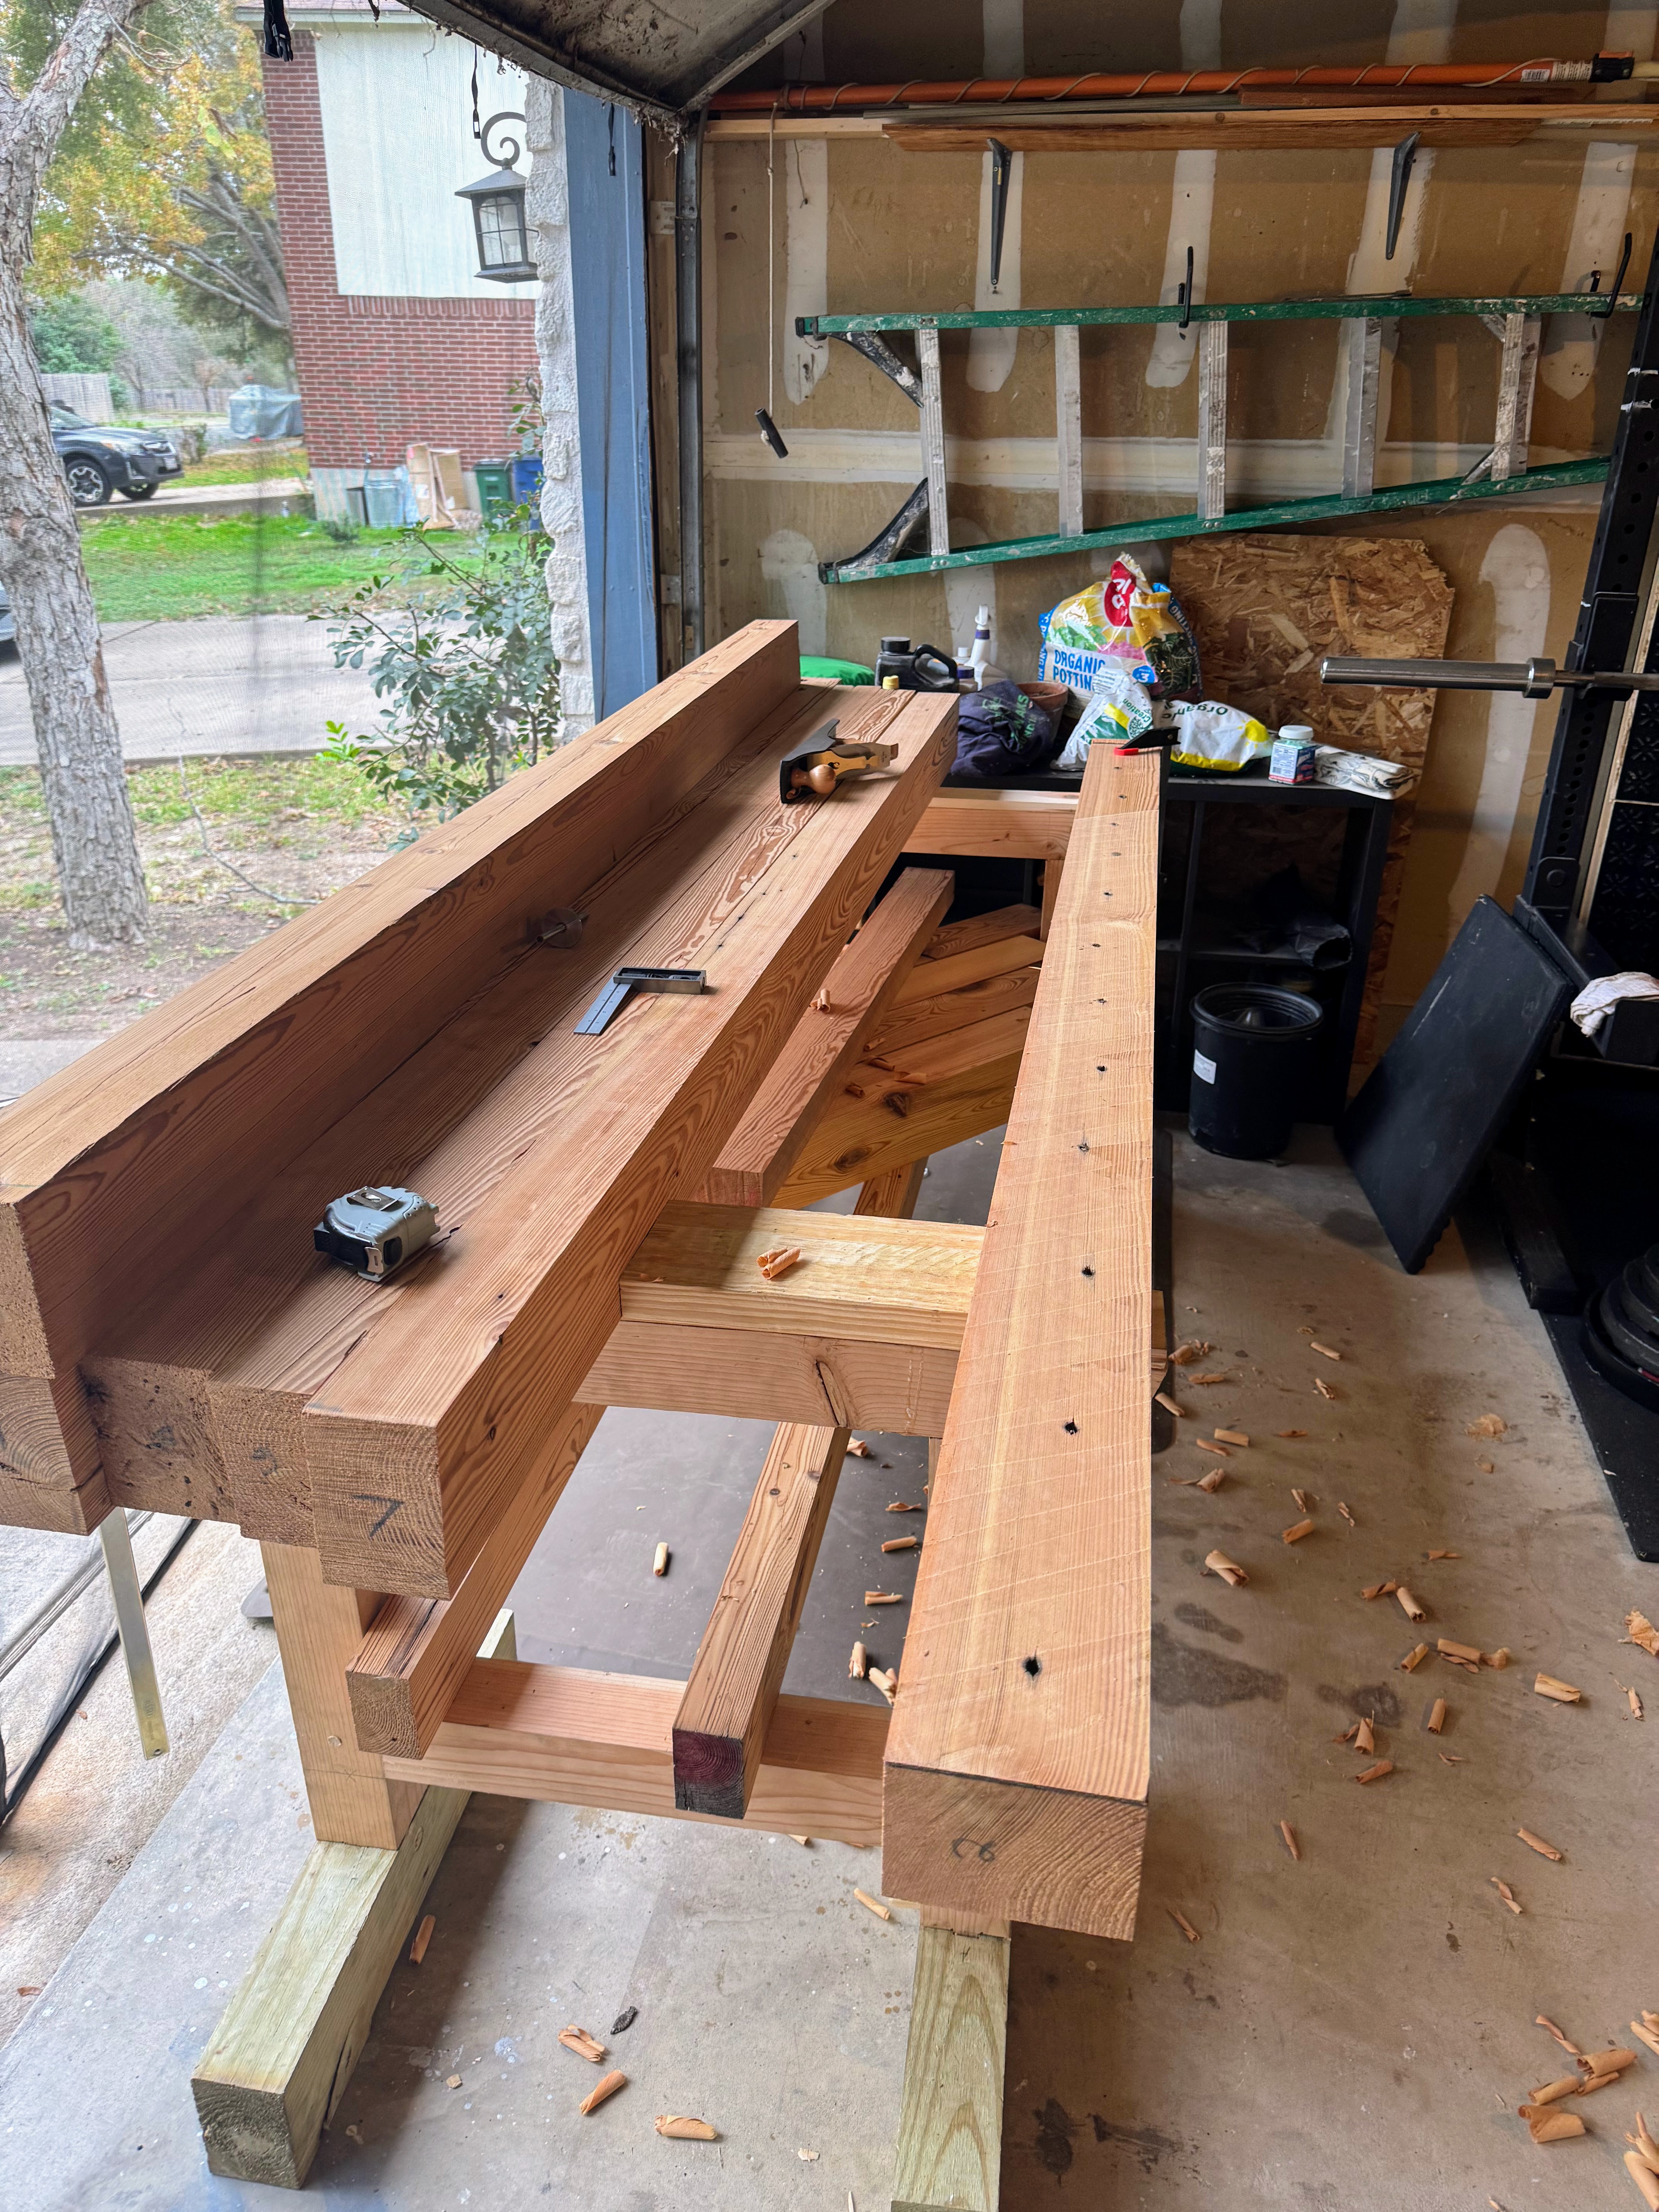
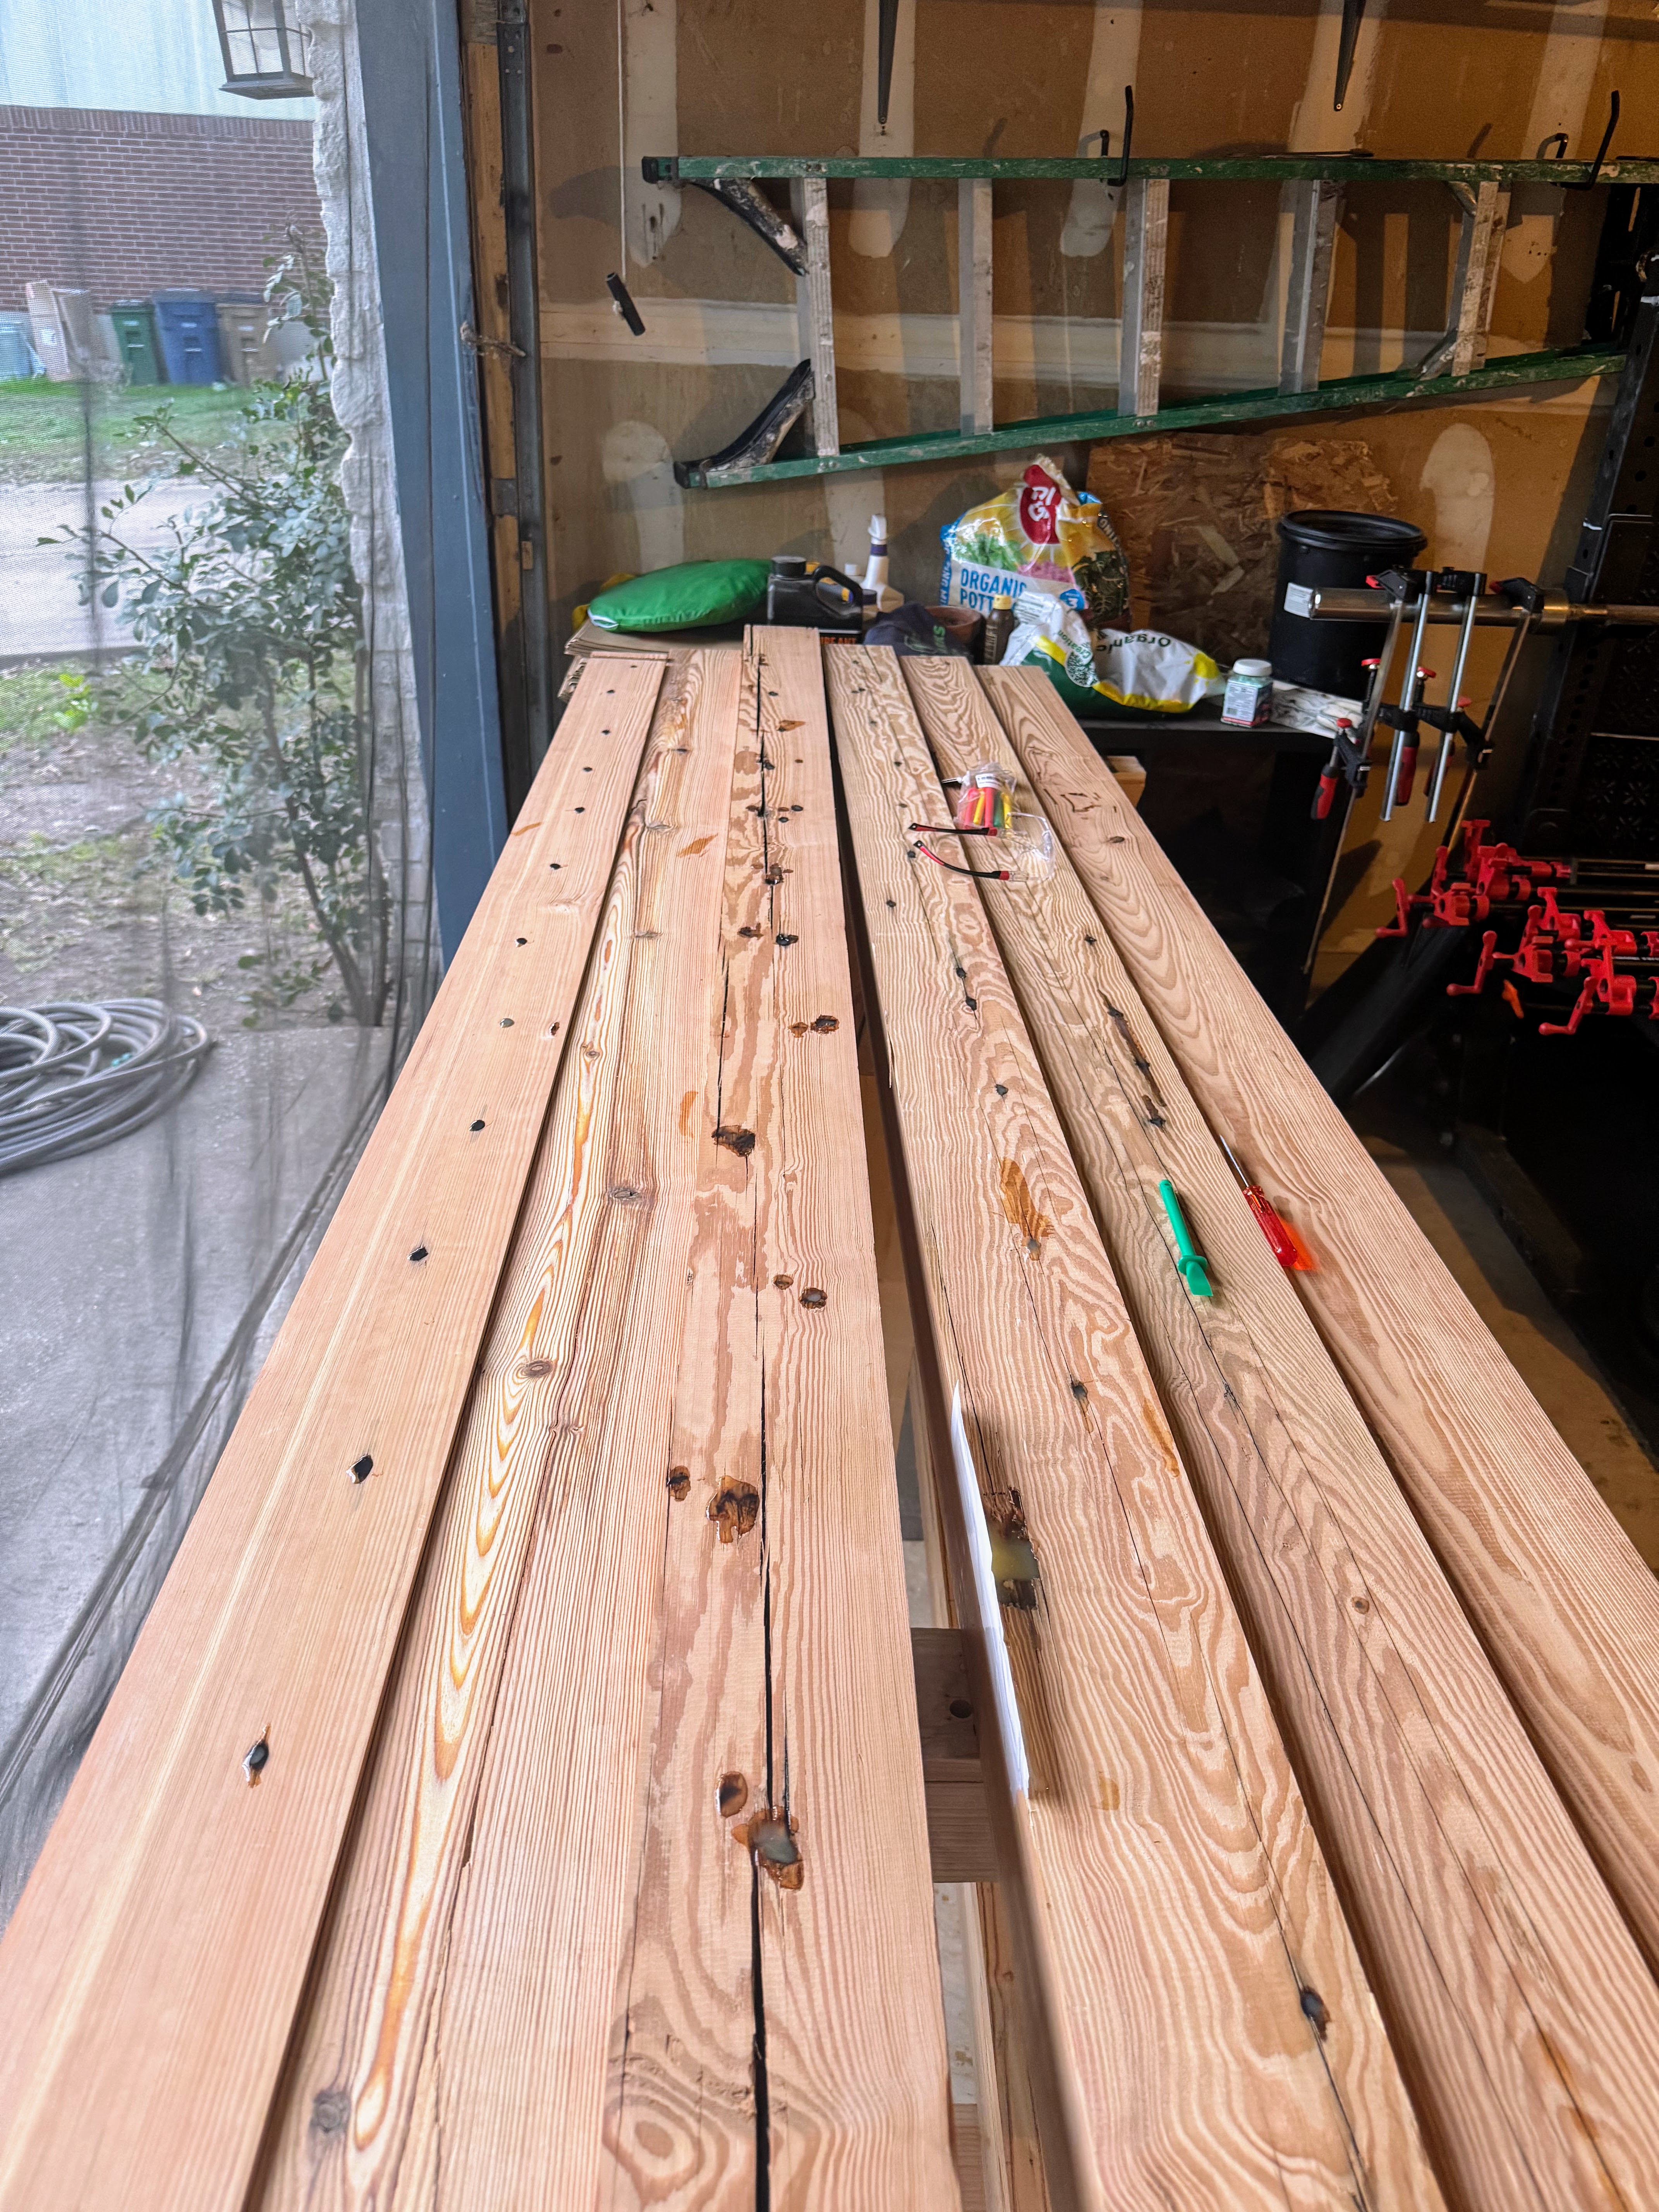
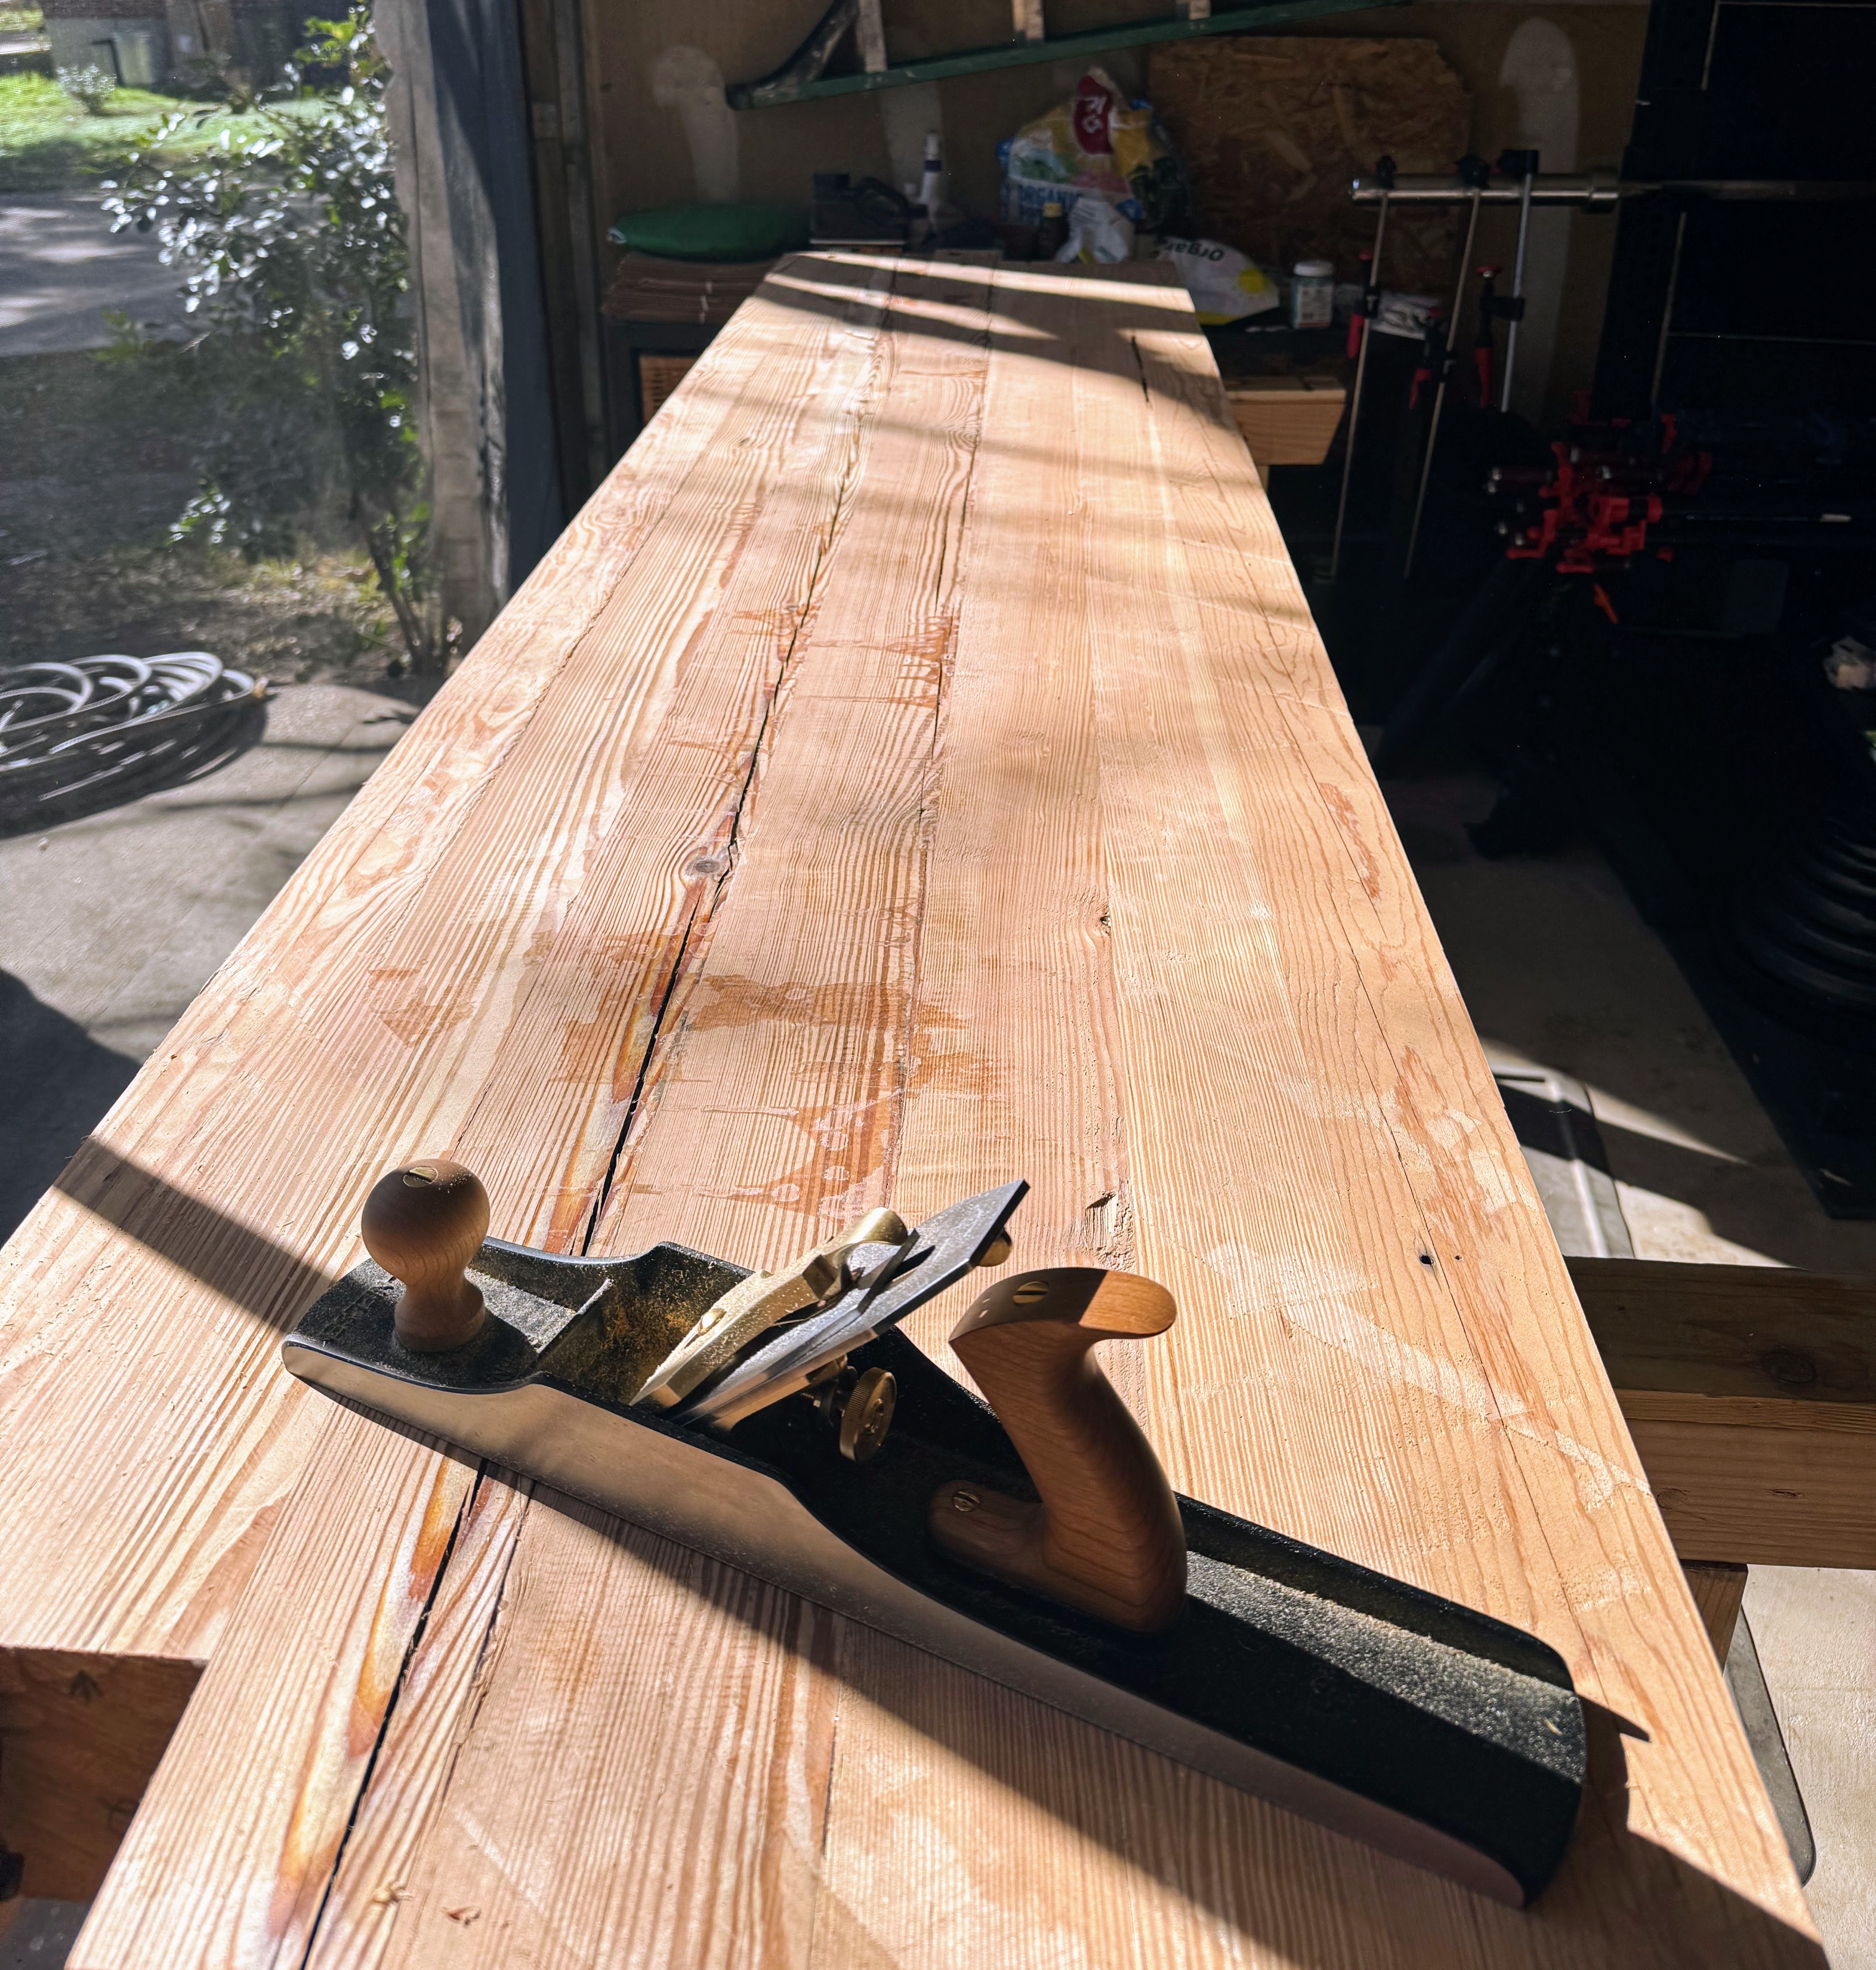
With the Longleaf Pine staged, I began preparing the individual beams for the benchtop lamination. This involved addressing several issues common with reclaimed lumber and ensuring flat, true surfaces for glue-up.
First, I corrected dimensioning problems. One beam tapered along its length and required planing to true it. Another had significant planer snipe at one end that needed removal. All beams were then worked with a jointer plane on their glue-up faces to ensure they were flat and square.
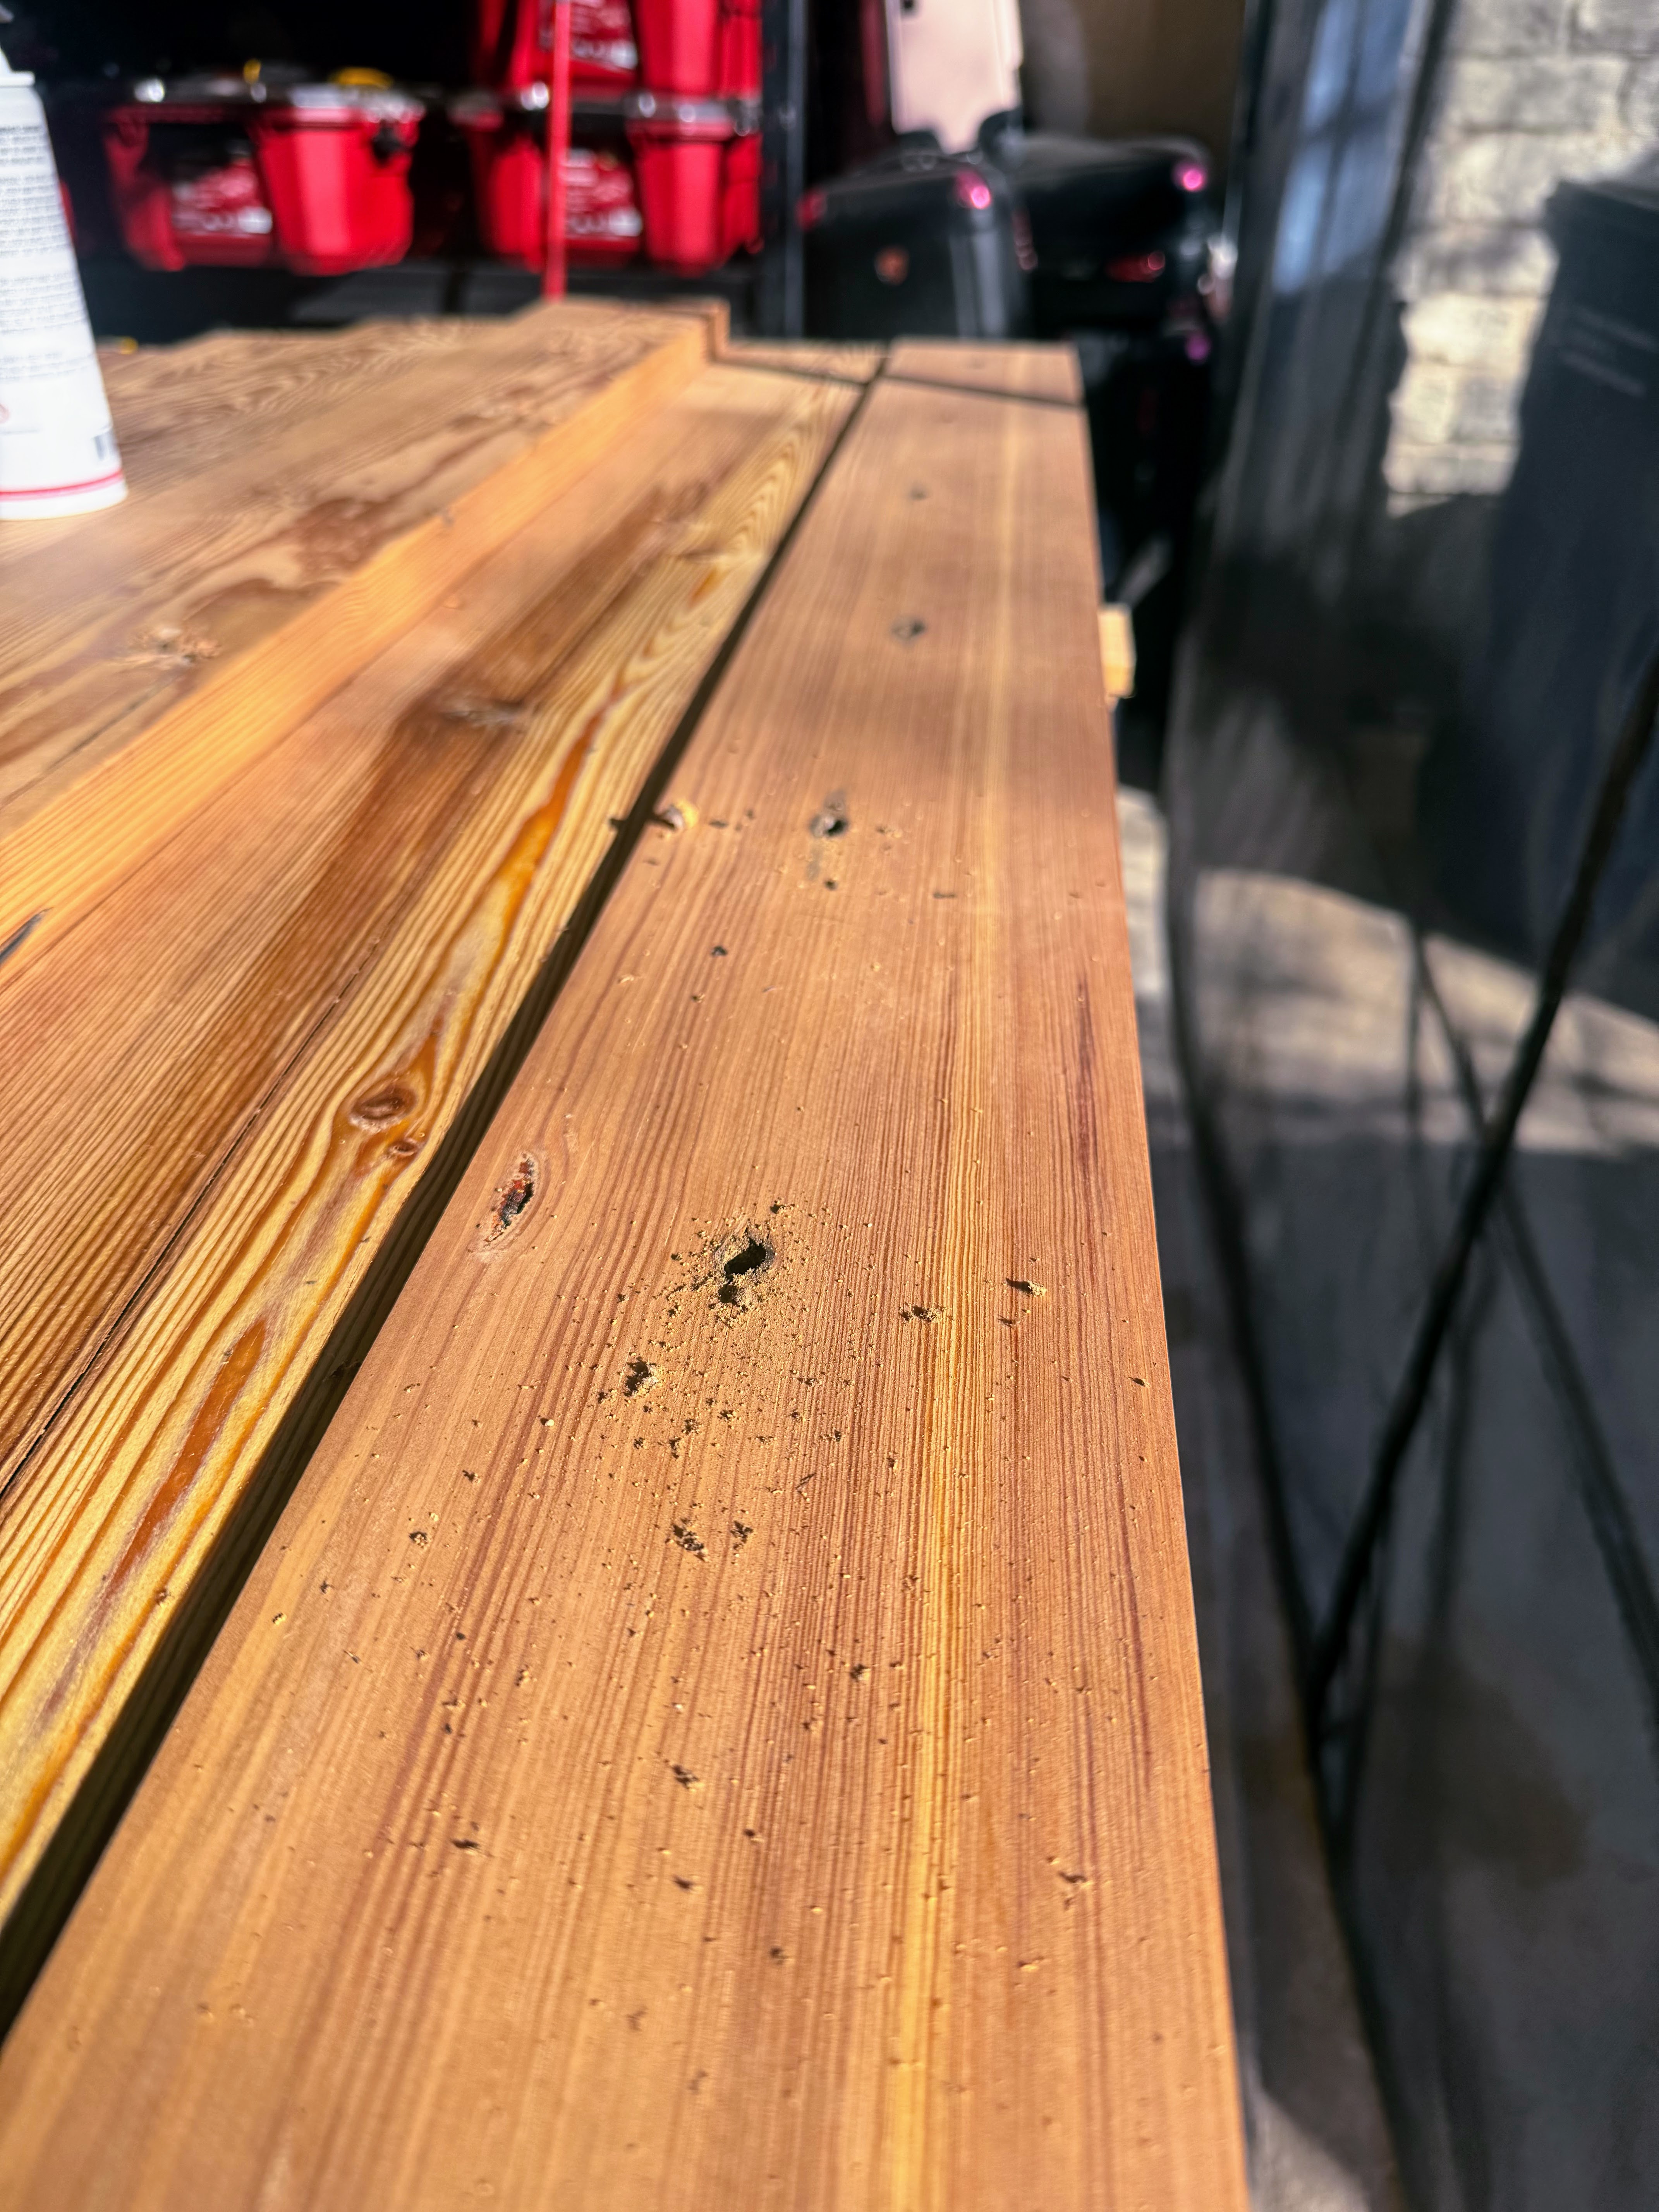
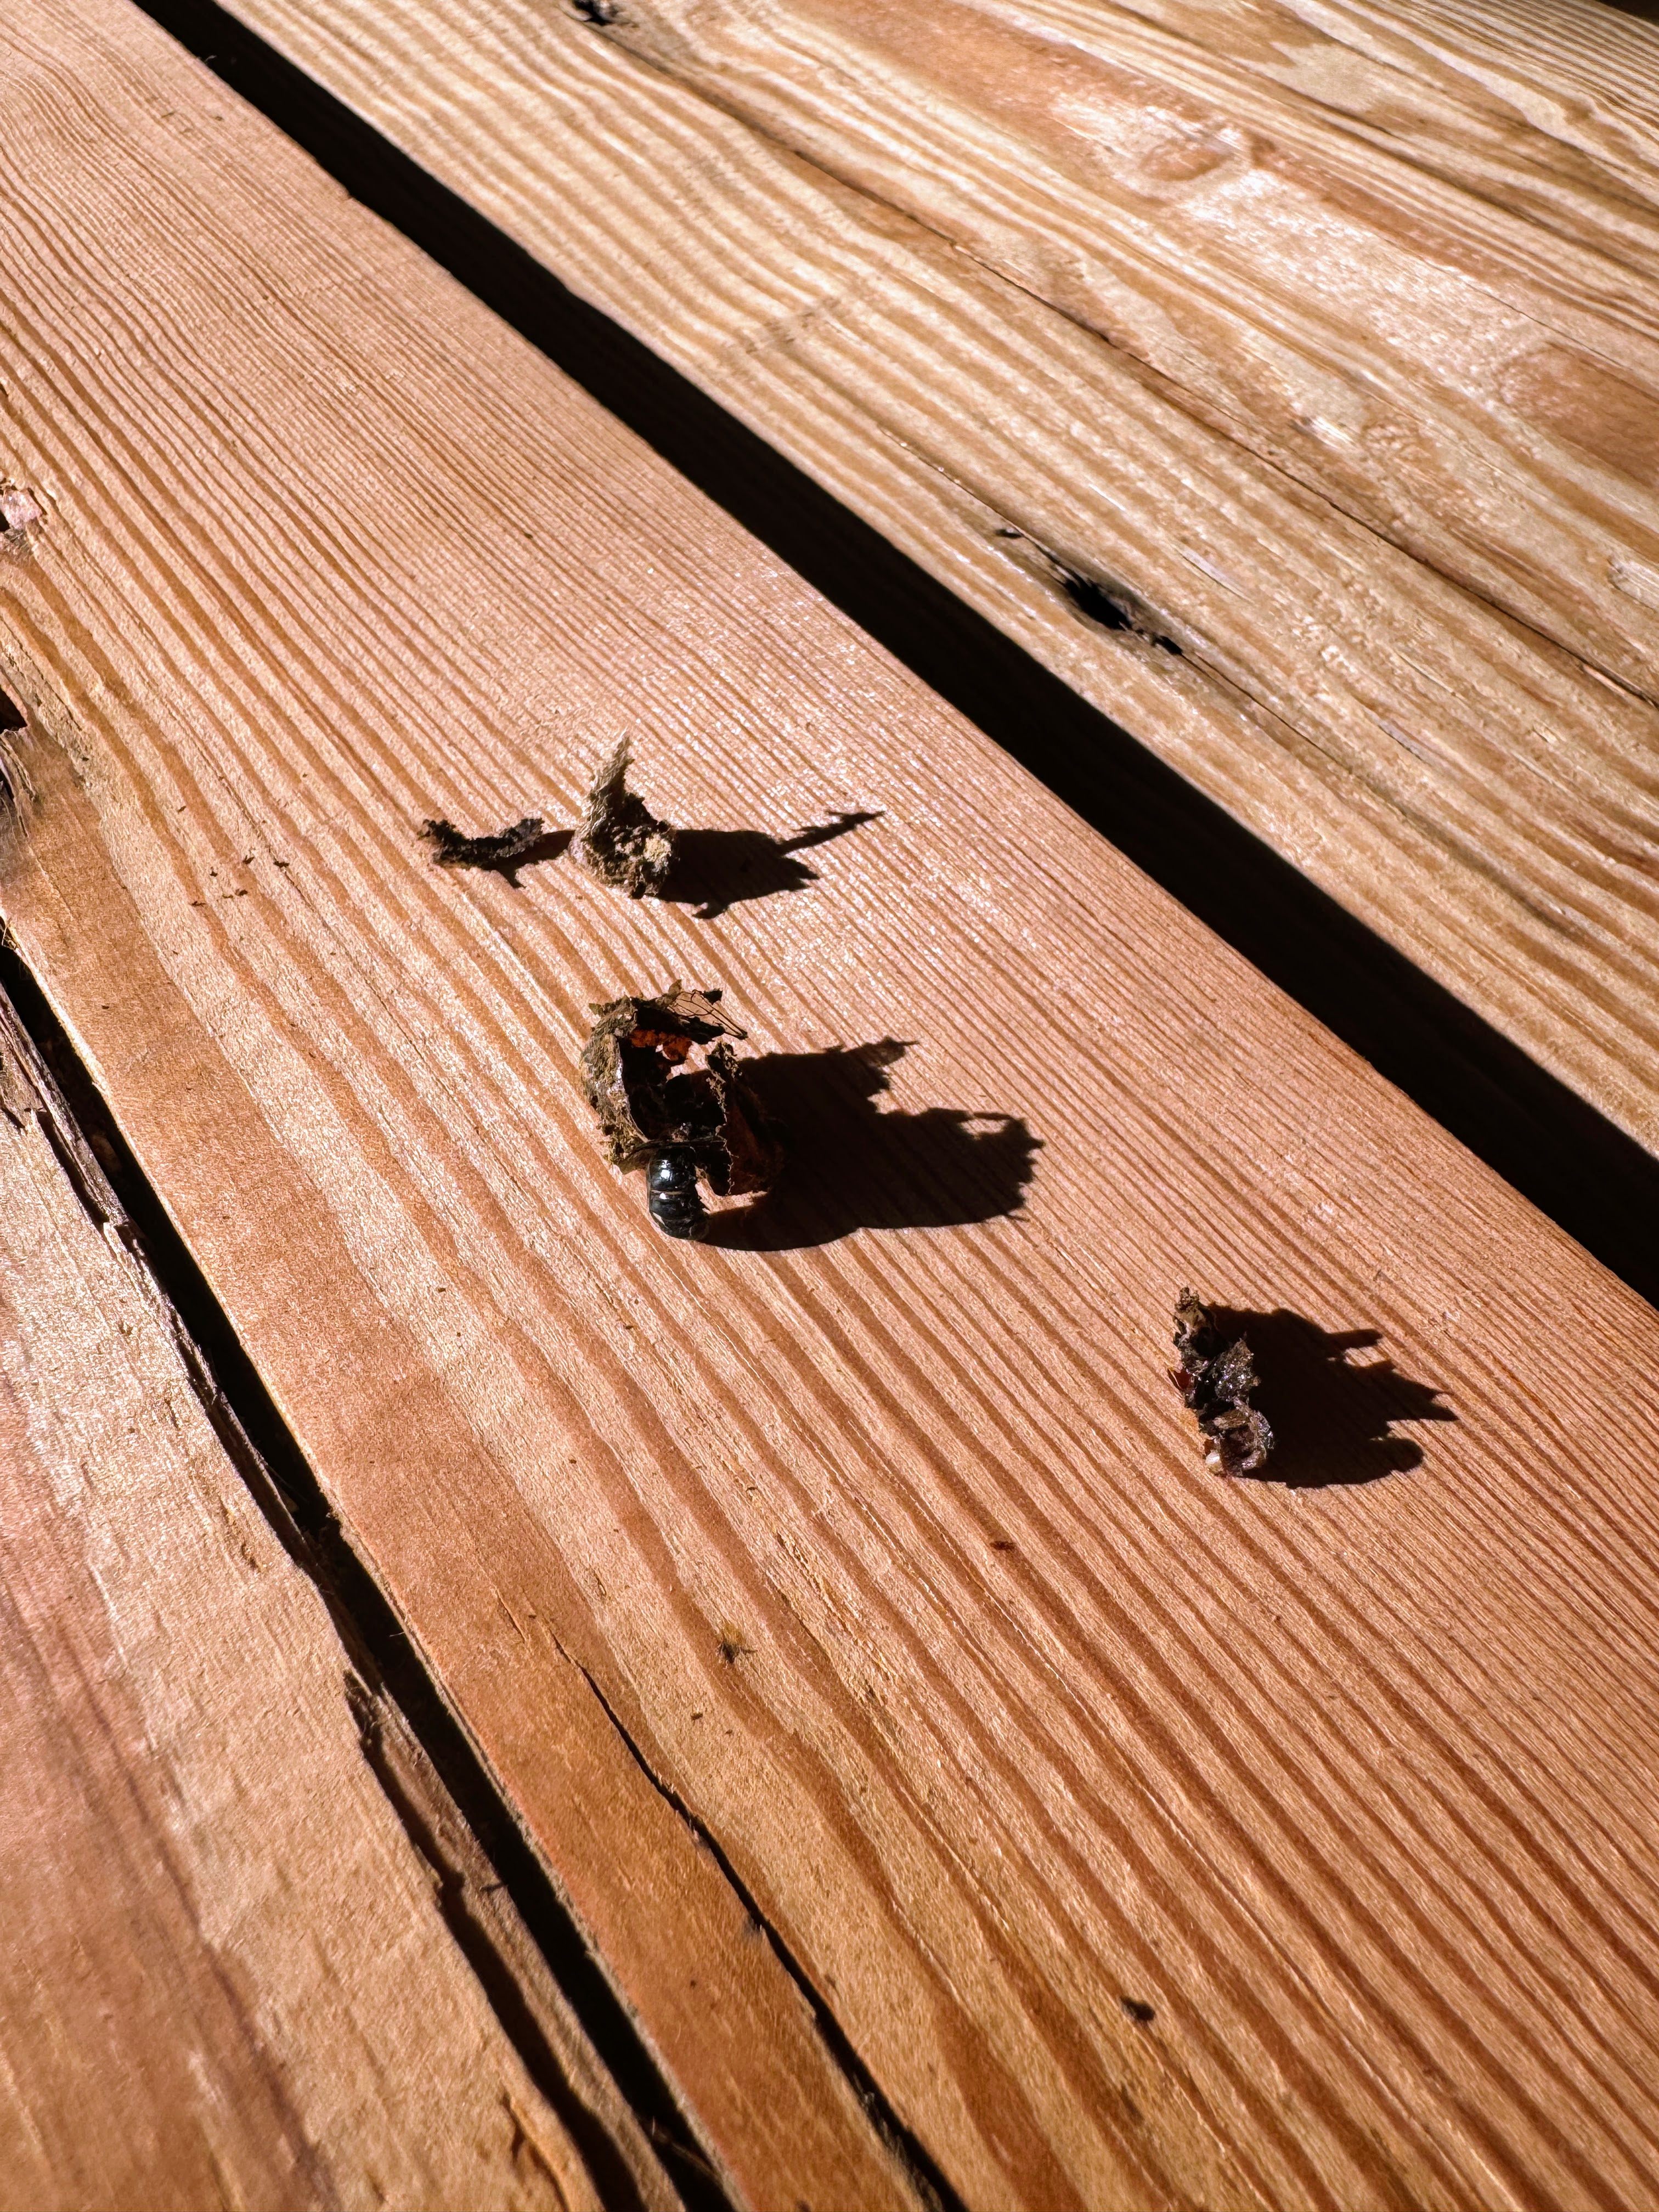
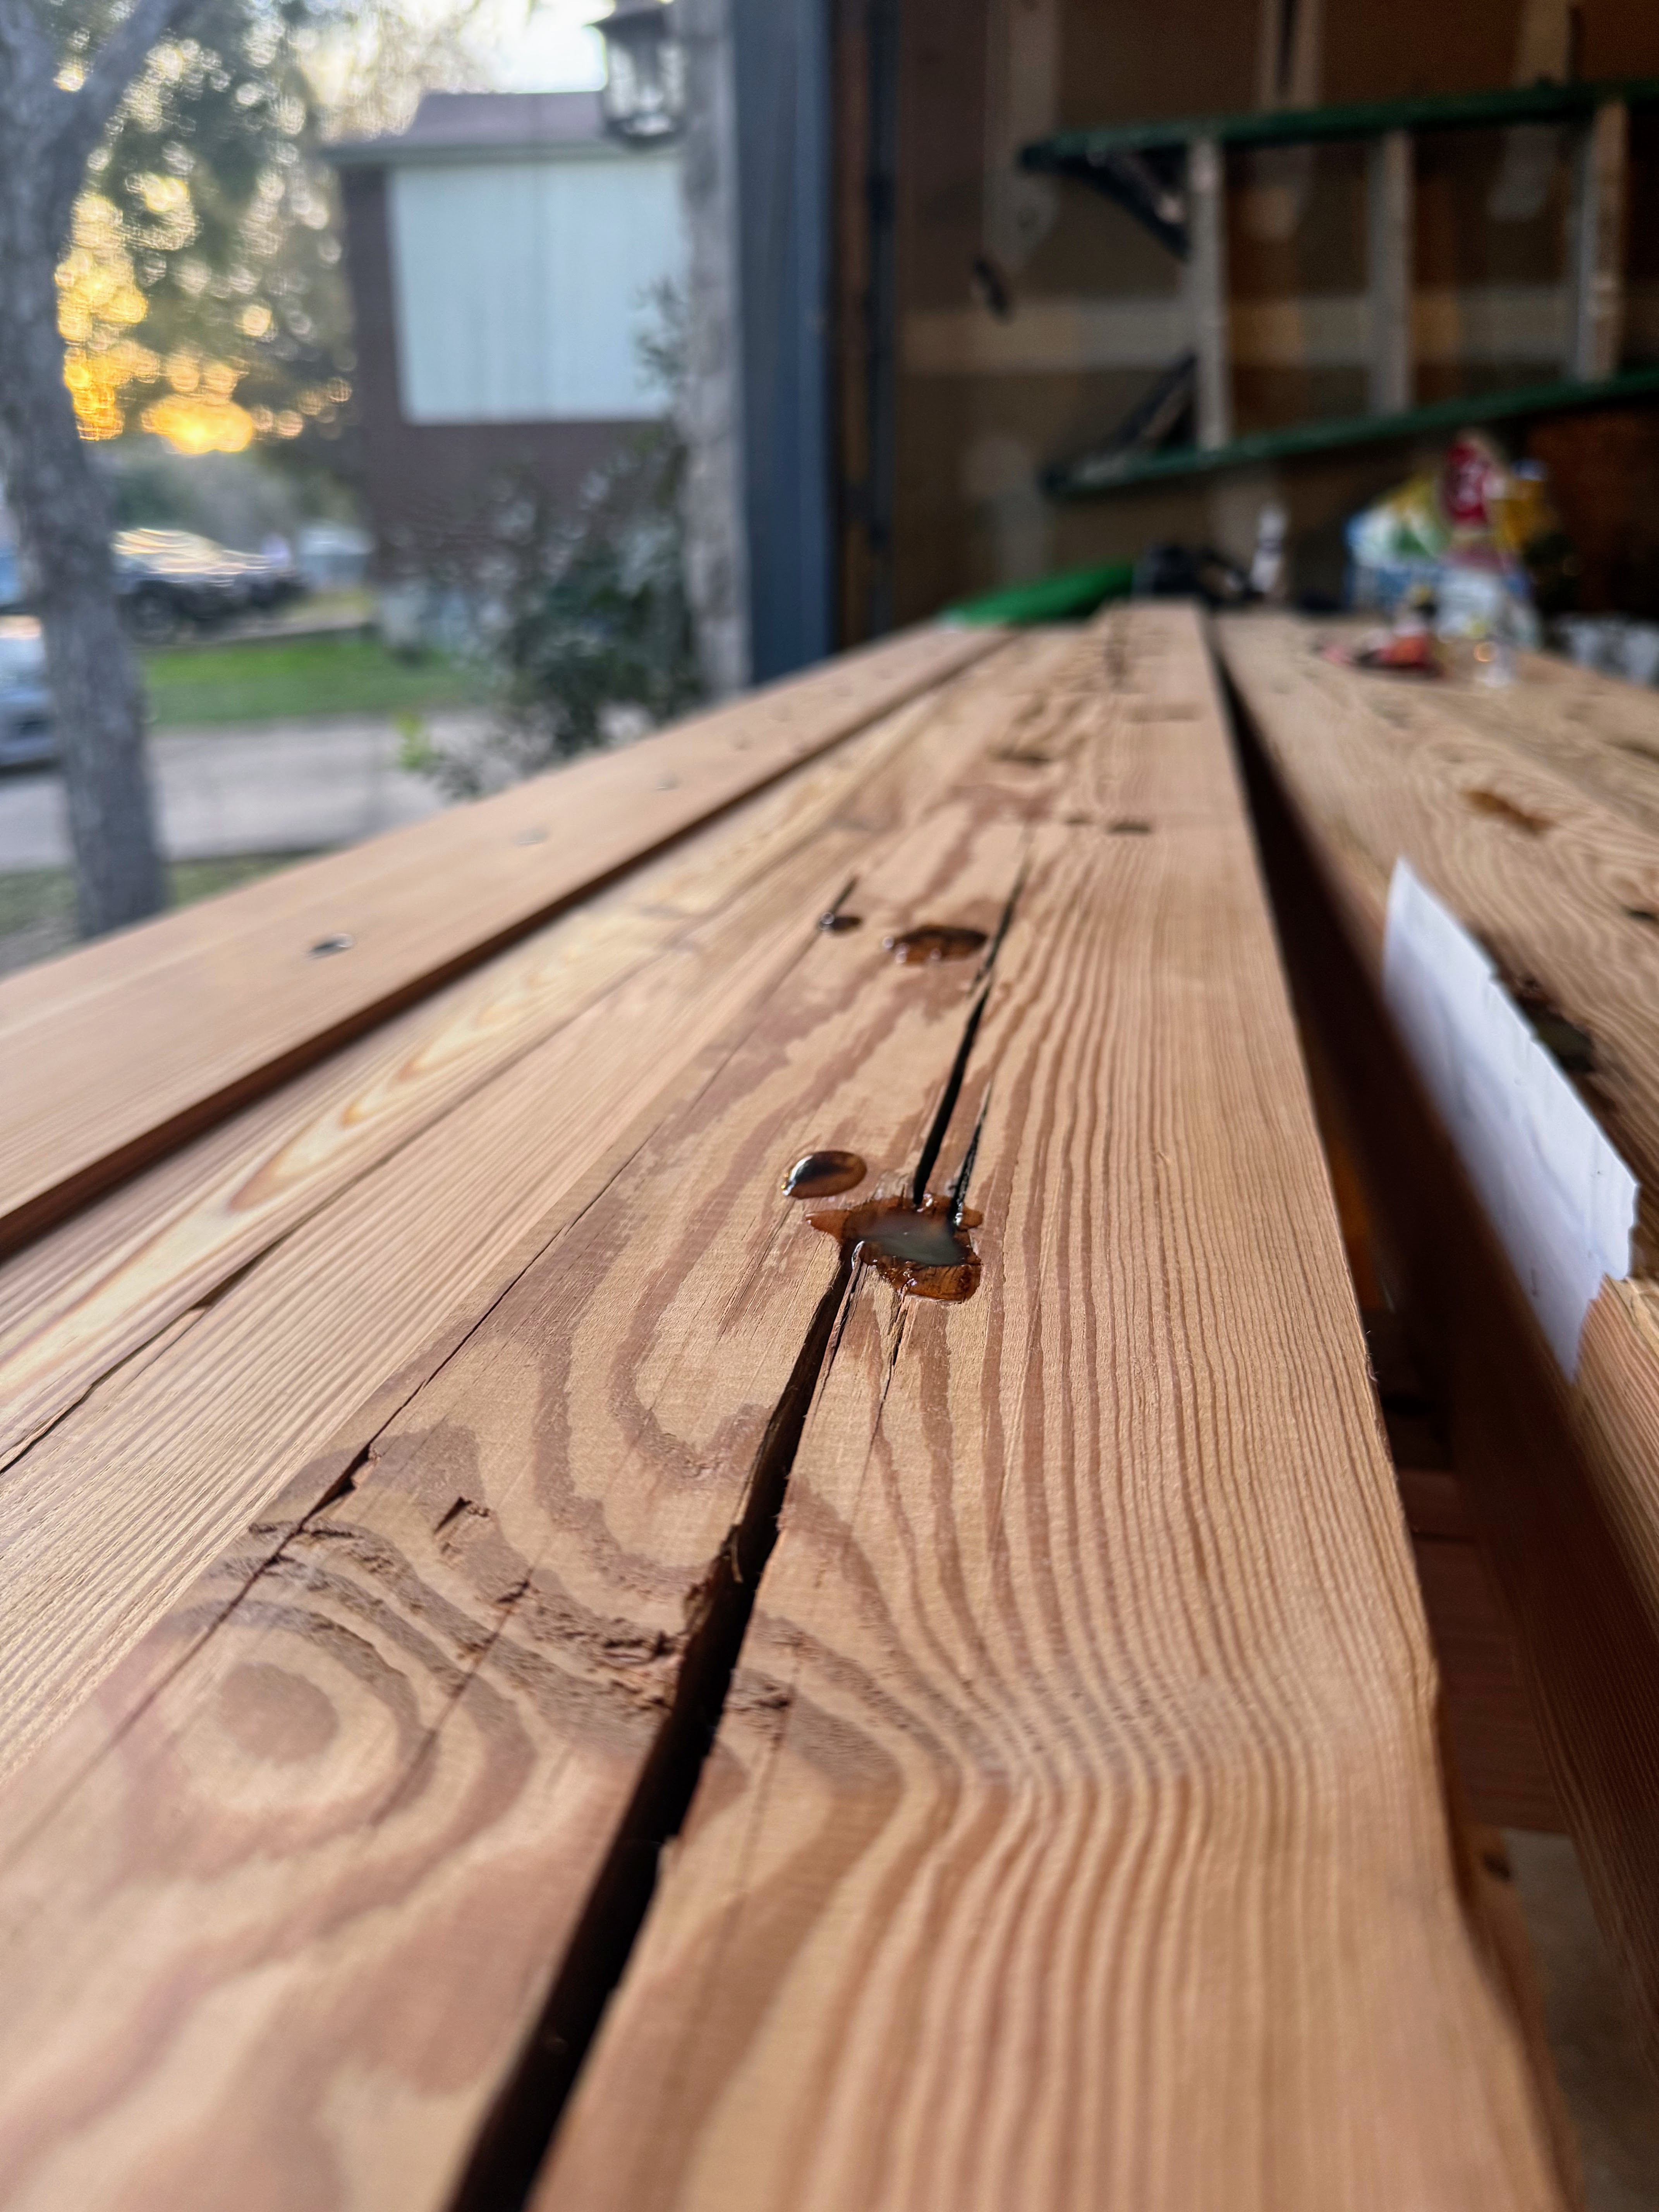
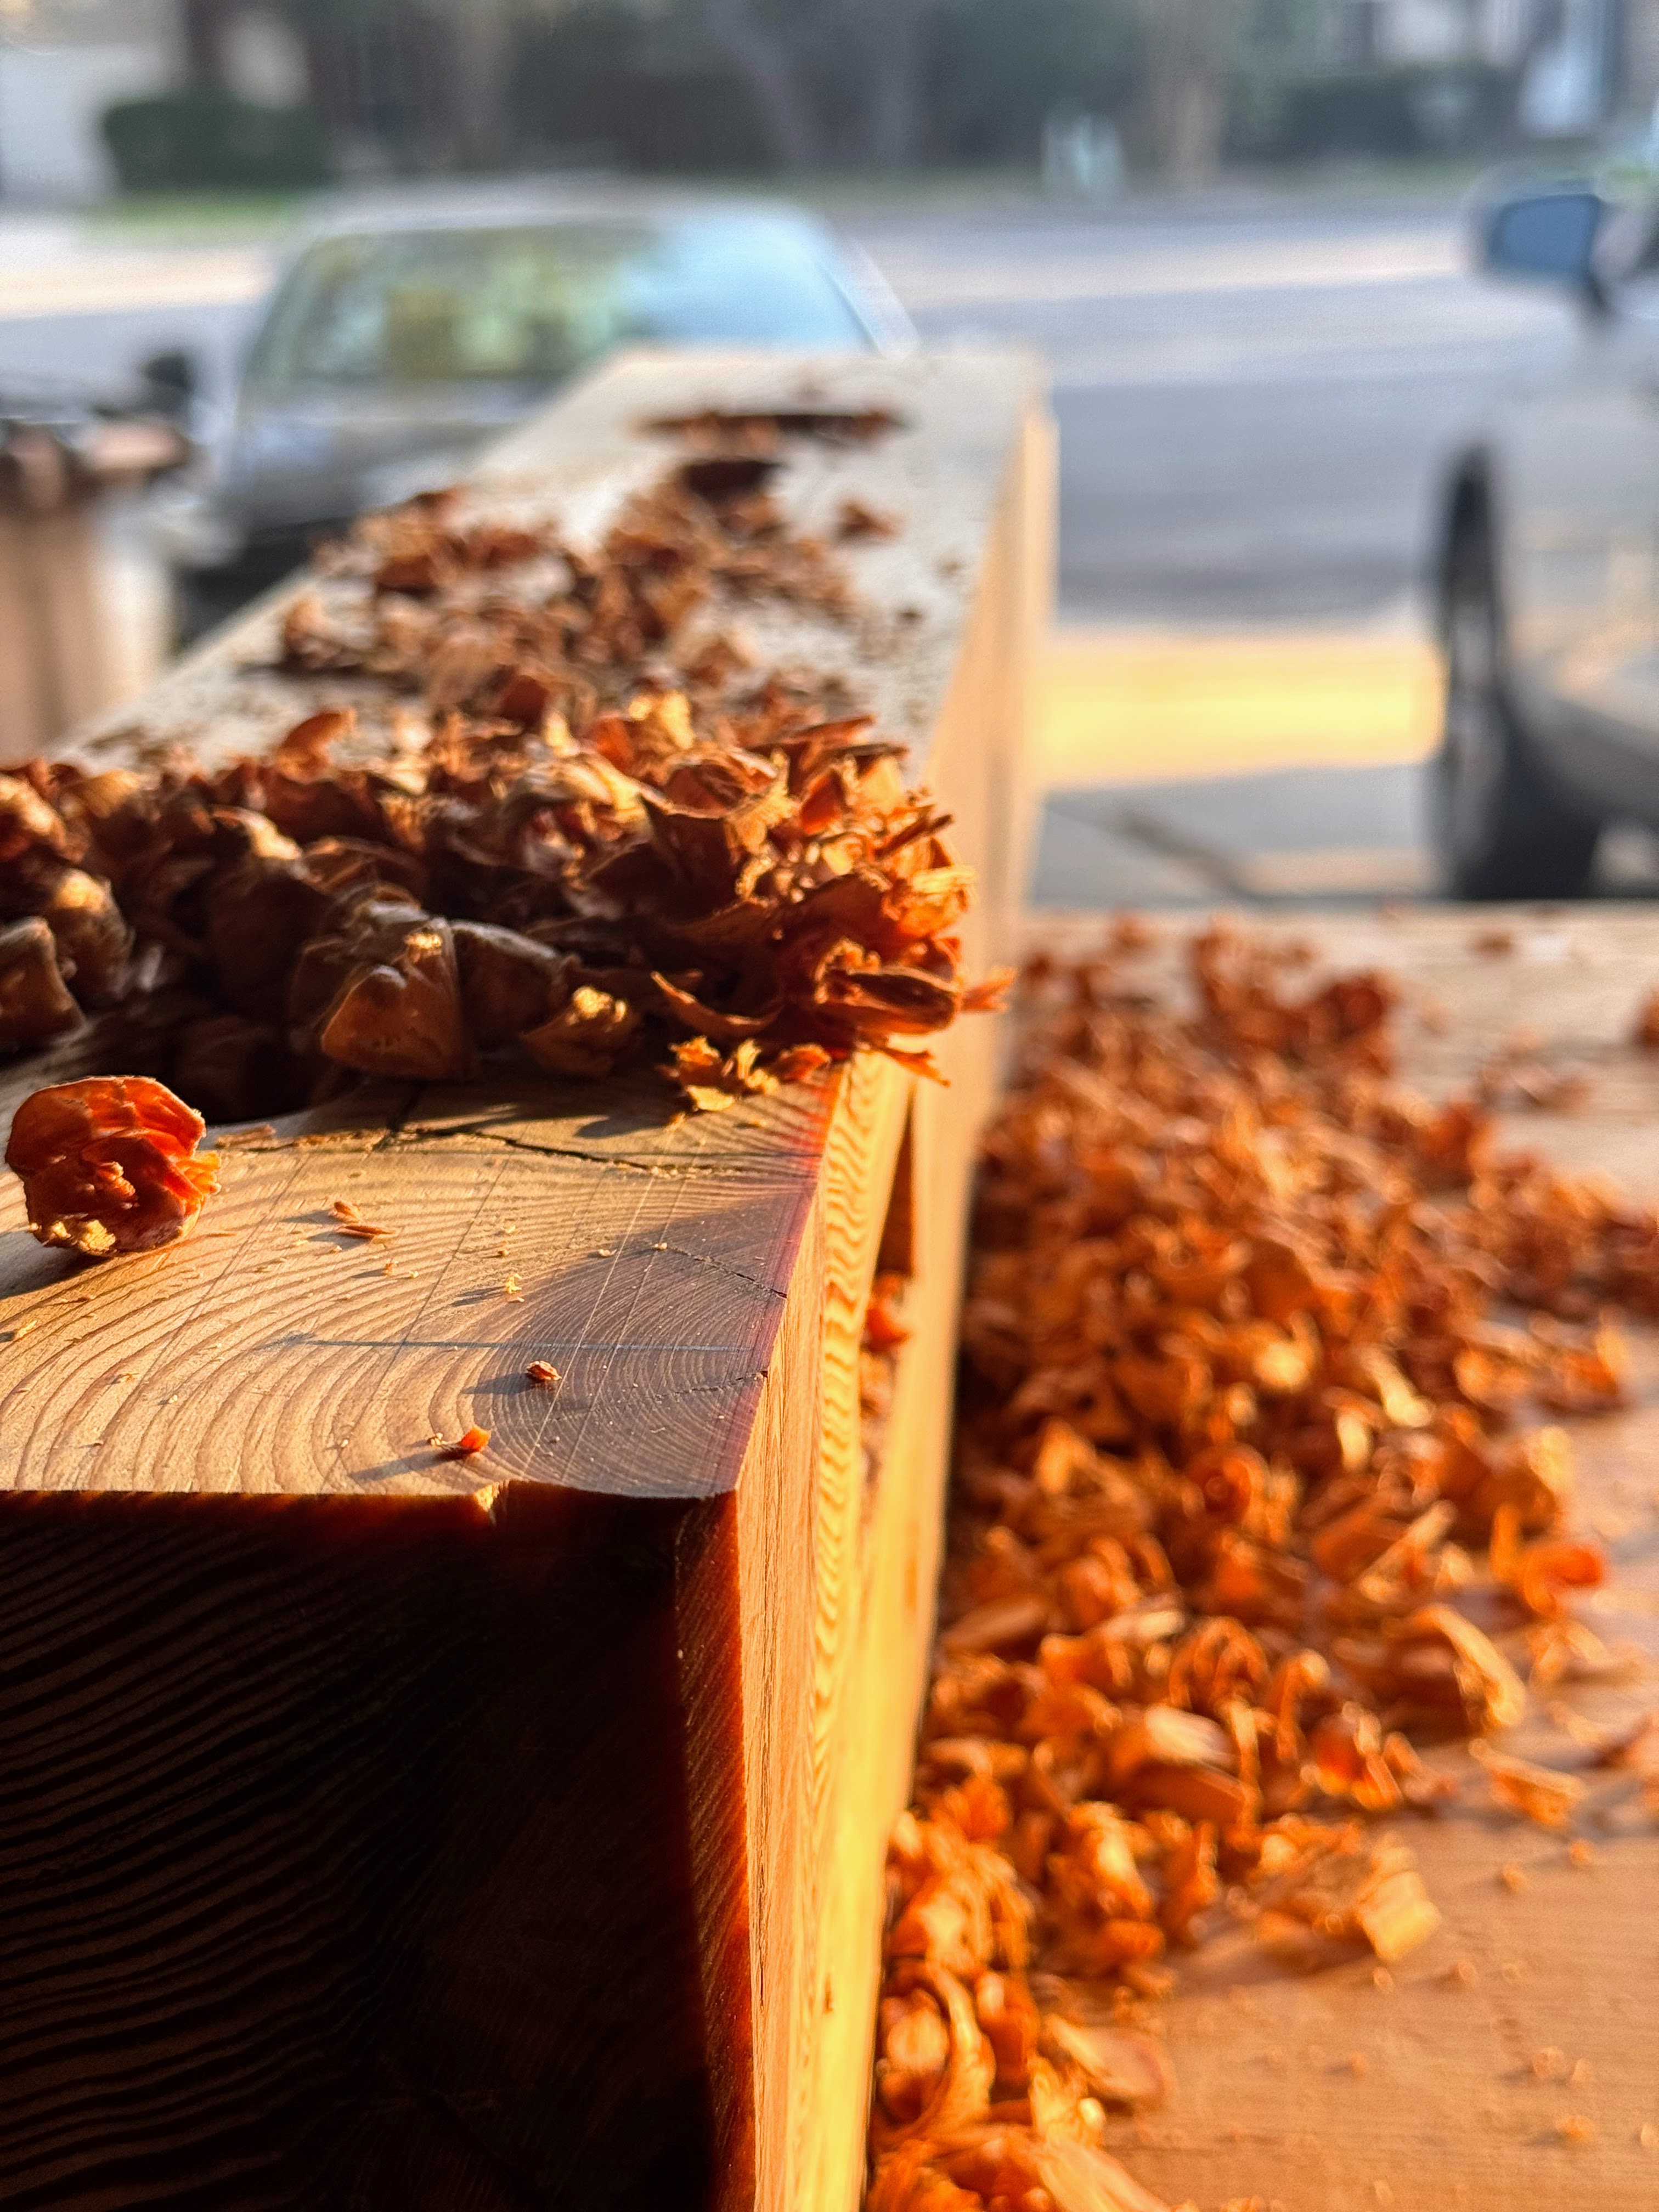
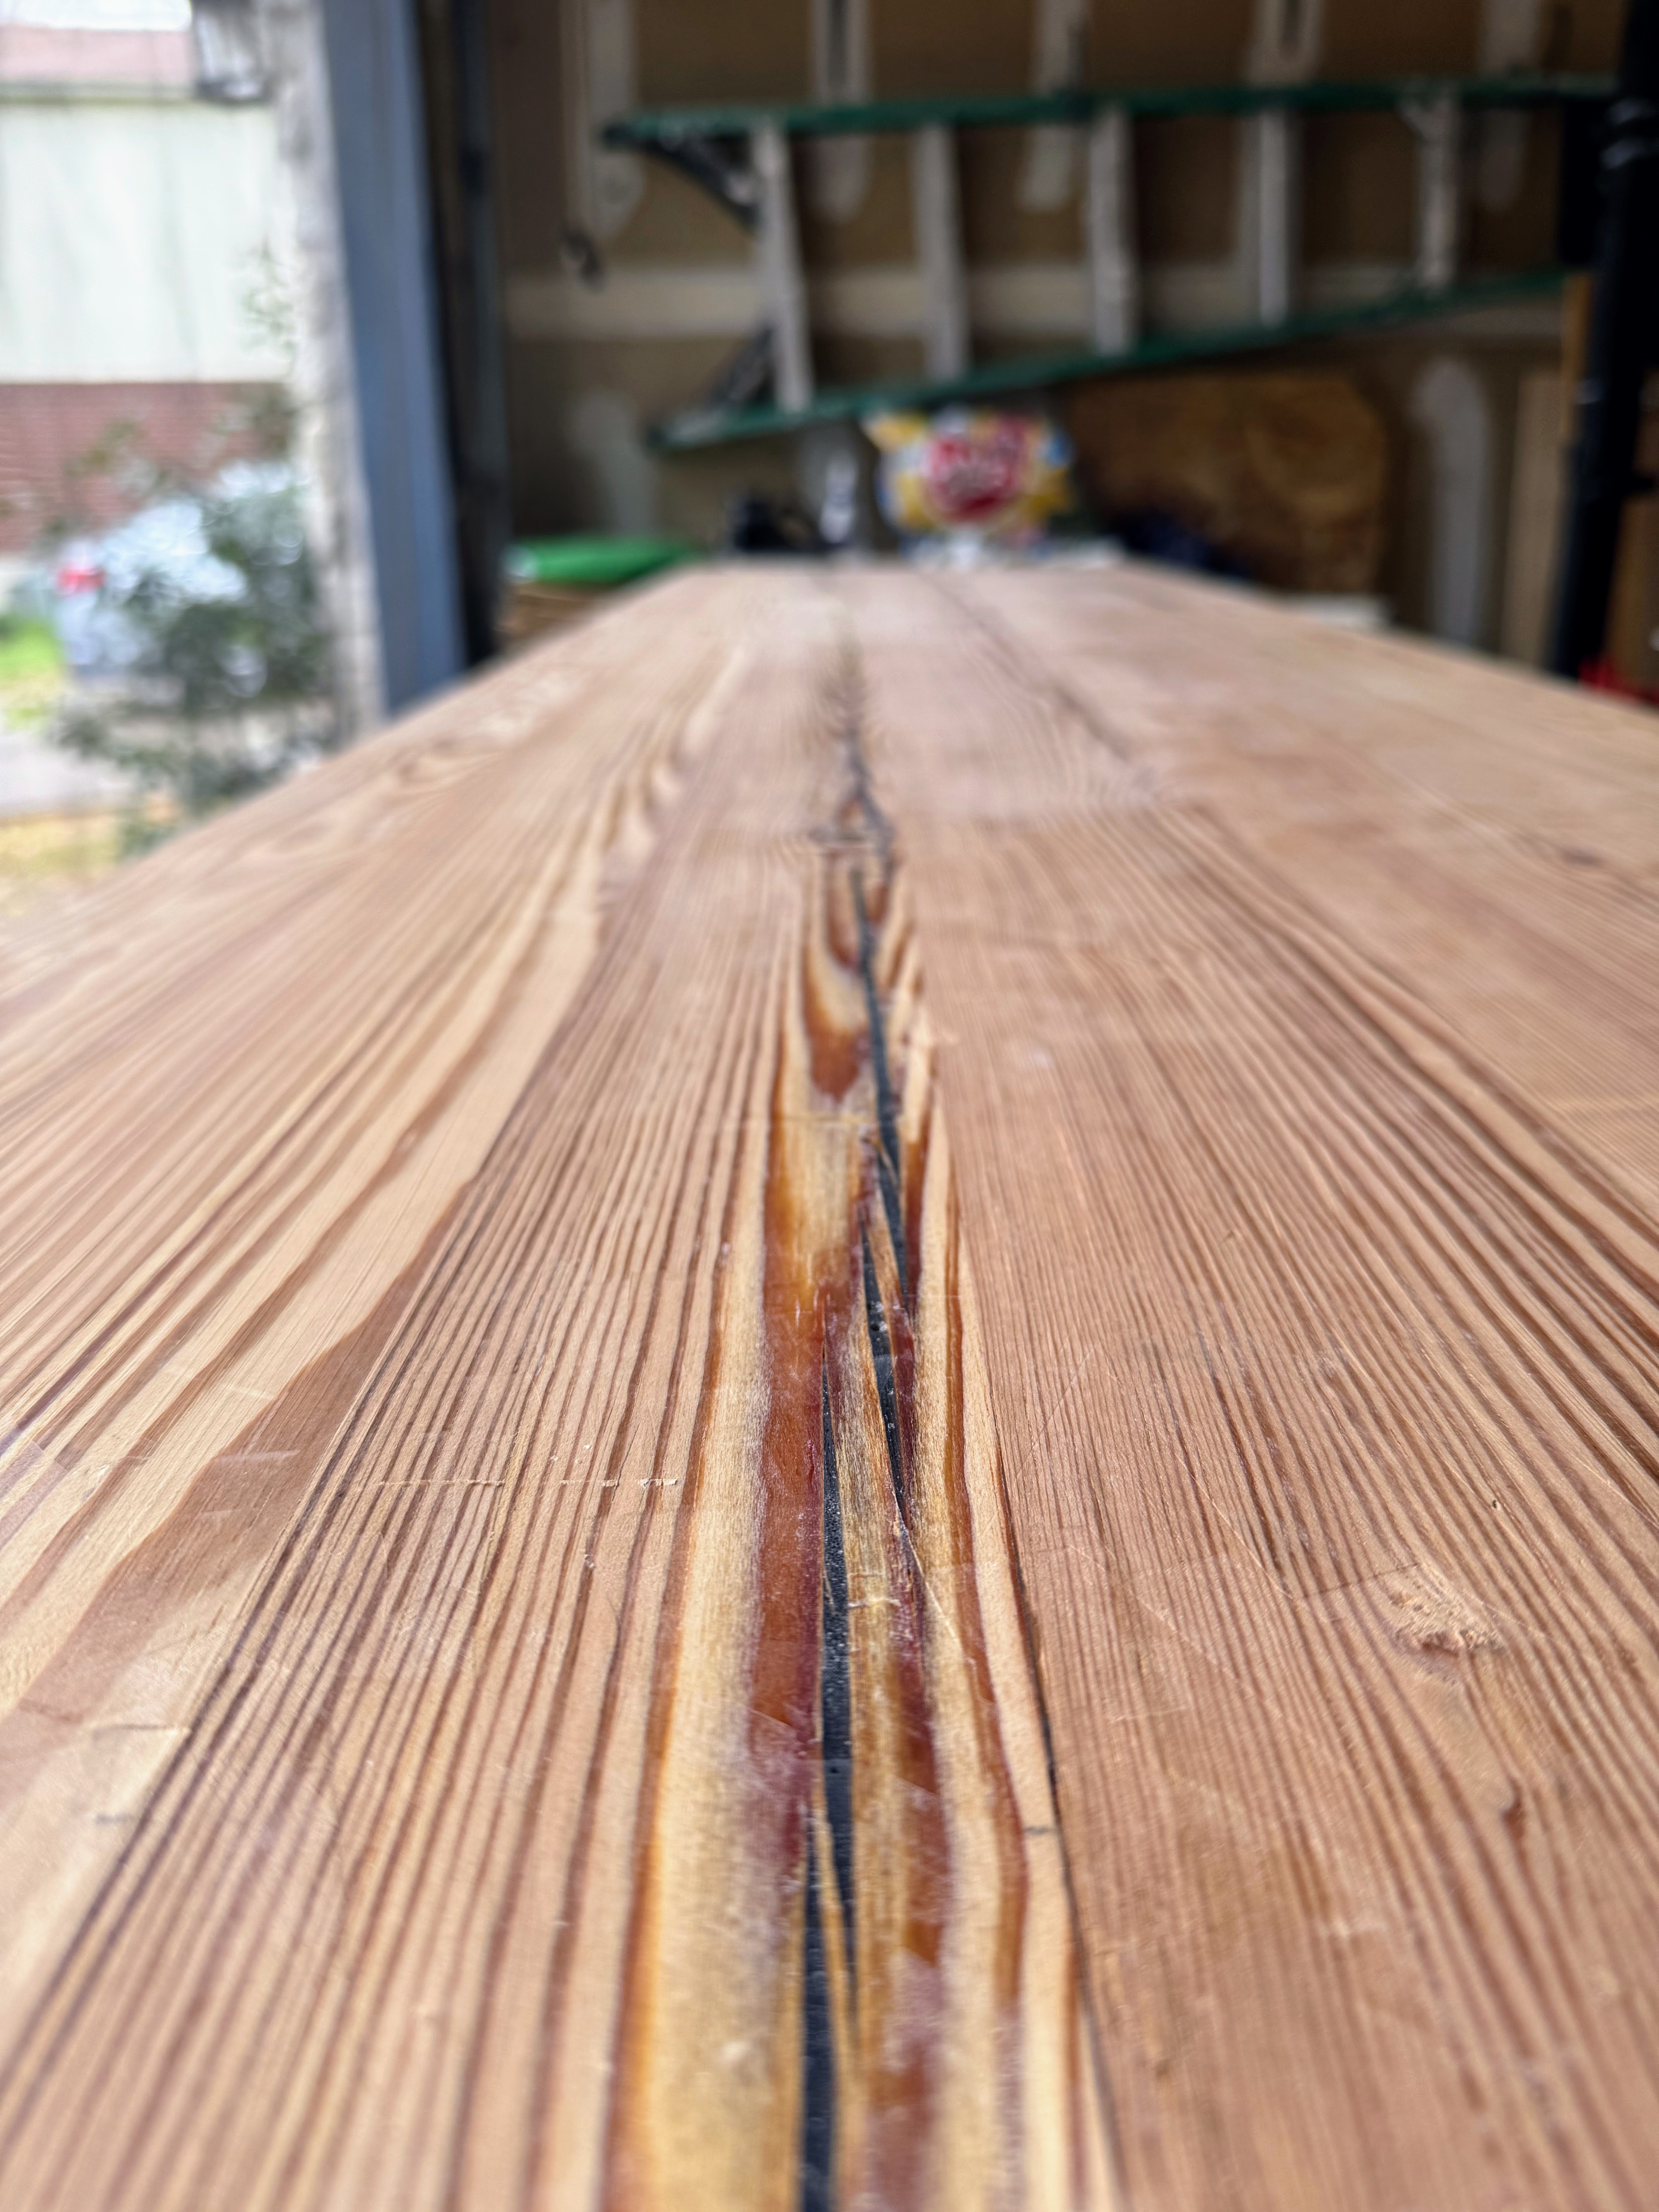
Being old, reclaimed wood, the beams featured numerous checks, cracks, some old bolt holes, and borer holes. The borer holes were initially a concern, but the sawmill staff assured me the insects were not active pests, just opportunistic. After digging out some insect carcasses, I decided to fill these voids and imperfections with T-88 structural epoxy.
The epoxy work was satisfying. The old pine readily absorbed the T-88, which did an excellent job filling the various holes and stabilizing the cracks. This step was crucial for achieving a solid, reliable surface.
Part 4: Top glue-up
With the individual beams prepped, the next critical stage was laminating the seven Longleaf Pine pieces to form the workbench top. This was stressful and I thought I had prepared and listened to Chris’ advice as well as other build log’s advice and still didn’t go to plan.

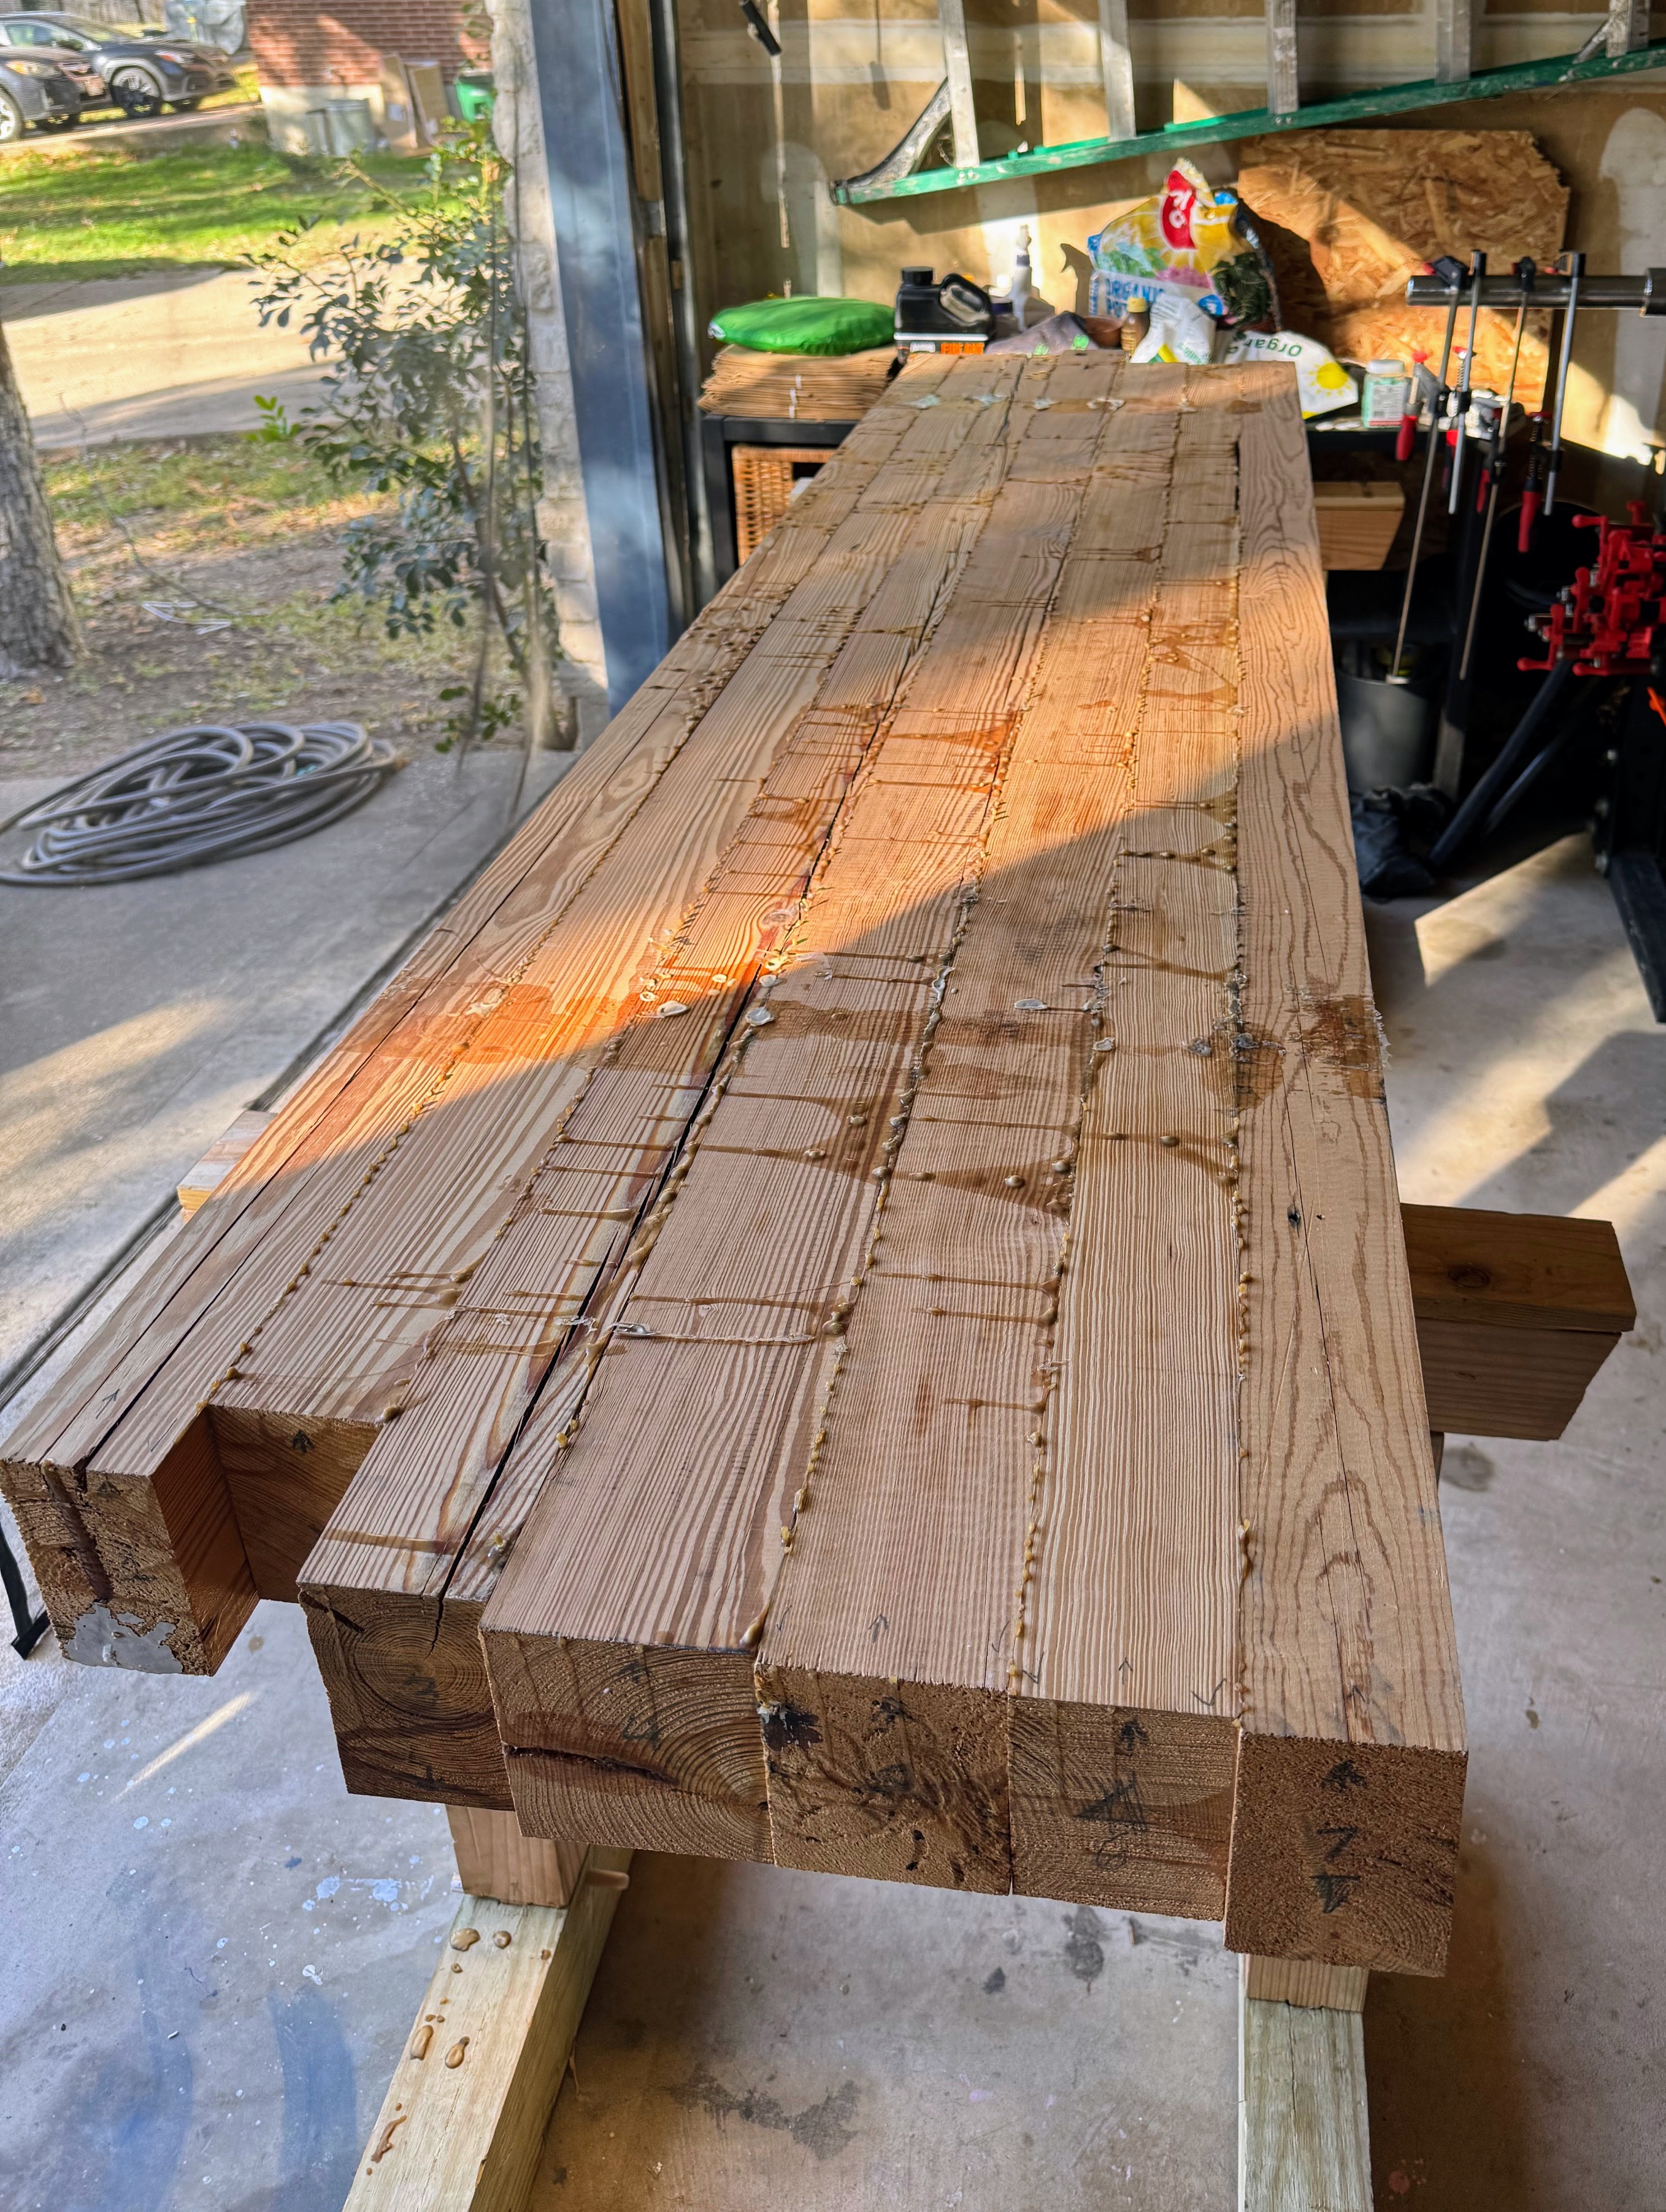
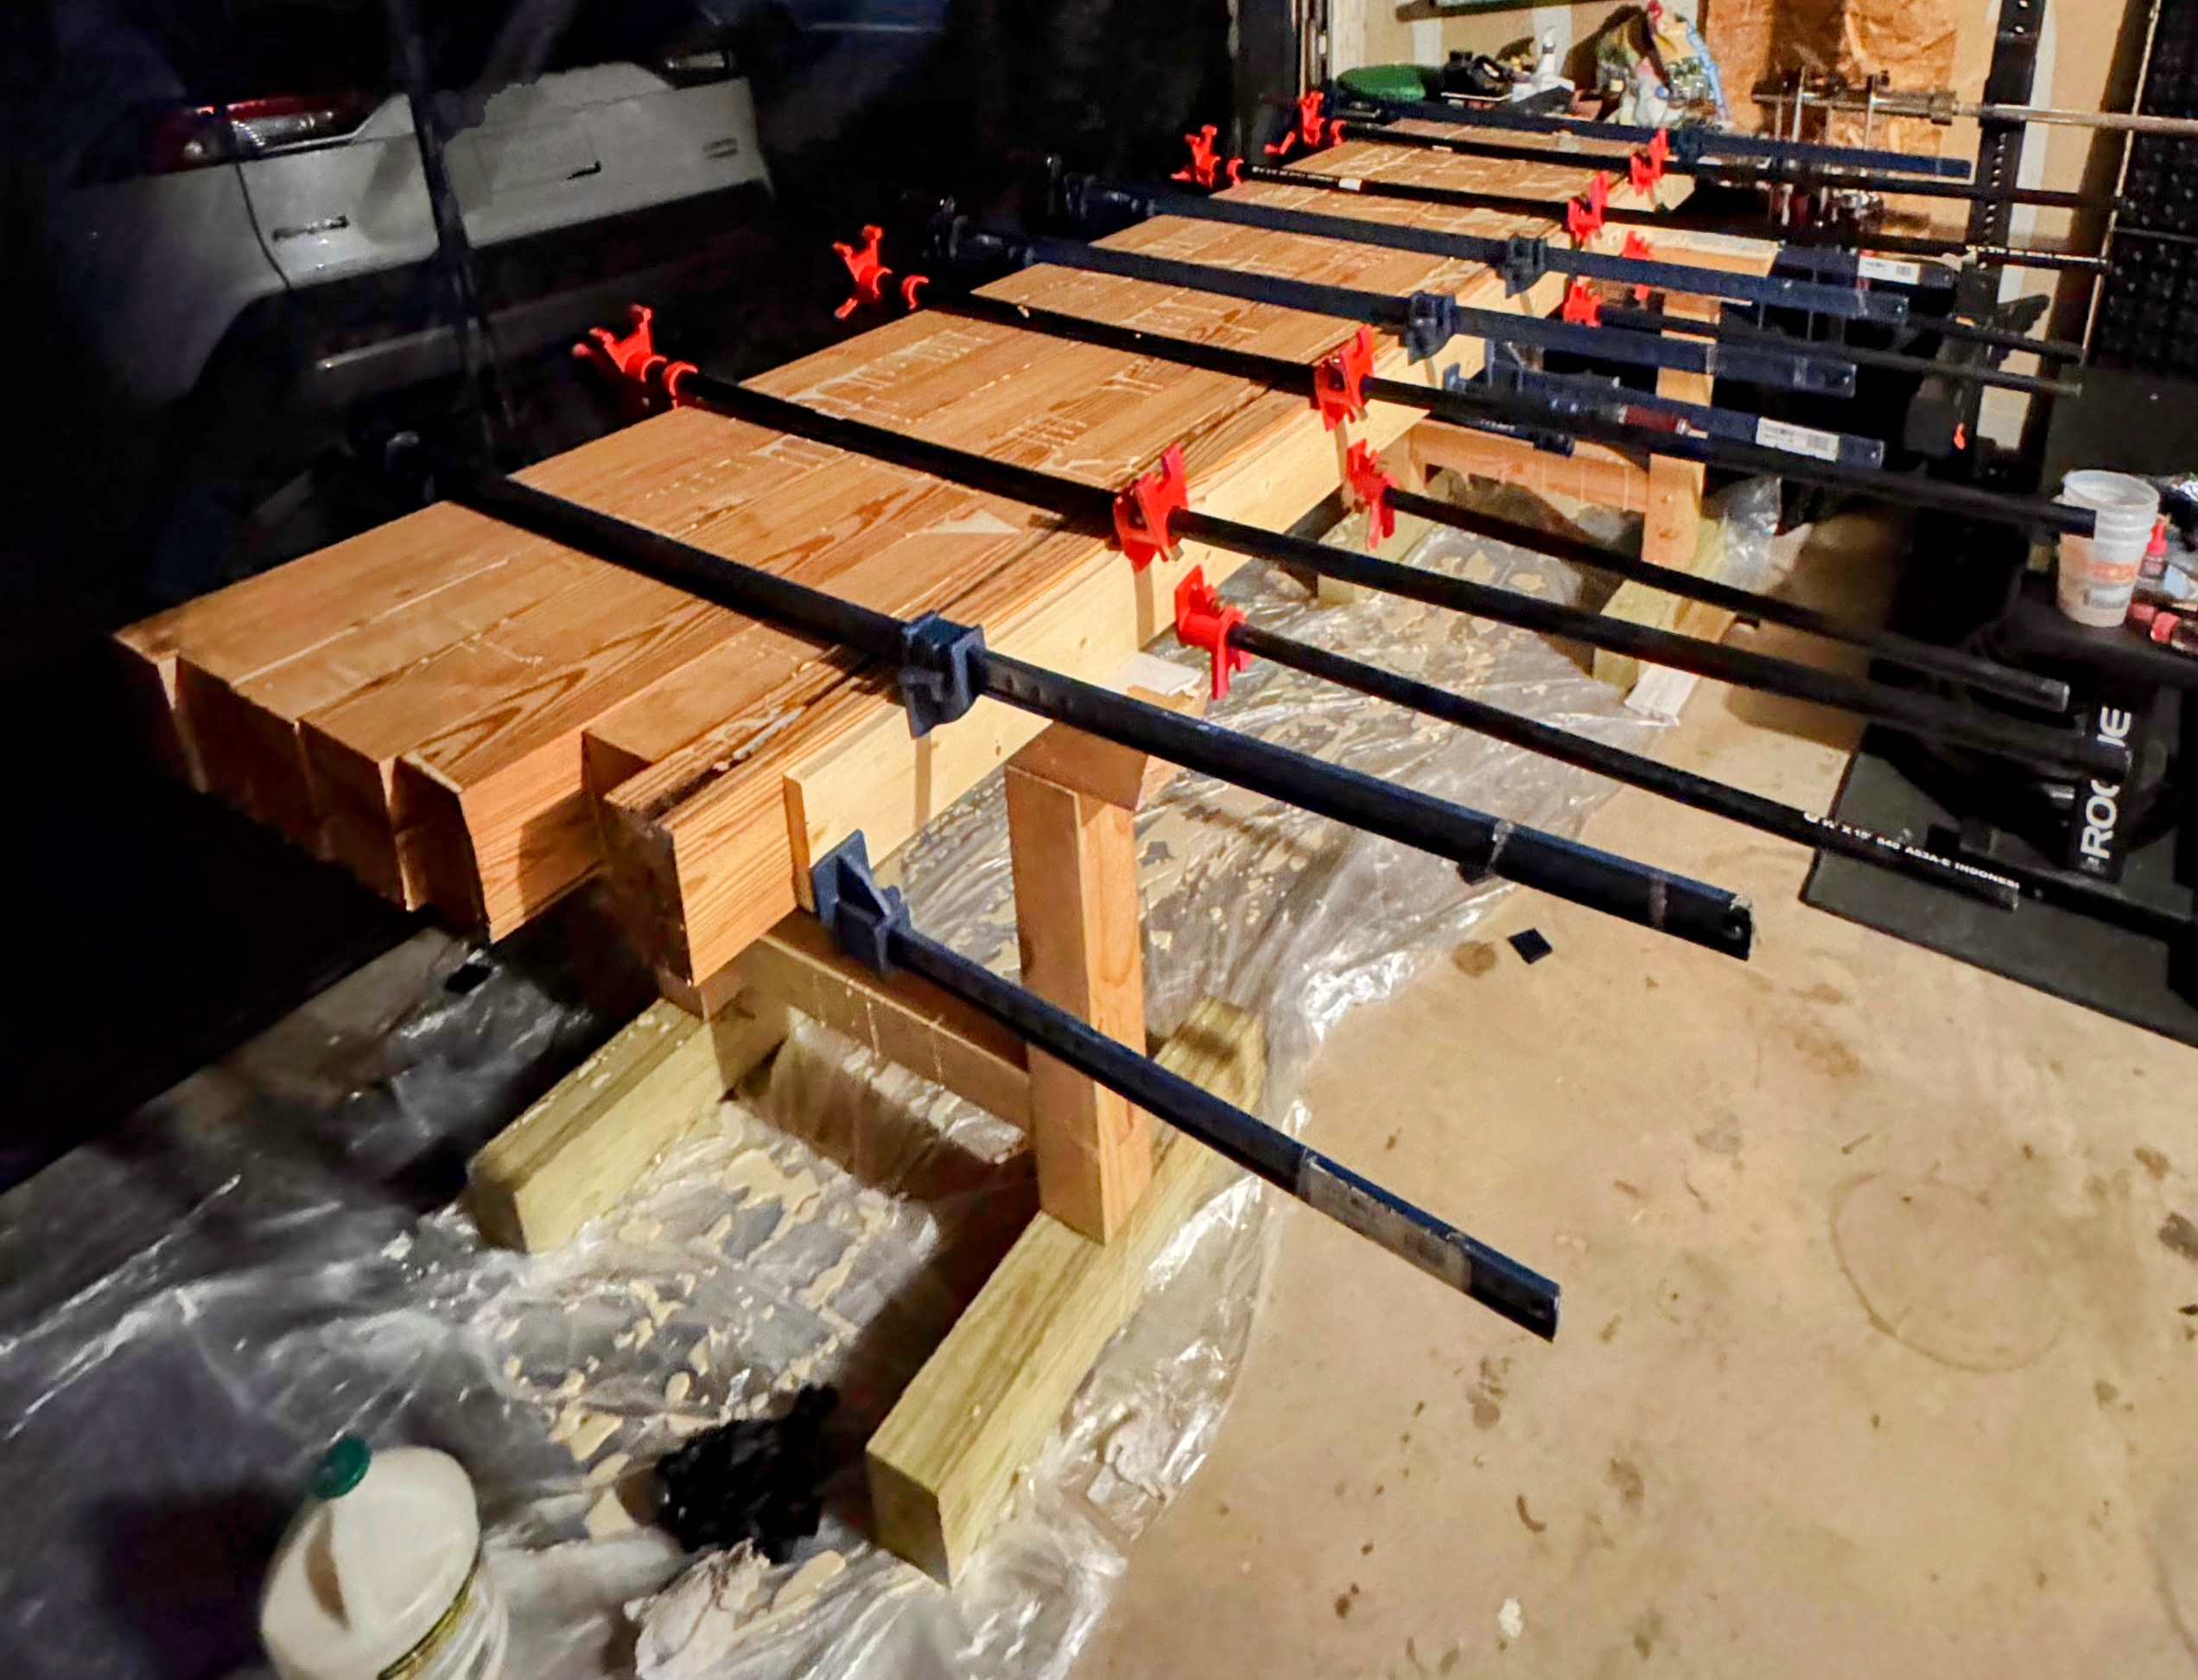
I spent about an hour arranging the beams, selecting the best faces for the top surface and ensuring tight joints. Wanting to move quickly, I decided to do the glue-up at night, aiming to start cleanup and flattening the next day. In retrospect, I don’t recommend this; doing a large glue-up when fresh and early in the day would be better. I oriented the beams “top face down” on the sawhorses, which I had carefully leveled by shimming their feet to avoid introducing twist into the assembly. The idea was that the weight of the beams would help keep the eventual top surface flat.
However, as Christopher Schwarz often says, “Your IQ drops by a few points the minute glue comes out,” and my experience was no exception. Just about nothing went as planned. I used Titebond III for its longer open time, a recommendation from another build log, which was fortunate as I glued all seven beams at once but would do smaller chunks in the future to reduce time pressure.
First, I oriented the third beam from the left incorrectly, with the intended top face pointing up instead of down (I would later need to epoxy that long crack, which turned out quite nice, but I was trying to avoid that).
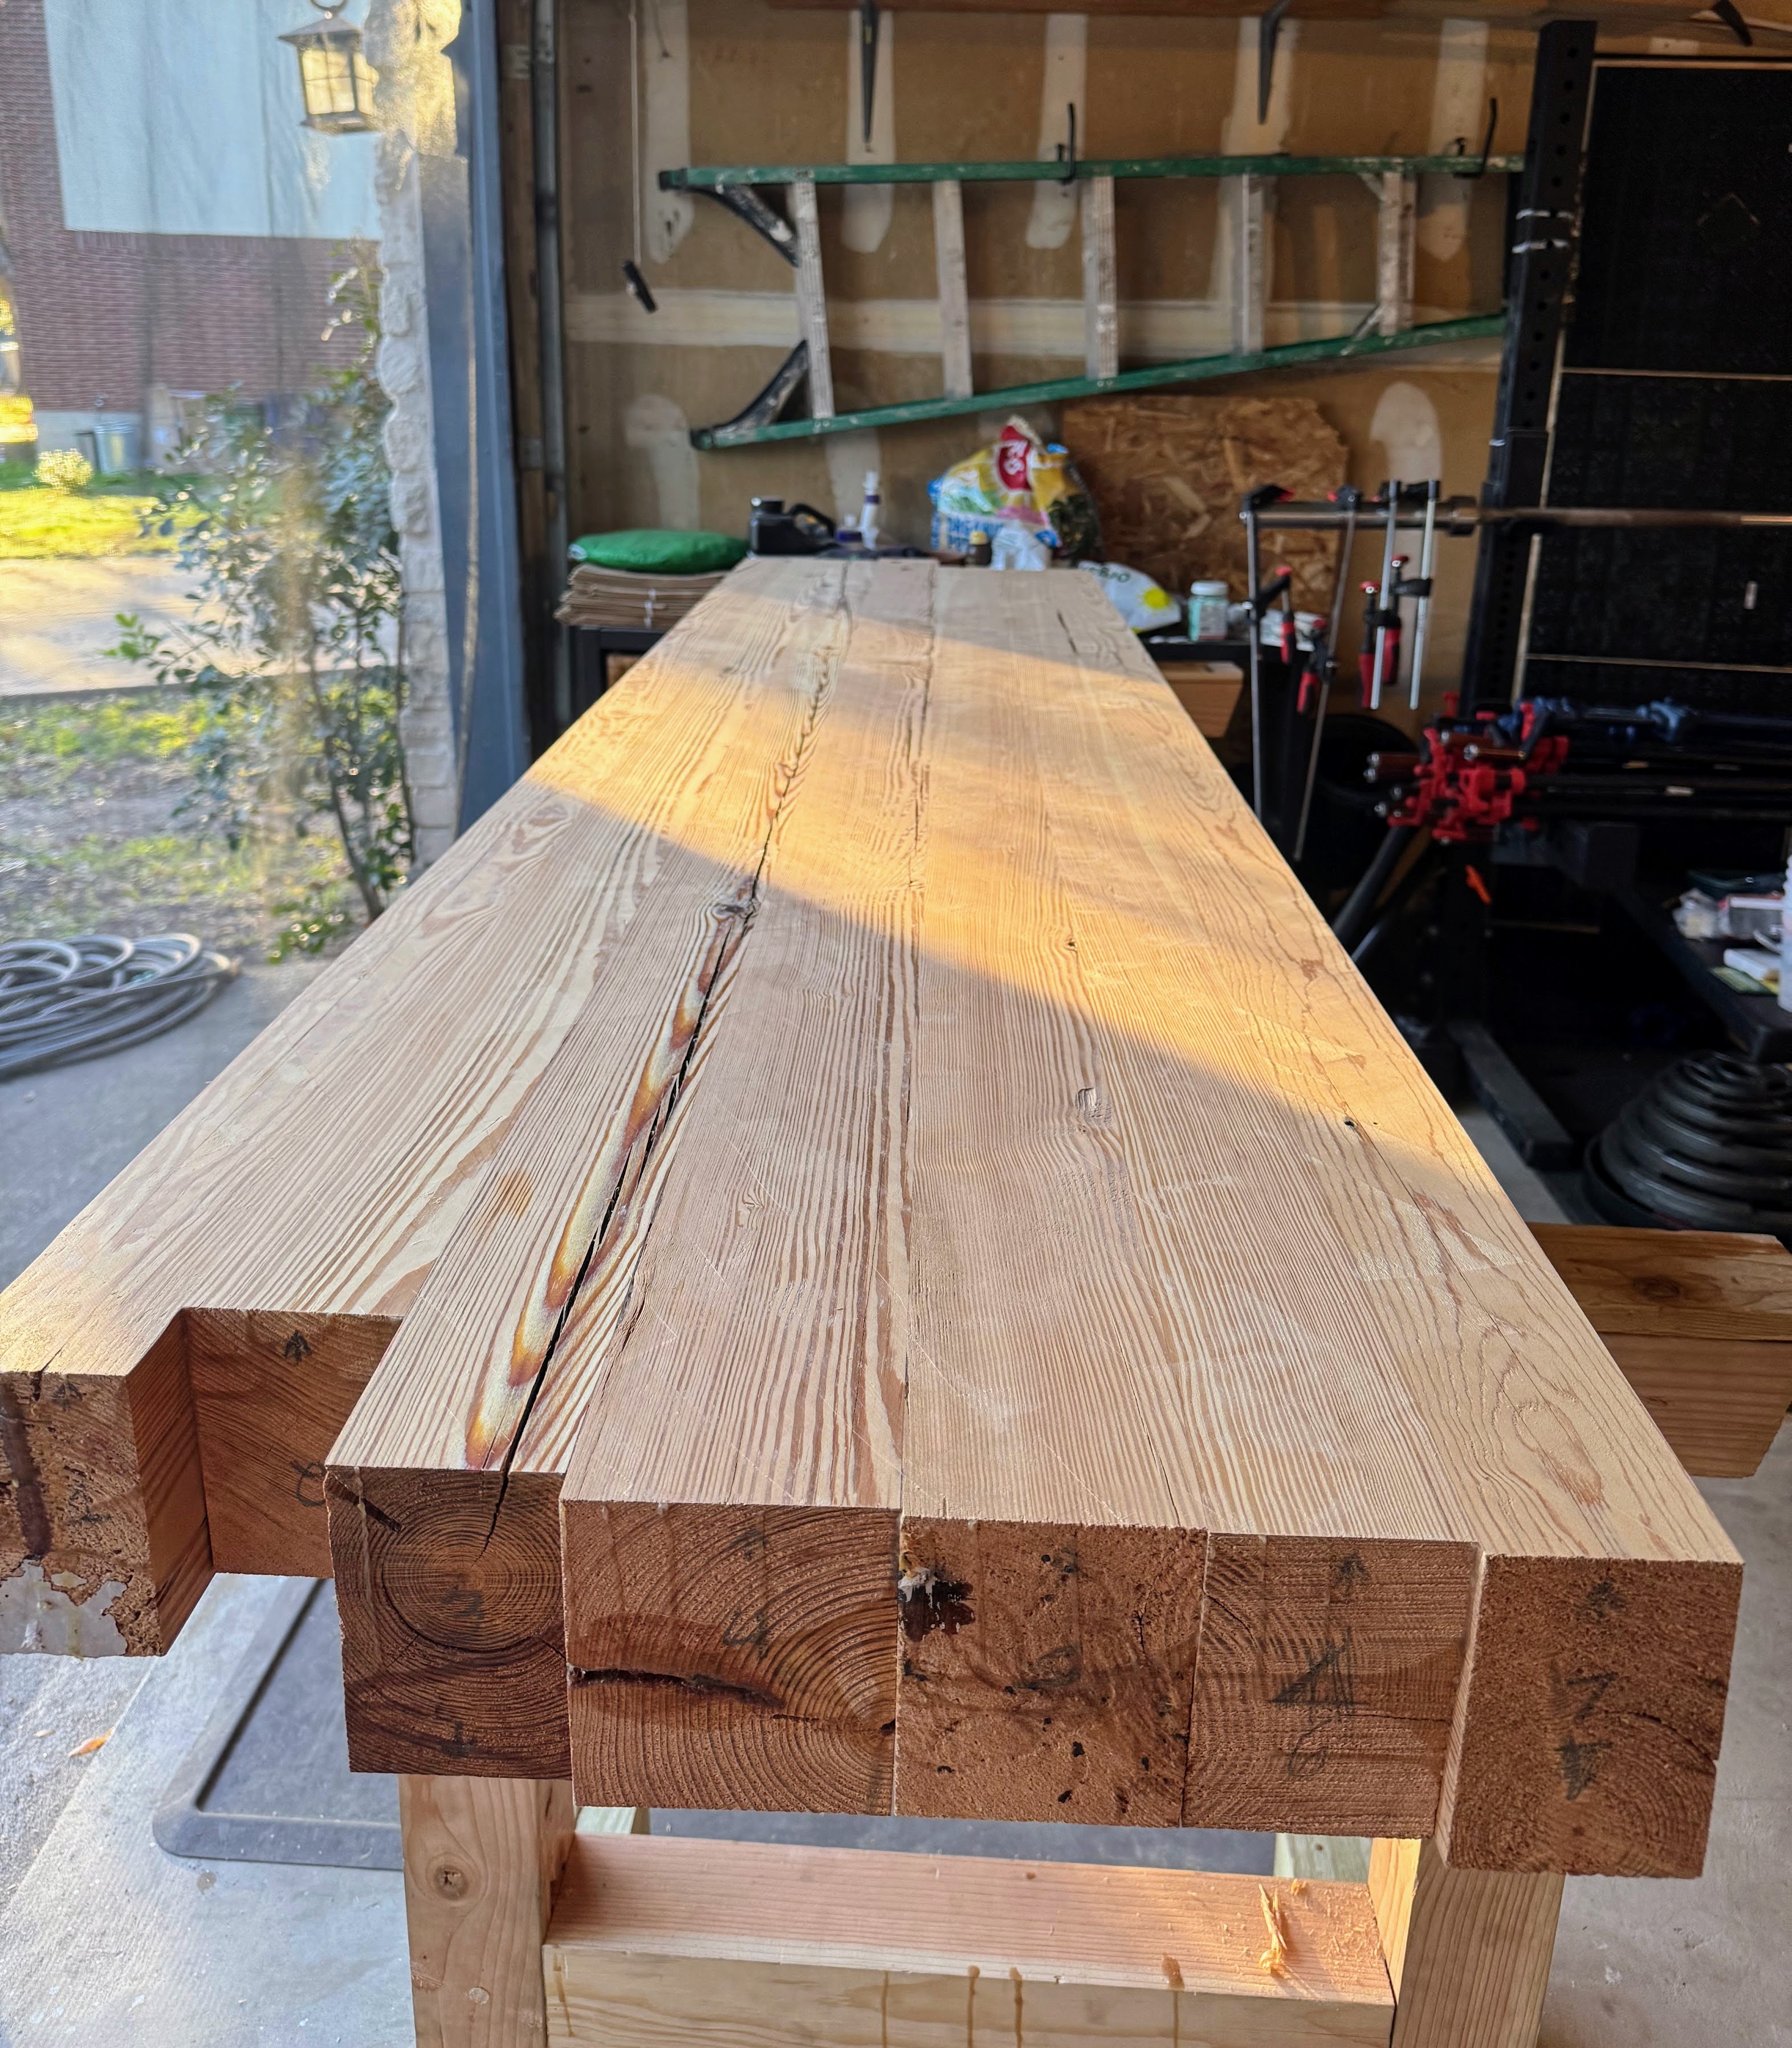
I hadn’t clearly marked the faces, only the ends, and missed this in the rush. Second, the second-to-last beam somehow slid down during clamping, creating a noticeable gap at one end. Thankfully, the sawmill had provided extra length, so I was still able to cut the top to its final 95-7/8 inches later (so close I just call it 8 feet).
For clamping cauls, I used 4-inch wide white pine boards as pads. This was a mistake; they should have been 5 inches wide to match the beam thickness, and white pine was too soft. The immense pressure from the clamps crushed the pine pads. Southern Yellow Pine boards would have been a better choice. The 4-inch thickness meant that the pads were aligned exactly with the whole chunk resting on the sawhorse so there was more clamping pressure translating into the edge there and not an even balance of clamping pressure going into the edge opposite that resting on the sawhorses. I believe this introduced a cup.
Alternating clamps (some top, some bottom) was also very difficult under time pressure, as I had to hold clamps in mid-air while tightening, causing them to slip. I would plan this clamping strategy better in the future. In total, I used eight shop-made pipe clamps (from 10-foot black pipe cut in half) and eight heavy-duty Wilton I-bar clamps. The pipe clamps were easy and effective; the Wilton clamps were powerful but expensive. At one point, I applied so much torque I sheared the acme thread on one of the Wilton clamps.
After letting the assembly cure overnight, I removed the clamps. Glue squeeze-out was everywhere. I cleaned this up using a chisel plane. Despite the difficulties, the top was now one solid piece.
Part 5: Flattening
With the glue cured and squeeze-out removed, the next task was to flatten and dimension the newly created workbench top. This involved significant effort with hand planes.
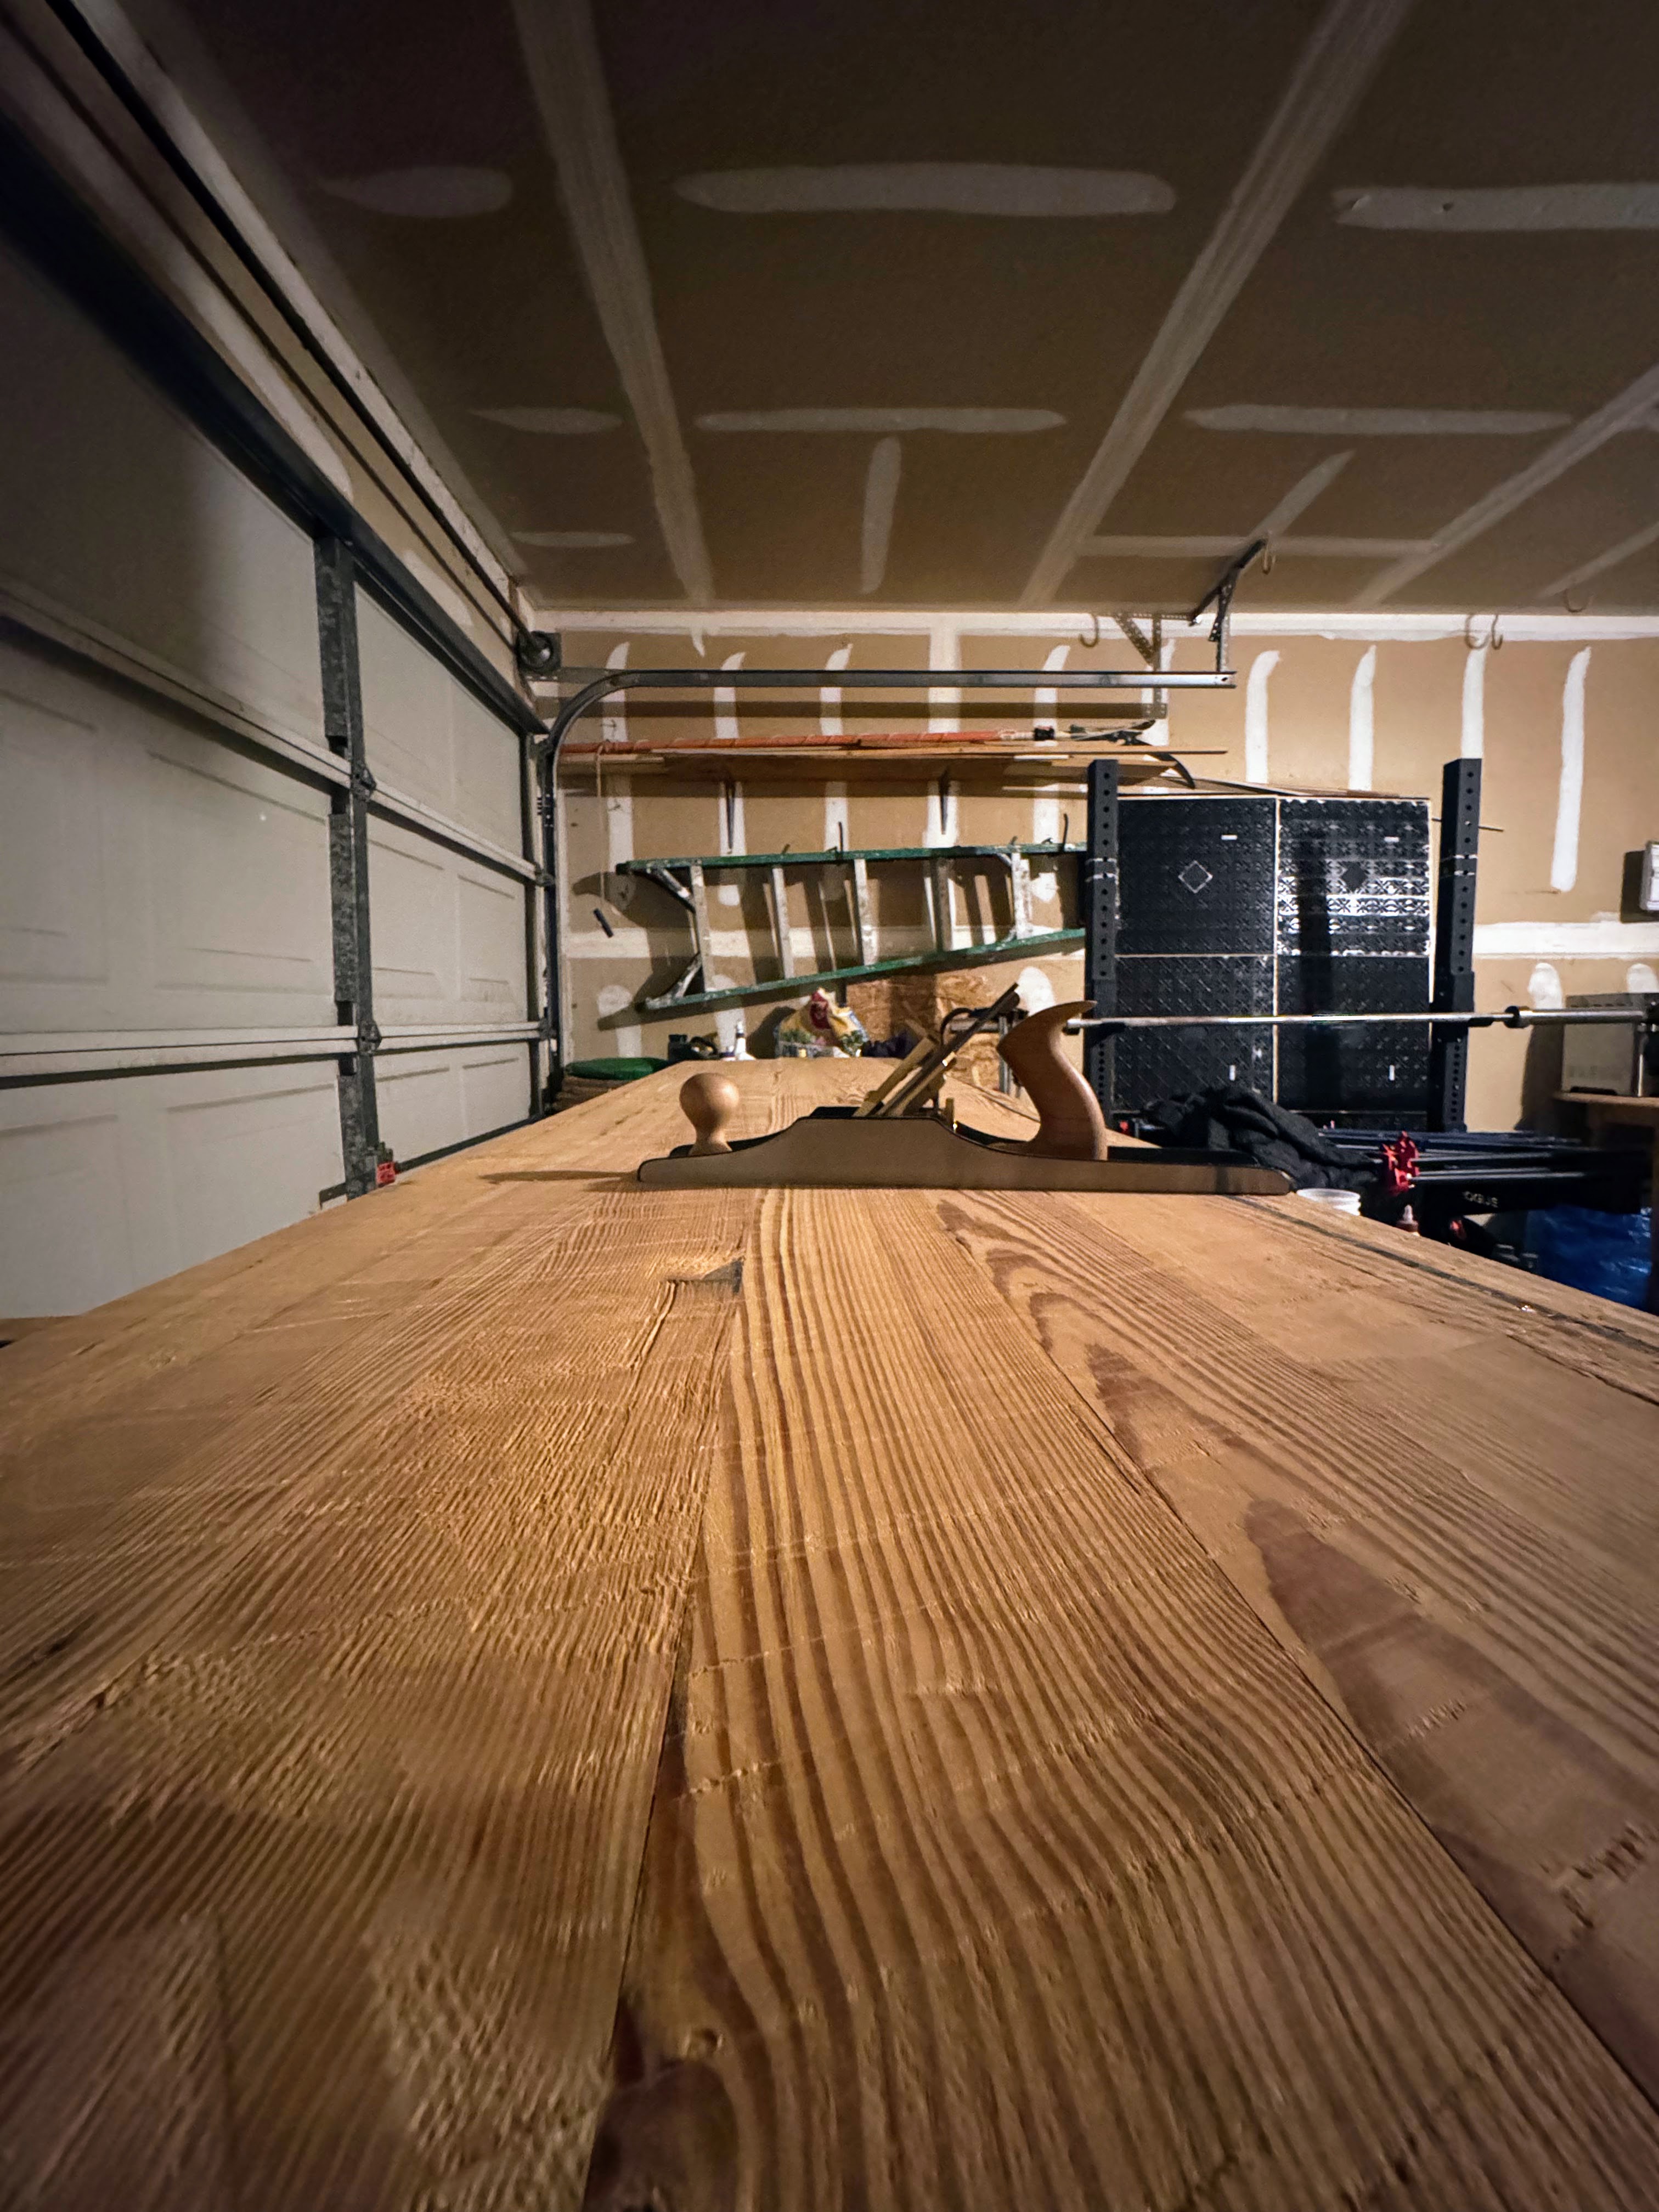
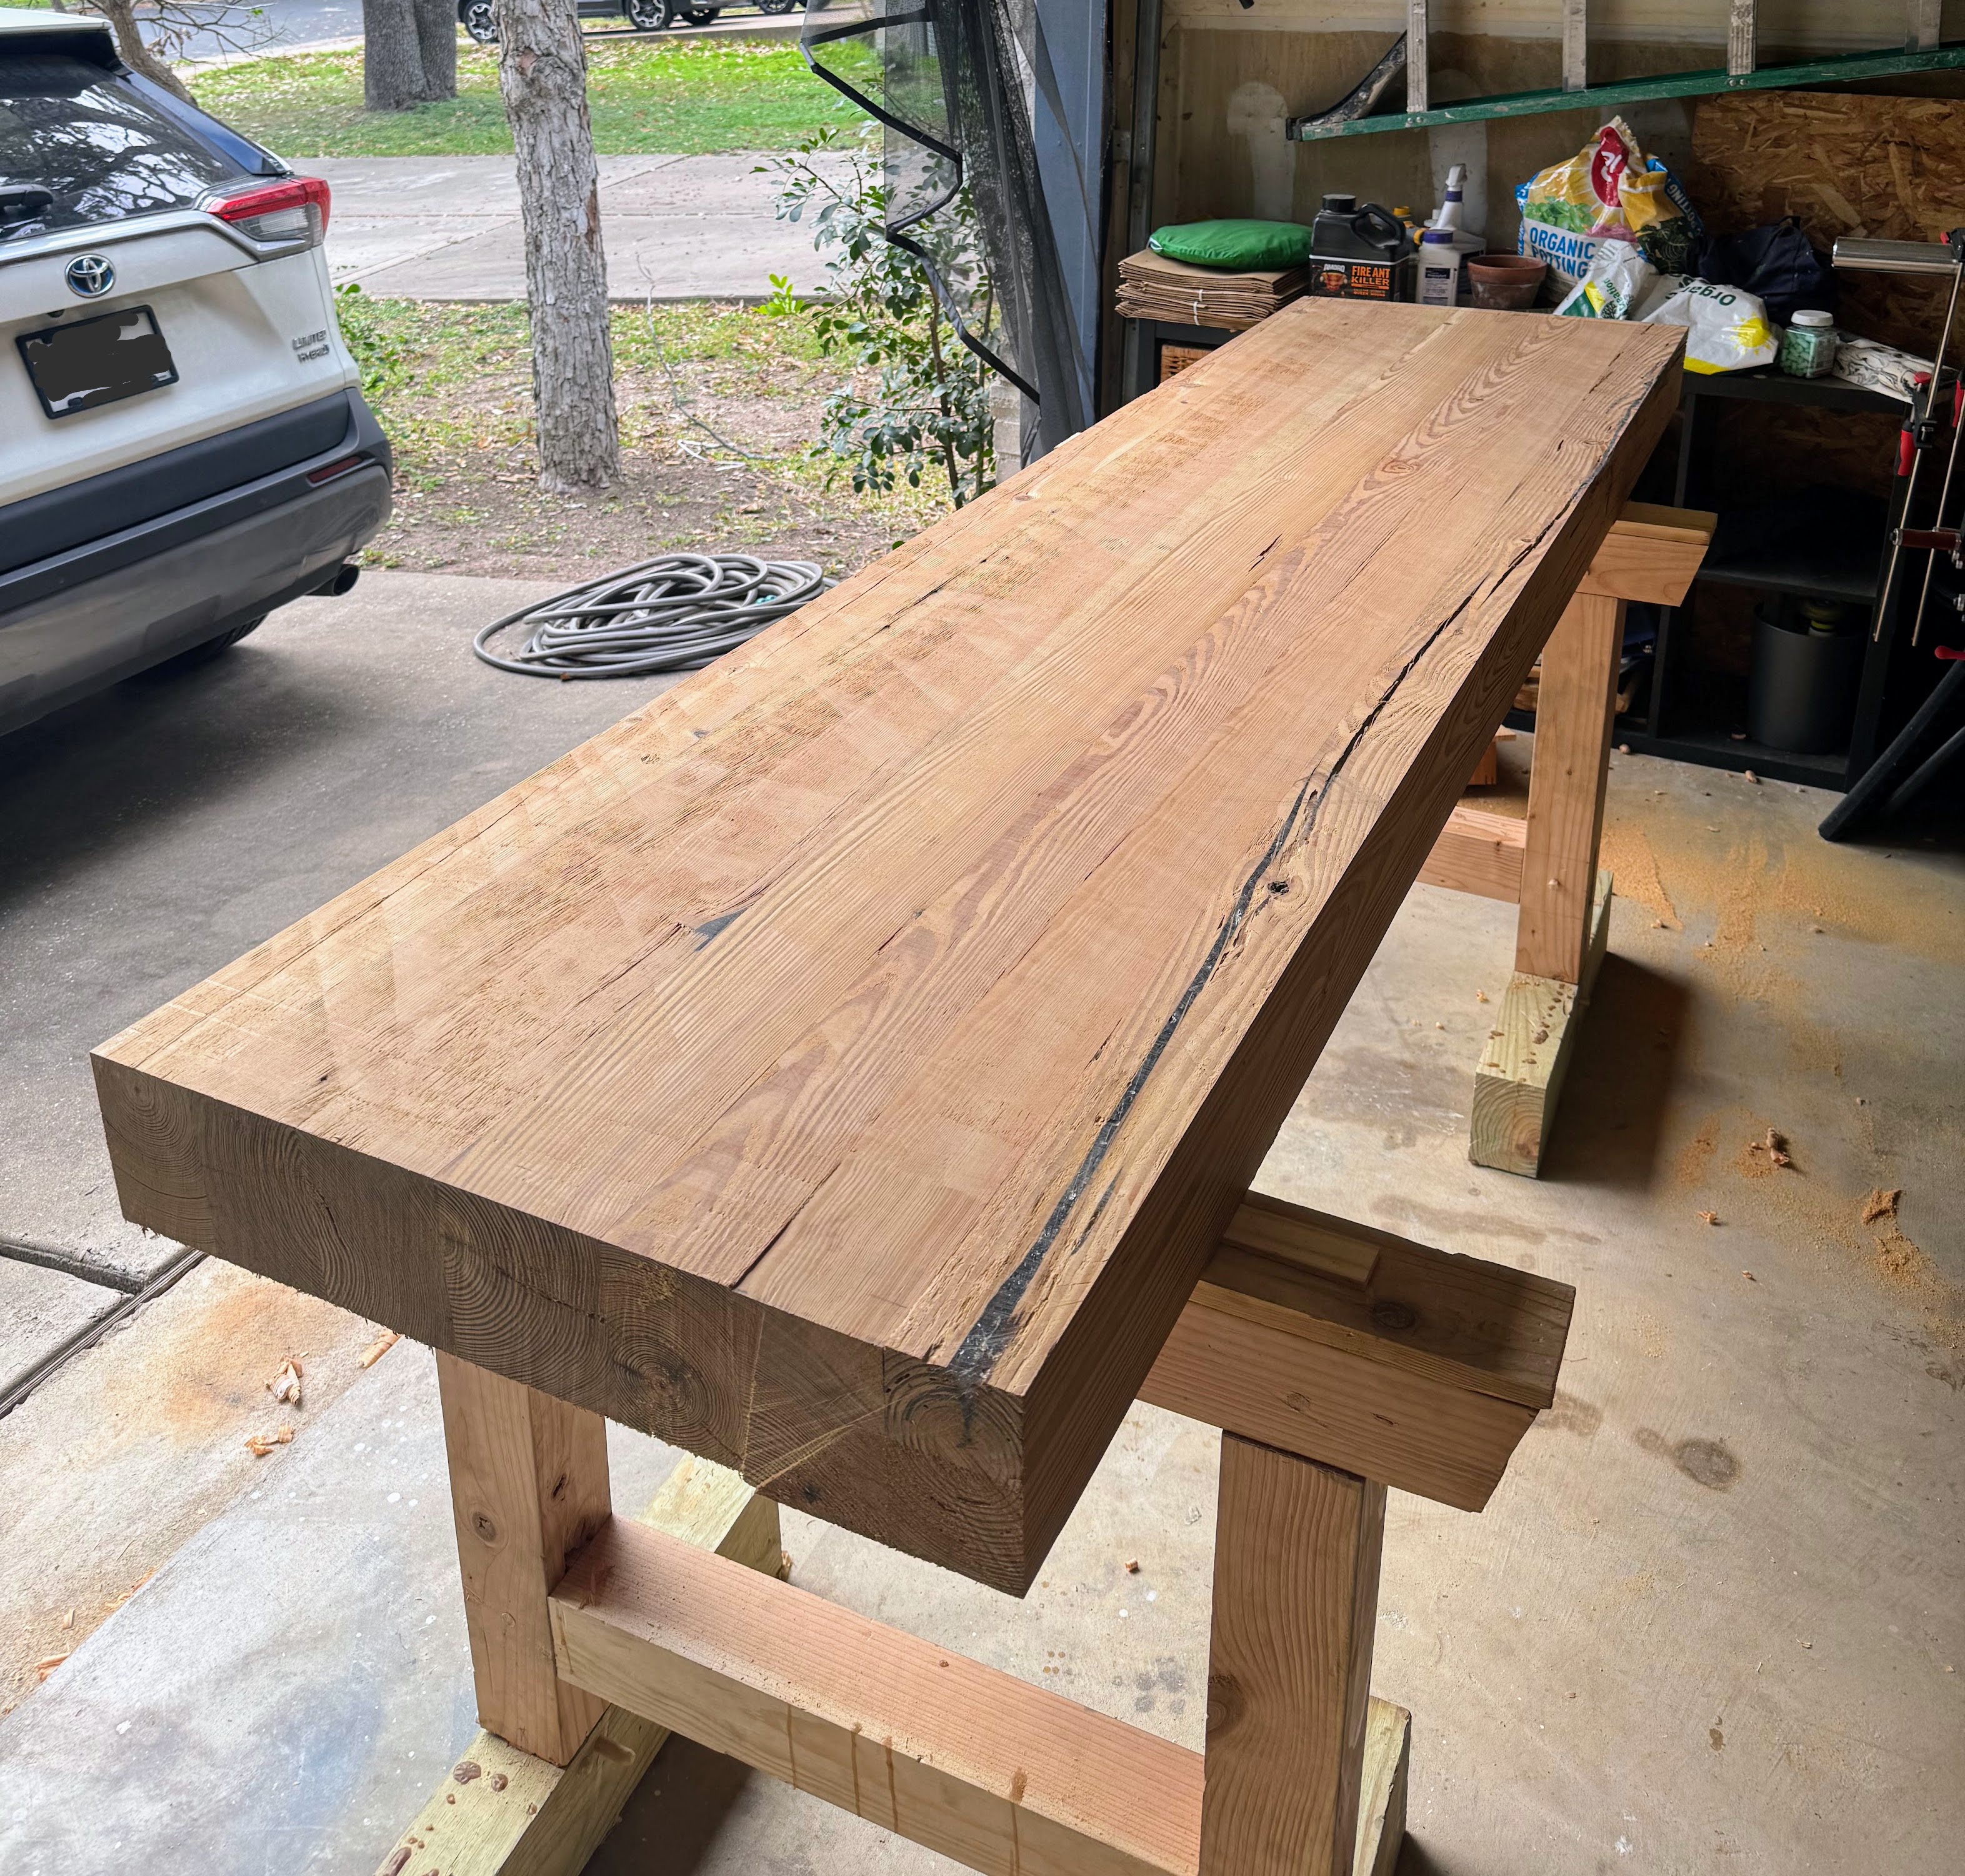
I flipped the top over to flatten the upper surface first. Despite my face-down glue-up strategy, the top had a slight cup. Using my No. 6 hand plane, I worked with a cross-hatch diagonal method to gradually flatten the surface. This was hours of work, including frequent stops to resharpen the plane iron. It was laborious but the result was quite nice.
Next, I flipped the hulking top again to flatten the bottom. This side presented with a bow, which also required planing out. After flattening both the top and bottom surfaces, the initial 5-inch thickness was reduced by about 1/8th of an inch, leaving a final thickness of approximately 4 7/8 inches – not bad, considering the initial state.
With both faces flat, I jointed the long edges of the top. Maneuvering the top onto its side was a challenge; this laminated top was heavy, even for a powerlifter. I used the sawhorses effectively here, resting the edge of the top on the sawhorse feet and clamping it to the sawhorse beam for stability.
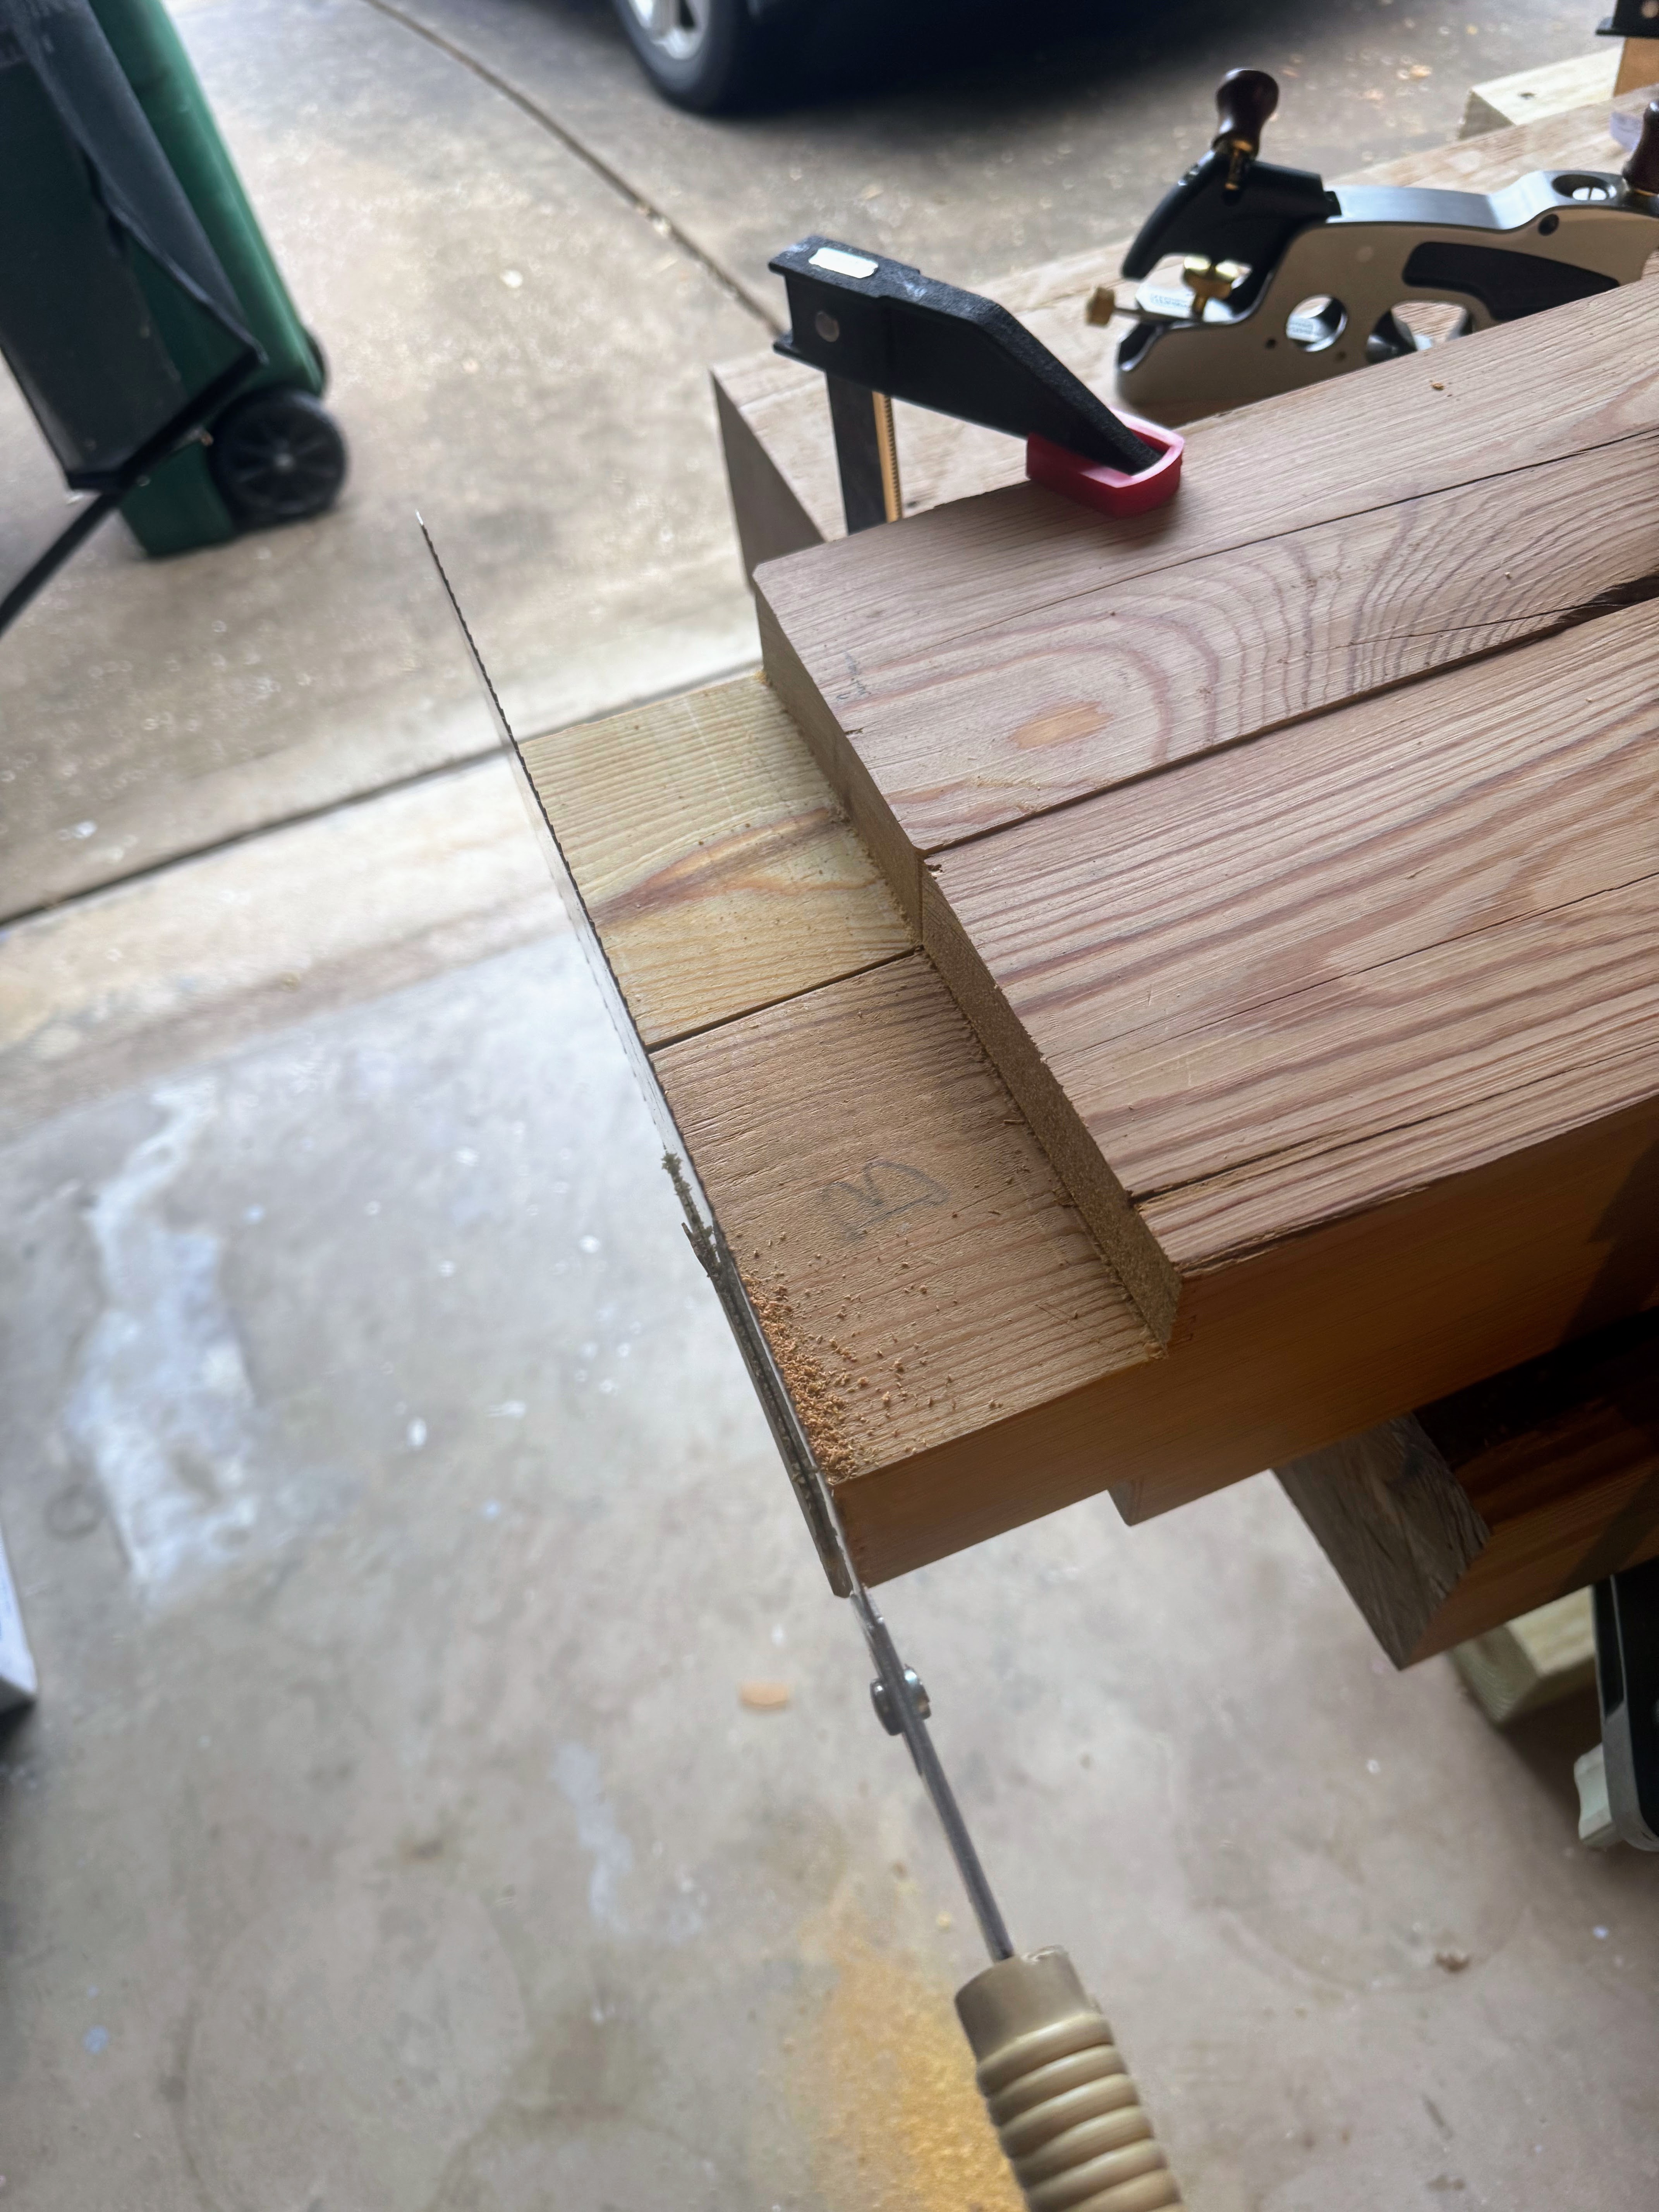
Finally, I cut the top to its finished length. With the top placed face-down on the sawhorses, I made the initial cuts with a circular saw and then finished them with a hand saw. These end cuts didn’t turn out perfectly square.

Part 6: Crafting the Base – Joinery and Adjustments
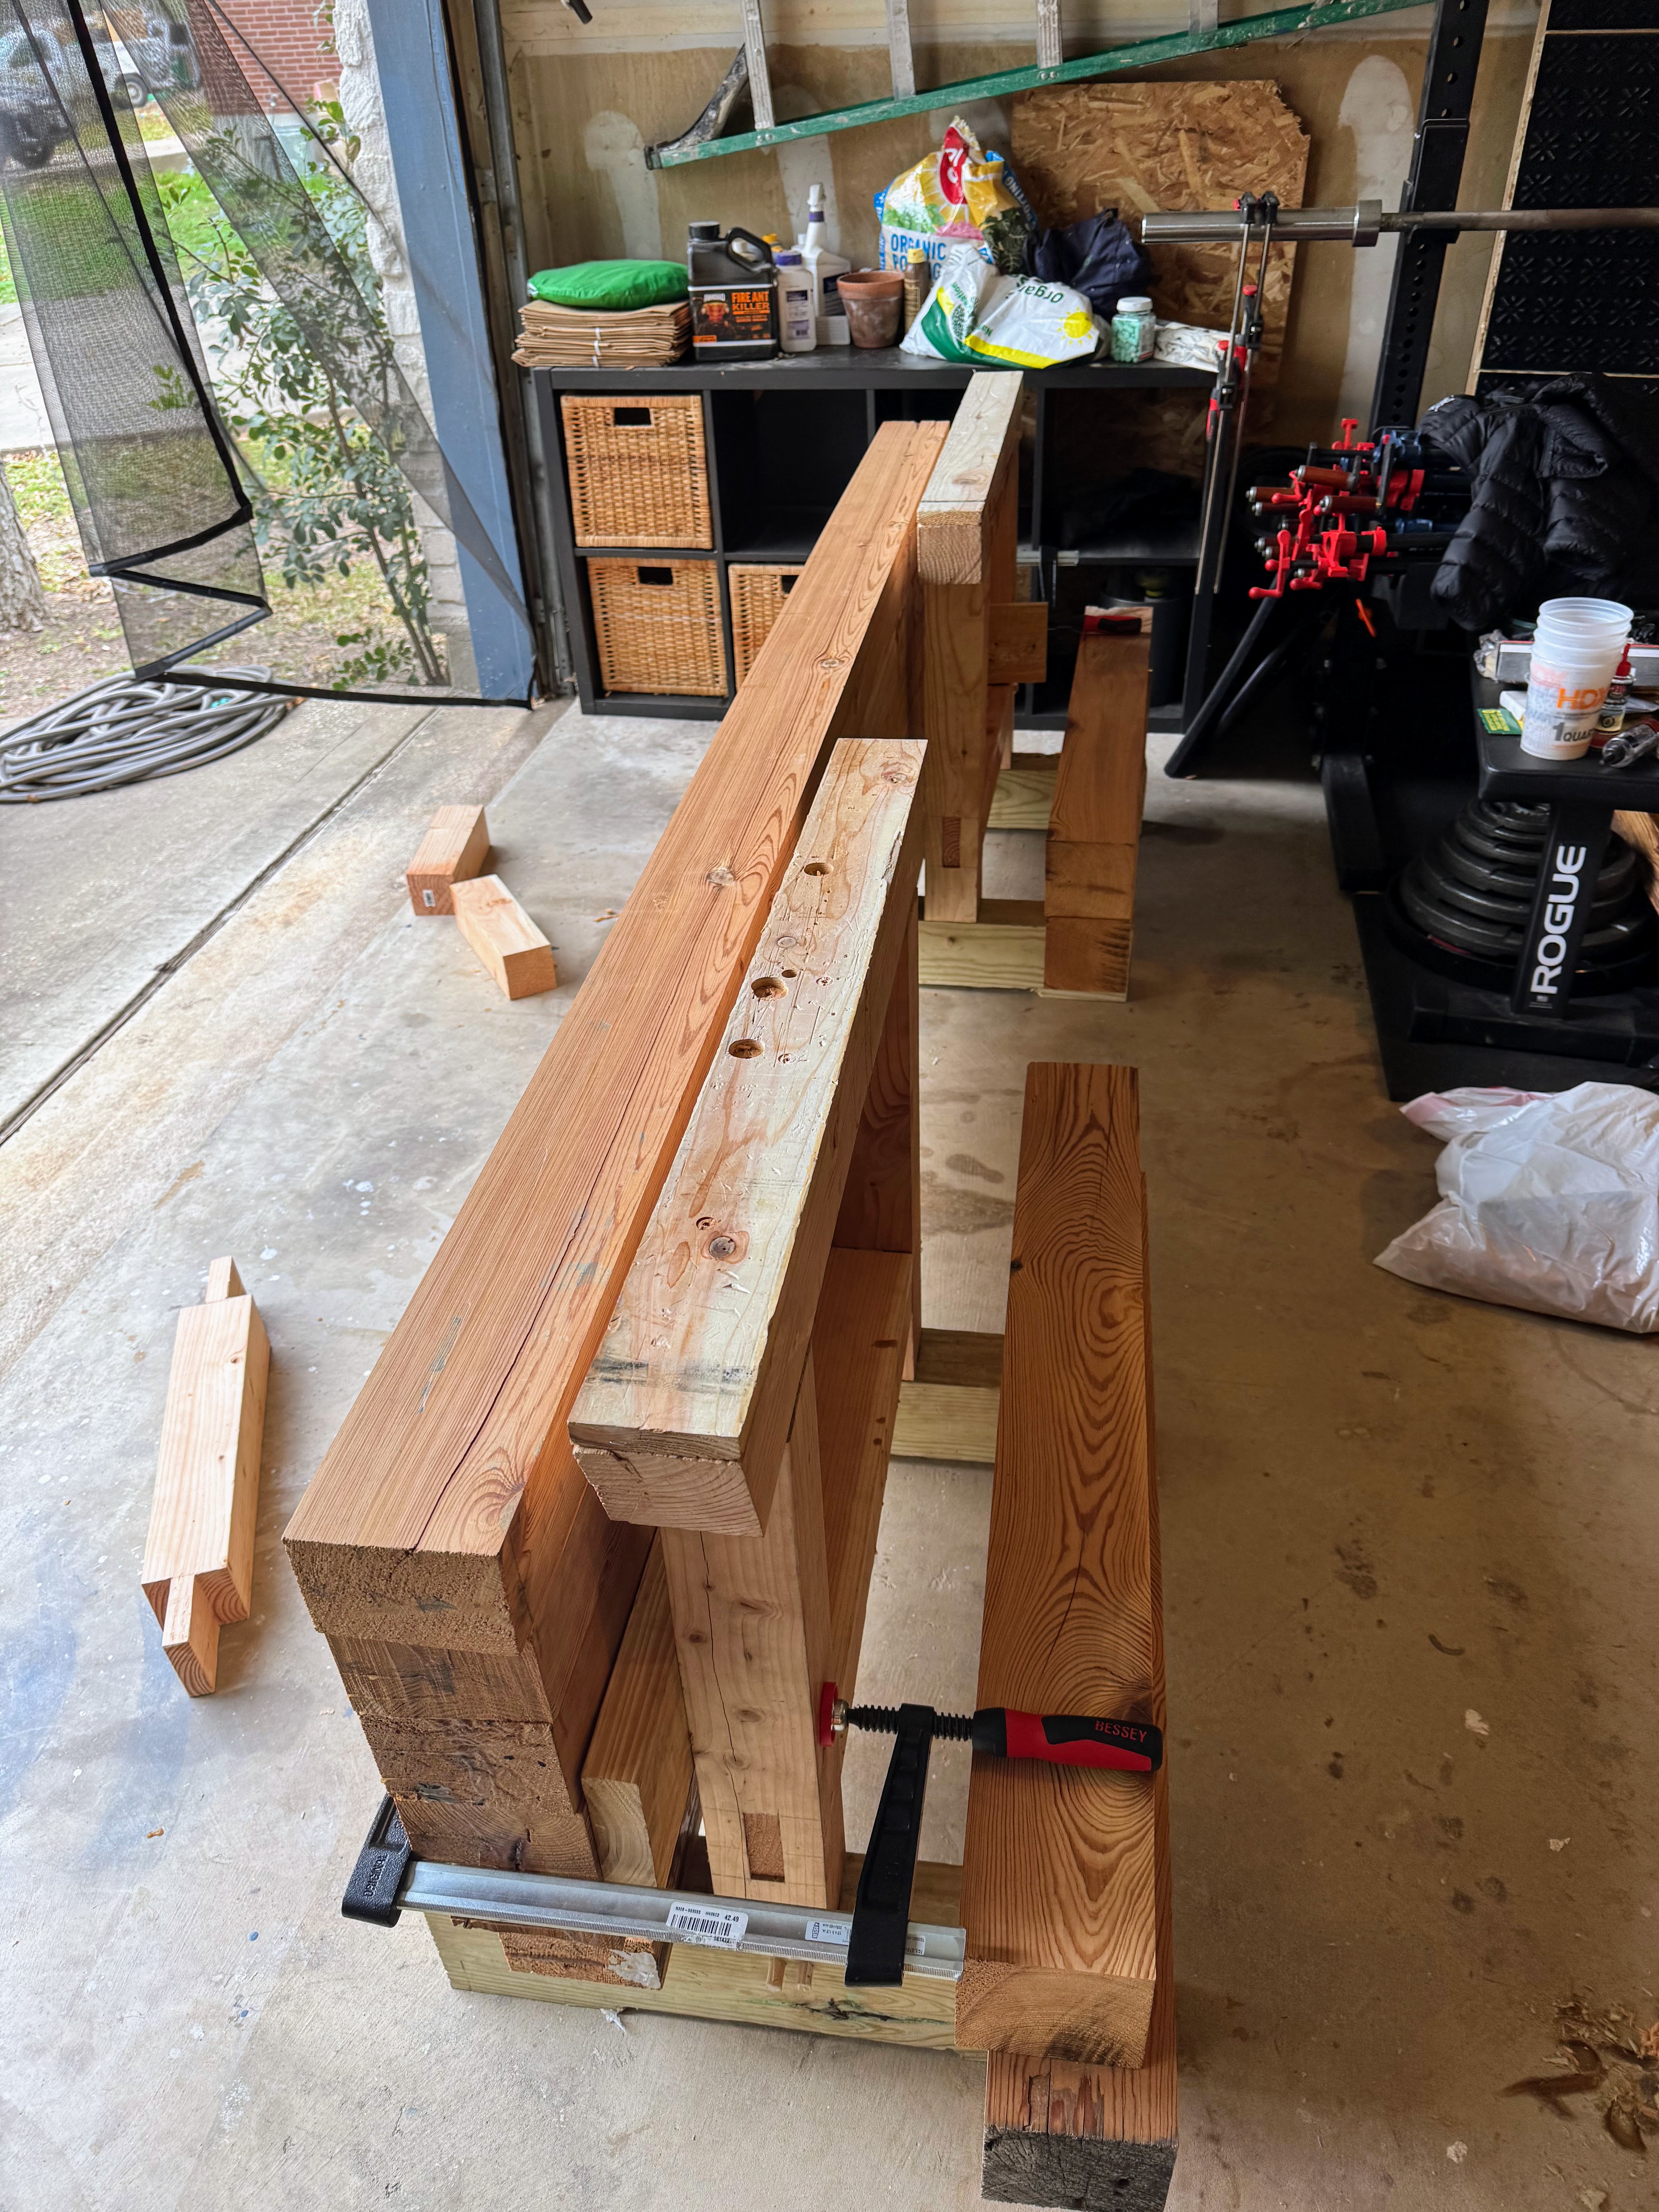
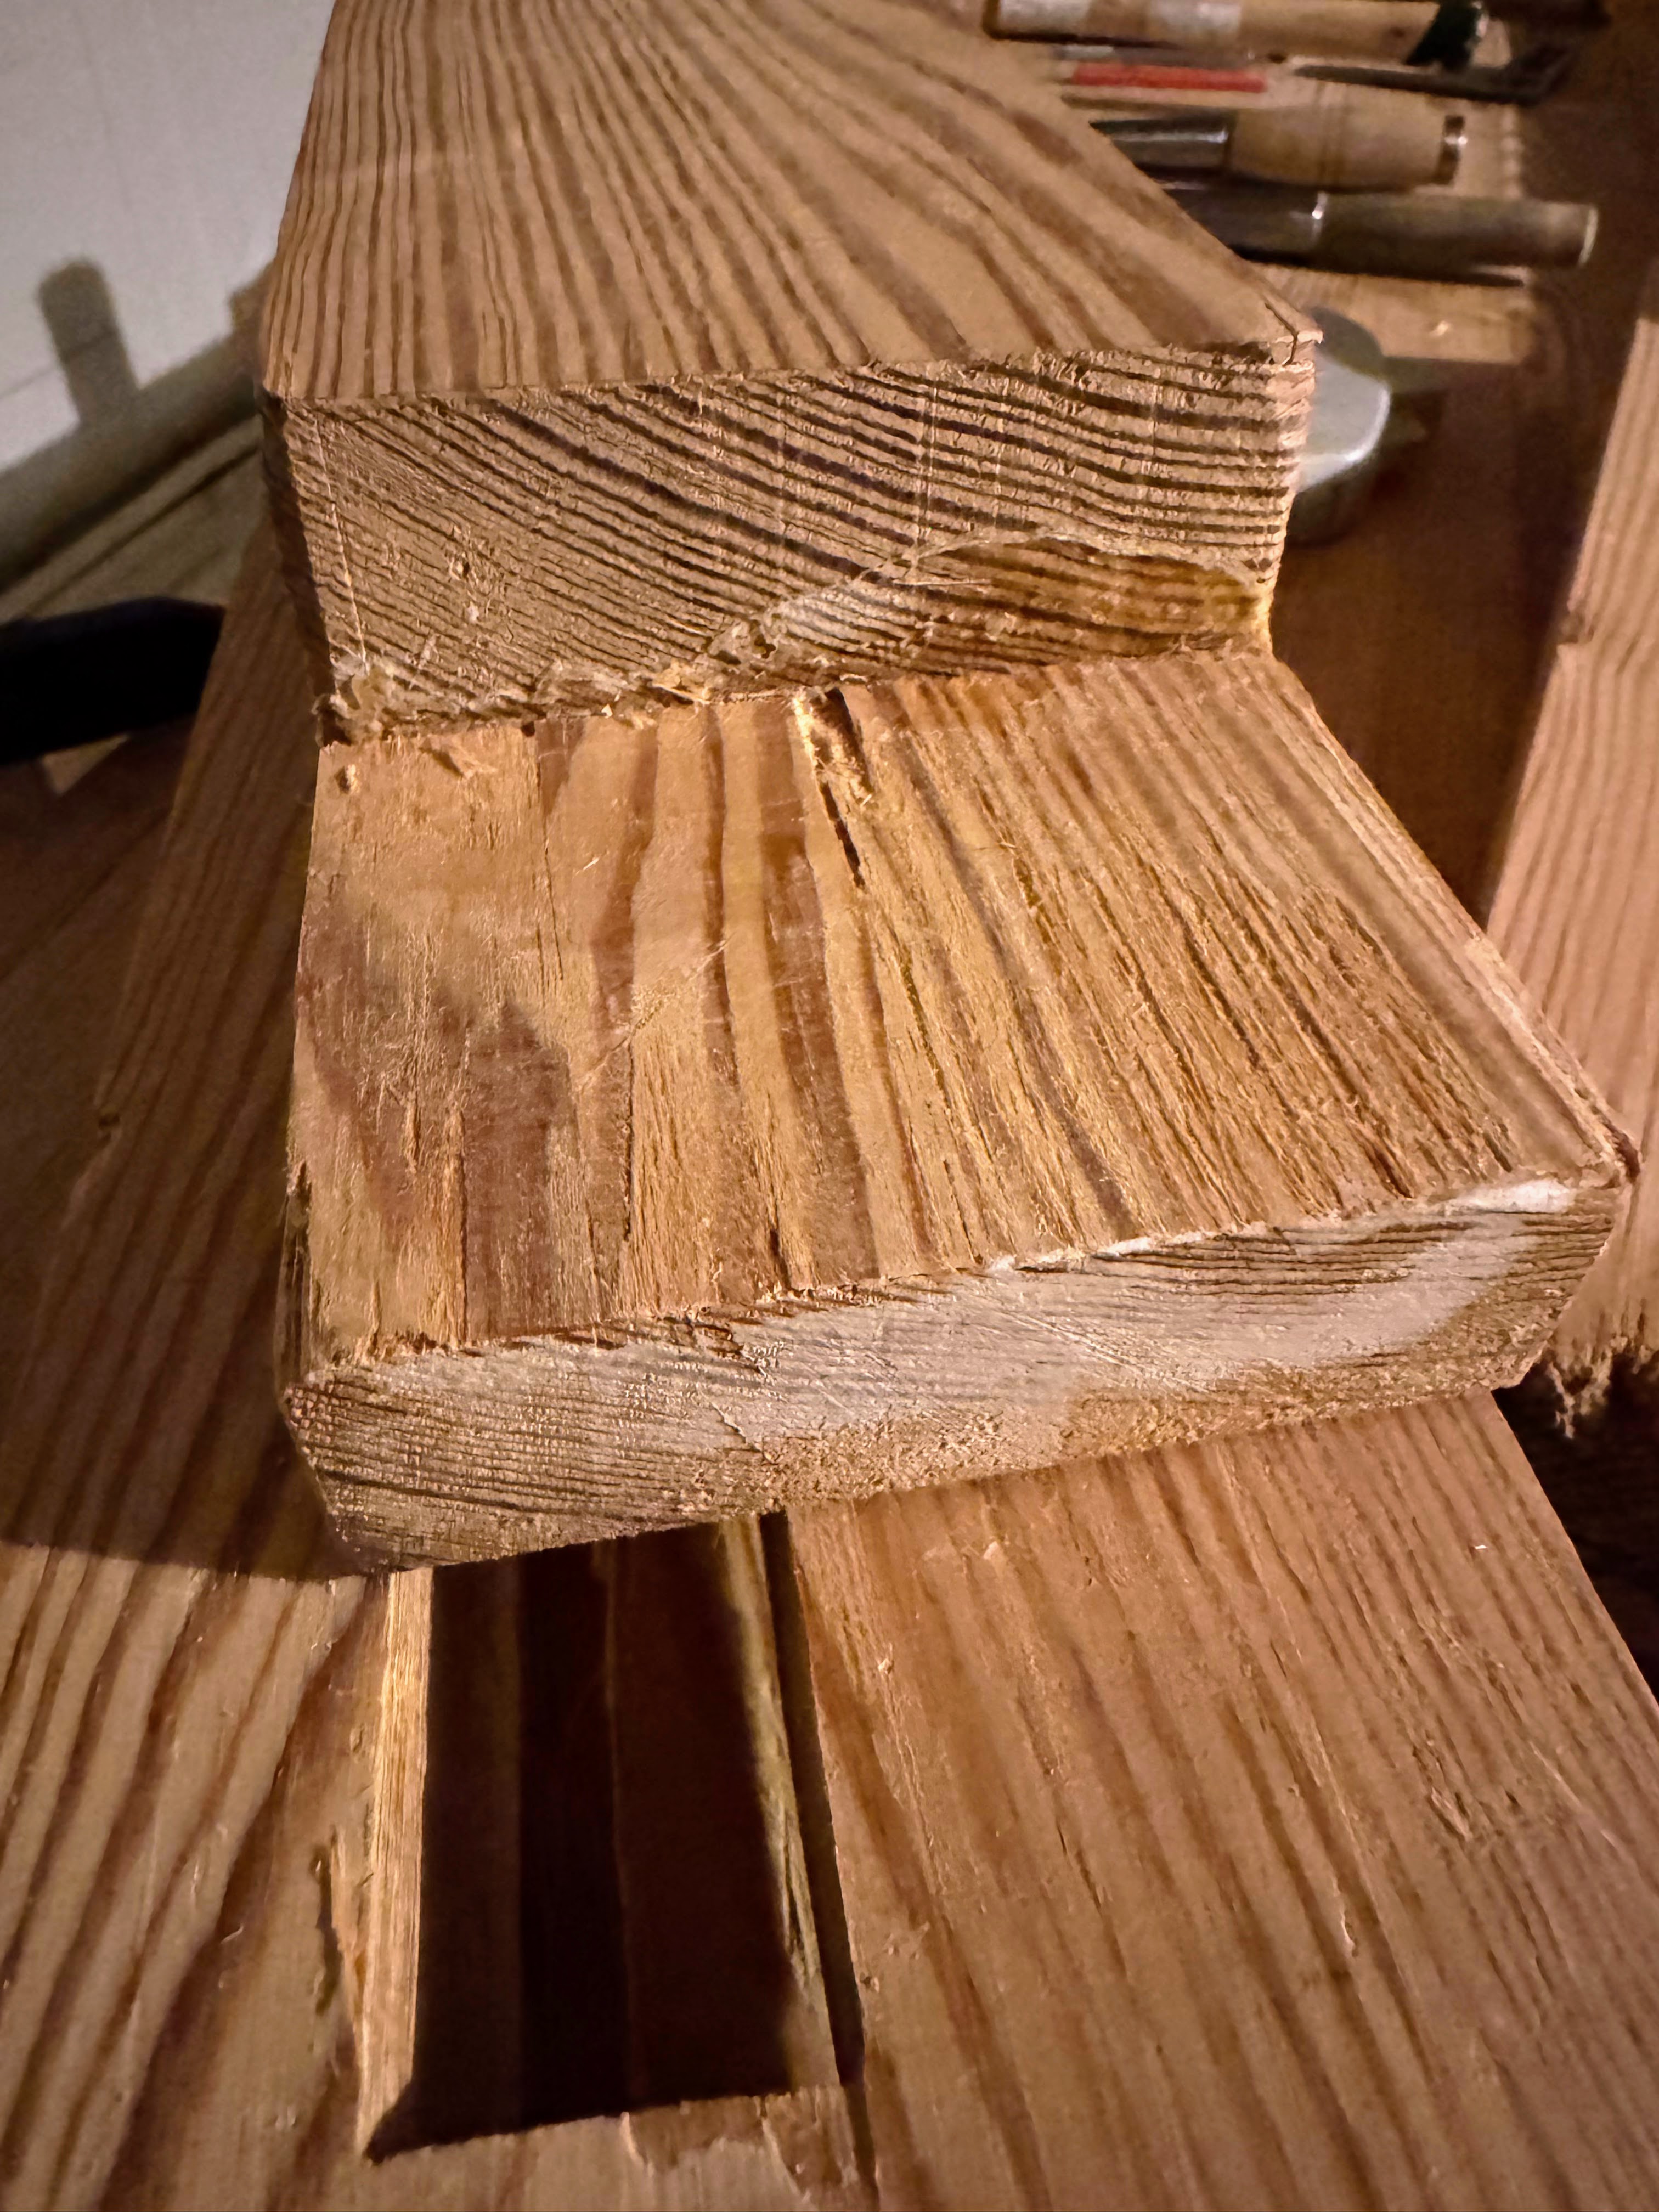
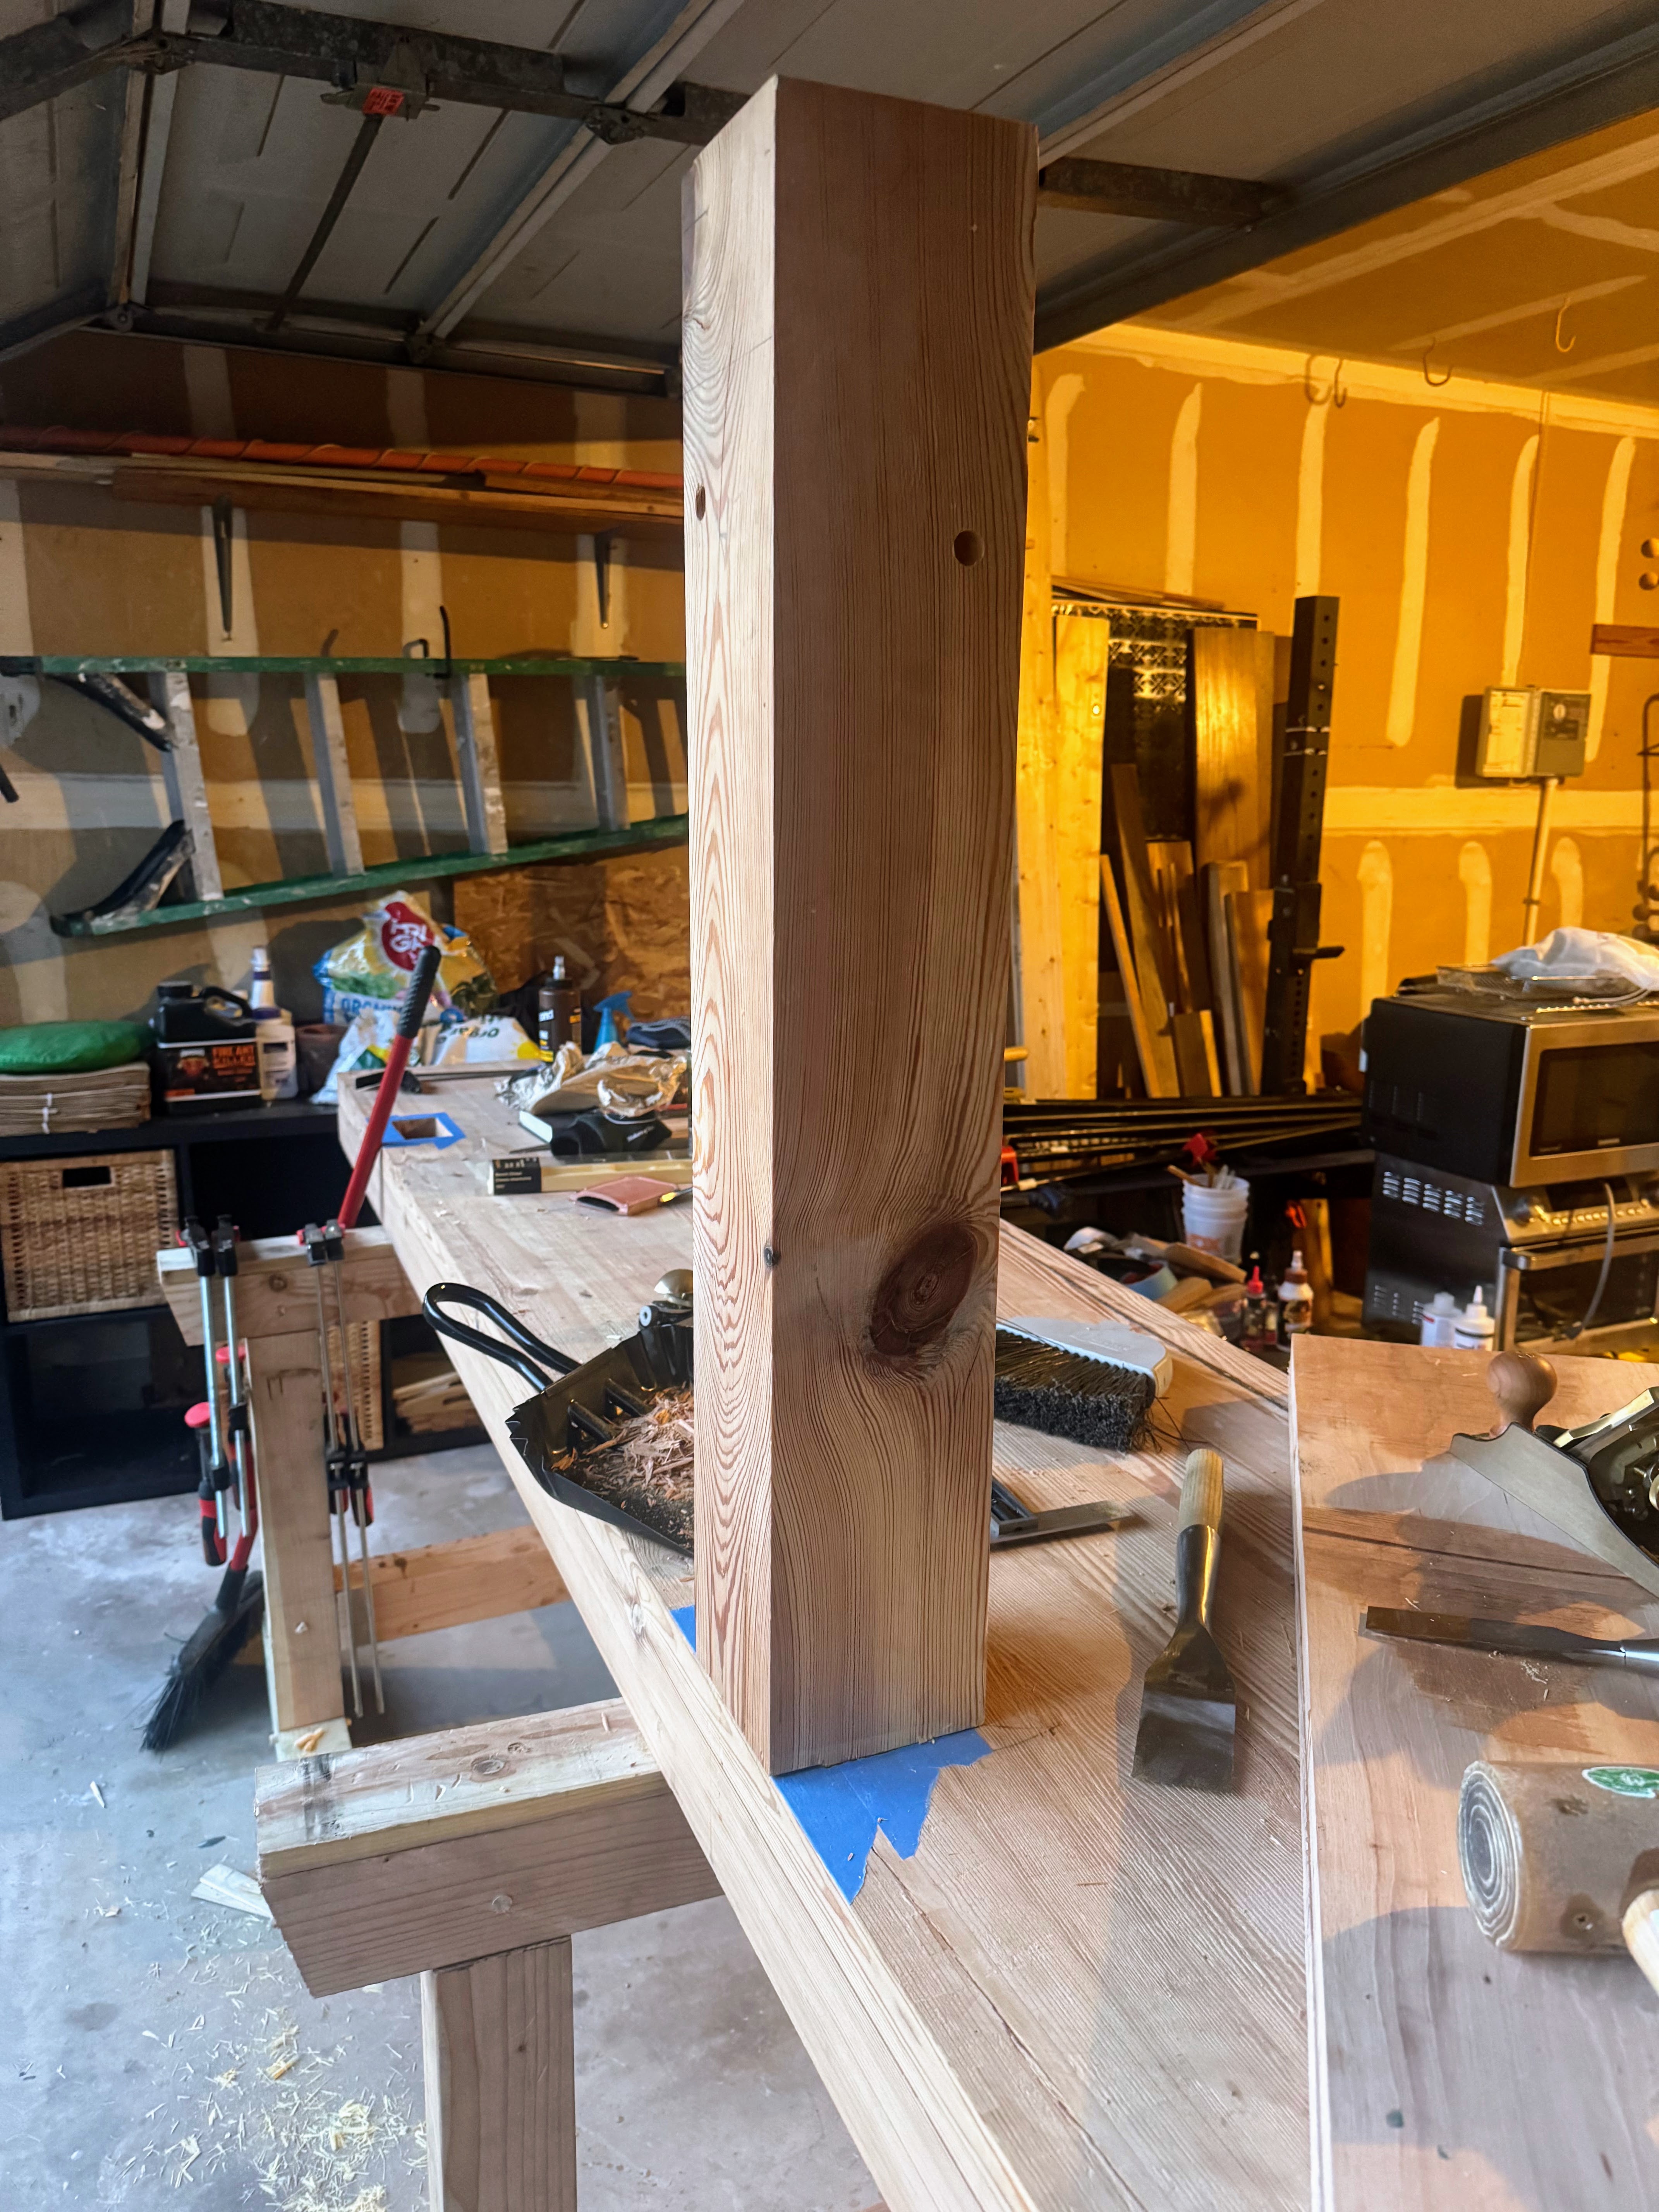
The next phase involved constructing the base, which meant cutting tenons on the legs and the mortise and tenon joints for the stretchers and stringers that connect the leg assemblies.
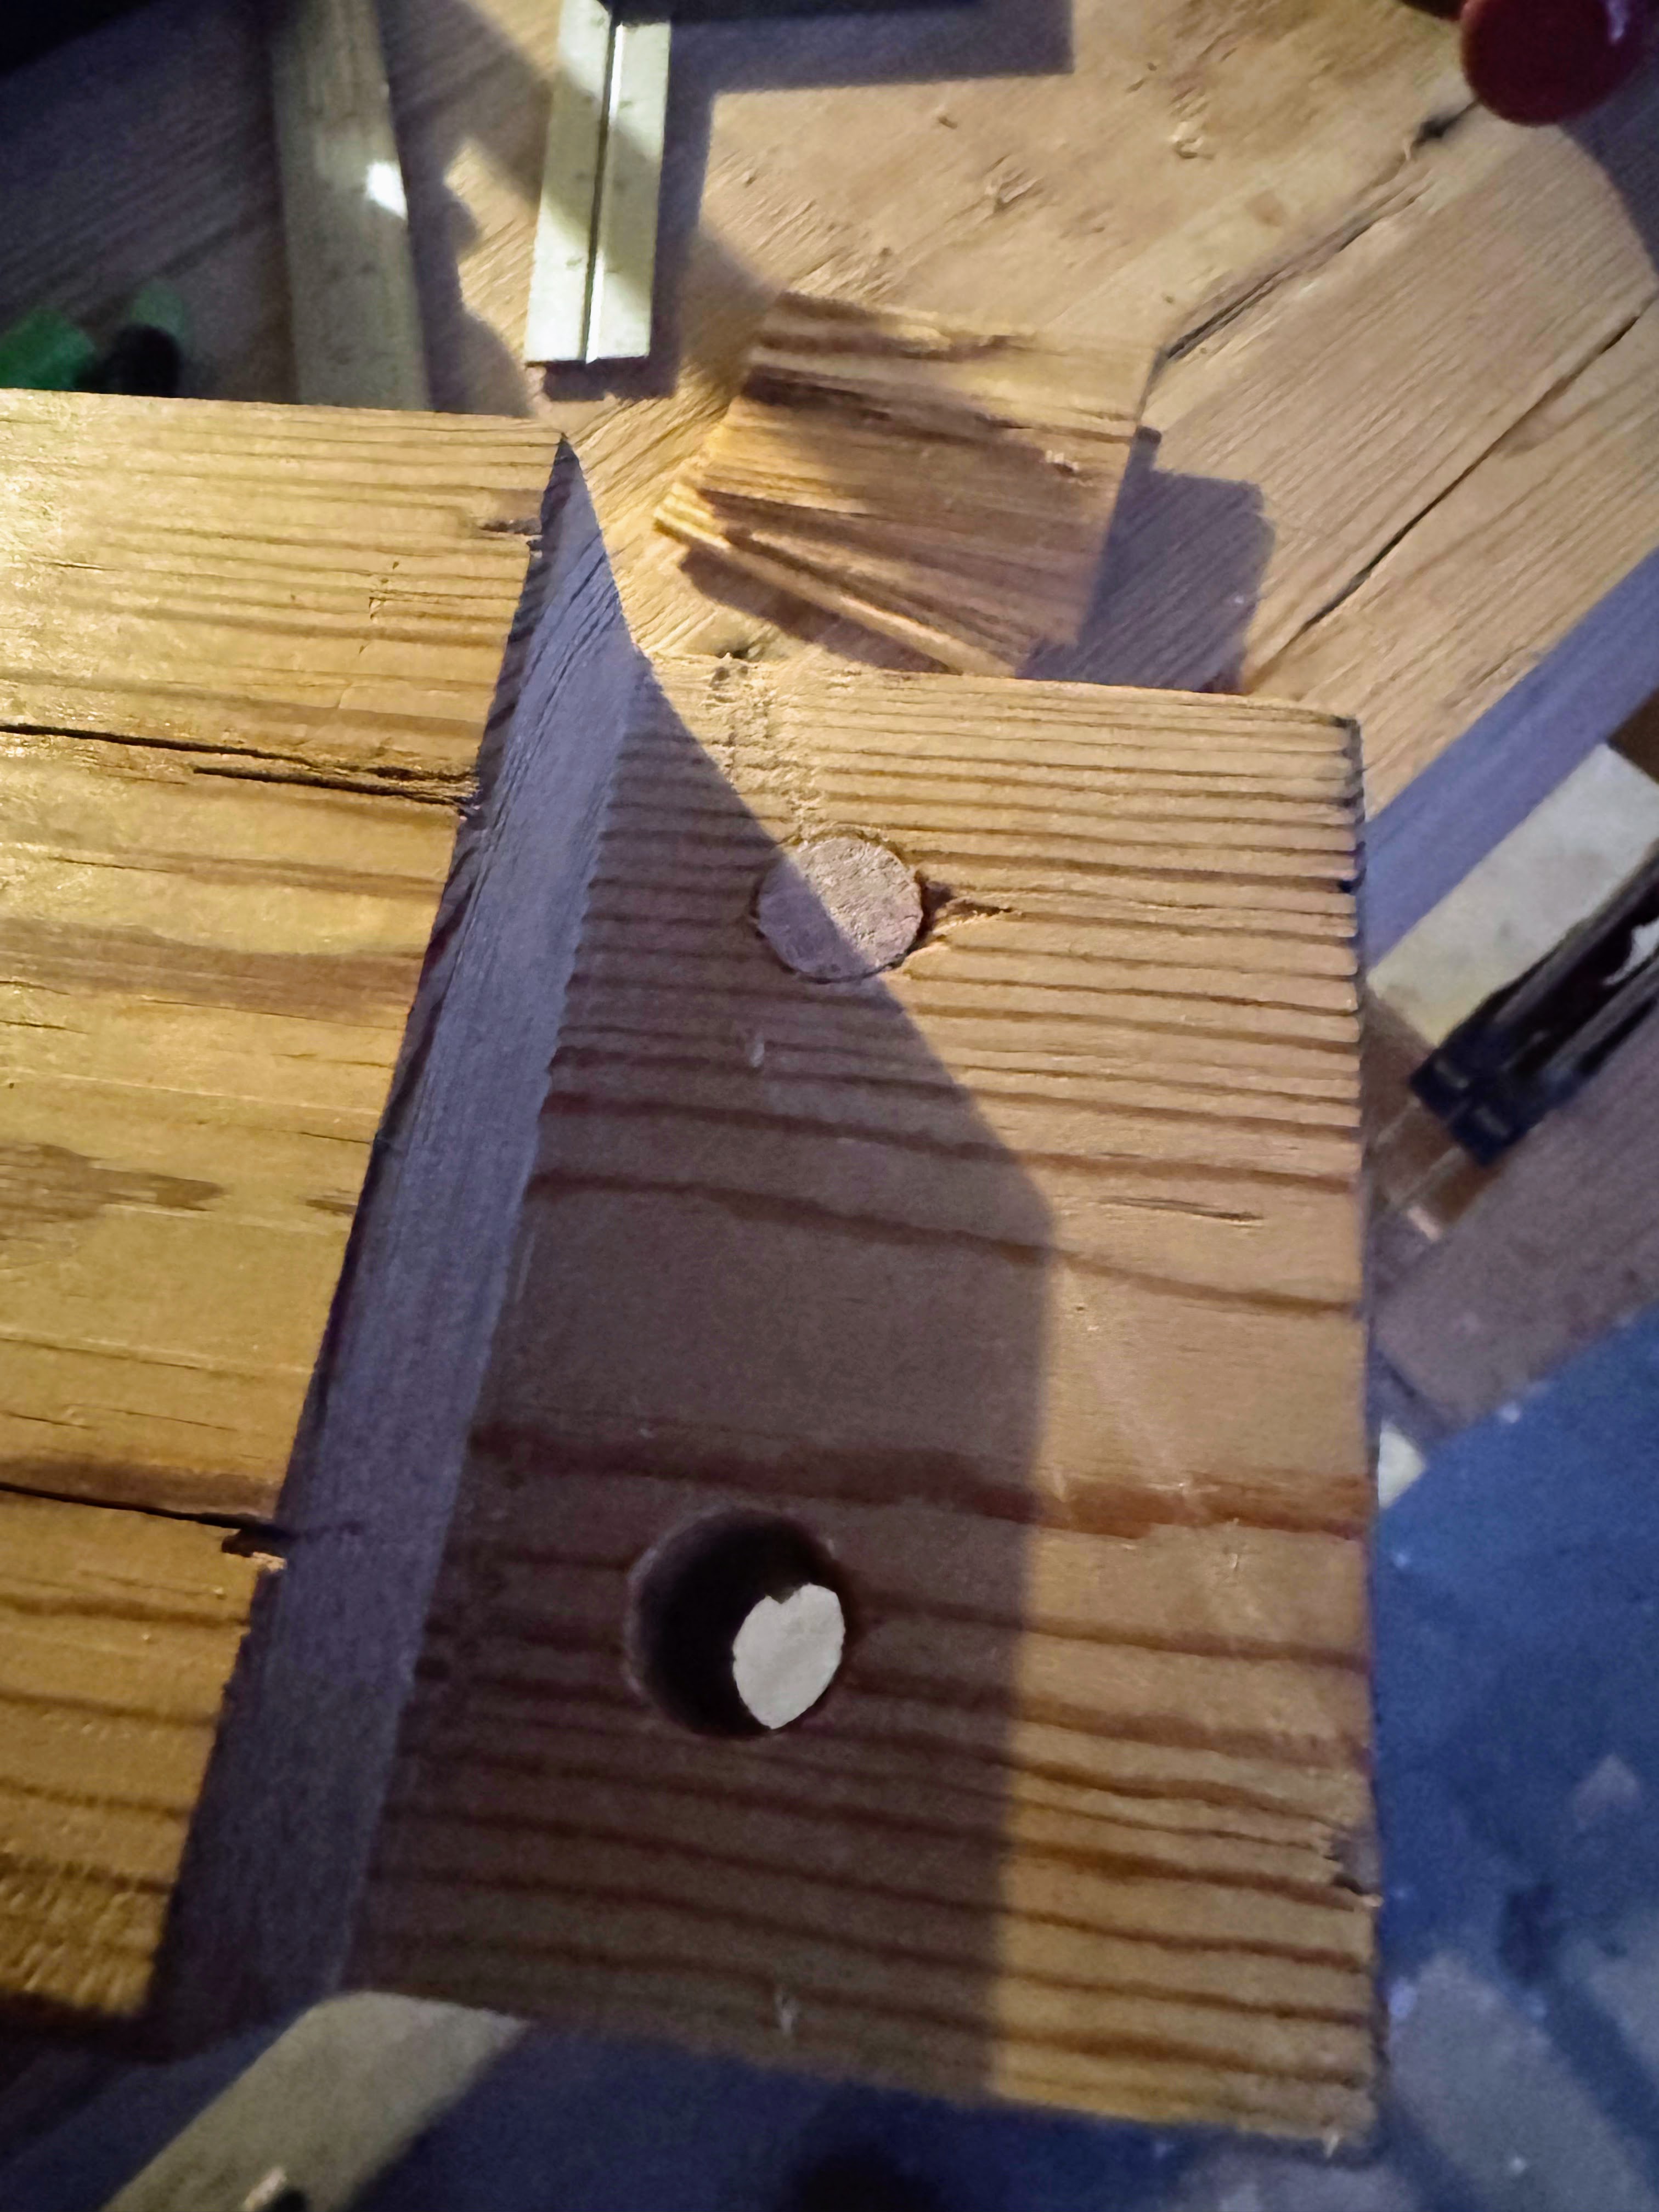
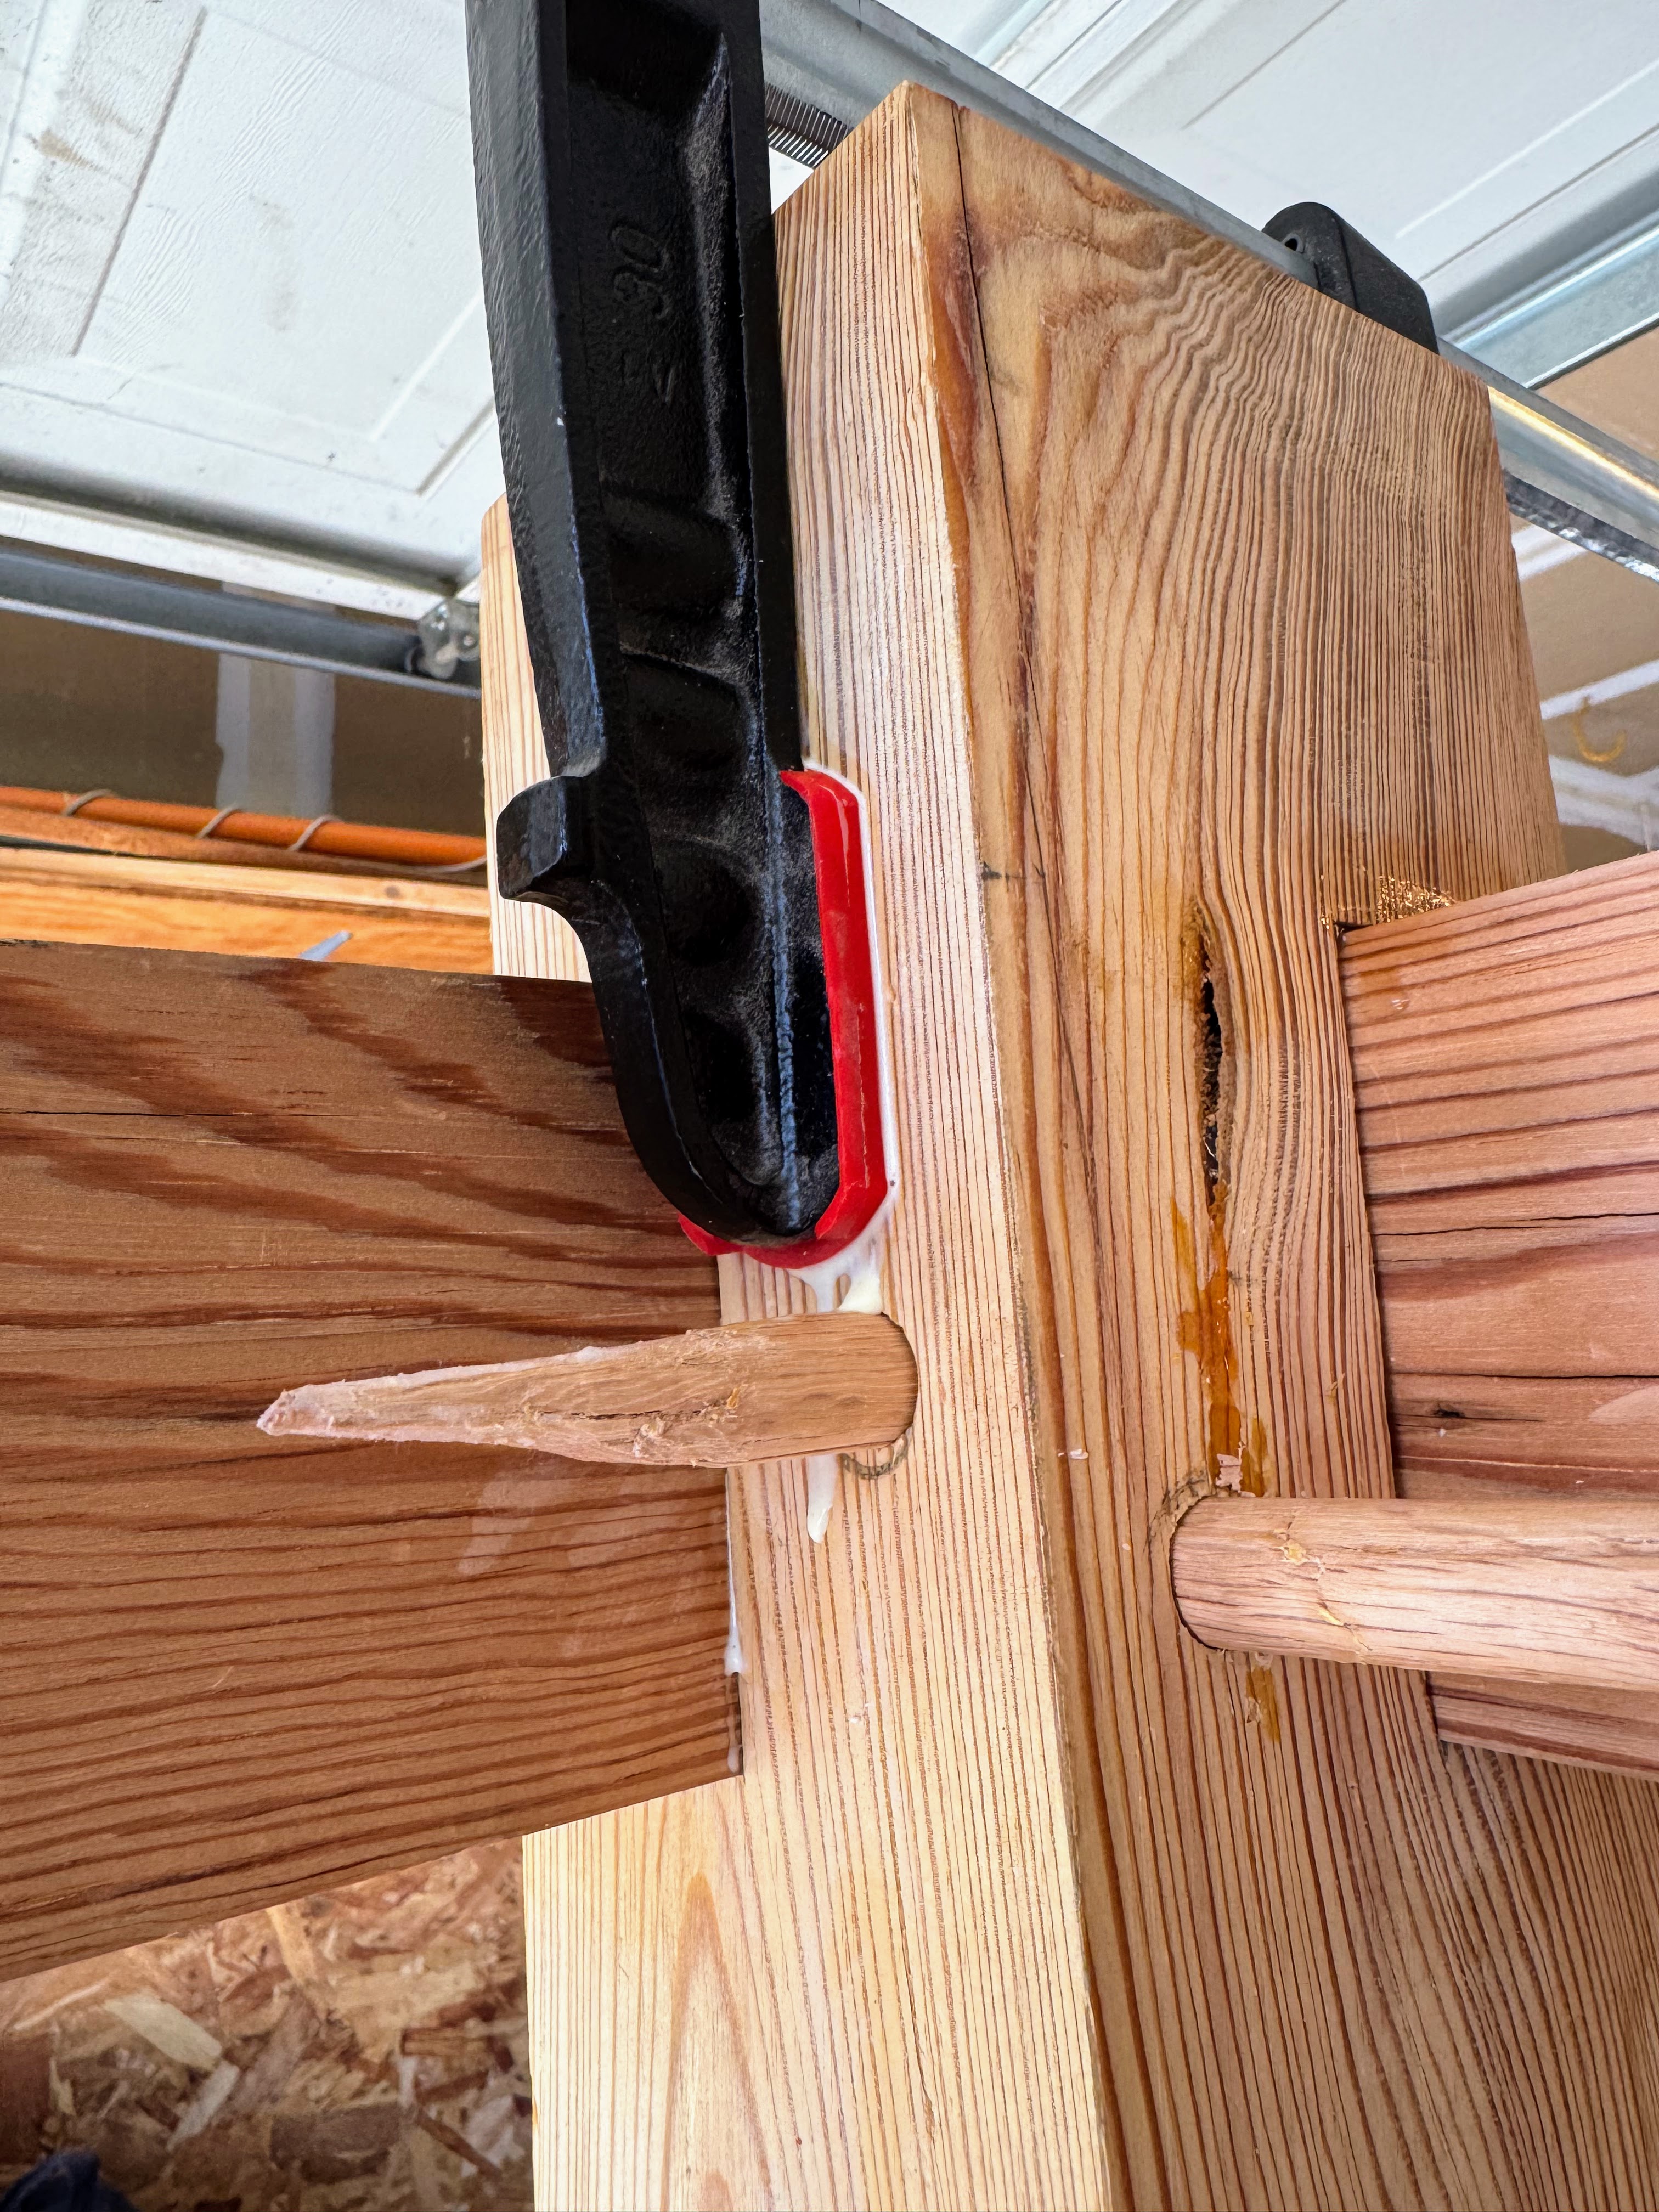
This stage was characterized by a number of measurement errors and subsequent corrections. I spent considerable time shaving down and fine-tuning tenons and shoulders to ensure everything would be as square as possible for the final assembly and “staking.” For instance, one stringer tenon was over-cut and needed to be thickened. Another stretcher tenon required a sliver to be sawn off to achieve the correct fit. I wanted to be fastidious here as squareness is crucial when the joints pull tight from draw boring.
One of my draw bore holes on a tenon was not offset enough so I also had to do the “glue a dowel in” trick and redrill.
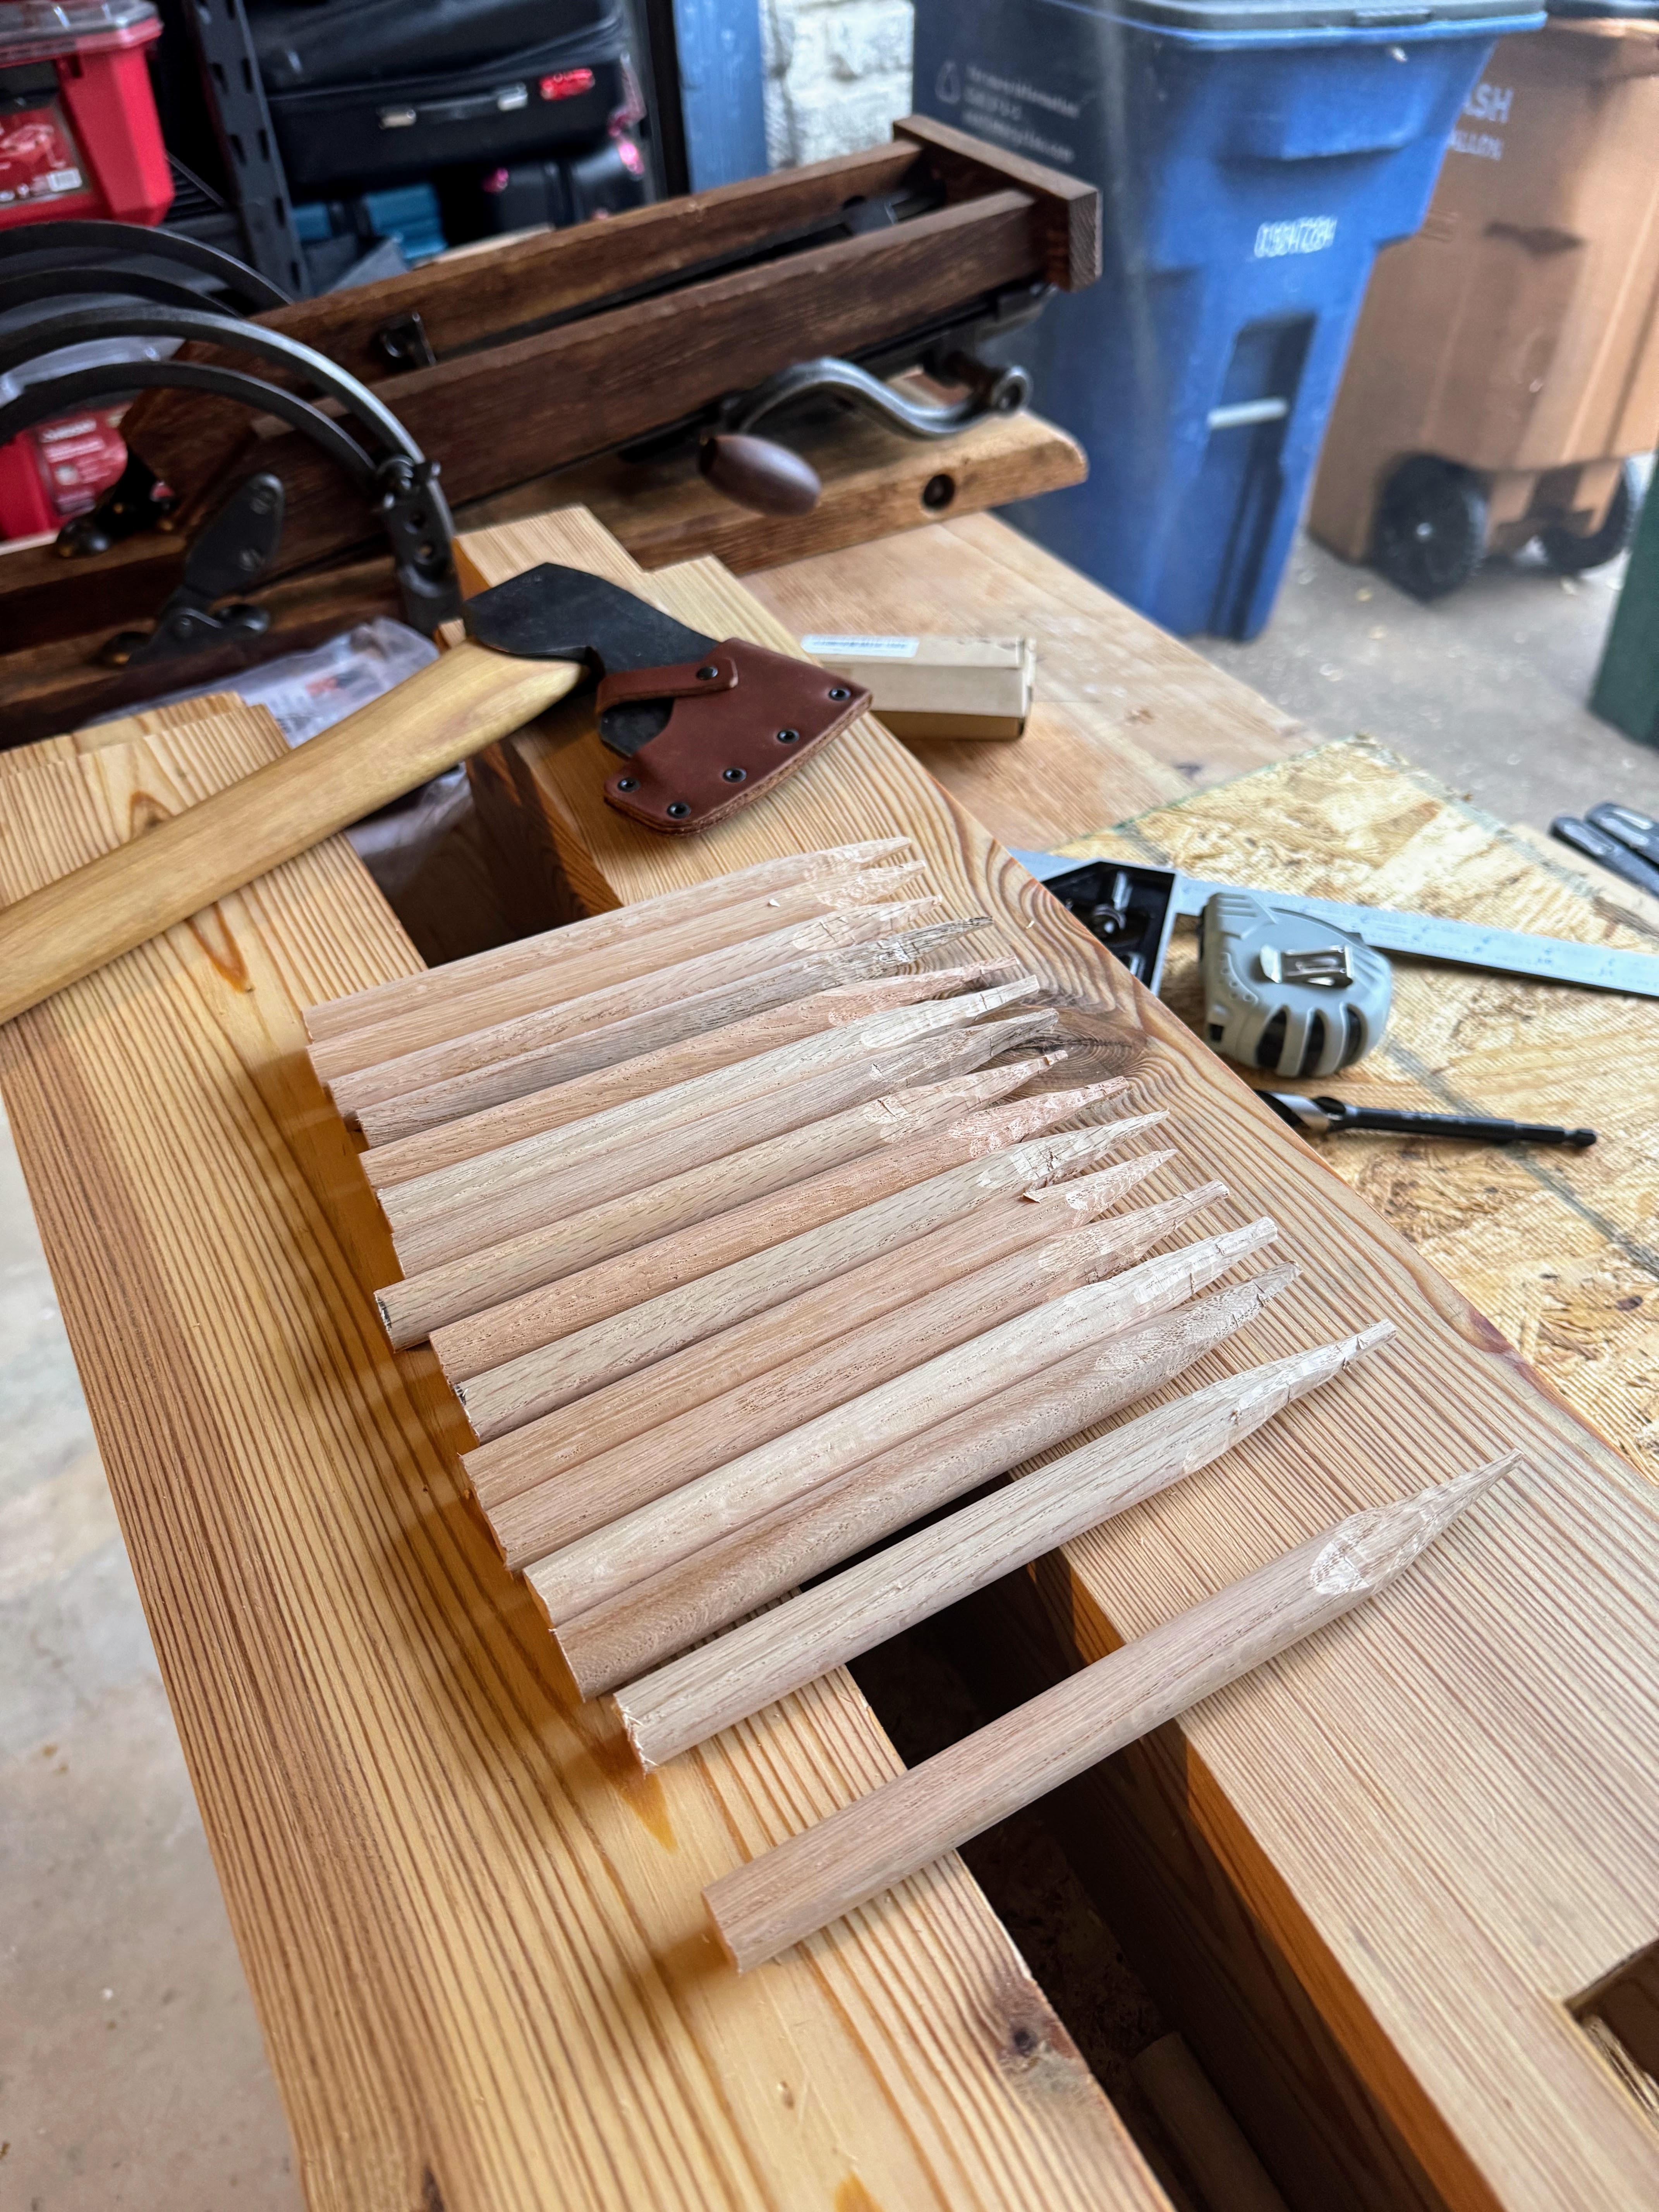
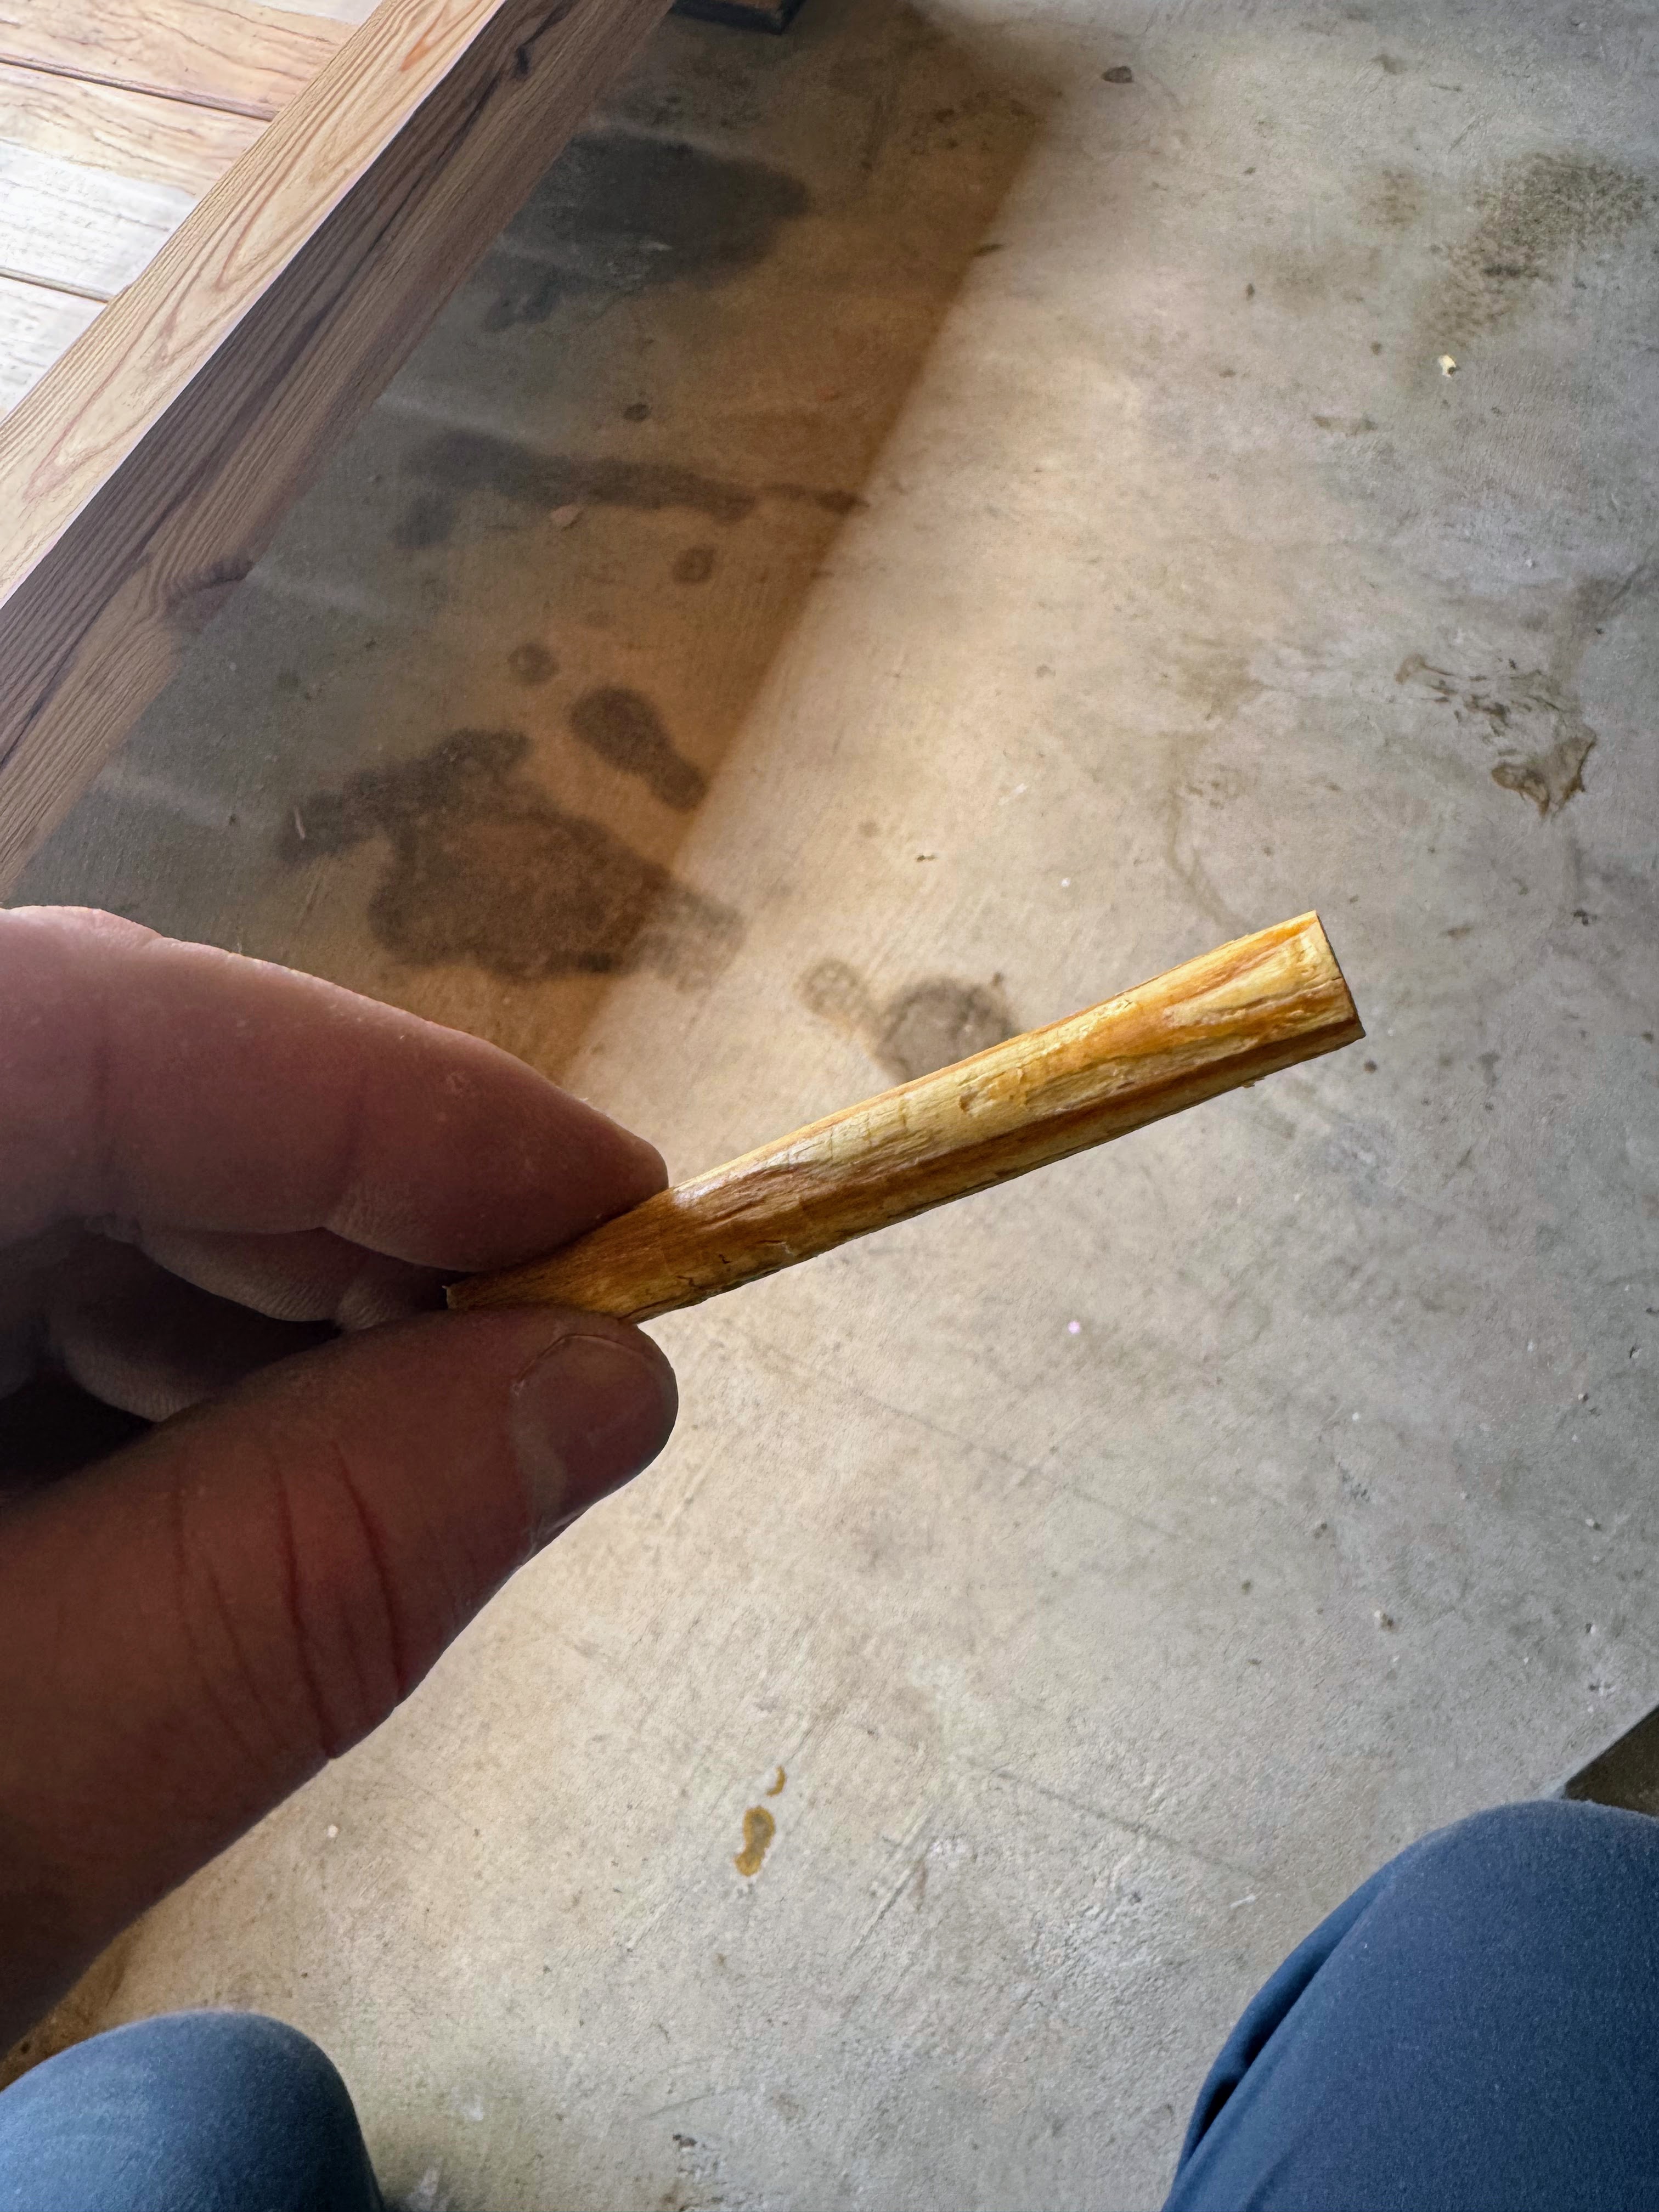
I also prepared the red oak pegs. I started with pre-made dowels of the correct diameter purchased from Lowe’s and then shaped one end of each peg to be pointy, following Christopher Schwarz’s recommendation.
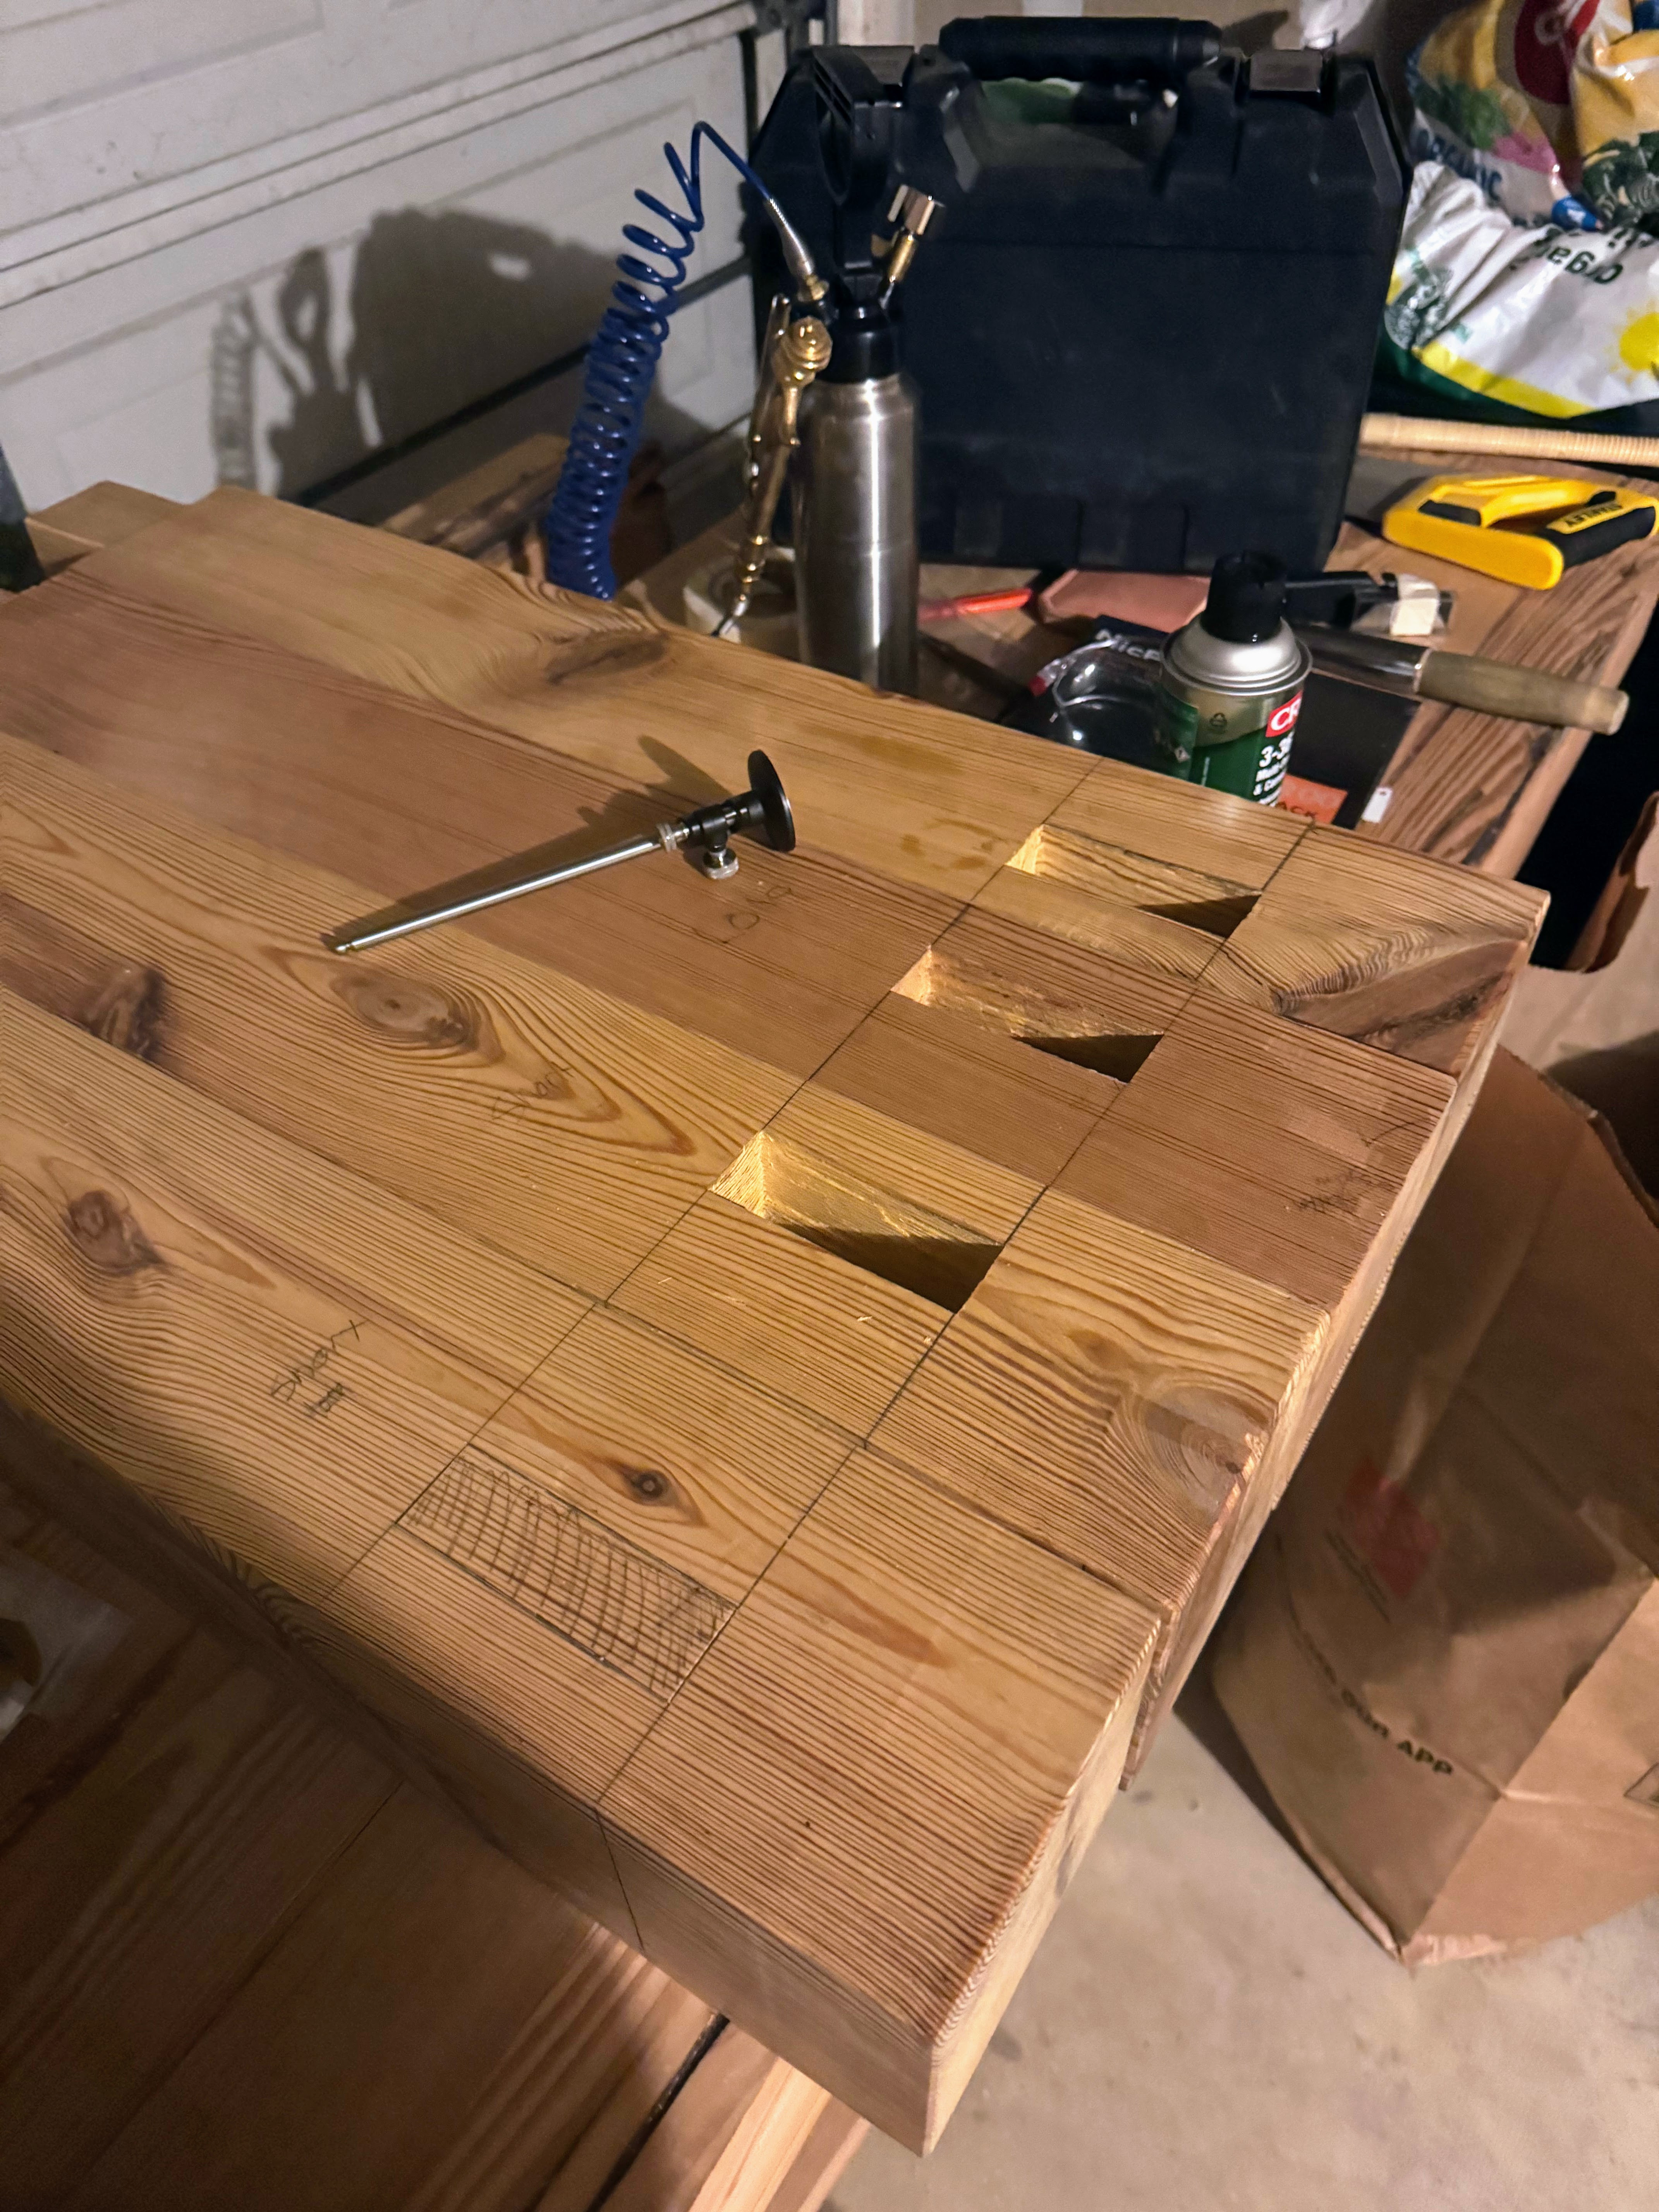
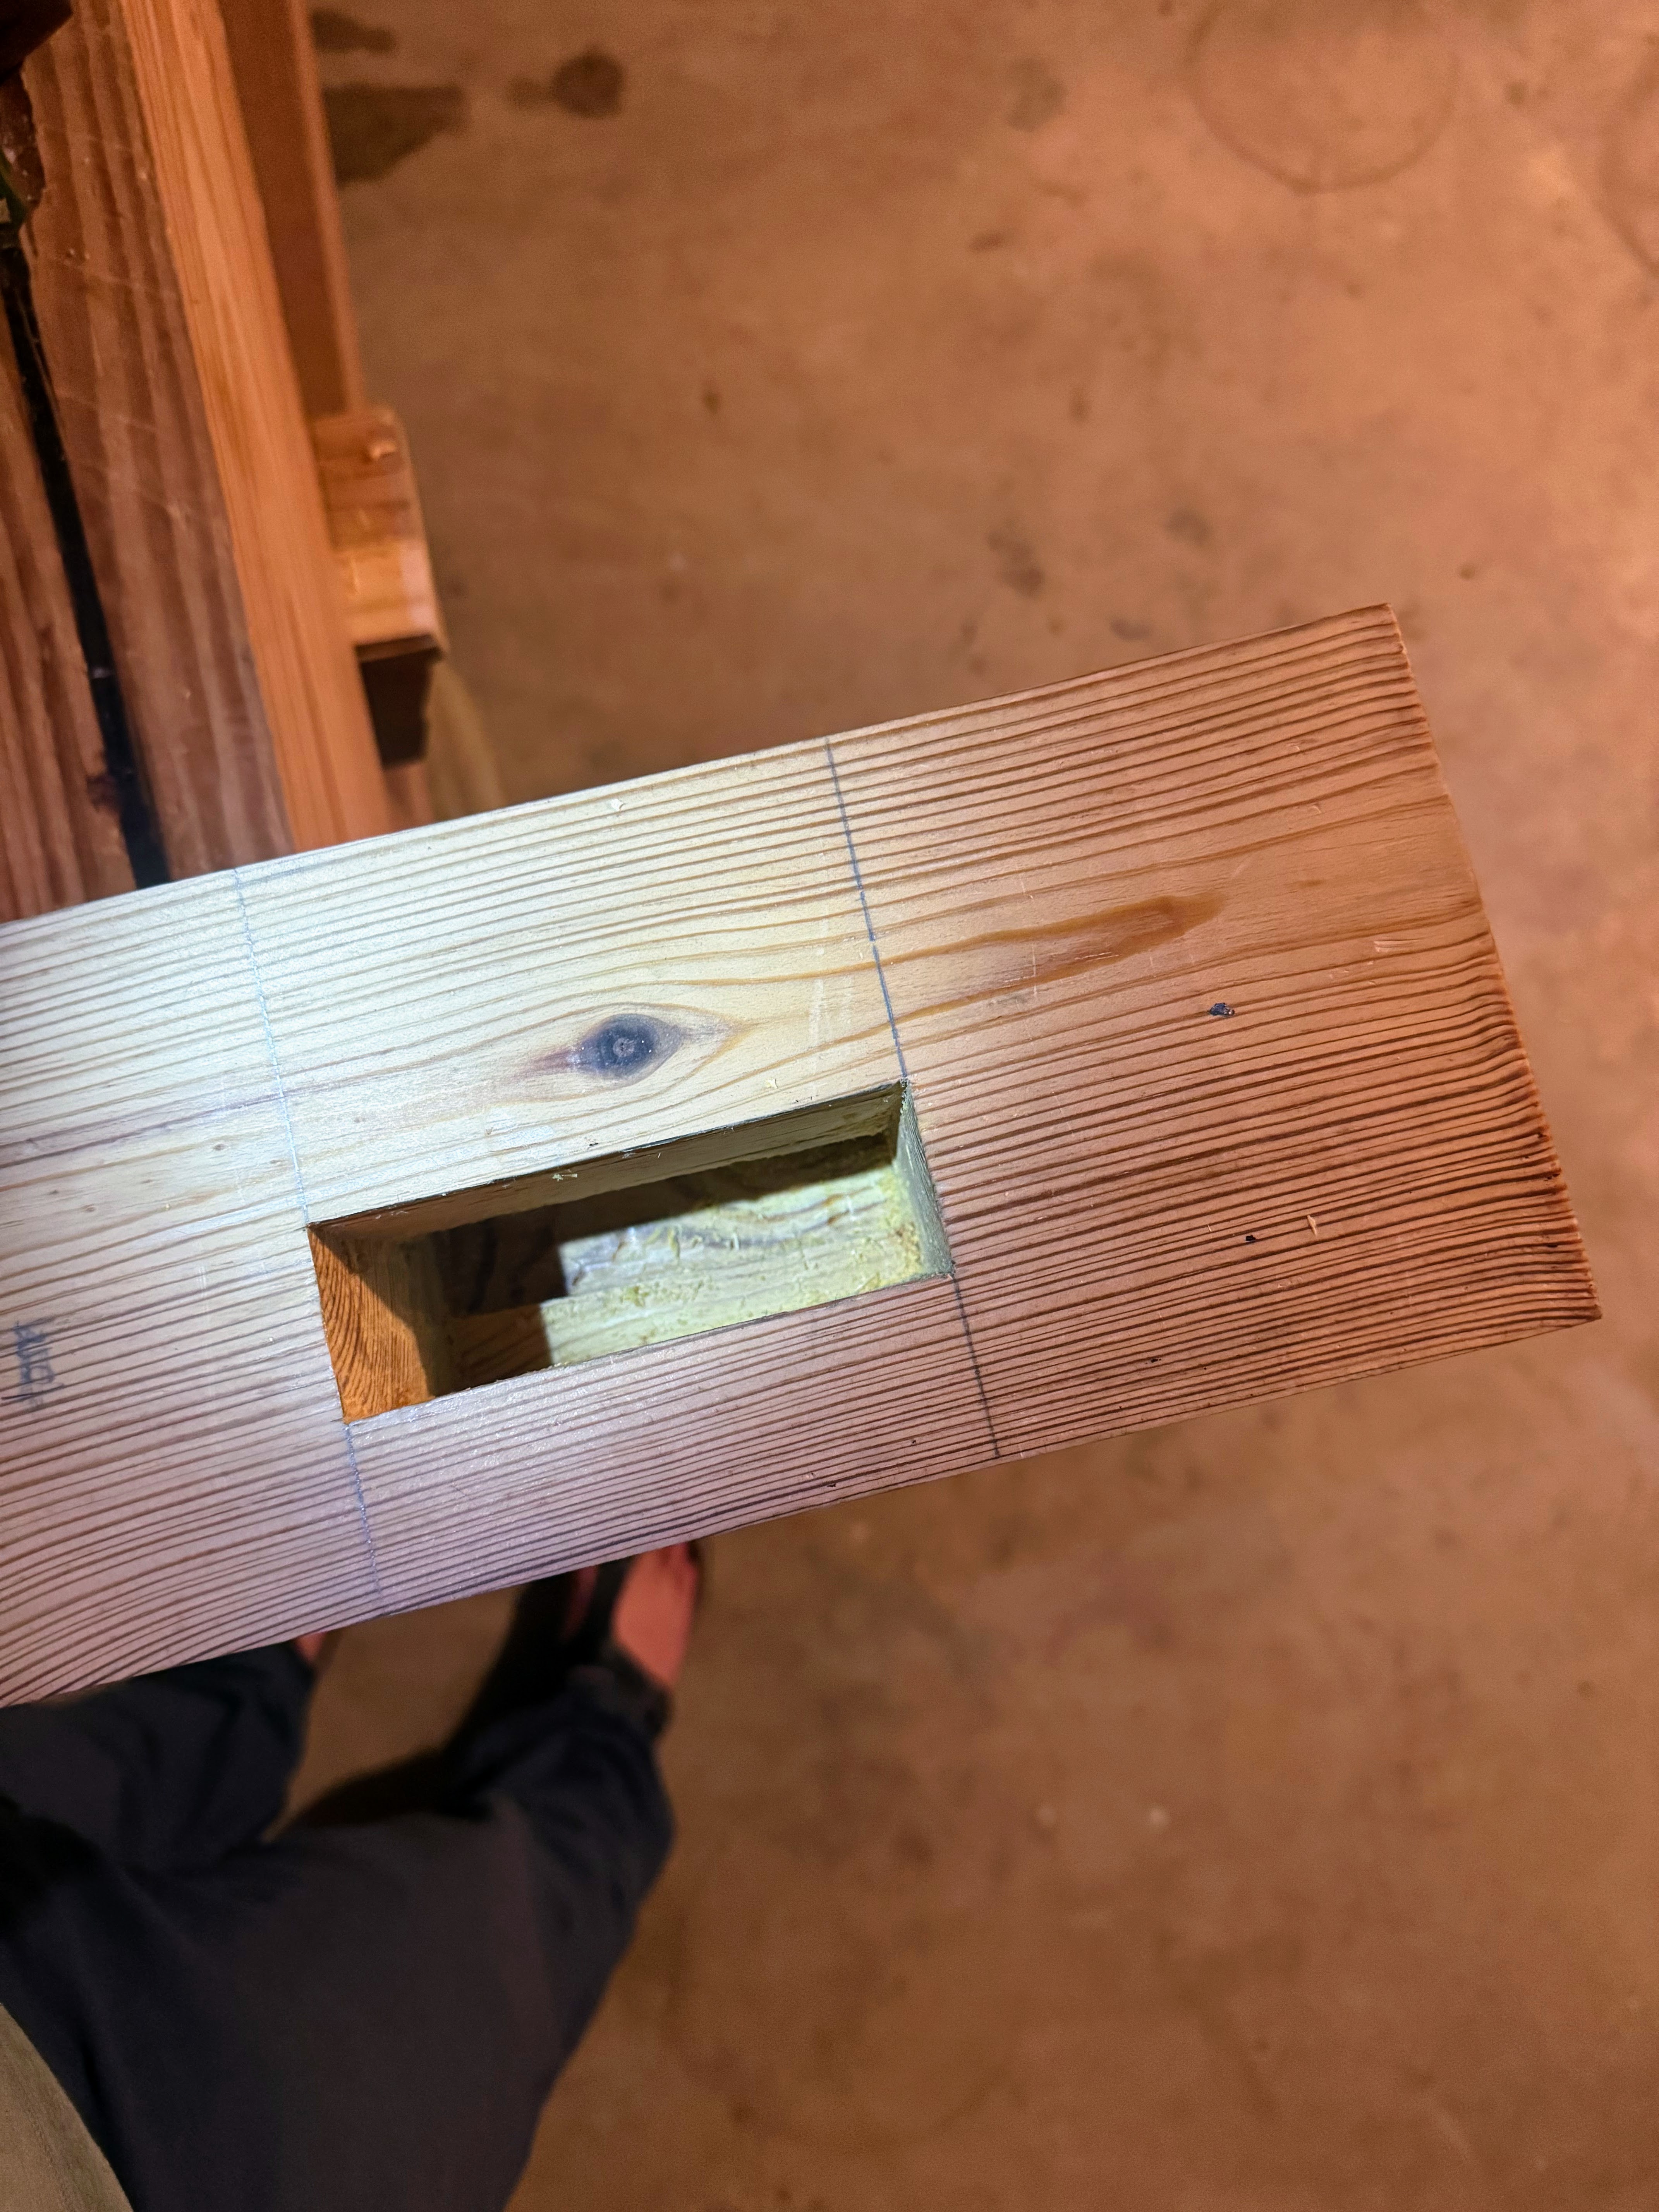
Part 7: Marrying Top and Base – Cutting the Leg Mortises
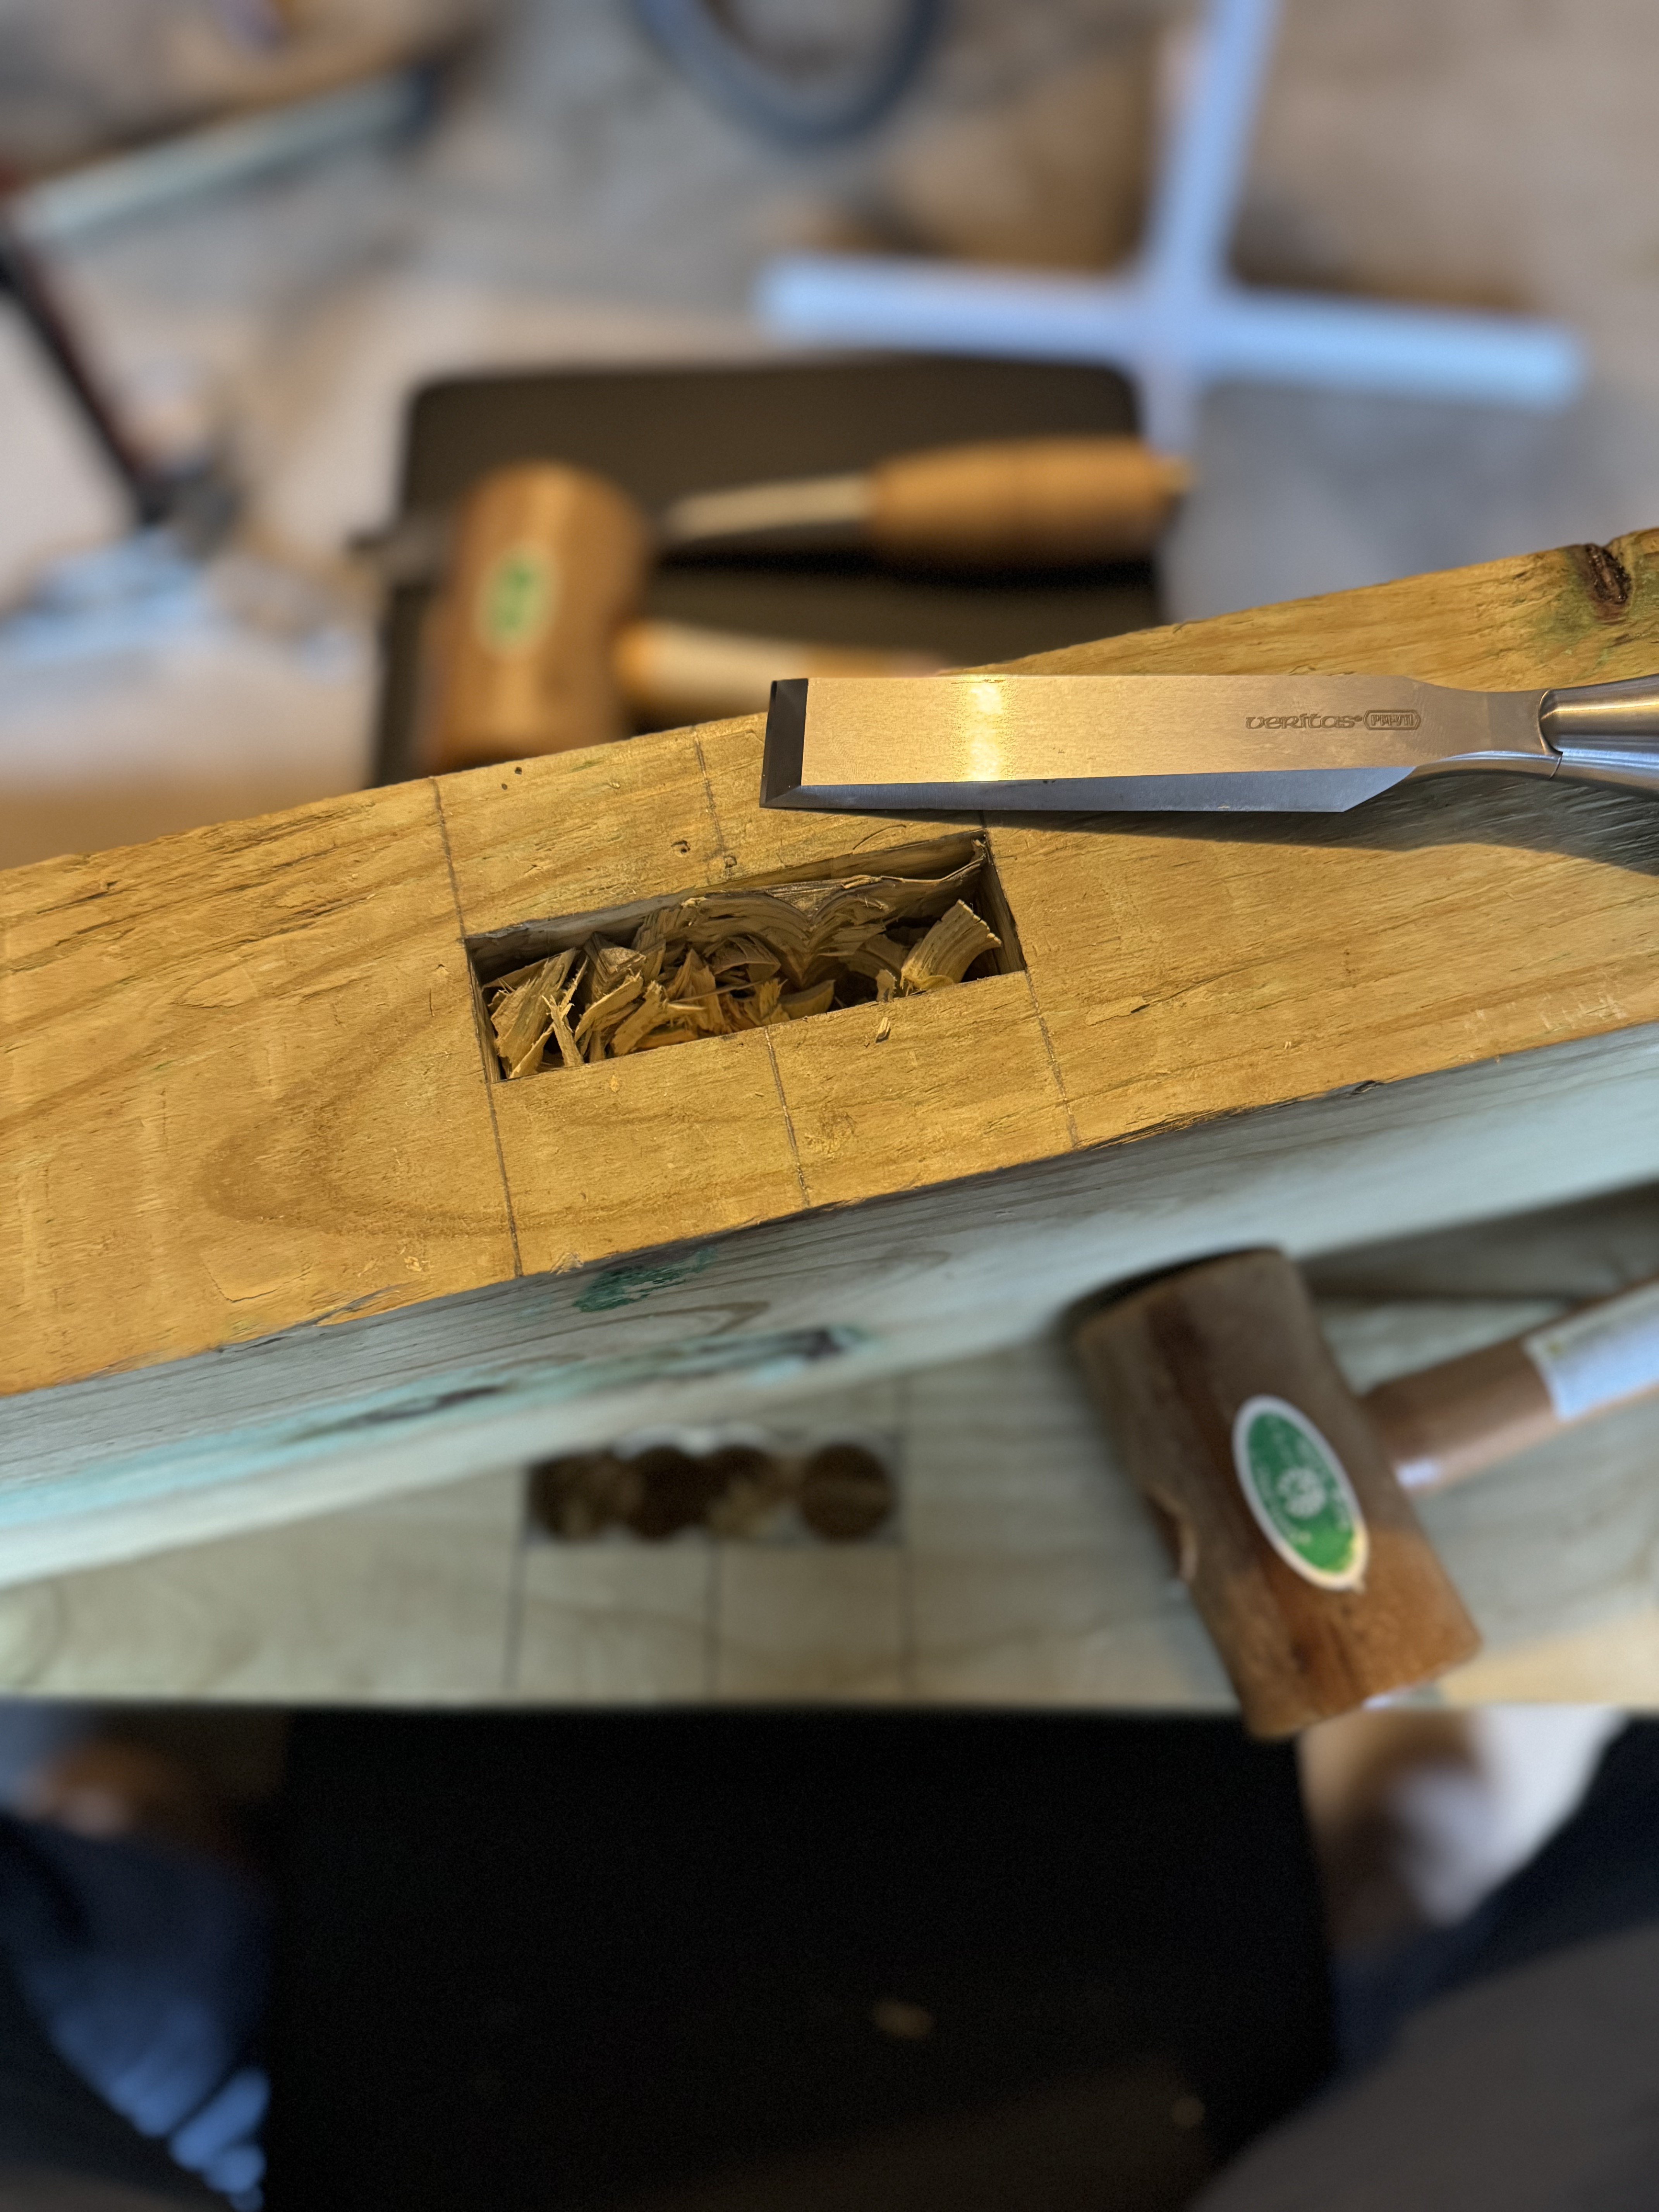
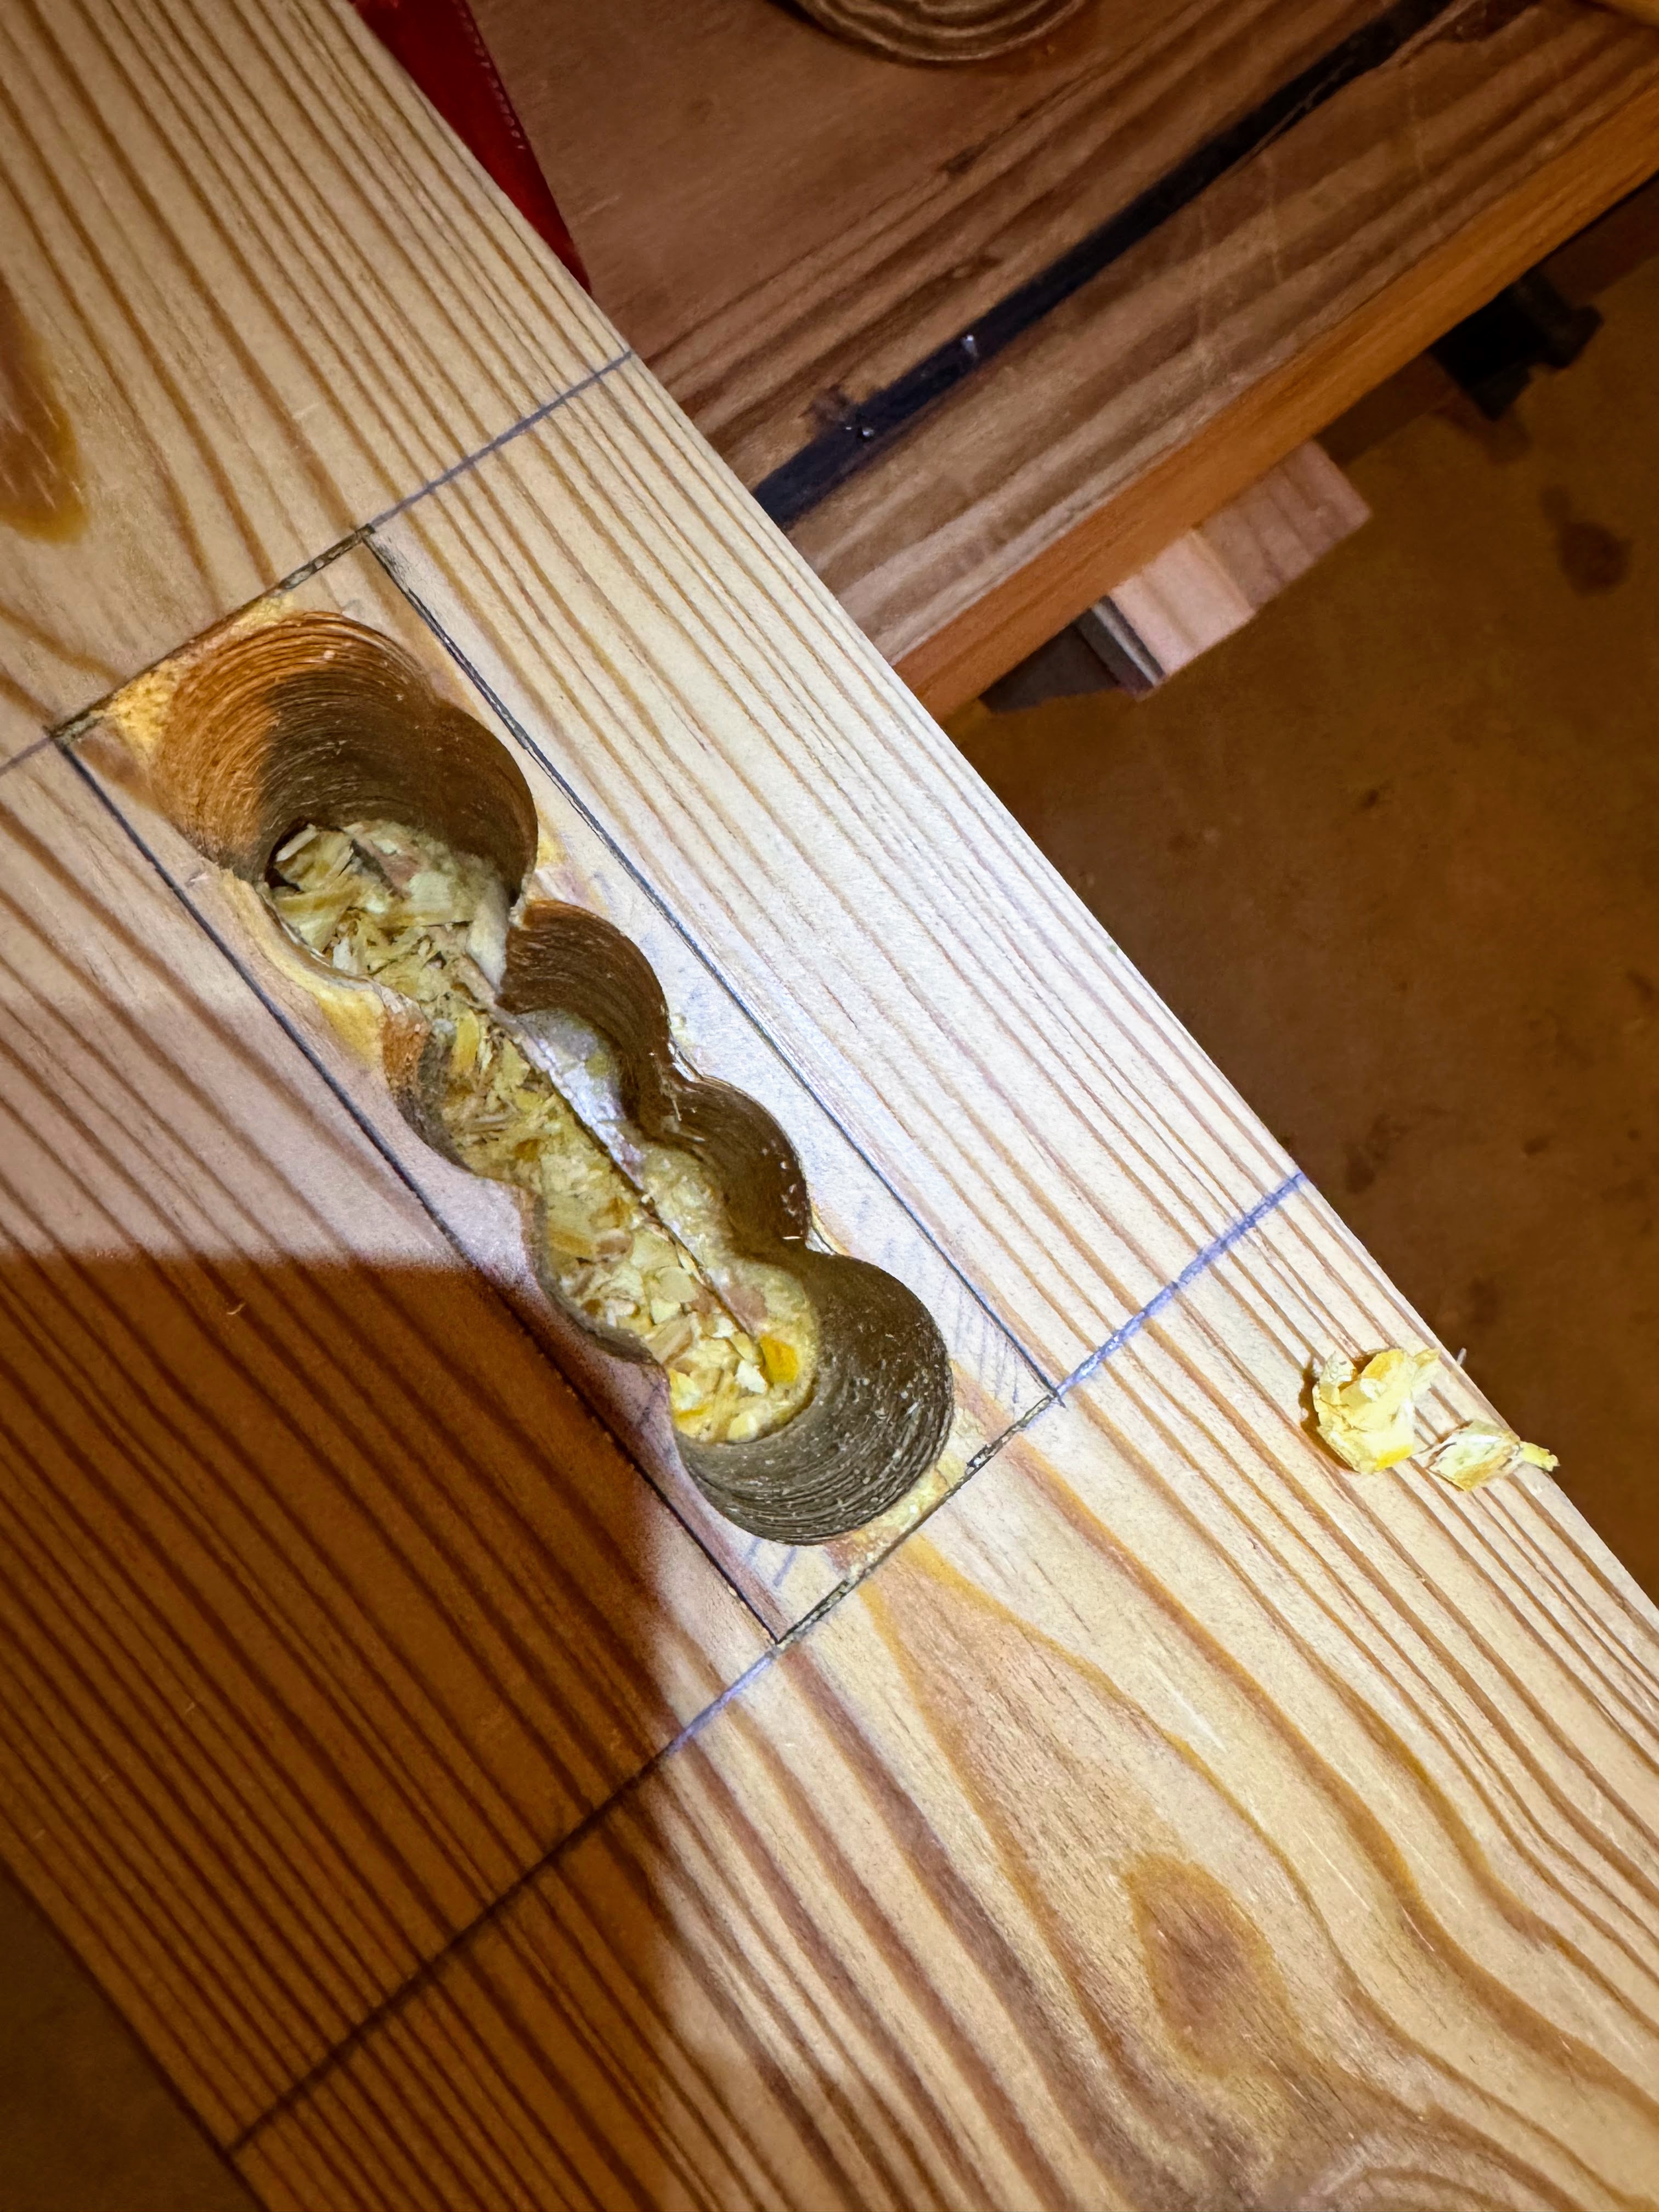
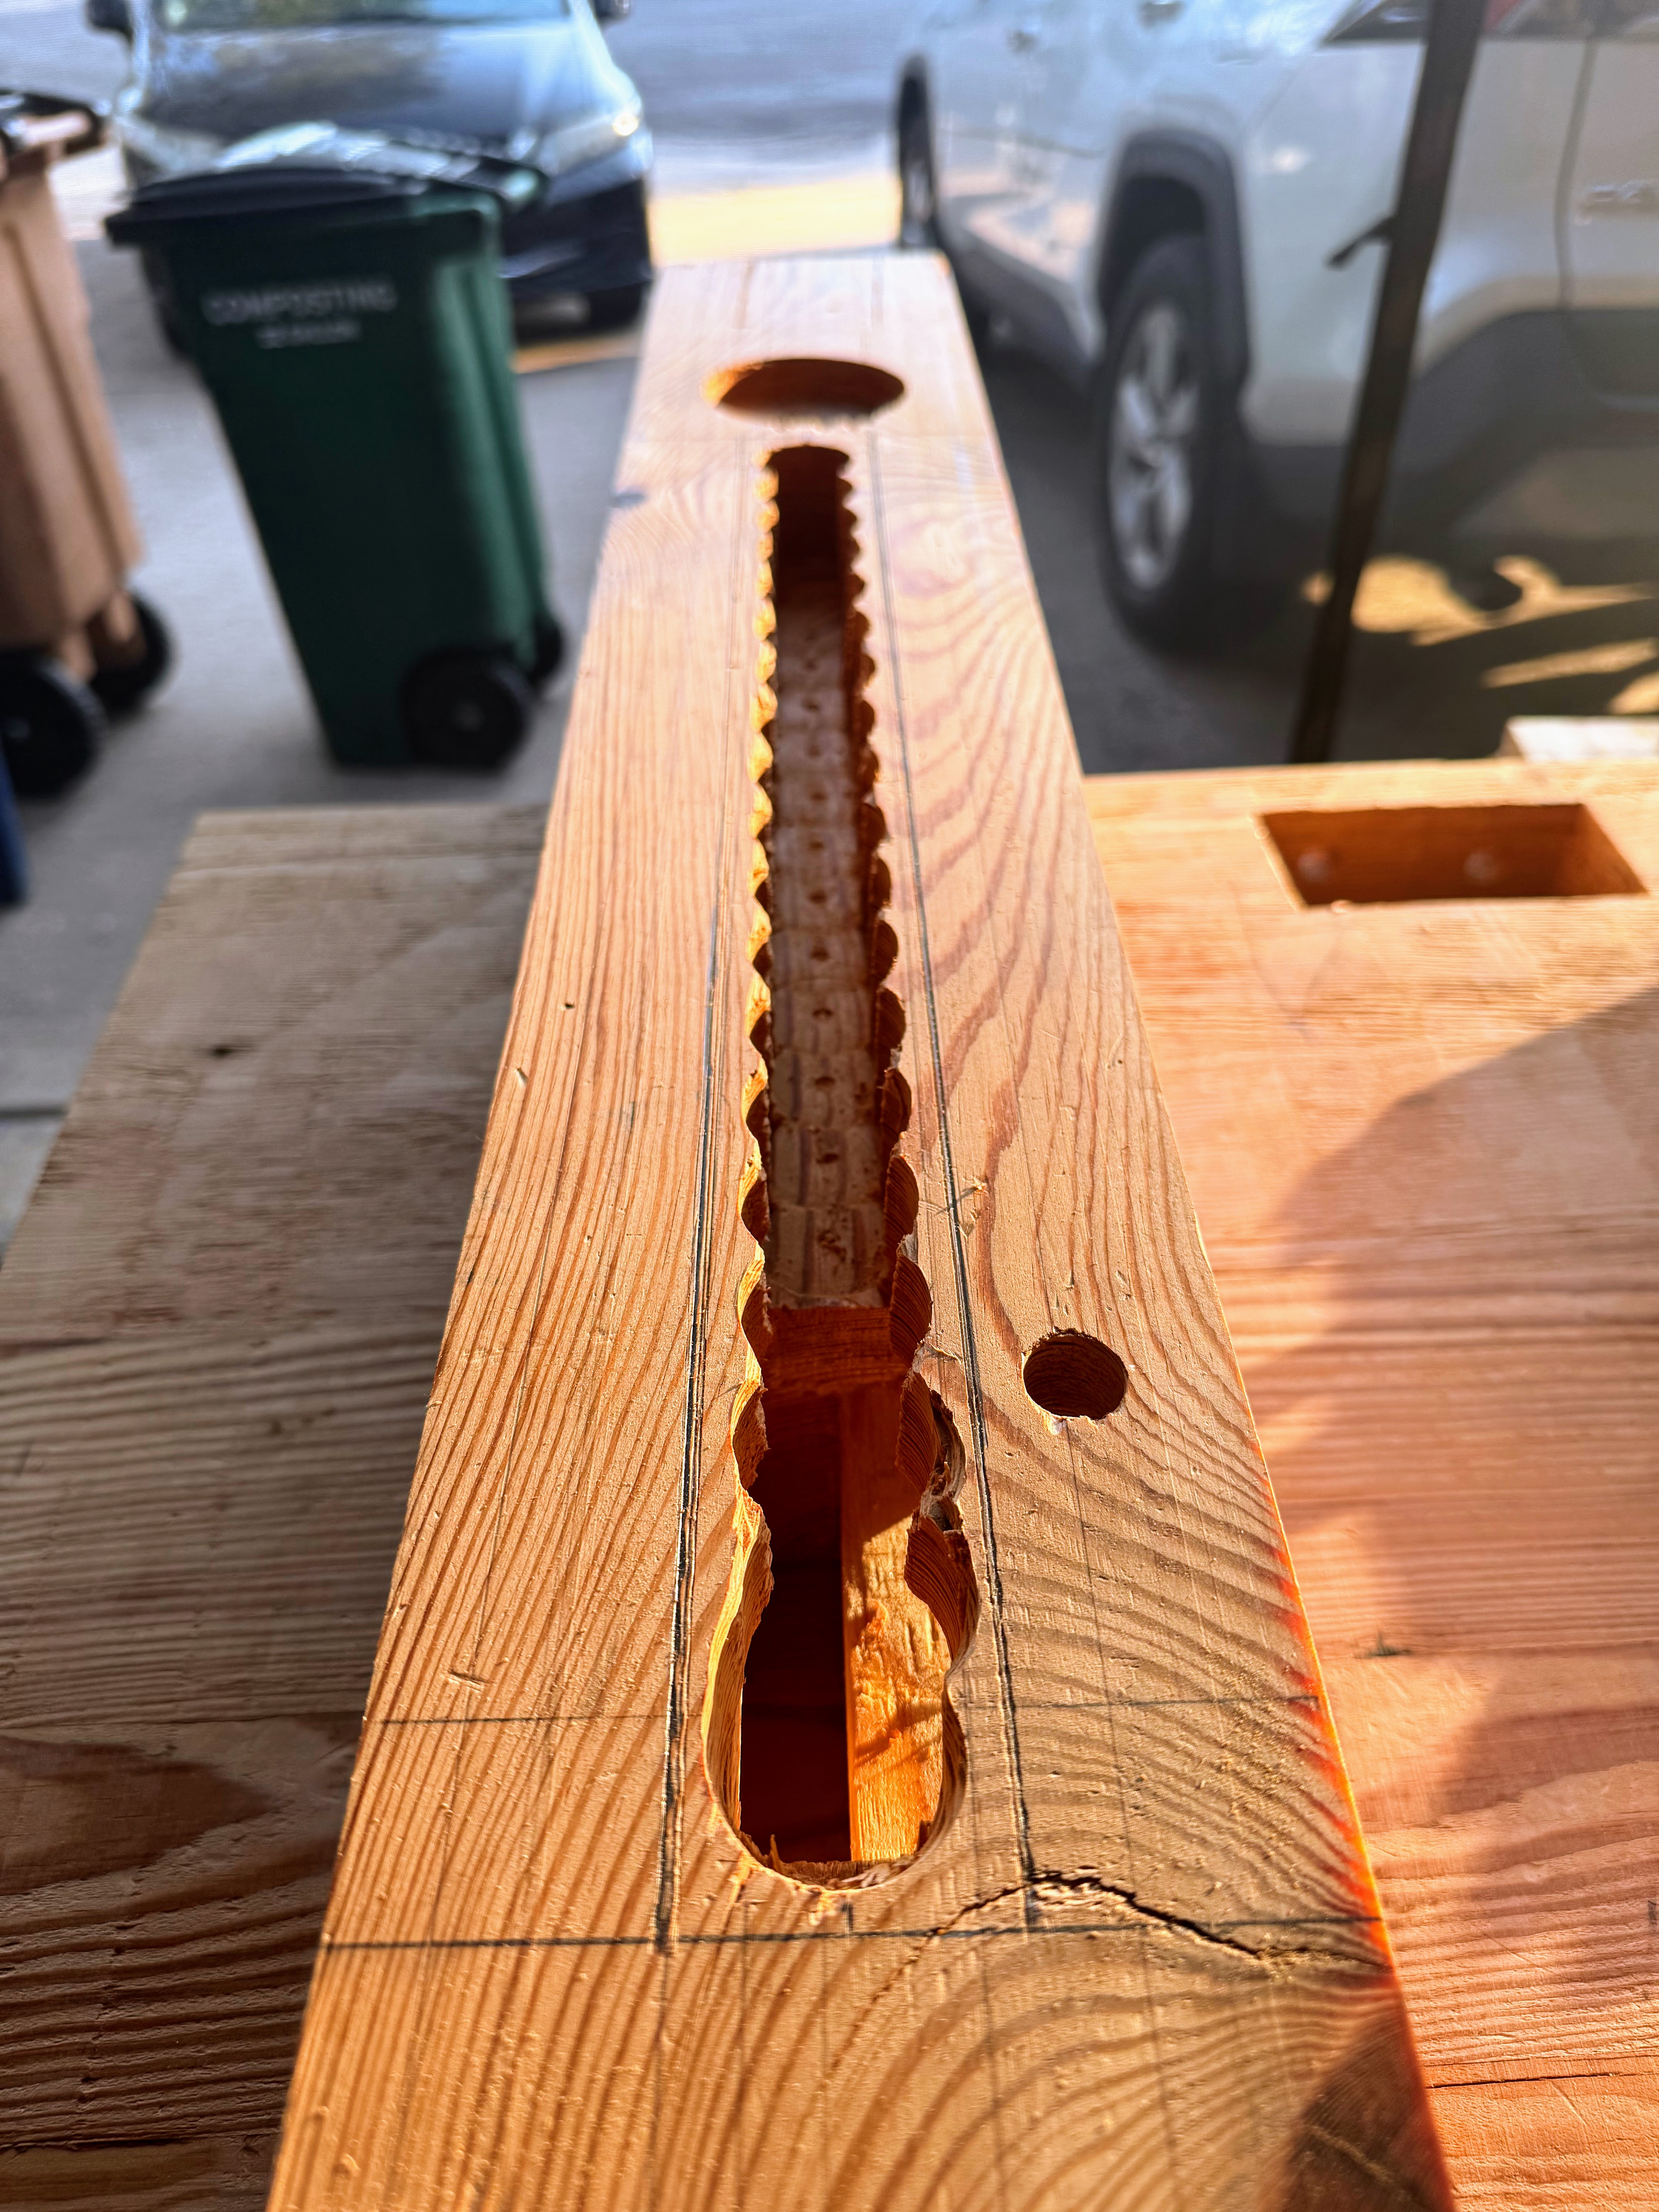
Once the joinery for the base was cut and test-fitted, the next step was to auger and chisel the mortises in the underside of the workbench top that would receive the leg tenons.
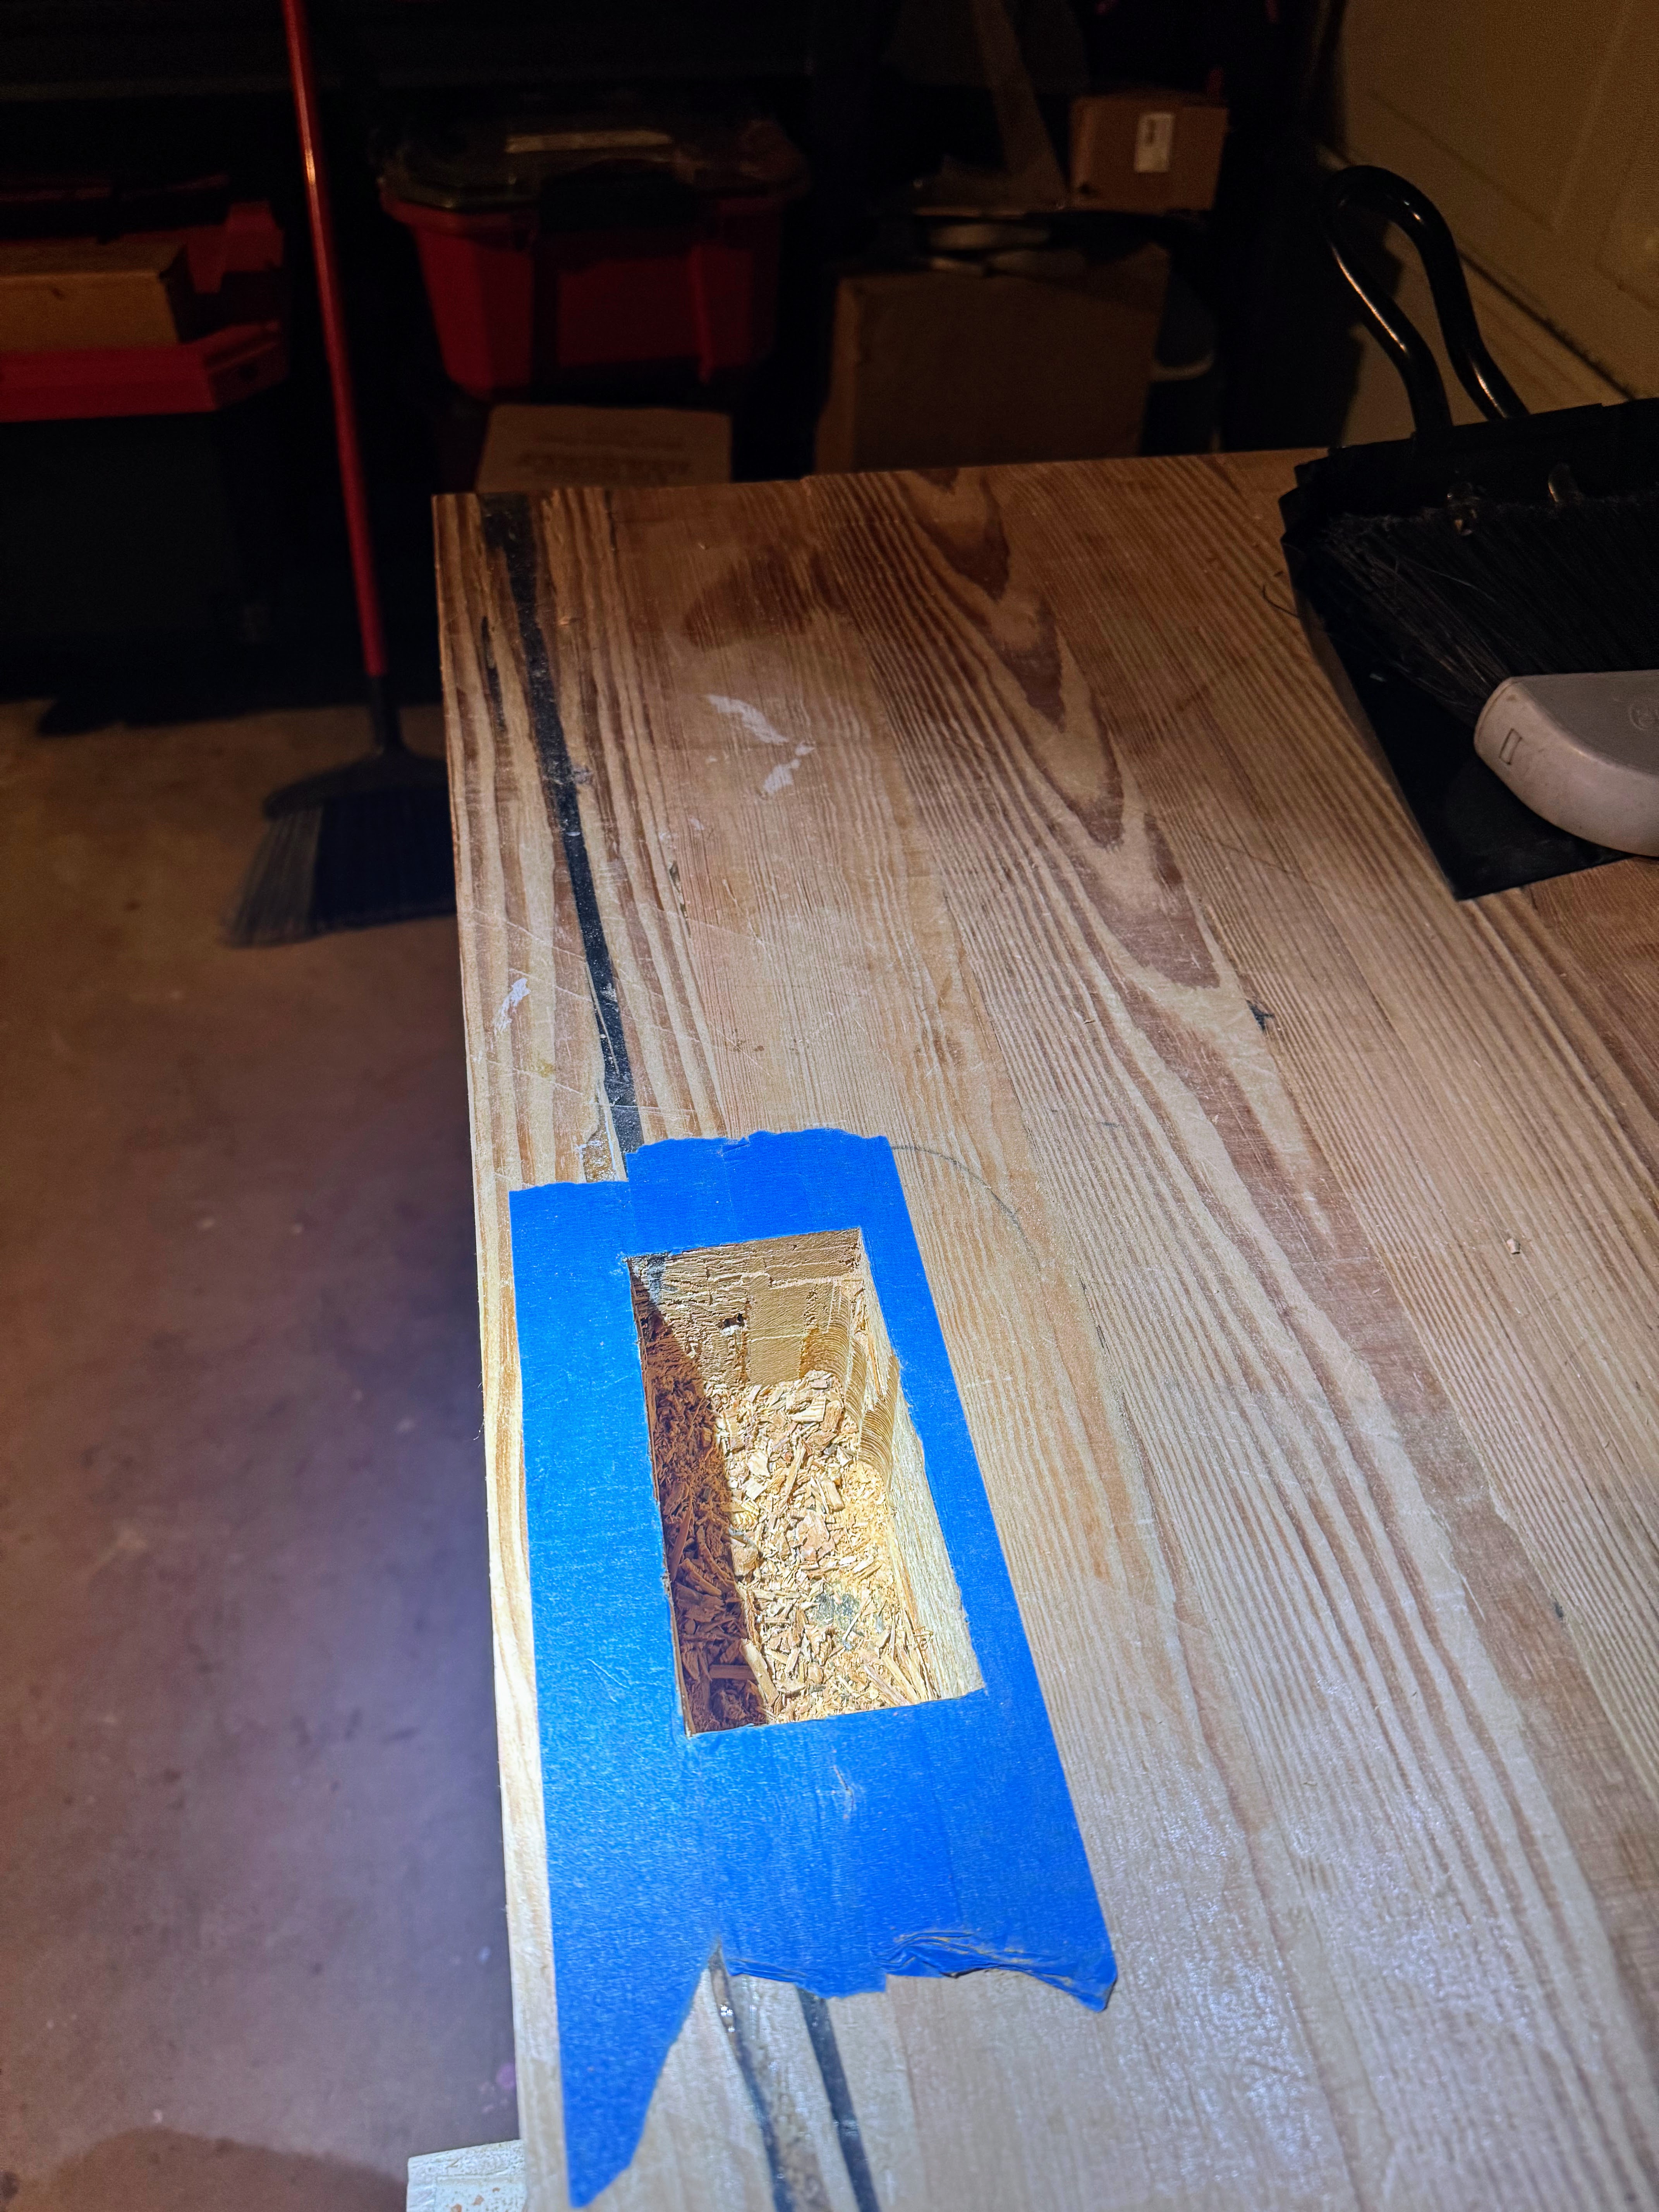
To ensure the mortise layout was as accurate as possible, I first dry-fitted the entire base assembly. This assembled base was then positioned on the inverted workbench top. I used the blue masking tape method to clearly define the mortise locations based on the actual position of the leg tenons after dry-fit.
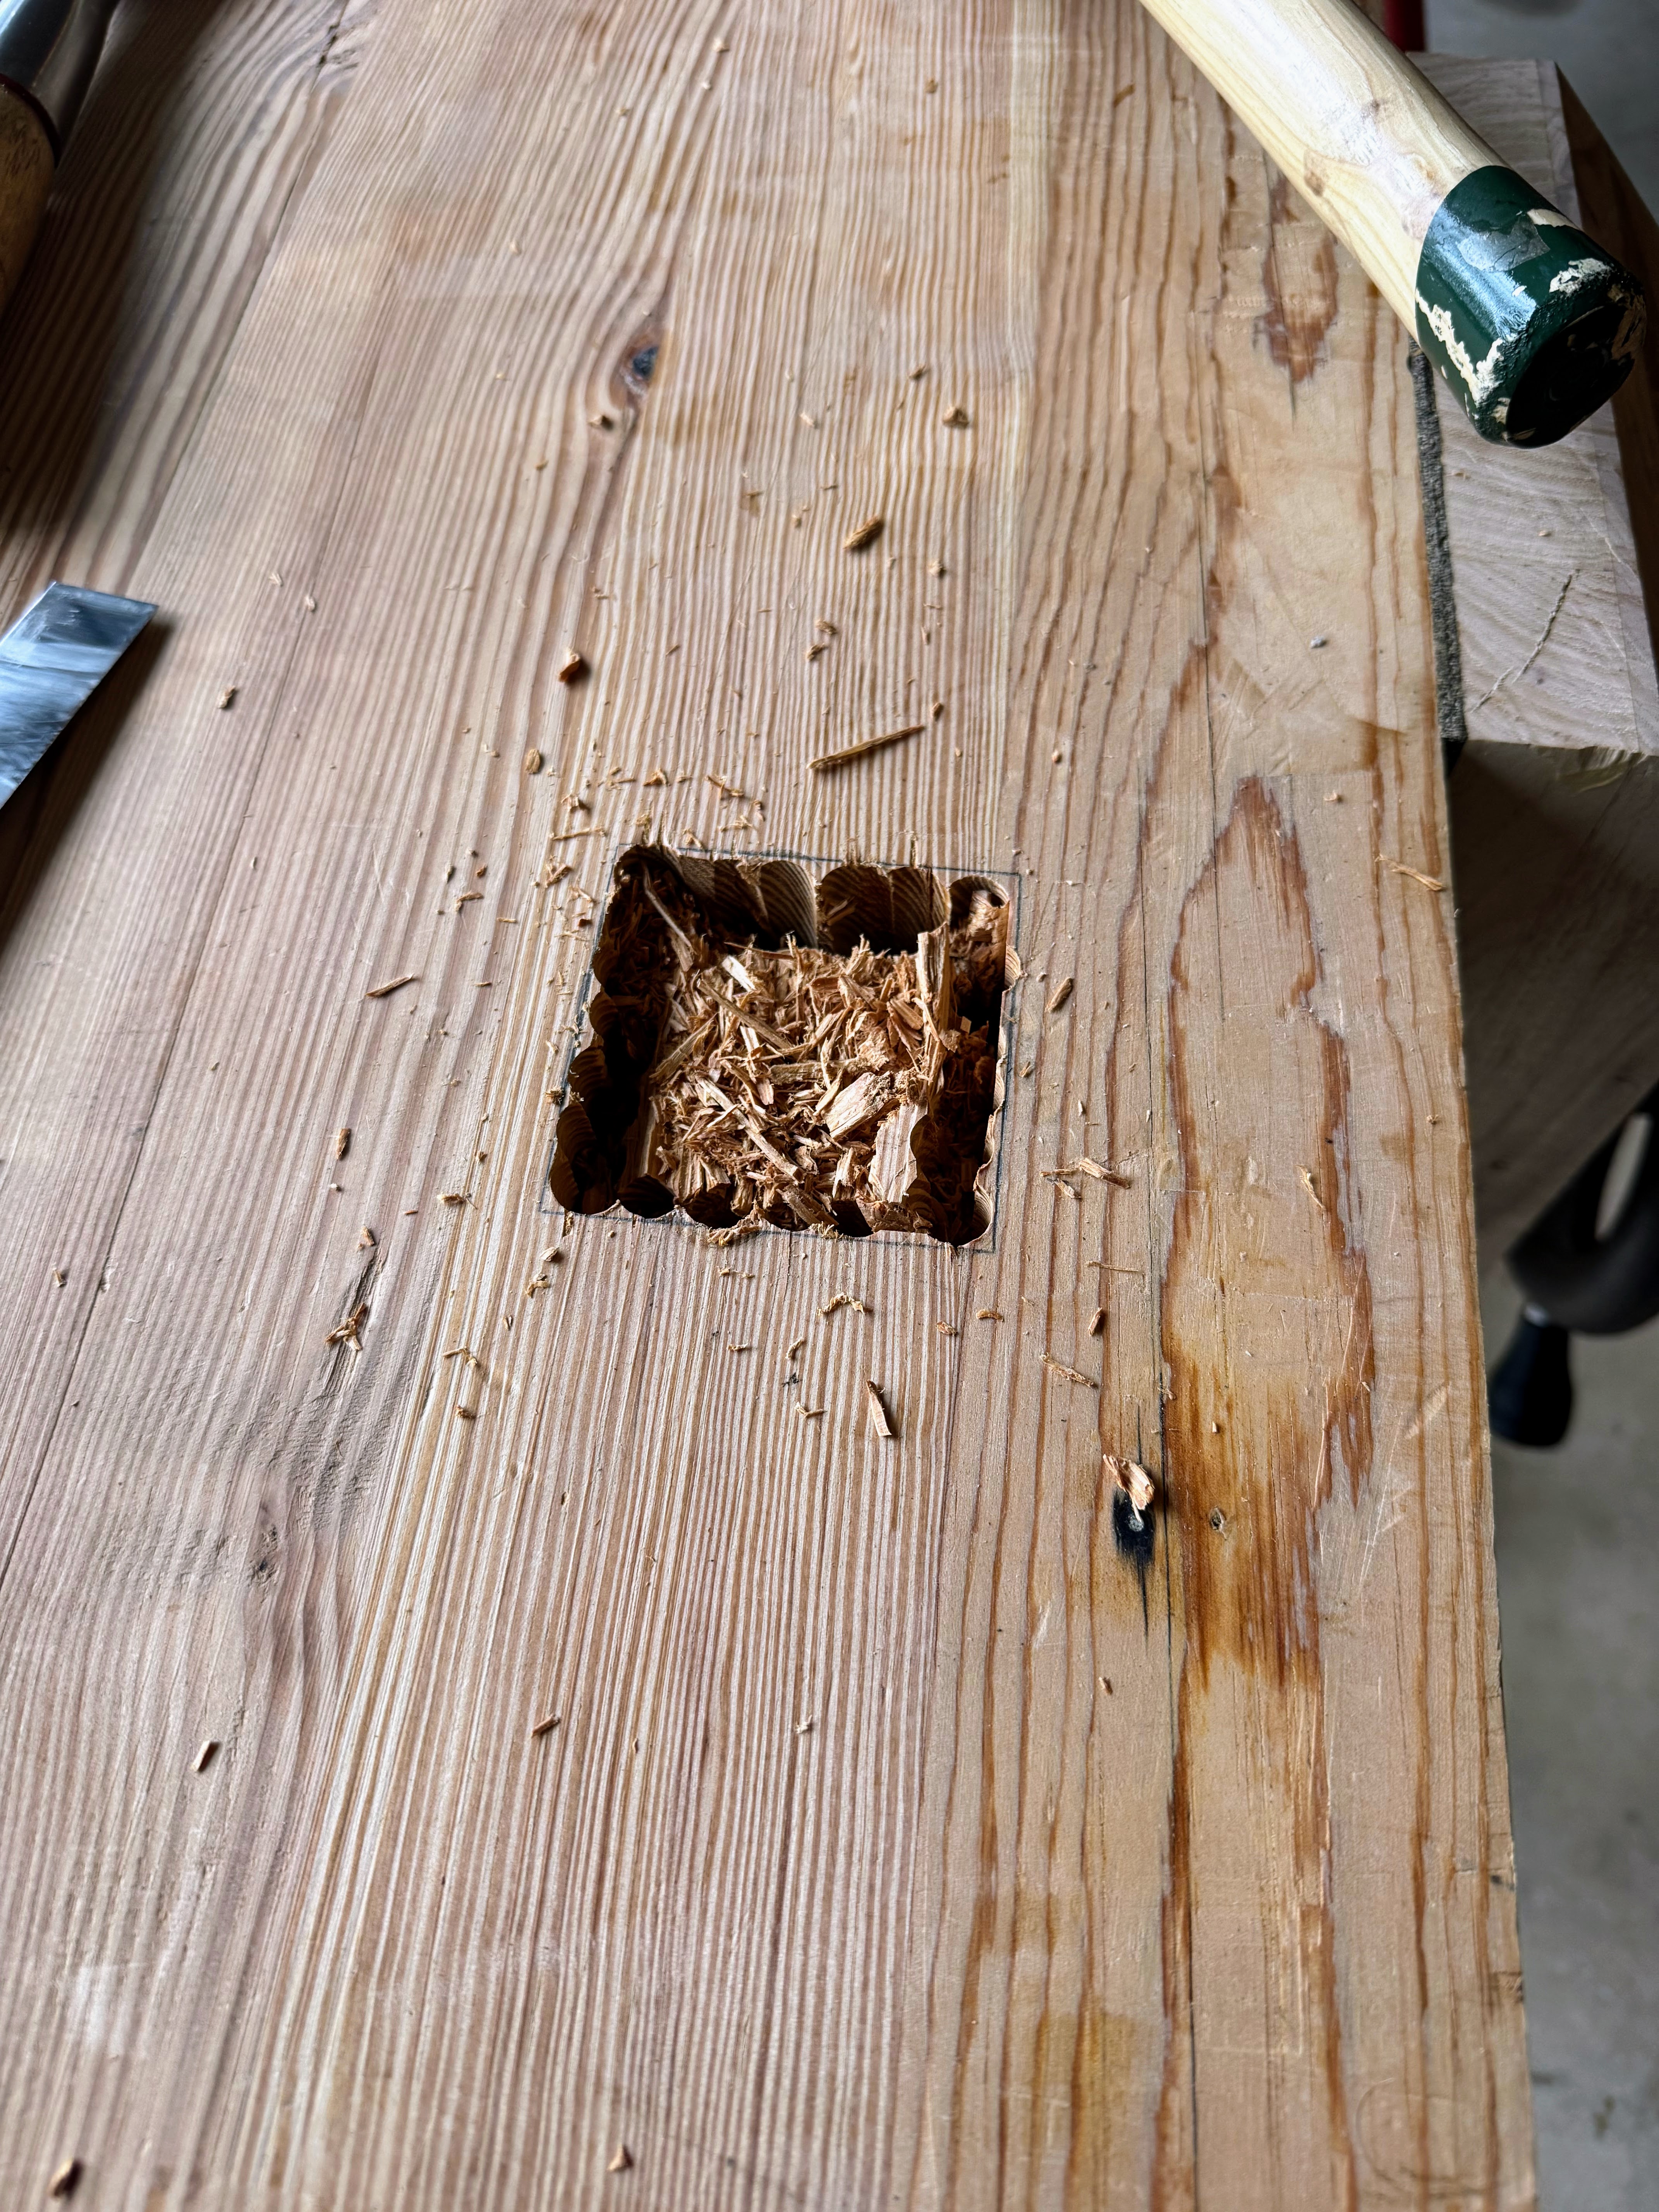
I began cutting the mortises by boring out the bulk of the waste material with my beam borer. The remaining material was then cleaned up with a 2-inch chisel. This was a laborious process; these large mortises took a very long time to complete by hand.
Cutting through knots in the Longleaf Pine was very difficult. Cleaning up the “end grain” walls of the mortises was also particularly challenging, requiring a lot of bashing.
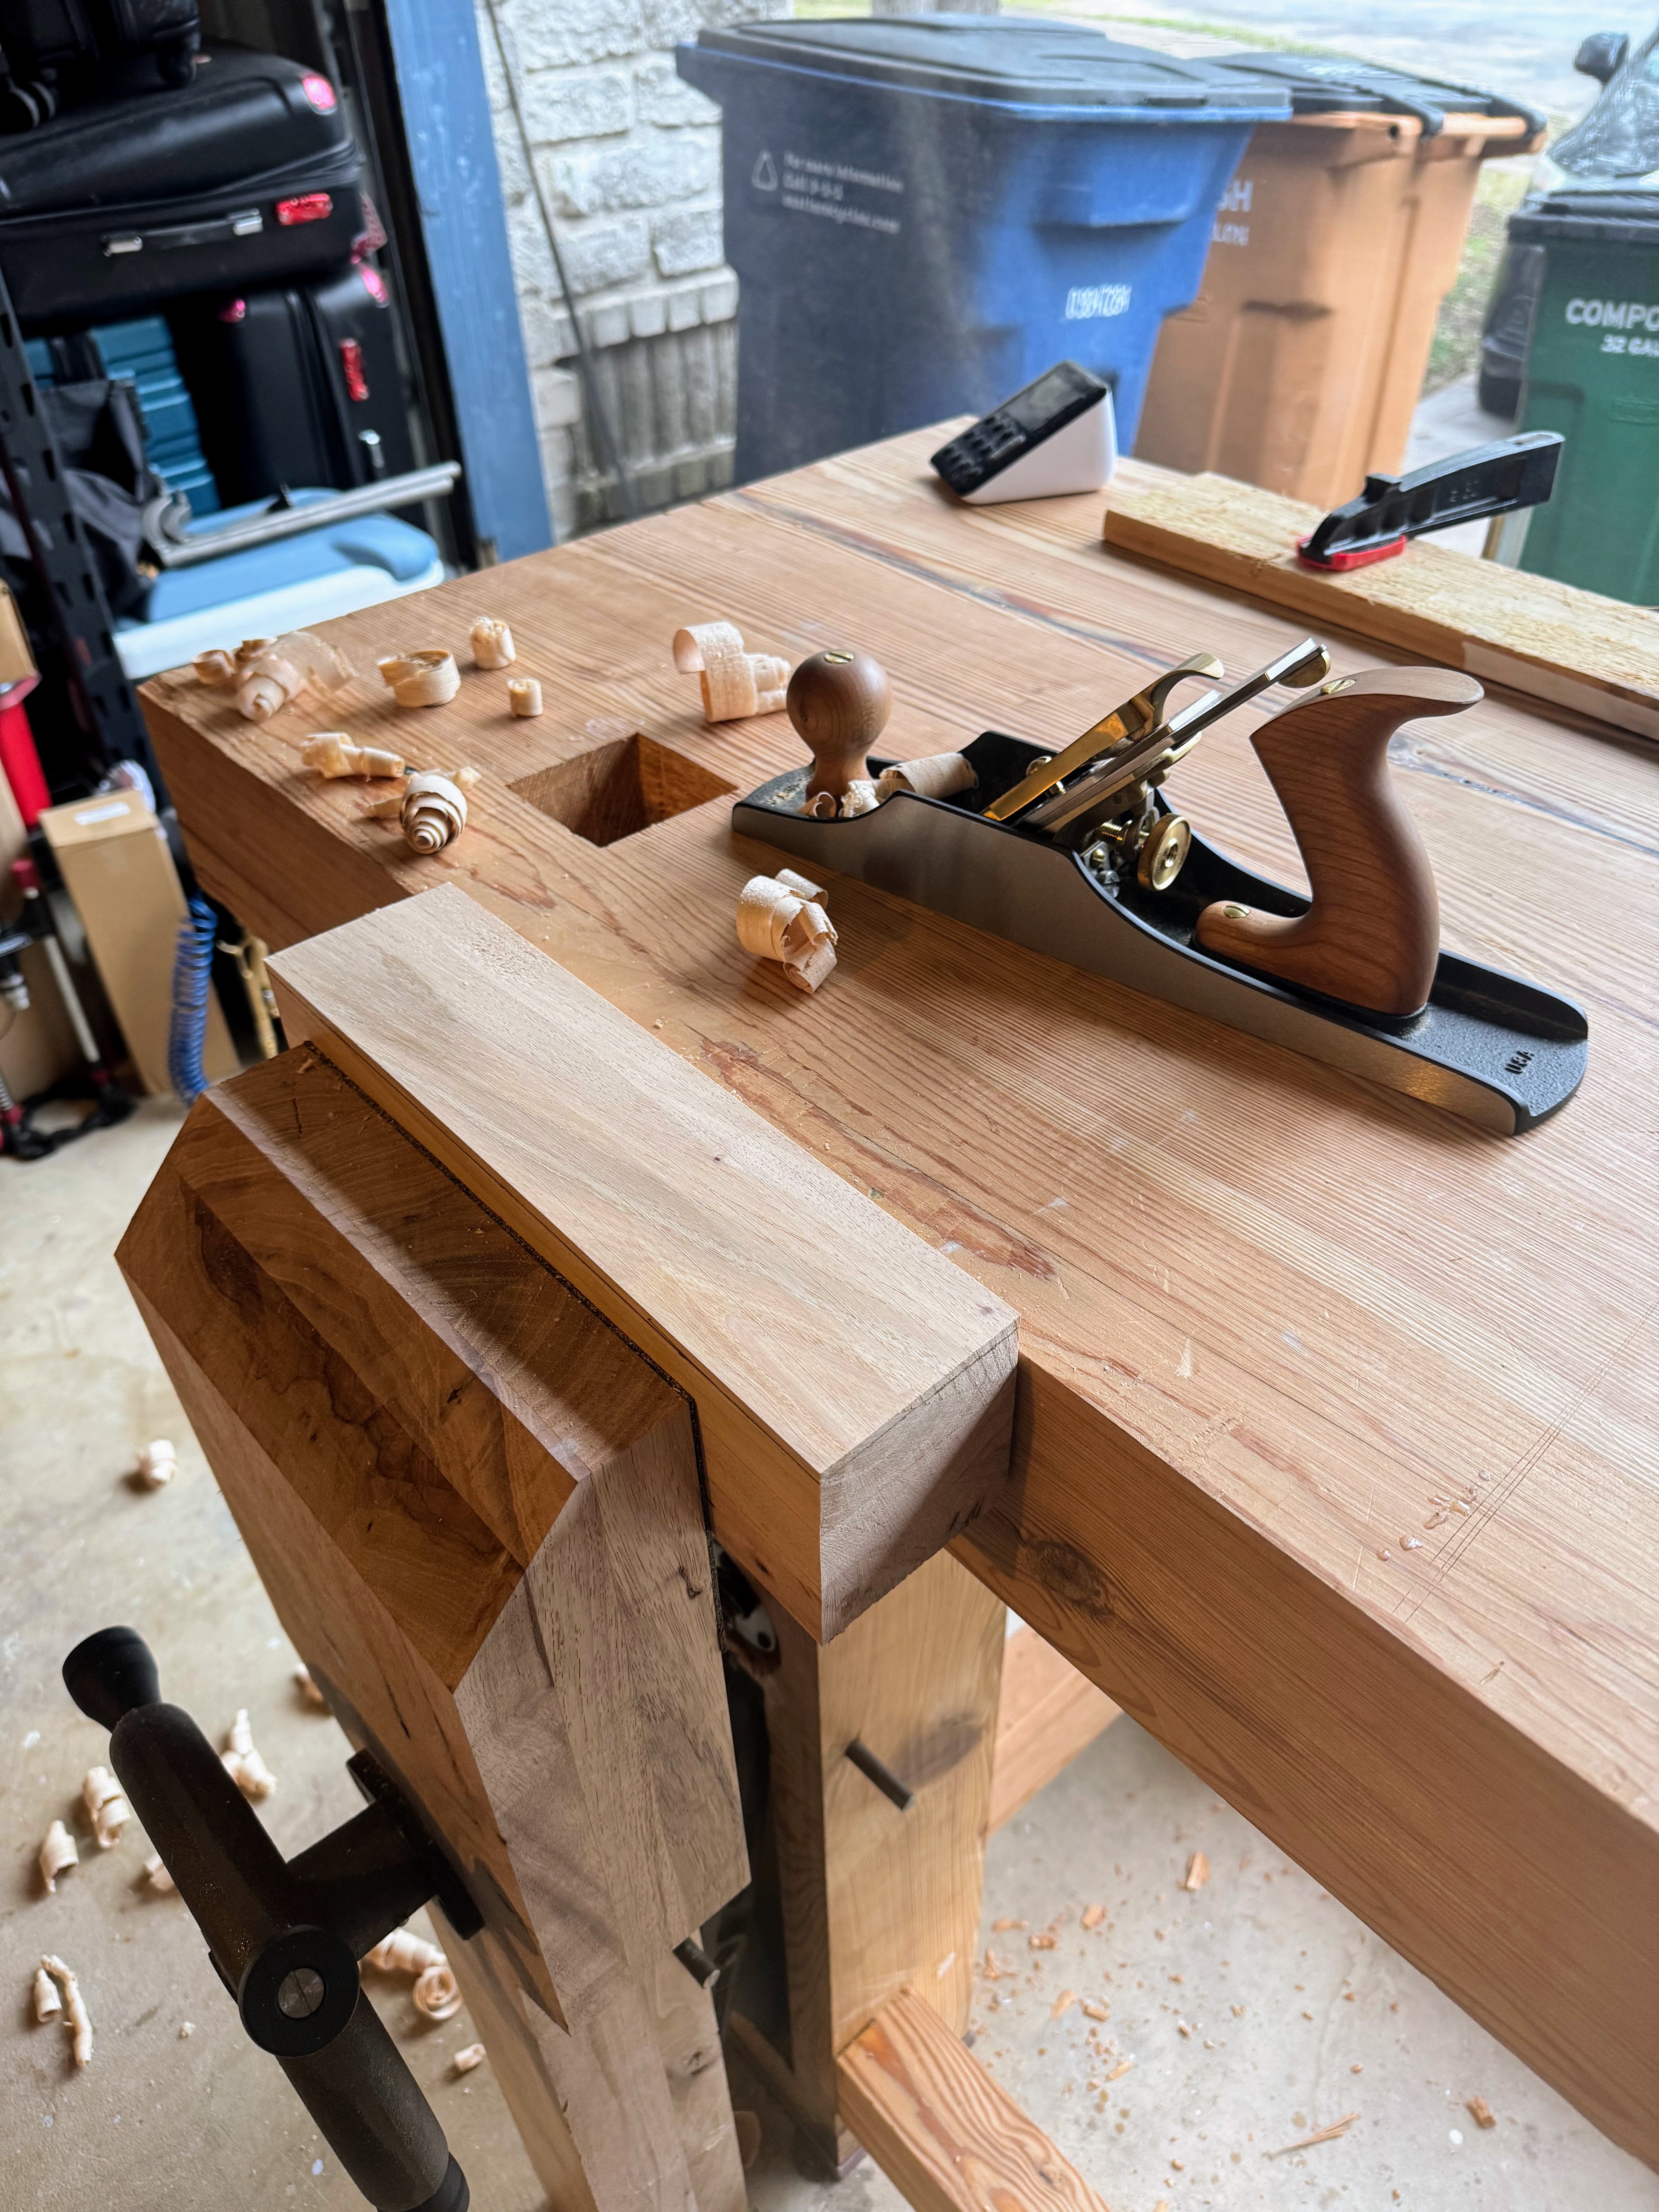
Despite the effort, the outcome was successful: all four leg tenons eventually fit snugly into their respective mortises in the top. This marked a major point in the assembly, with the two main components of the bench now accurately joined.
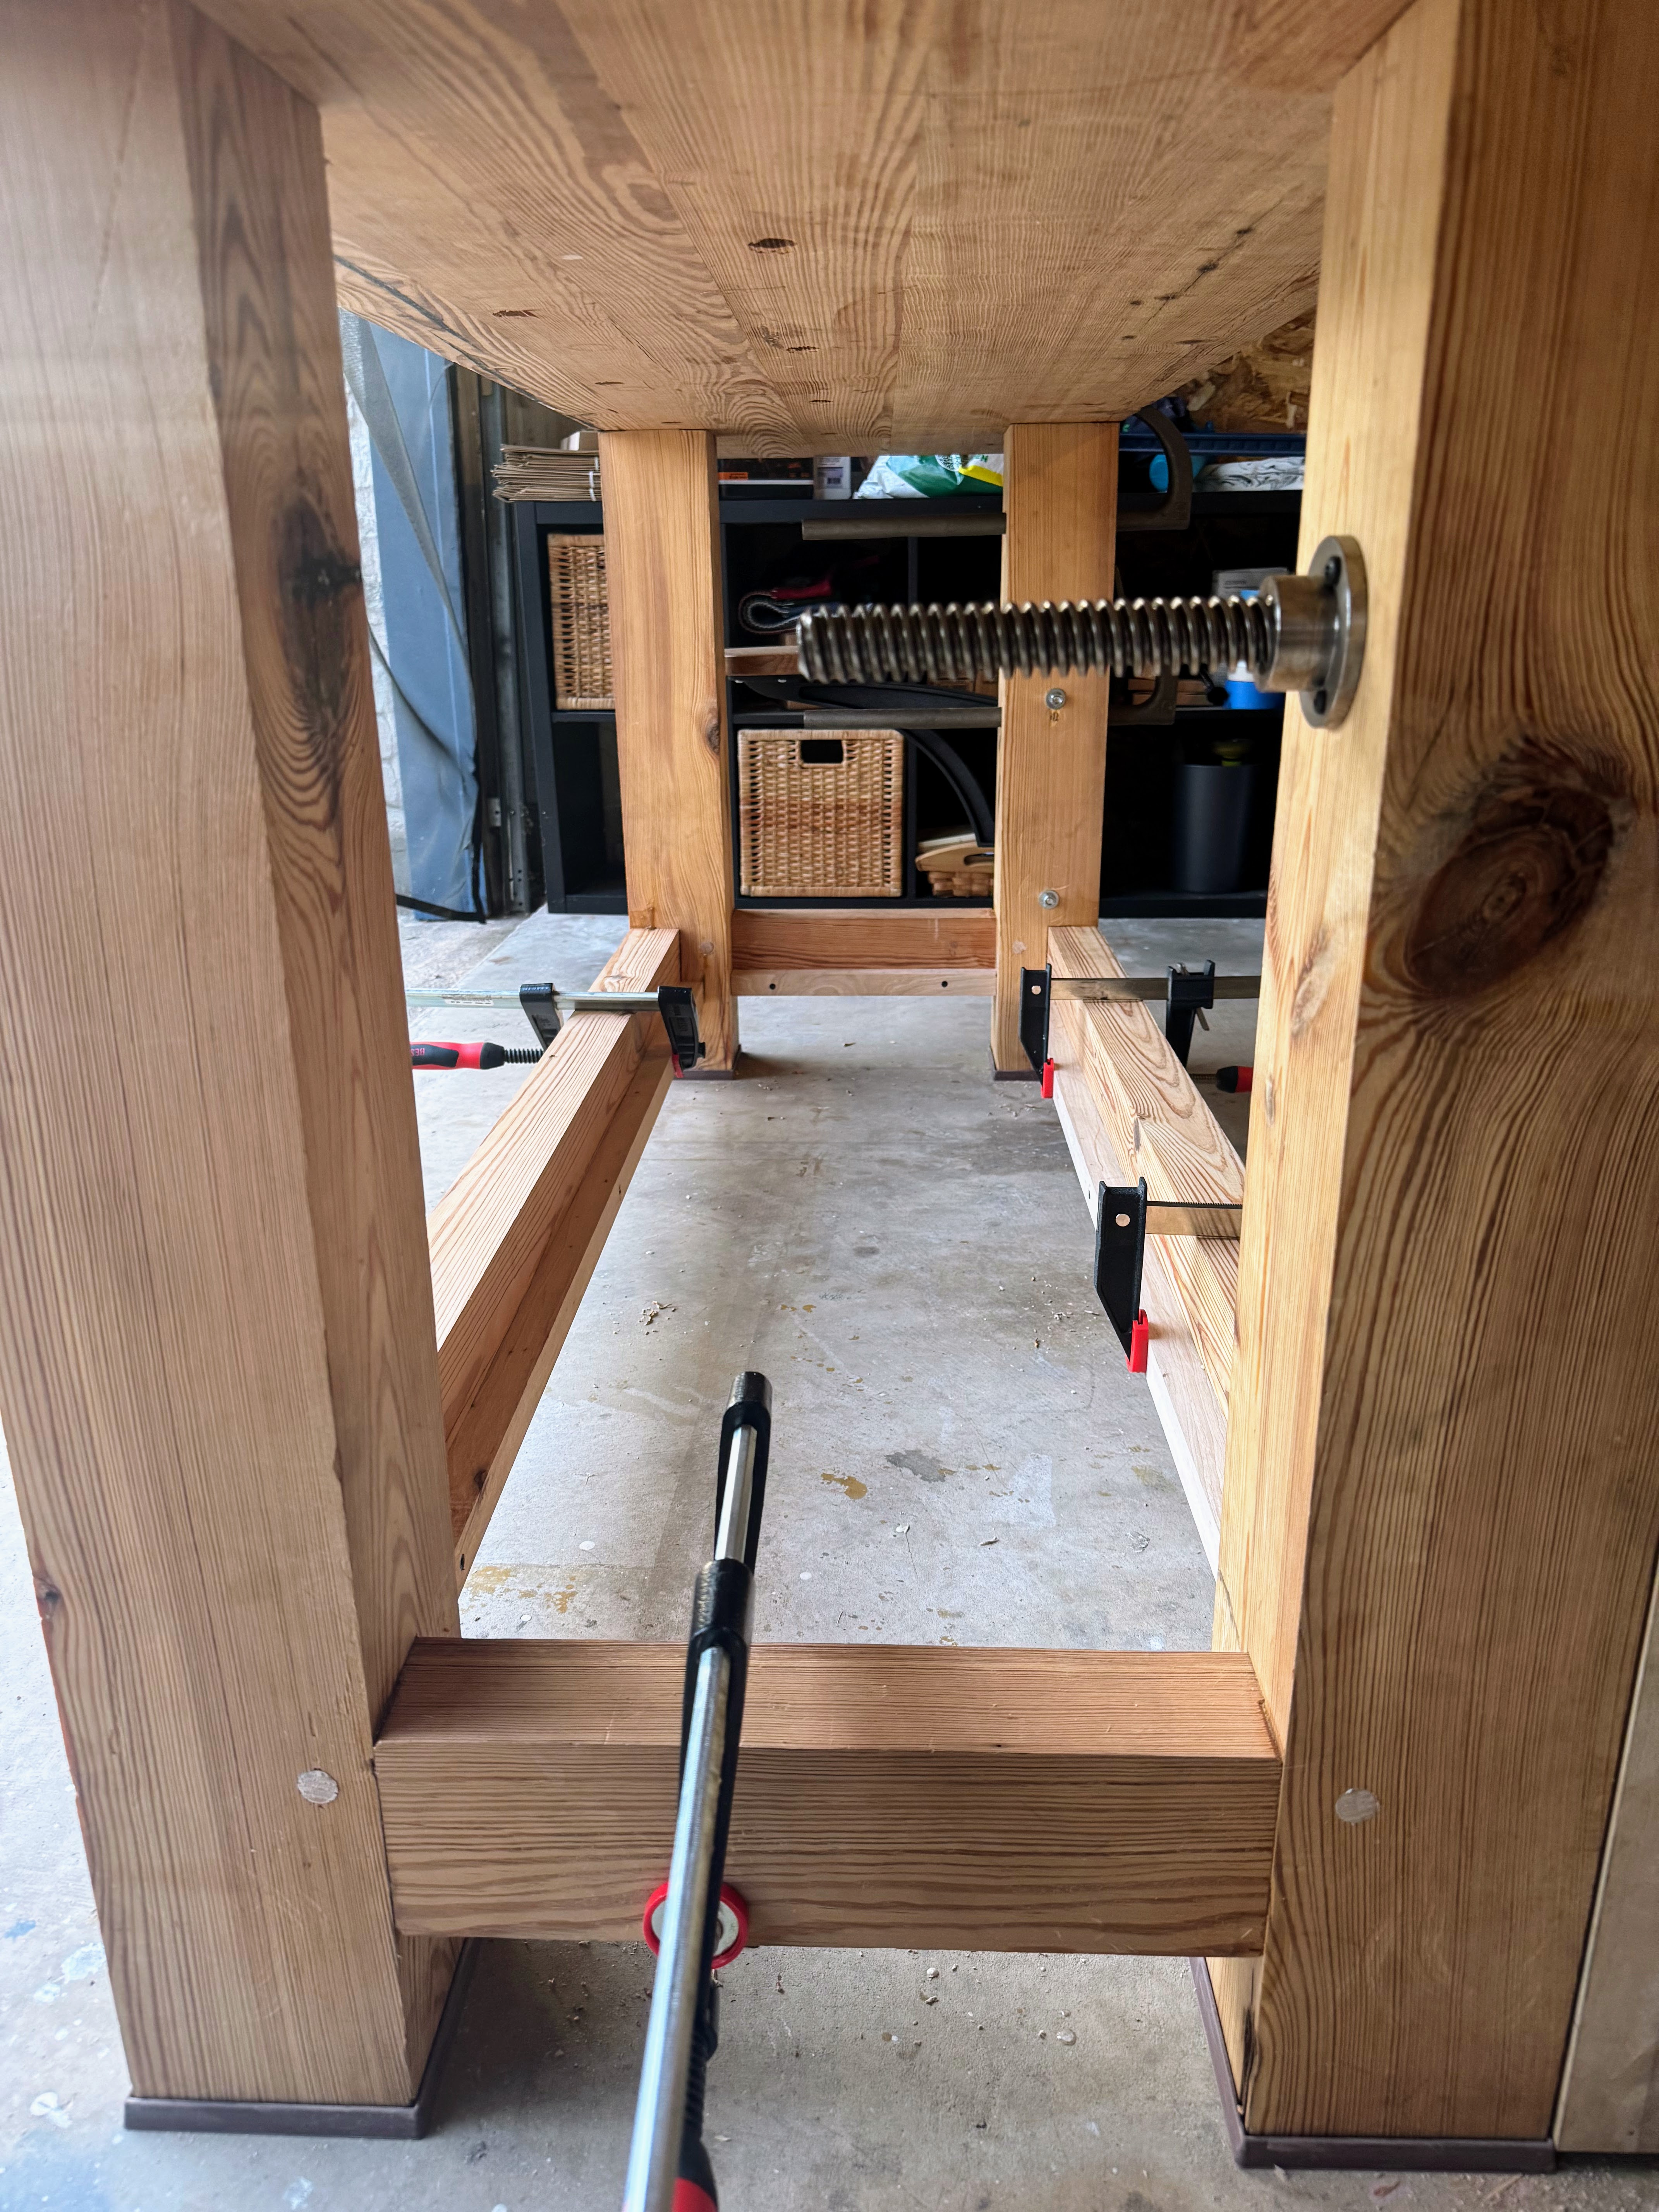
Part 8: Installing the Leg Vise
With the main workbench components prepared, the next step was installing the leg vise, using hardware from Benchcrafted. This required precise cutting for vise components and careful hardware fitting.
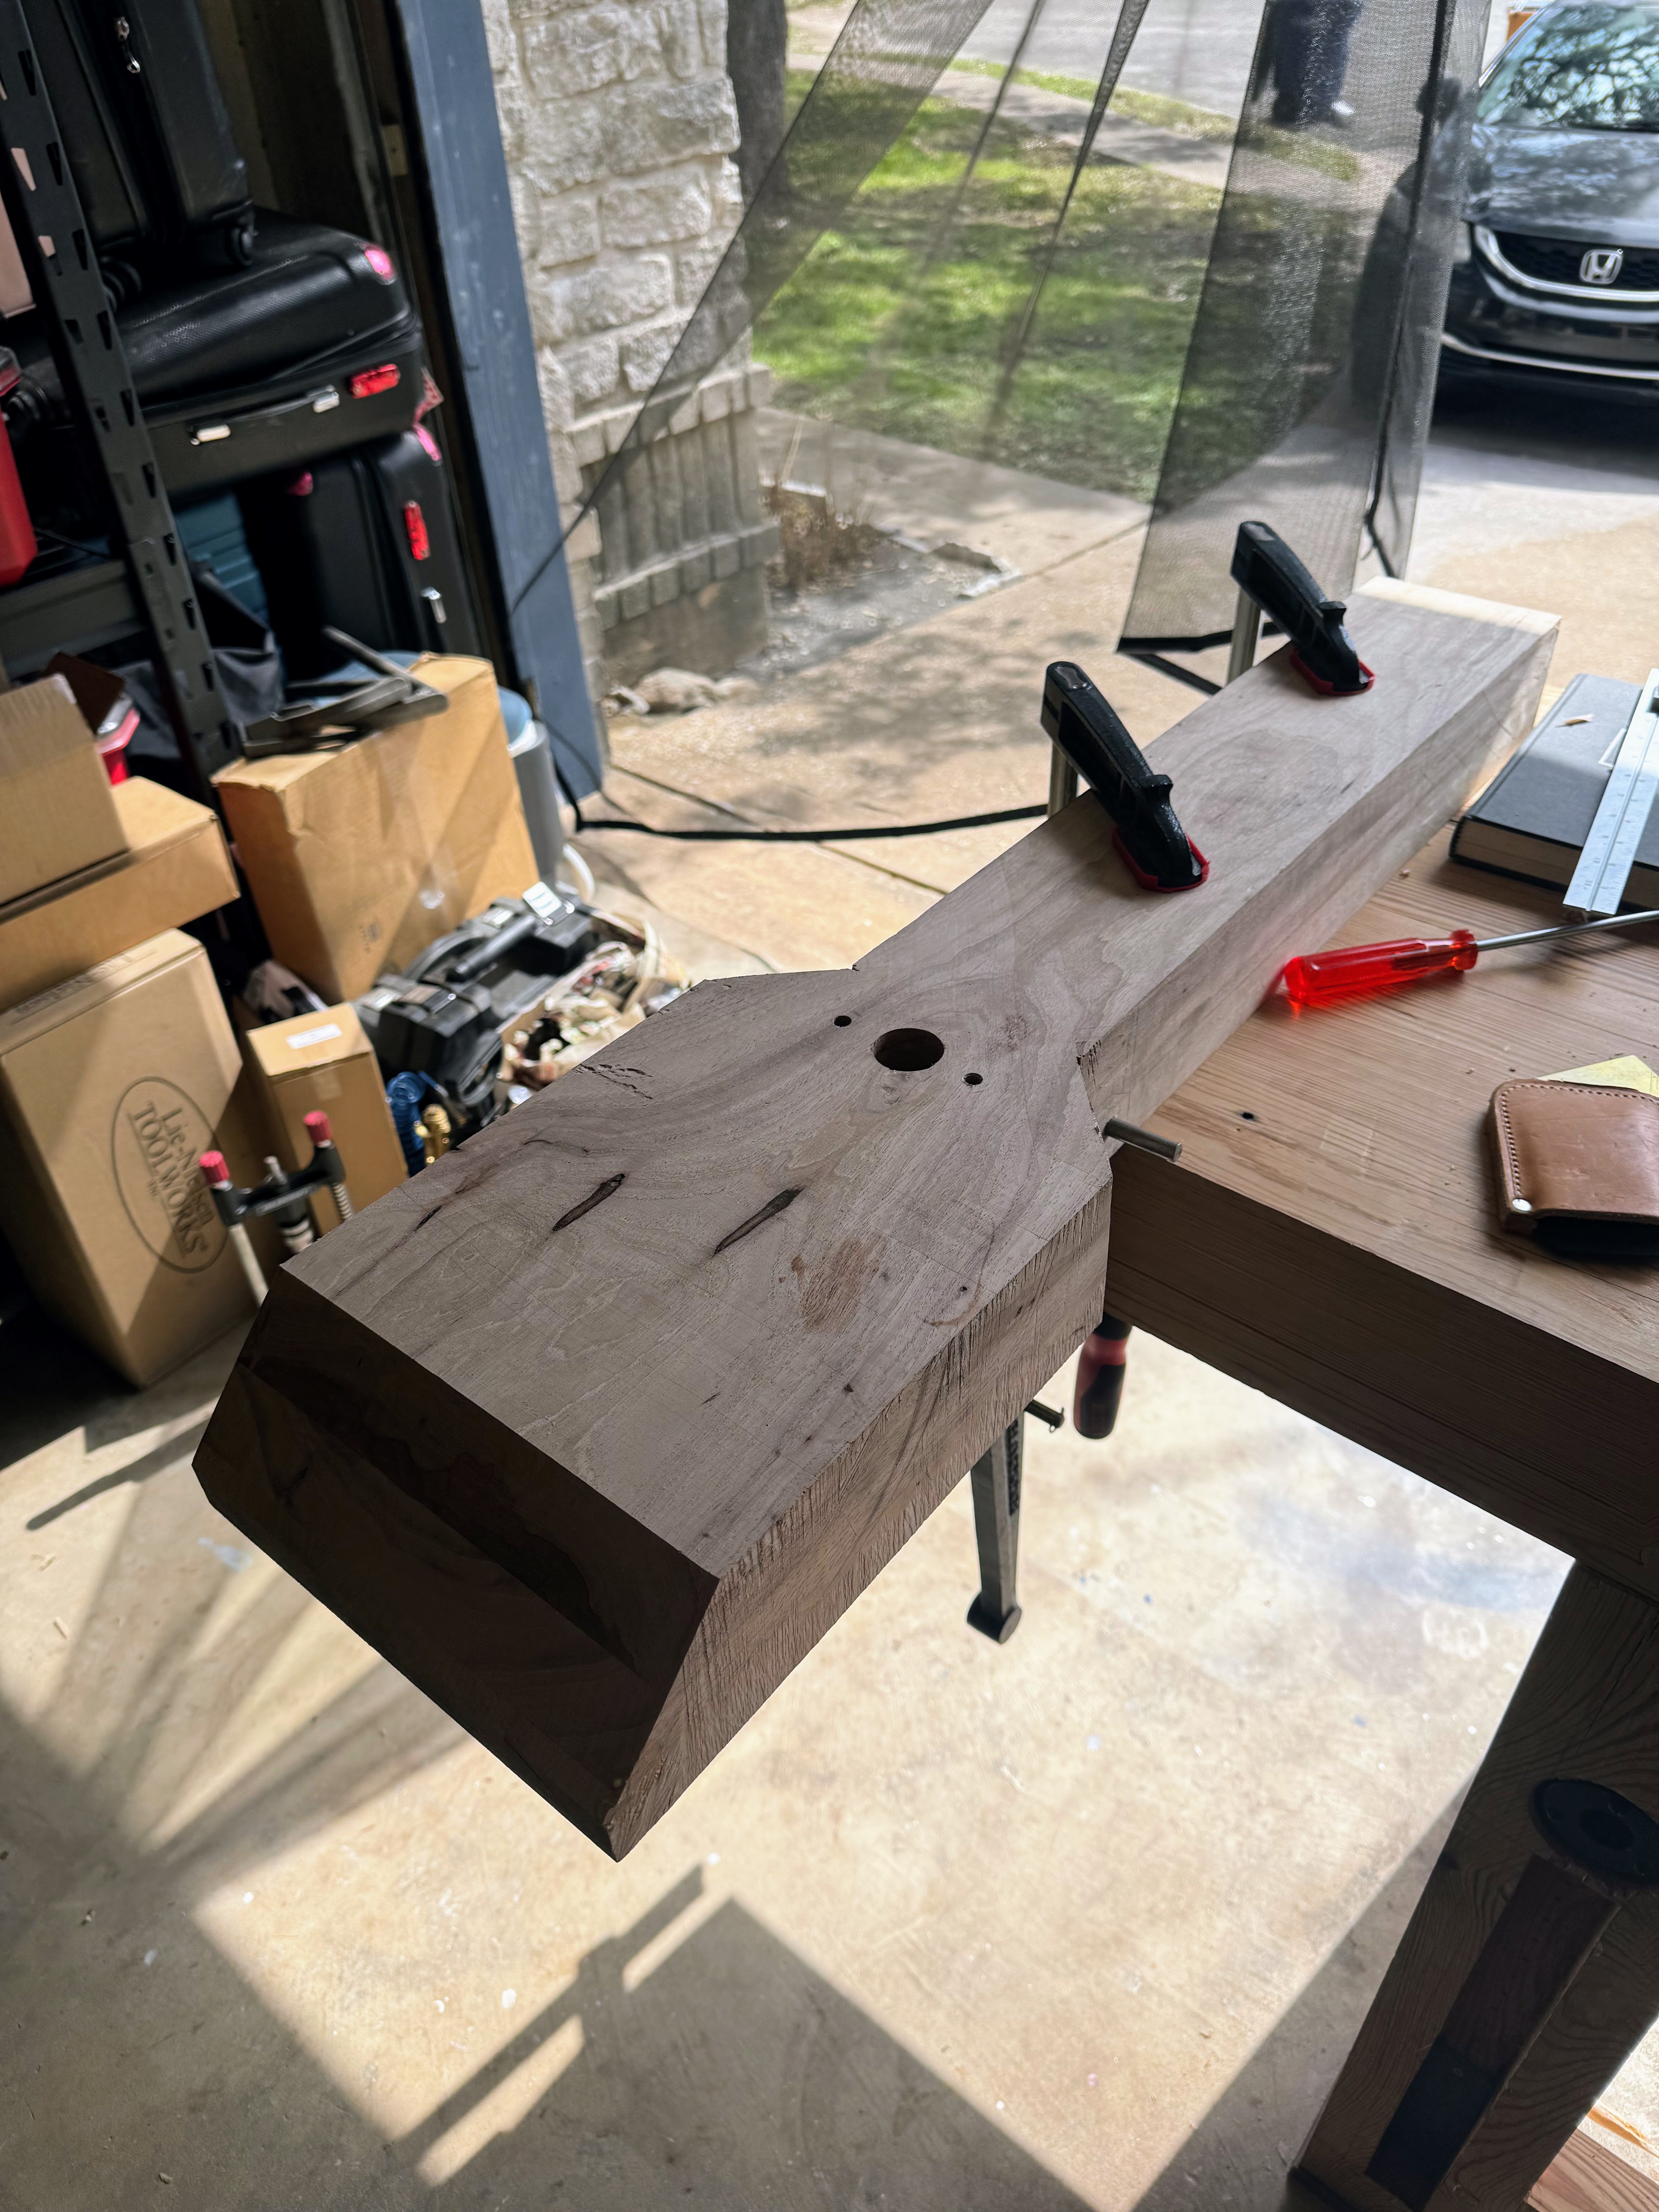
The vise chop was made from locally reclaimed pecan. I modified the plan’s dimensions, making the chop thicker and one inch wider per side. The bottom of the chop’s “wings” was cut to a 45-degree angle instead of a rounded profile. Pecan’s hardness made sawing difficult, and planing the faces flat and smooth required significant work.
Primary tasks for installing the Benchcrafted hardware included cutting mortises in the designated workbench leg for the parallel guide and the main vise screw nut. An accurately bored through-hole for the large Acme vise screw was also necessary. The pins for the parallel guide were also crucial to get precisely square and I used my beam borer for this.
After preparing these openings, I fitted the hardware, seating the Acme screw nut and an acetal bushing. Precise alignment of these parts with the screw hole in the pecan chop was necessary for smooth vise operation. This step required careful layout and execution.
Part 9: Final Assembly
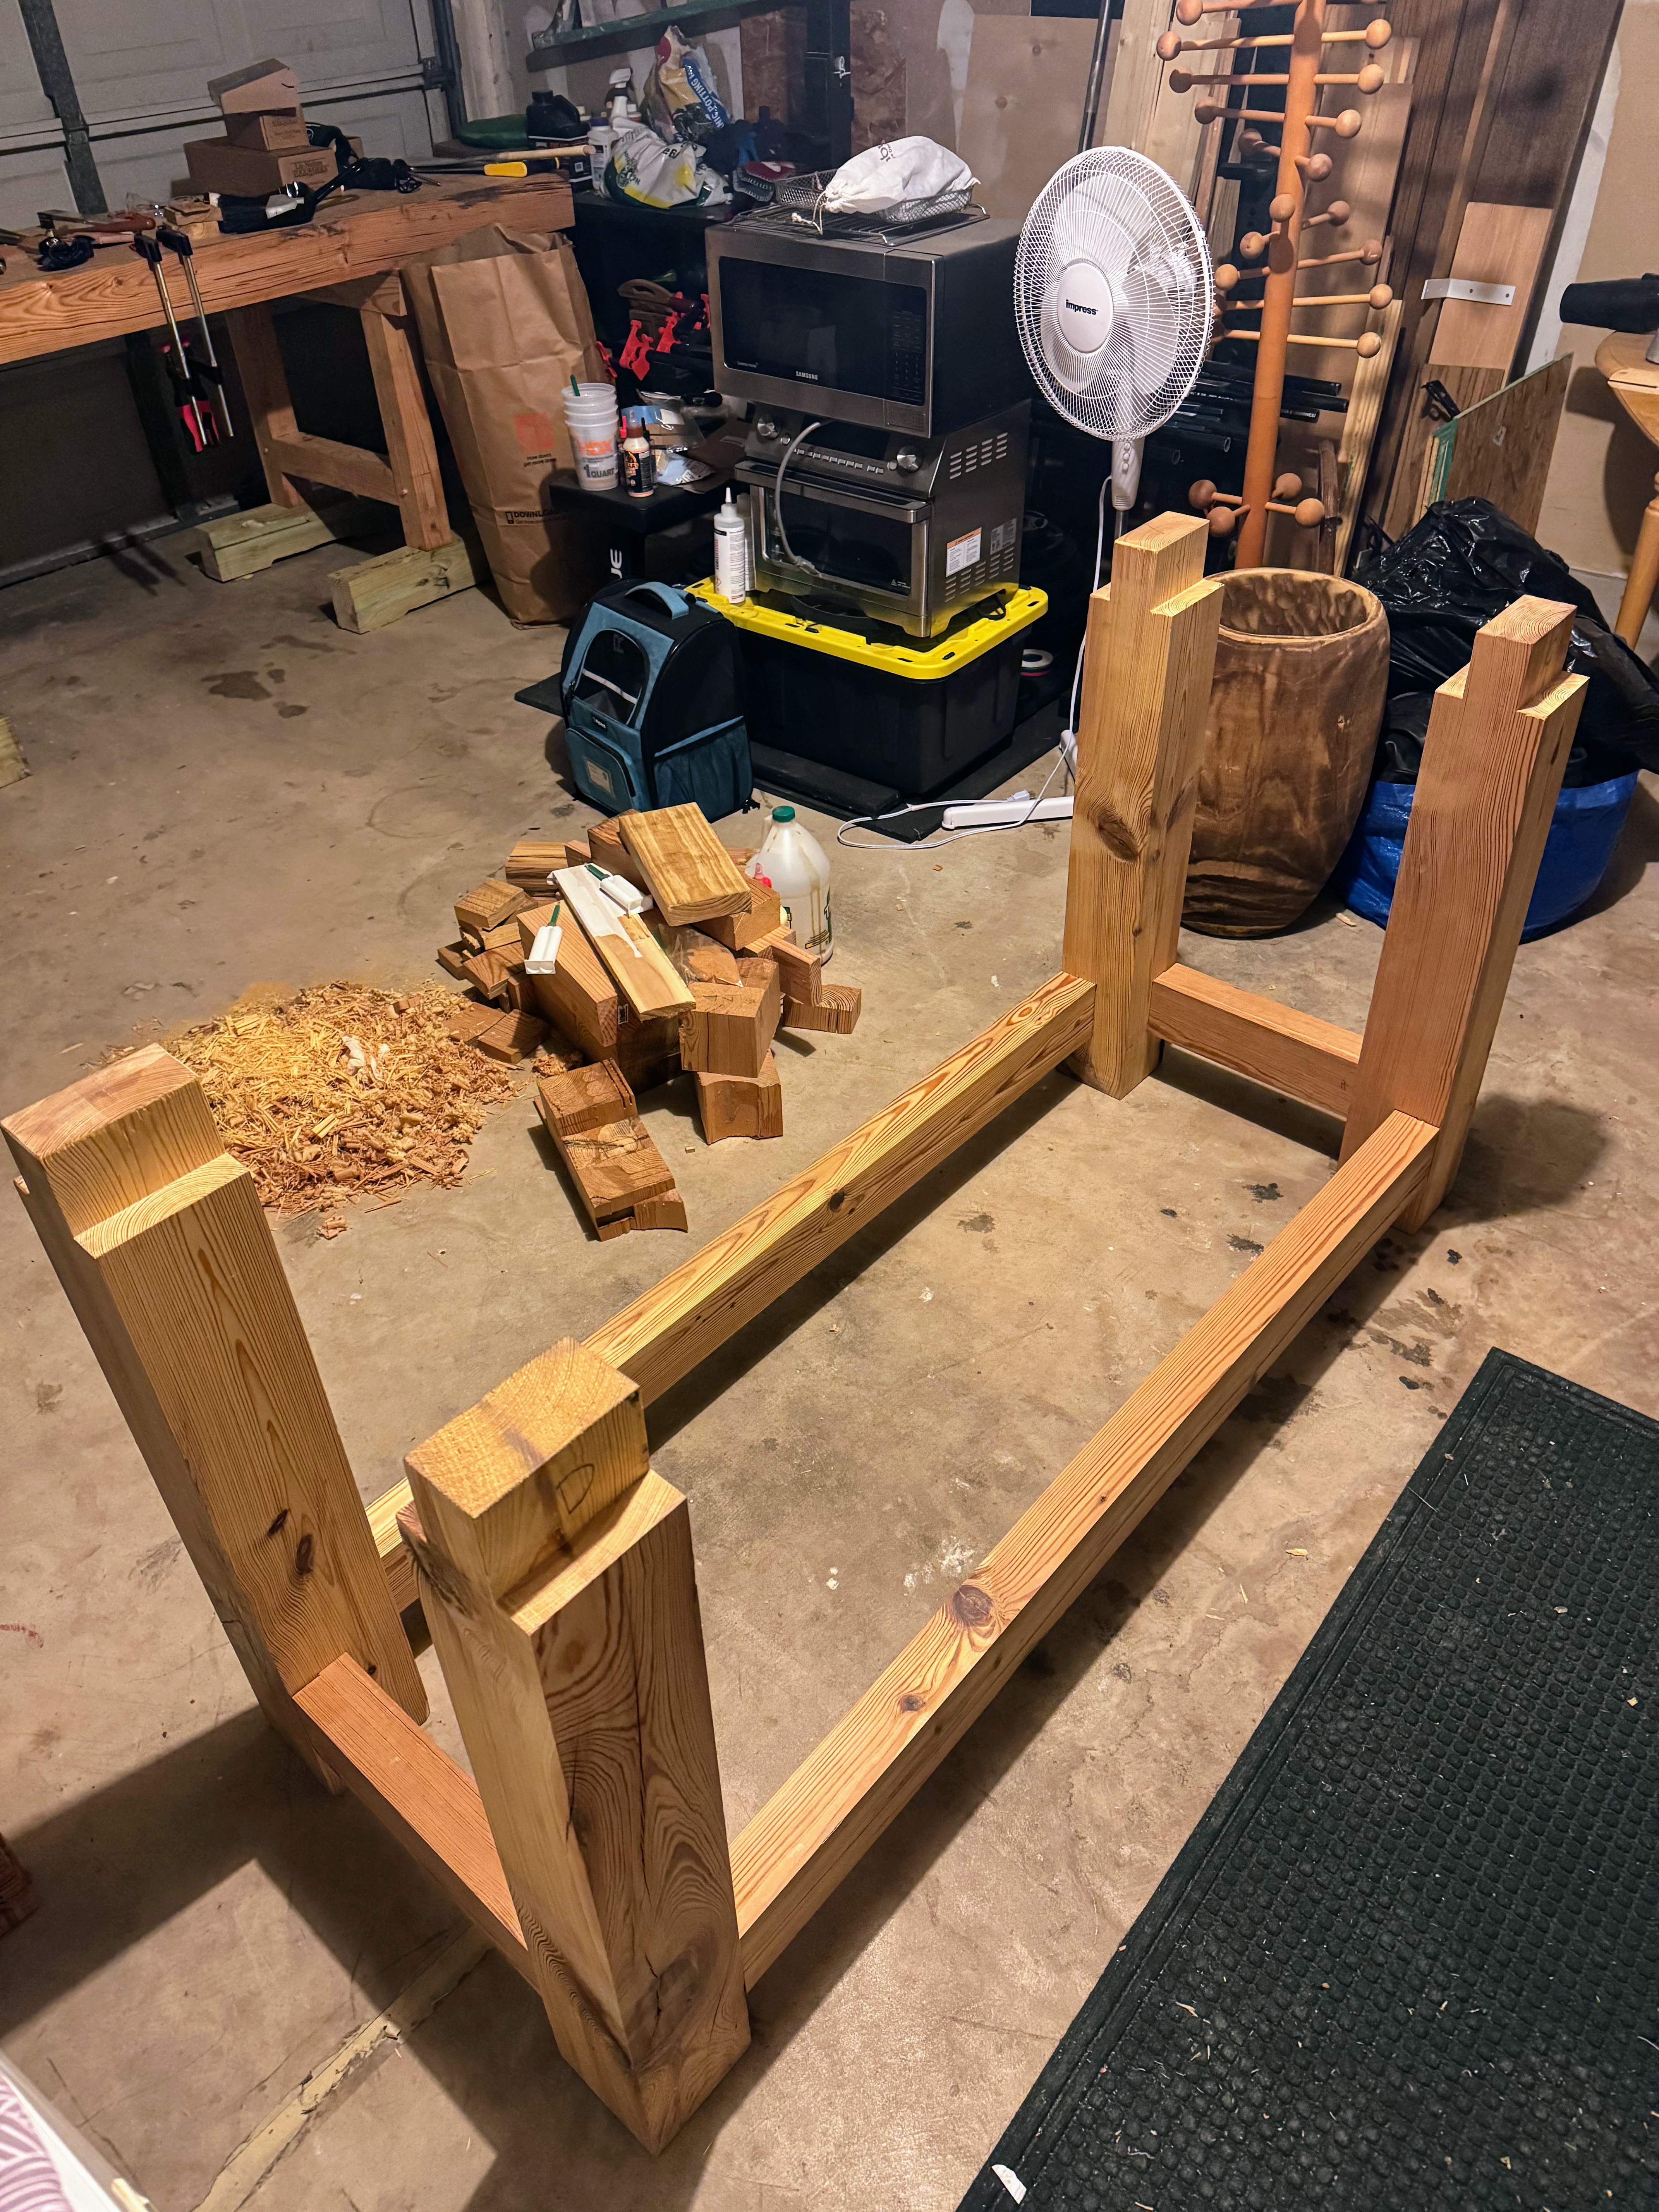
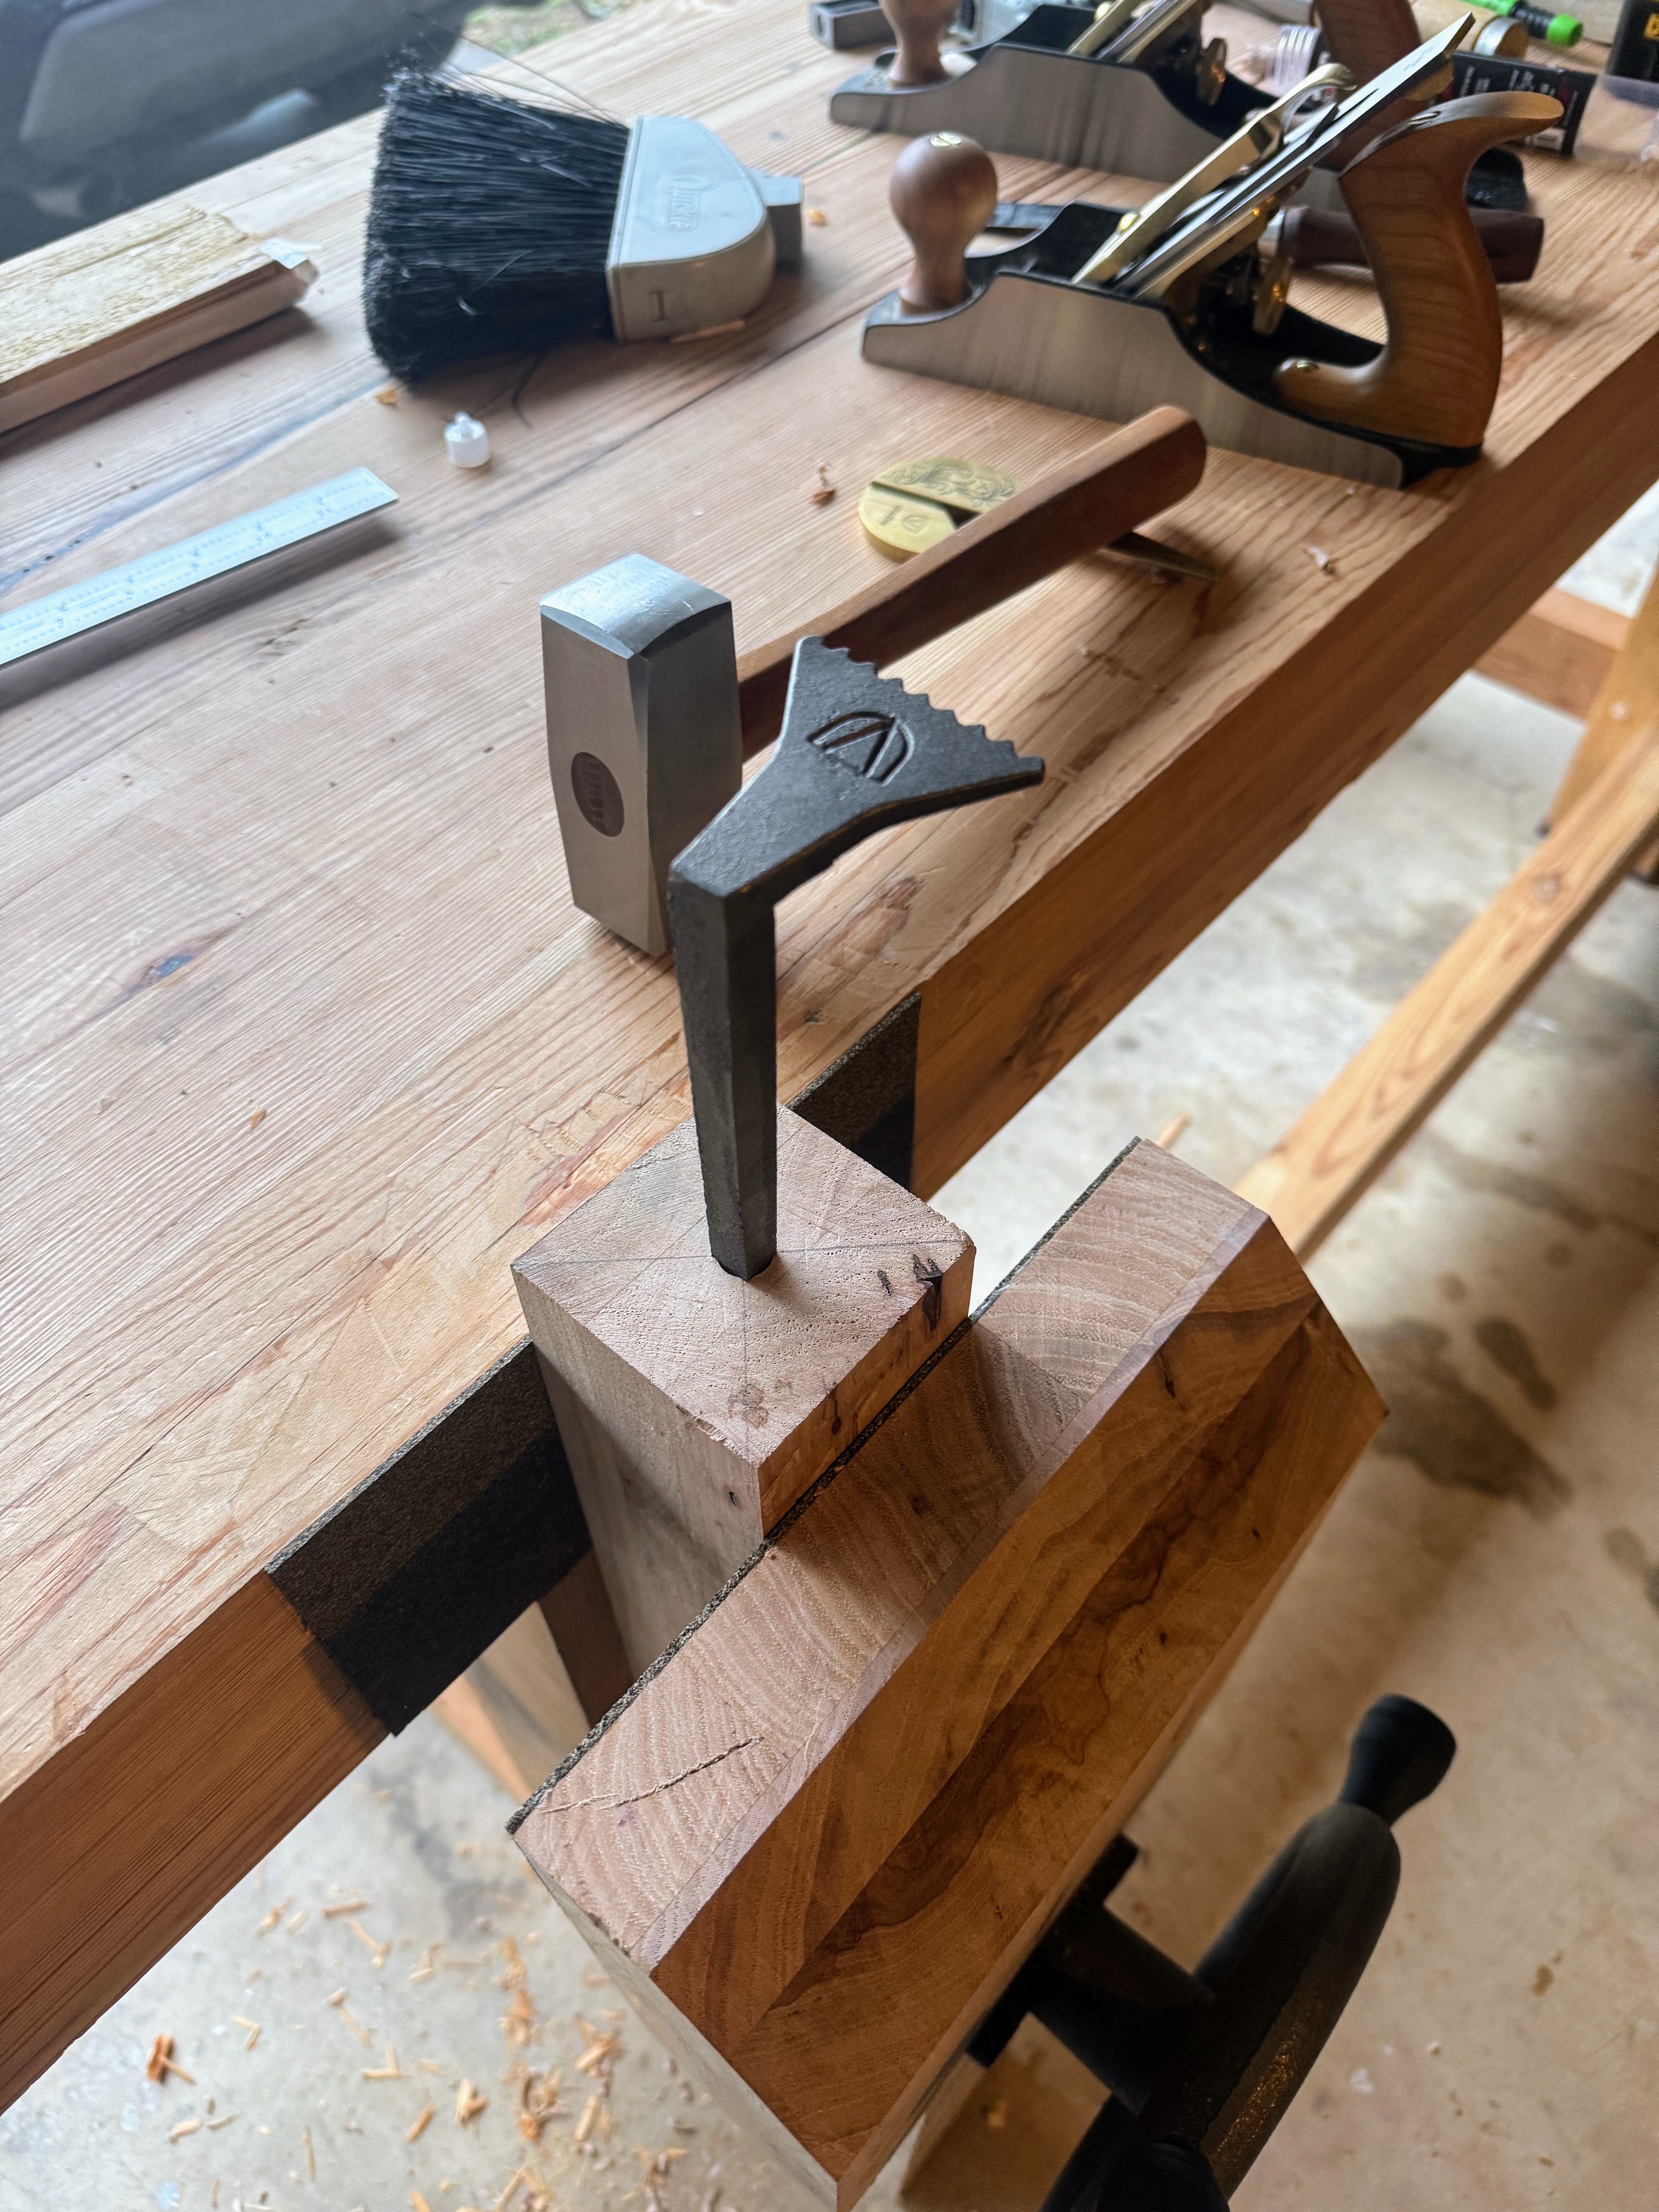
Once the leg vise hardware was fitted, the next stage was the final assembly of the workbench base and its attachment to the top. This involved gluing and staking 12 joints.
I used brown hide glue for this process. It was somewhat stressful, managing the glue as it tended to drip, while also needing to apply it to 12 joints and fit all components together in the correct order. I was also concerned about achieving adequate glue coverage in some of the looser fitting joints.
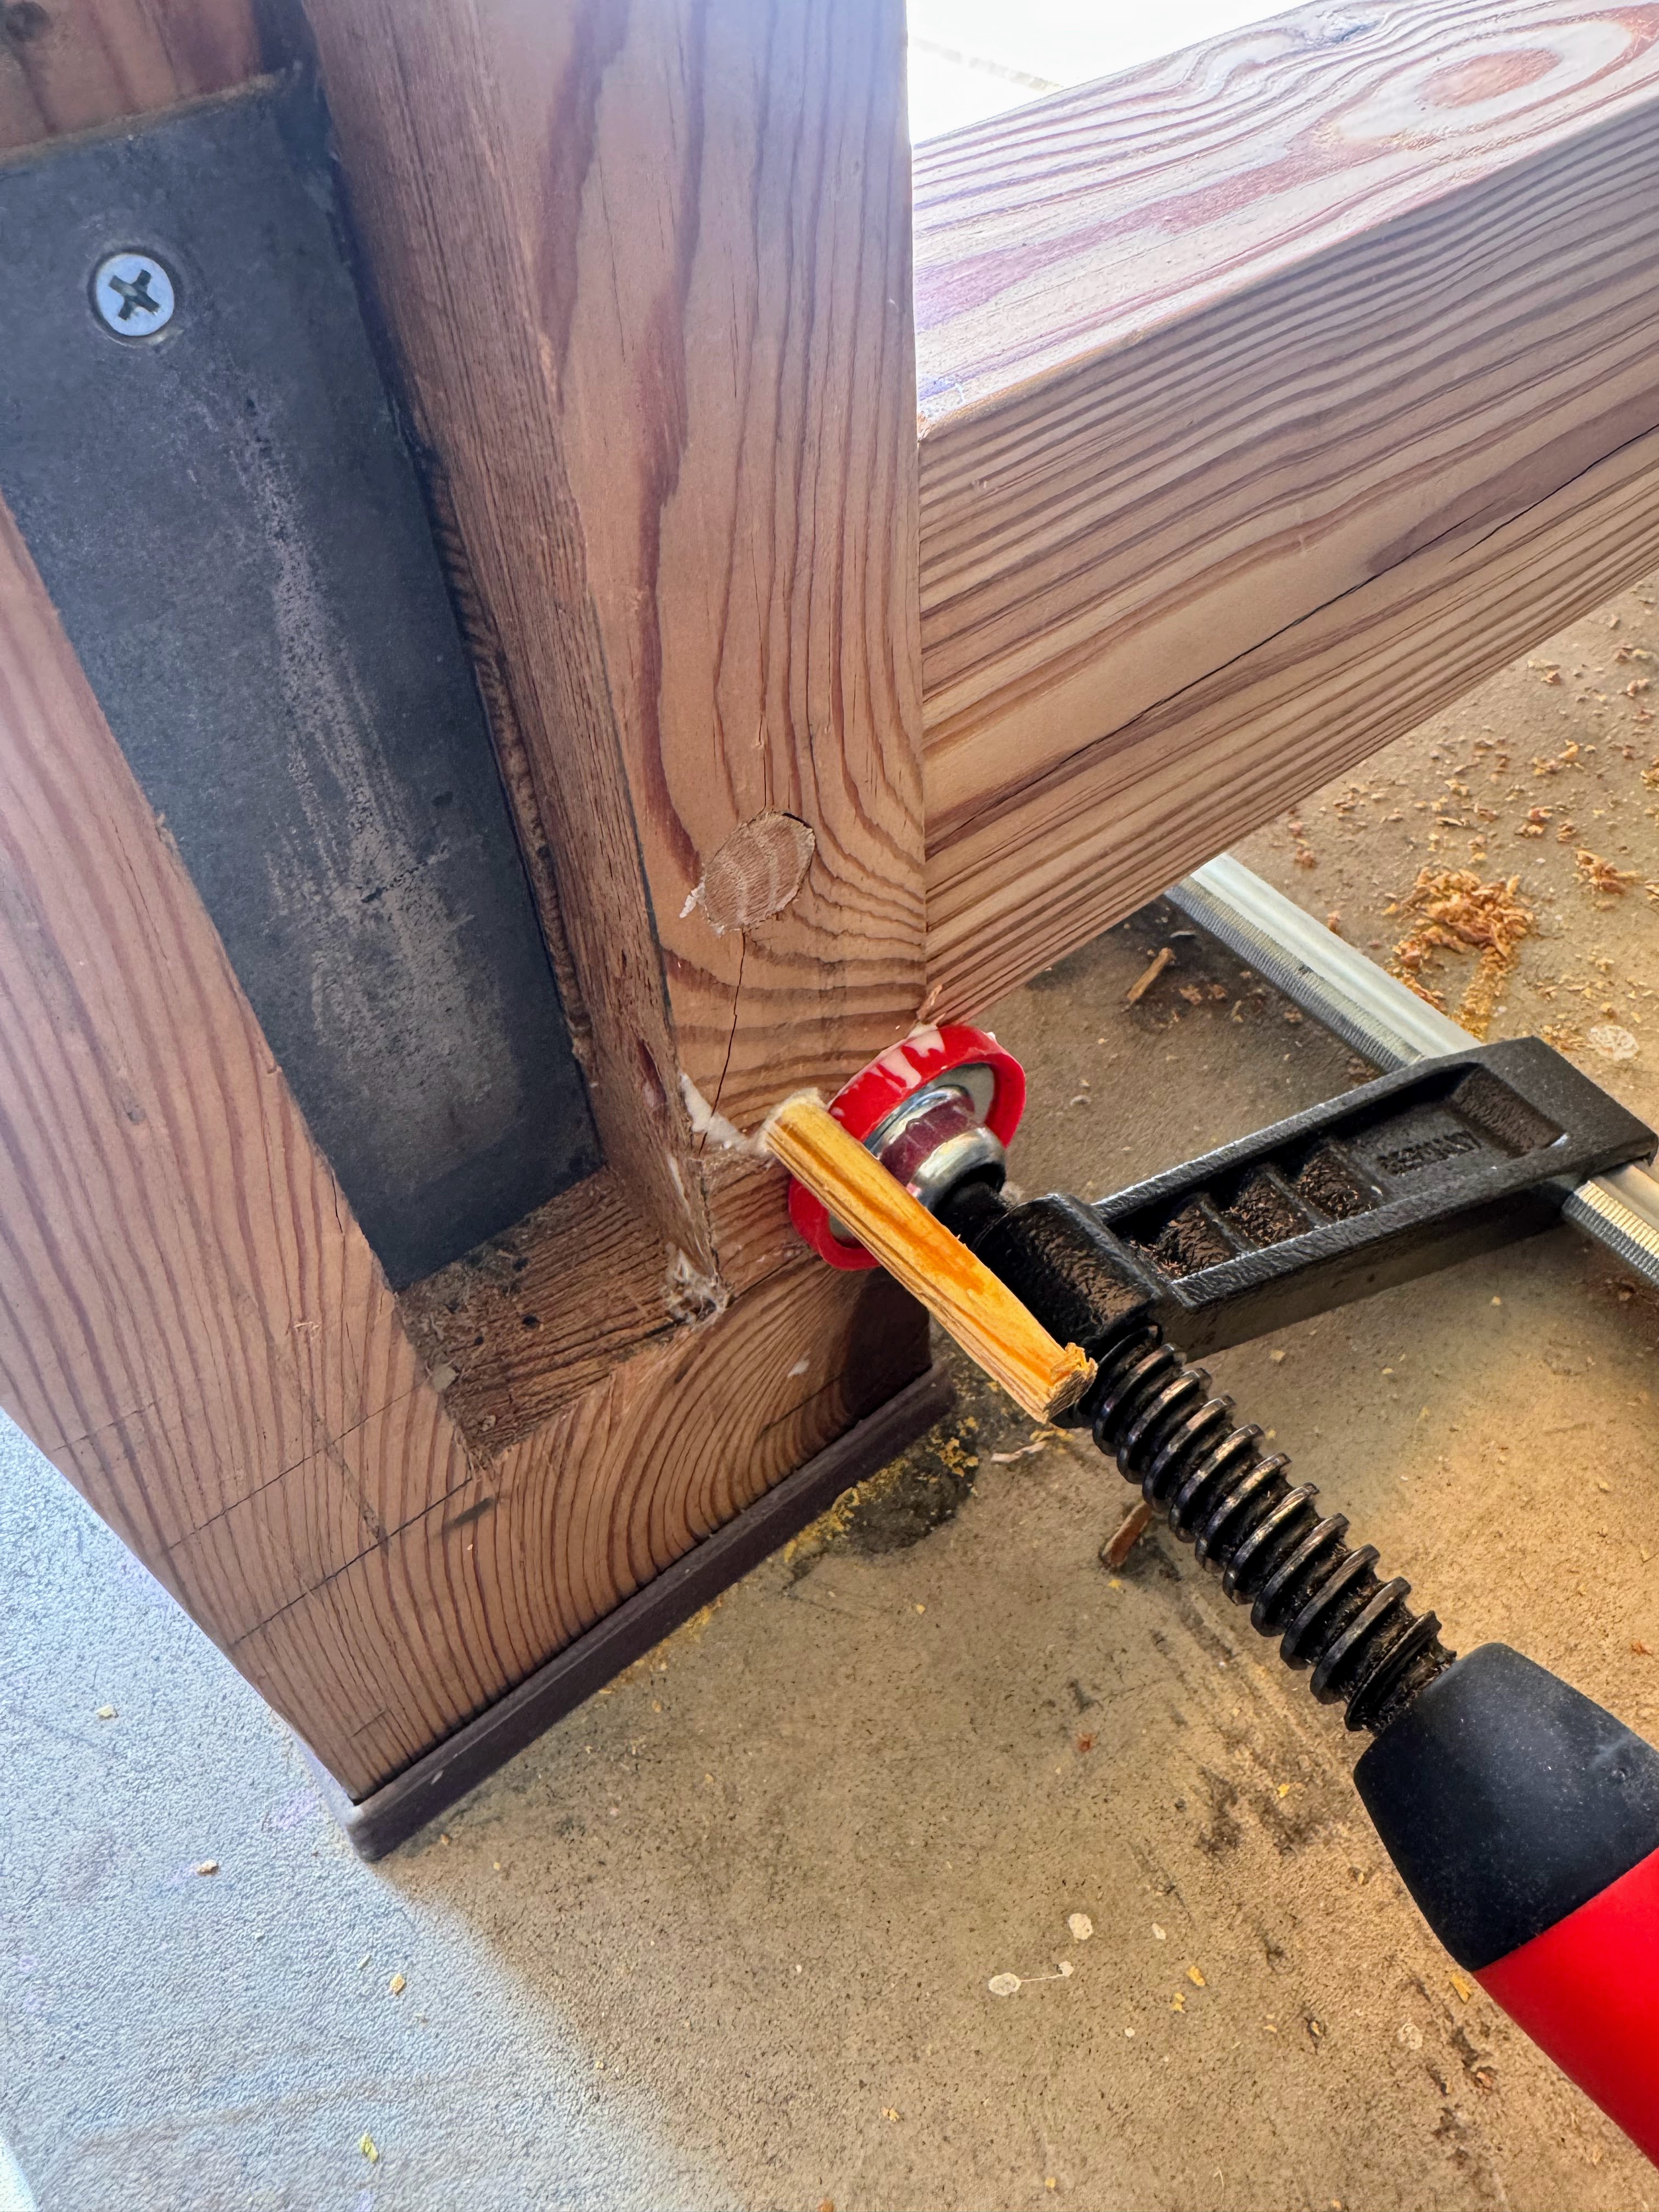
Following Christopher Schwarz’s recommendation for the staking sequence, I first drove the stakes (pegs) that join the leg tenons to the top. This was followed by staking the long stretchers, and finally the stringers. This order is designed to transfer any unsightly gaps to the less visible stringers. Pounding these stakes into the top and hearing and feeling the legs cinch tight was immensely satisfying. Fortunately, despite some drawbore offsets being on the generous side, there were no tenon cracks, which I was a little nervous about.
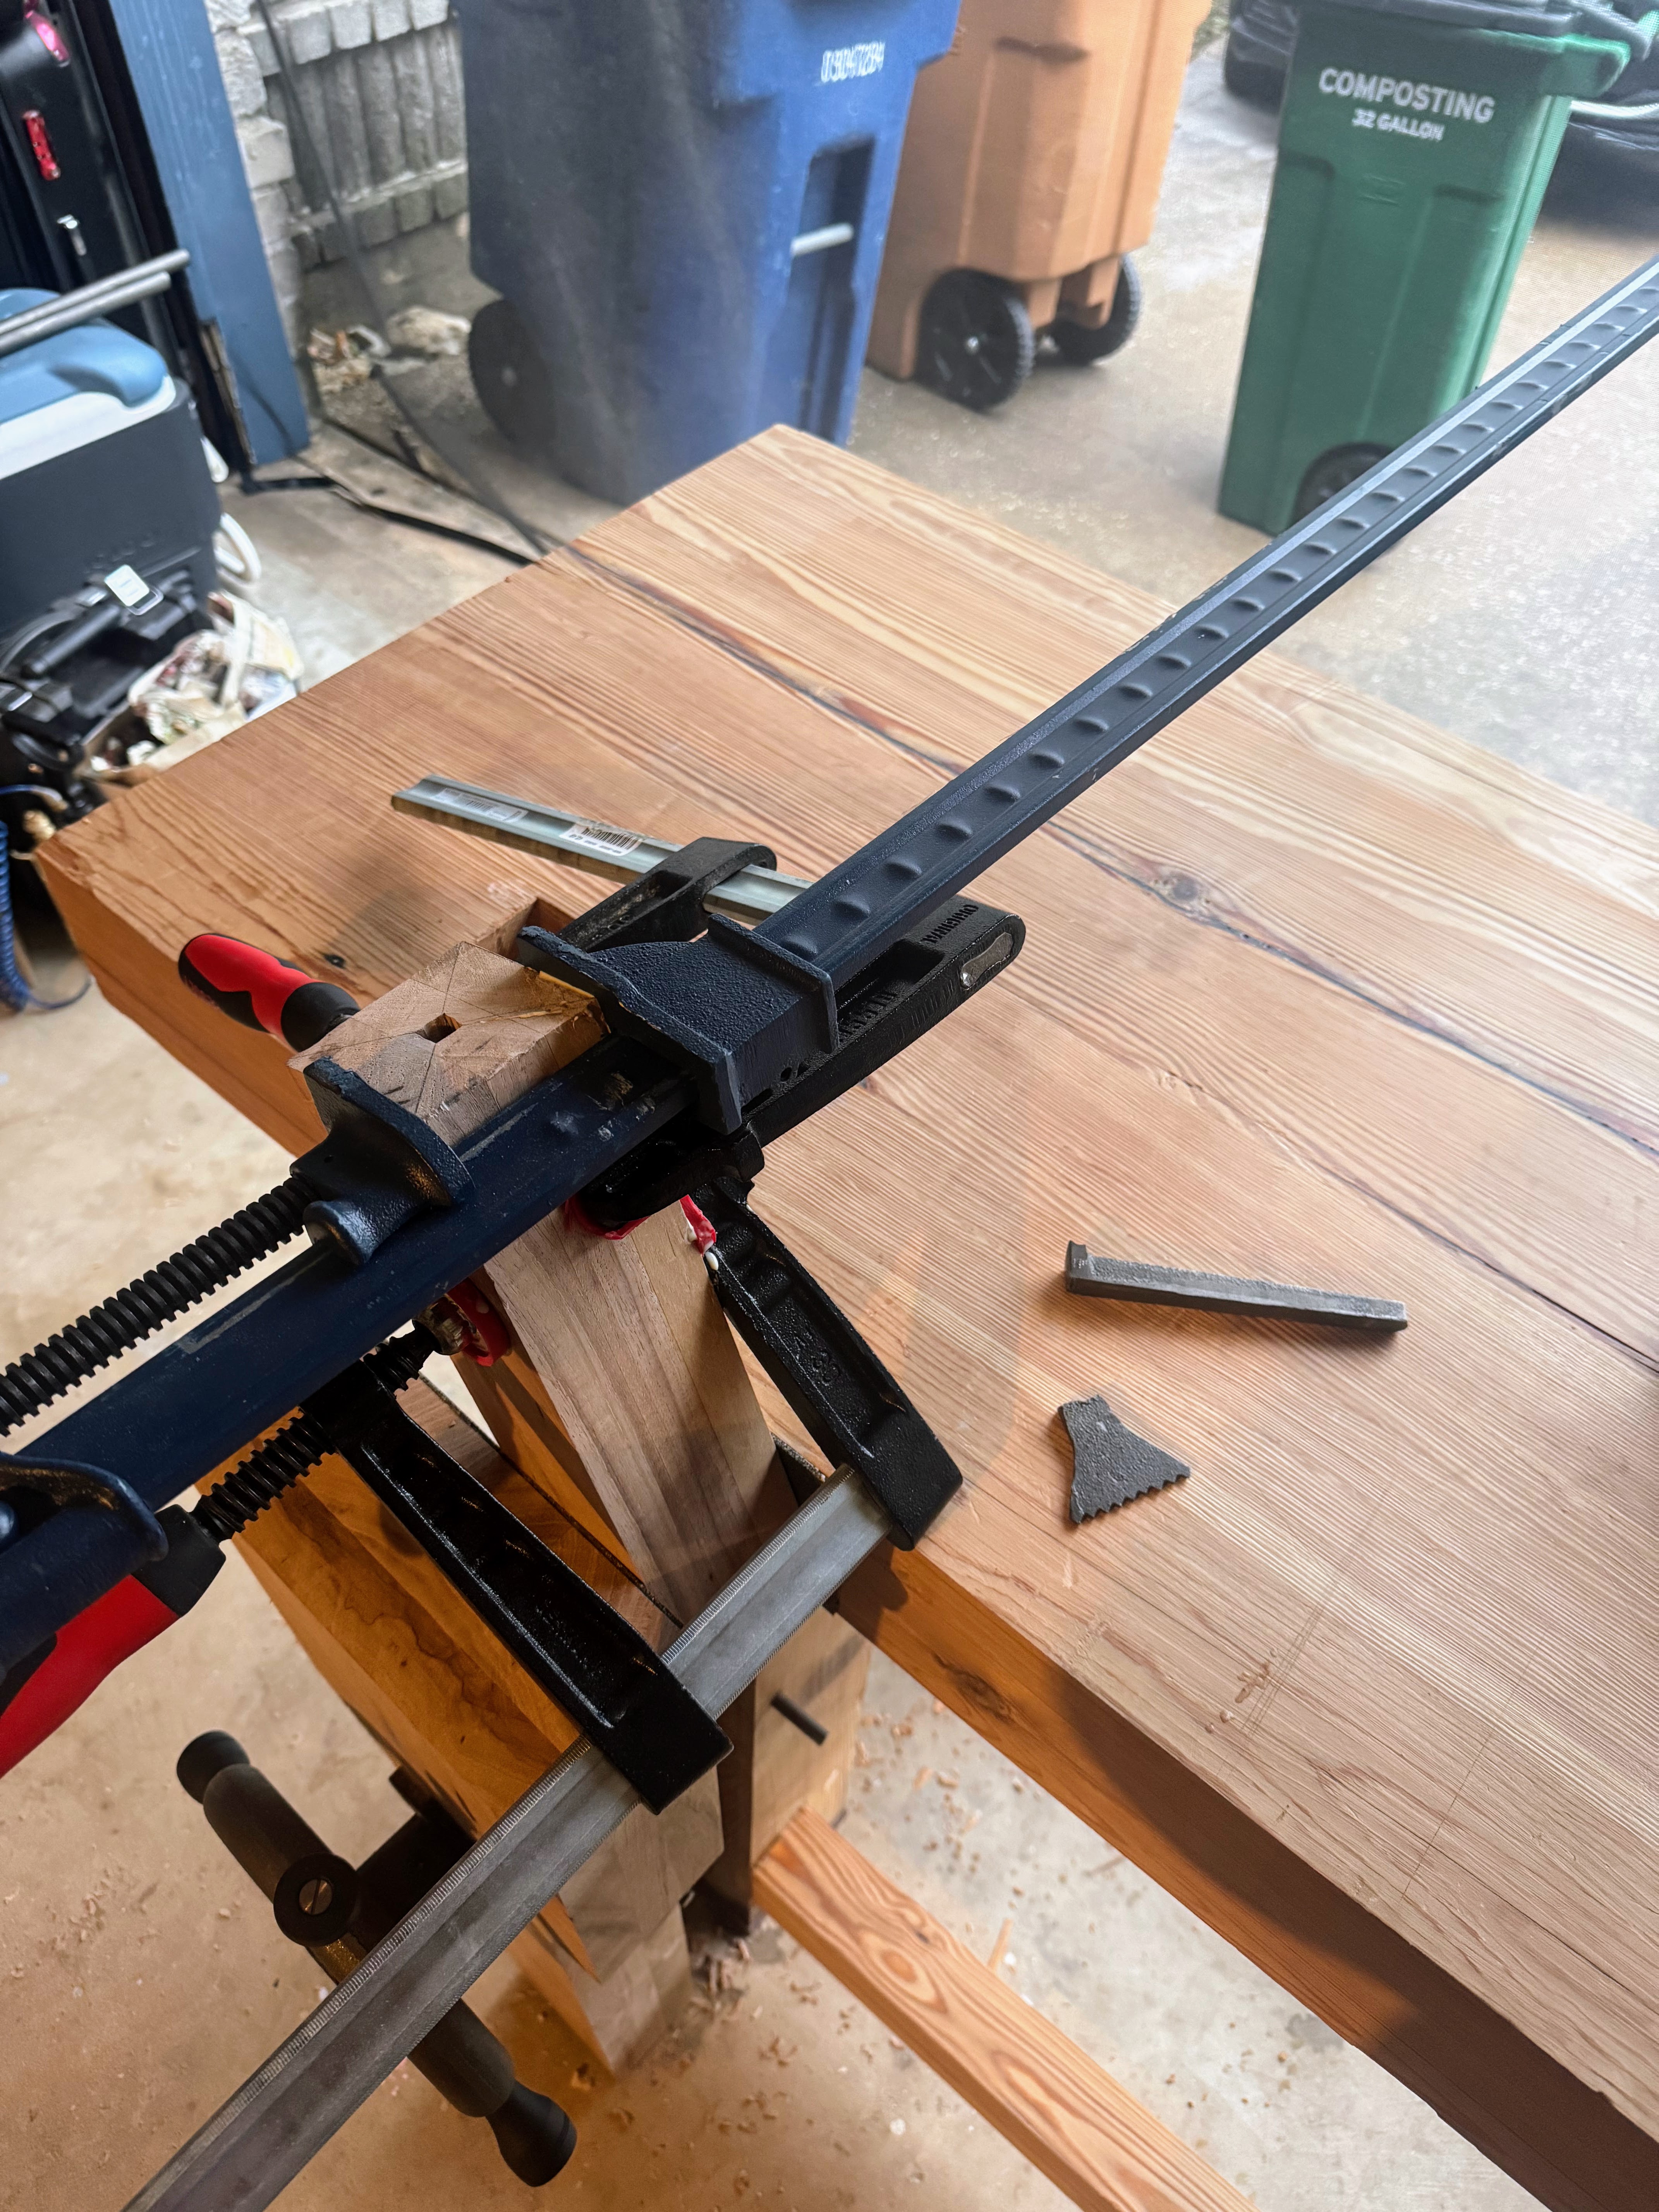
One incident did occur during staking: a shard from one stake split off and was driven through a leg, rupturing the wood above the drawbore hole for a stretcher. I performed some “wood glue surgery” with a clamp to repair the damage and then successfully drove in a replacement peg with a more carefully whittled end.
Part 10: The Flip
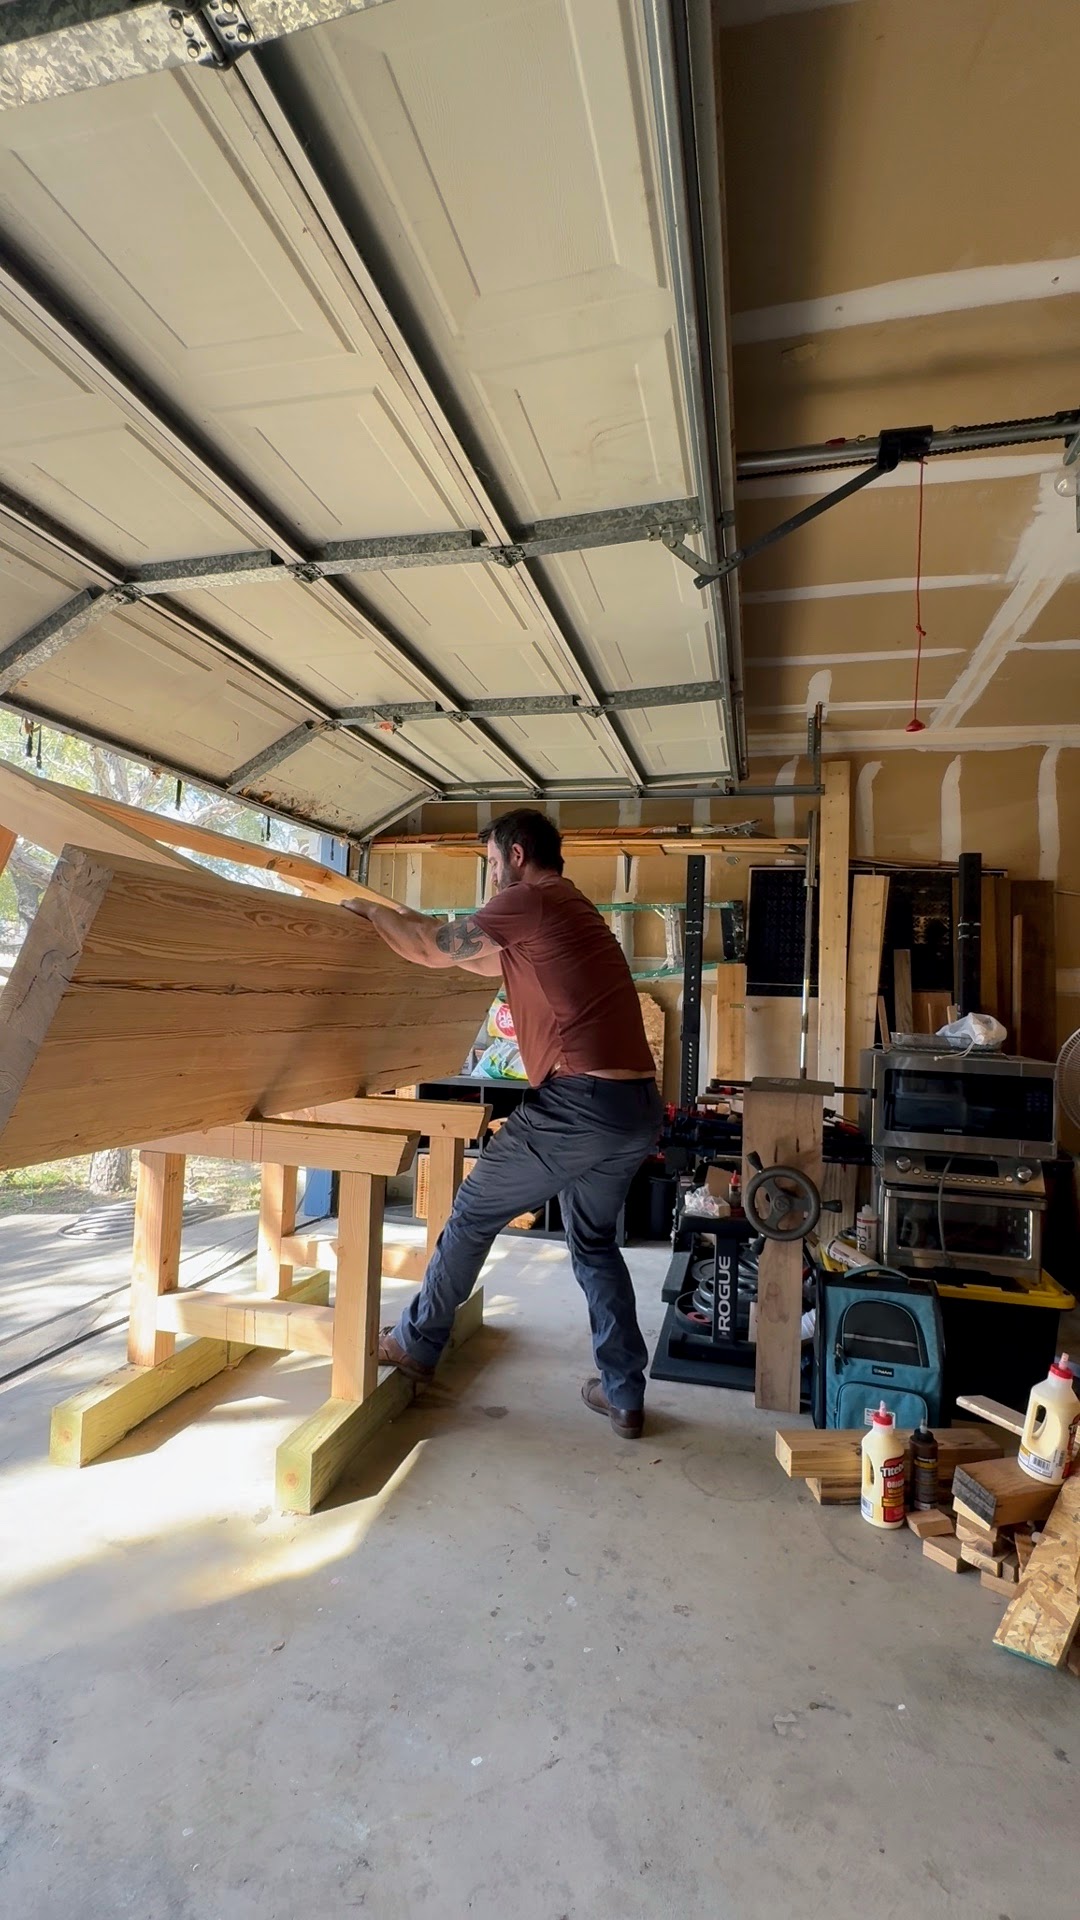
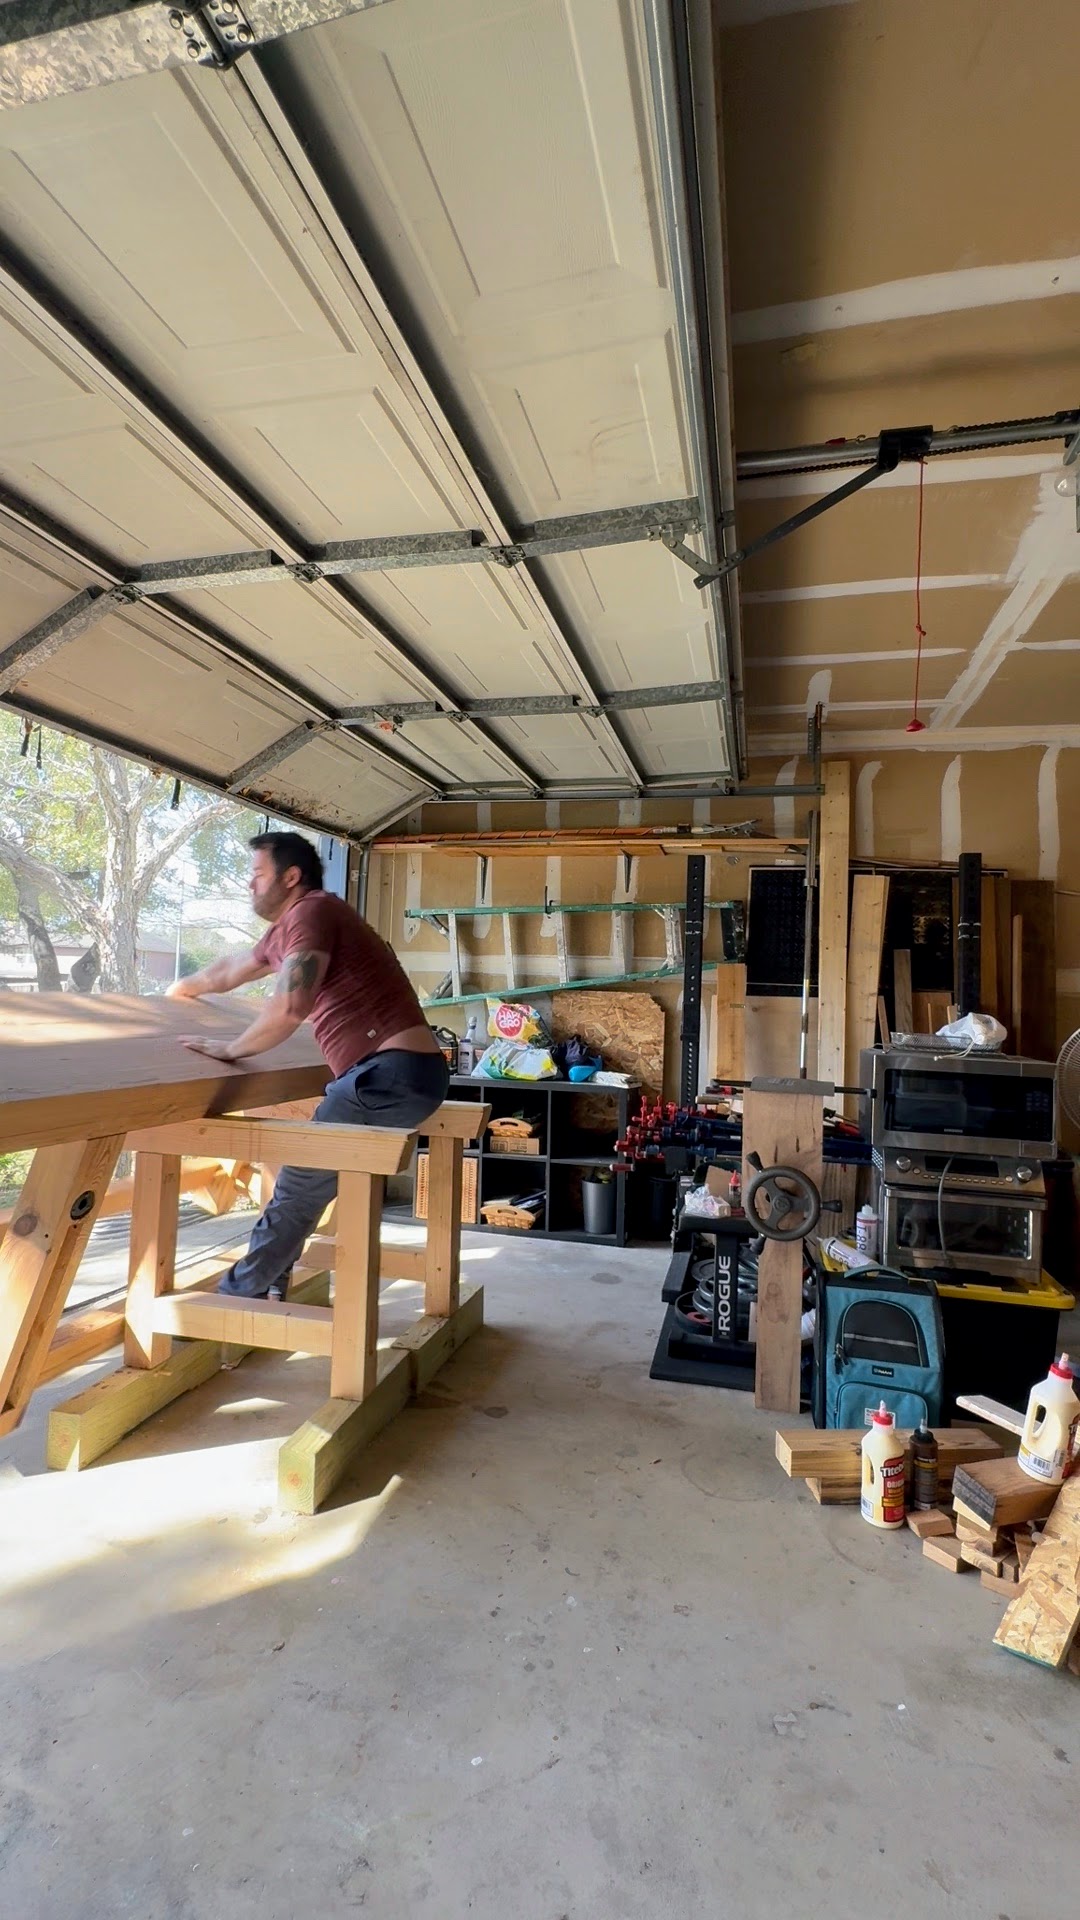
After the final assembly glue had cured overnight, it was time to get the workbench off the sawhorses. This involved flipping the entire bench, which easily weighed in the 400-pound range. I undertook this task by myself (I don’t recommend this).
While I had a plan for rolling it over, I misjudged the pivot point. As a result, the bench didn’t gently rotate but essentially flew off the sawhorses, landing on its legs on the ground with a massive thud. Frankly, I don’t recommend flipping a bench of this size alone.
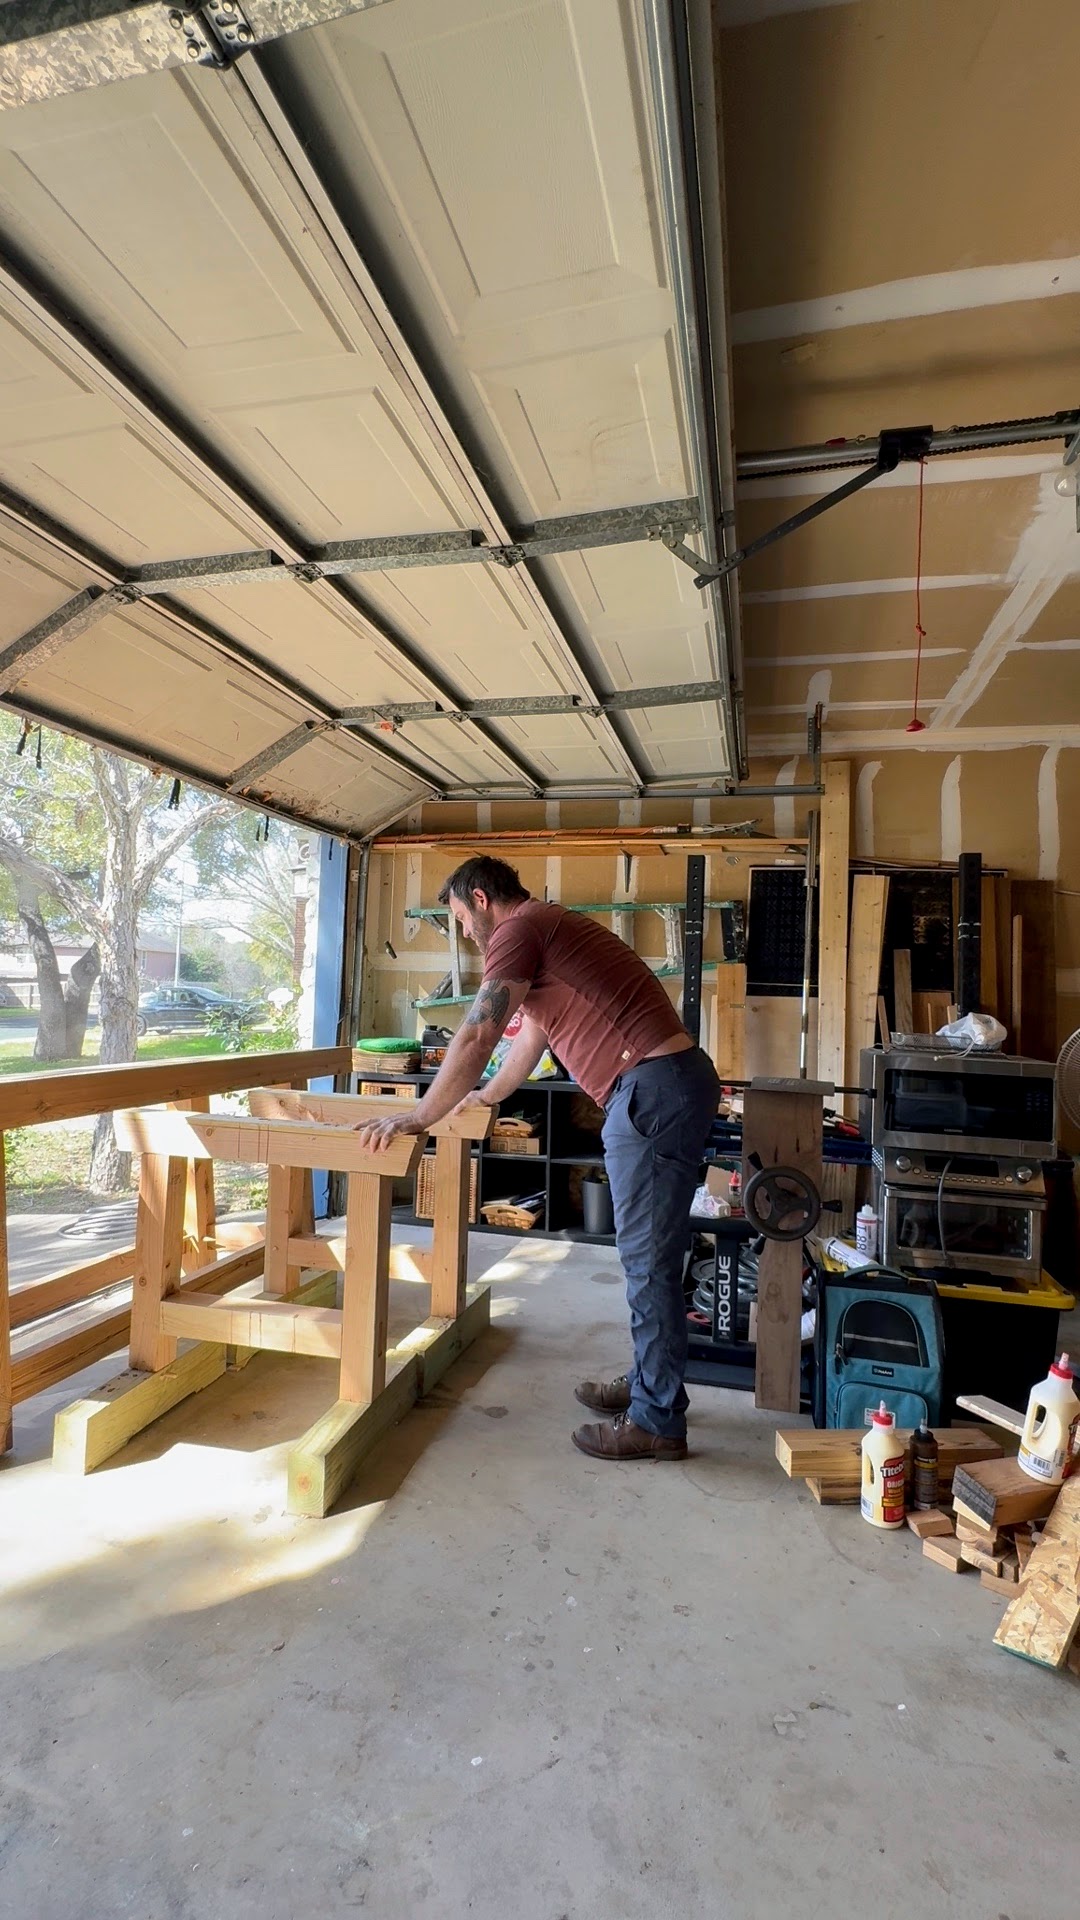
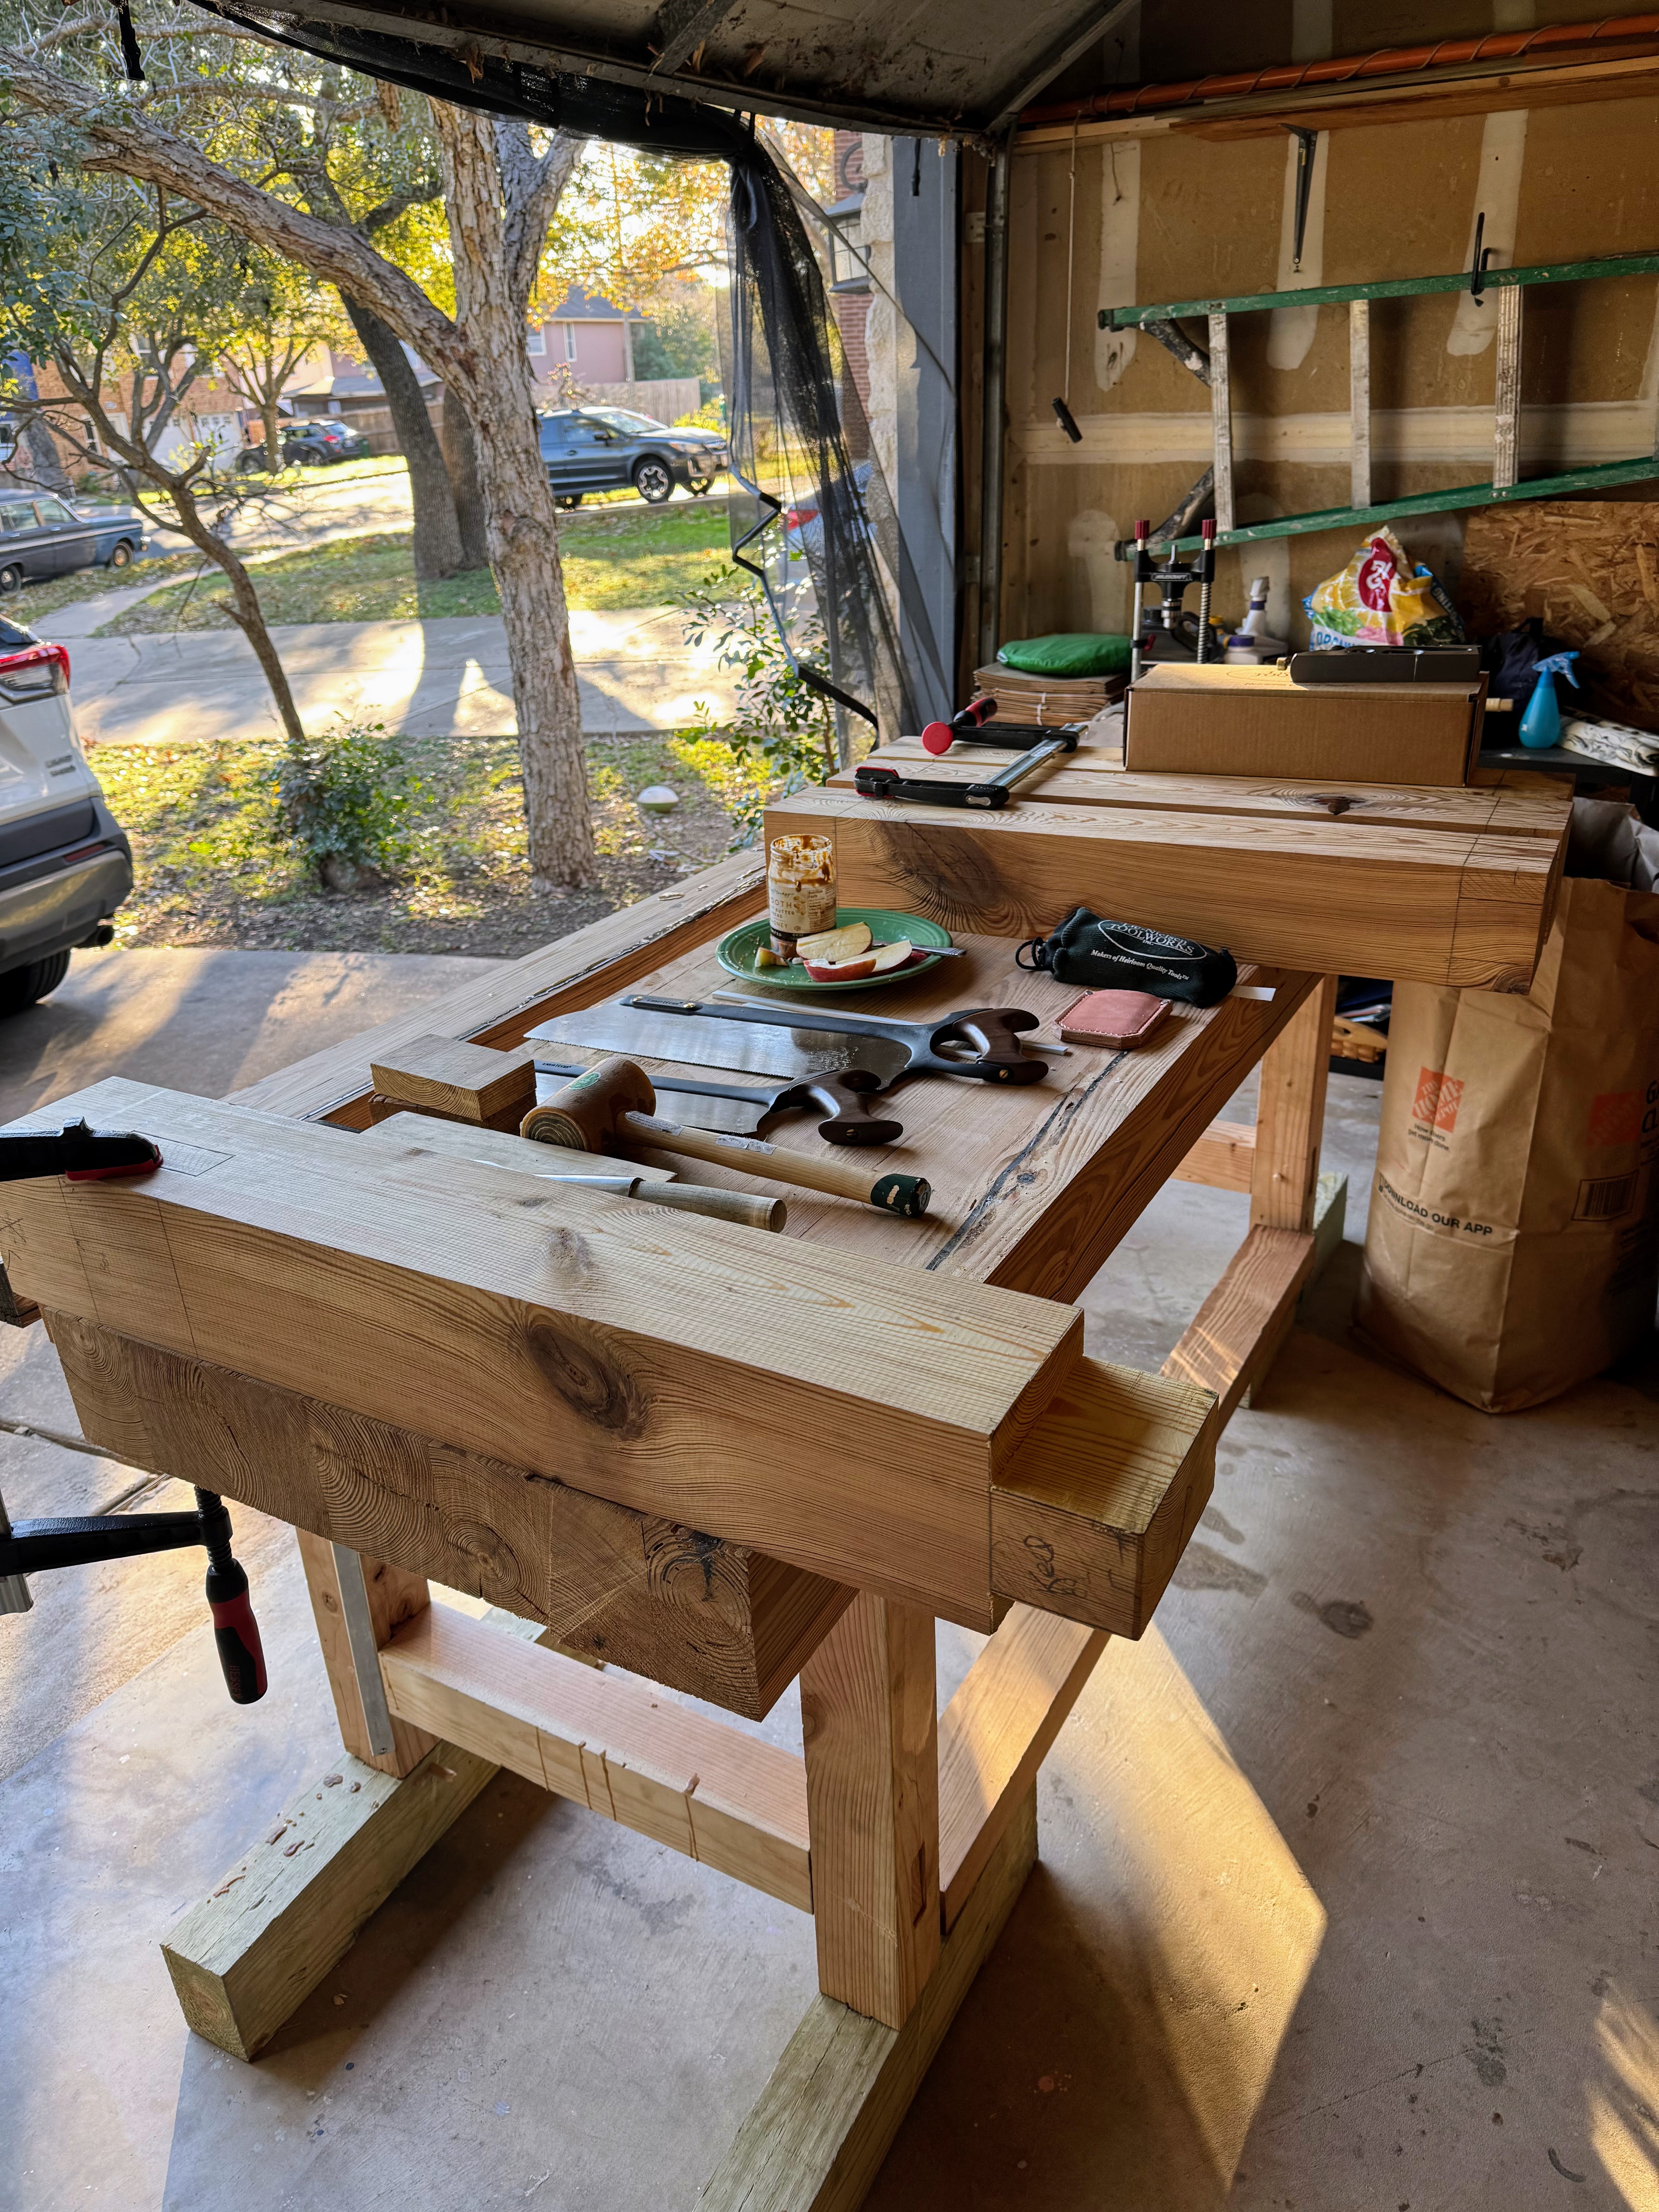
Remarkably, despite this uncontrolled landing, there was zero damage to the workbench – no cracks, no chips, and no loose joints. It was rock solid. A real testament to the strength of the mortise and tenon (and drawbore) construction and the overall robustness of the design. I also attached the vise chop and swing away seat.
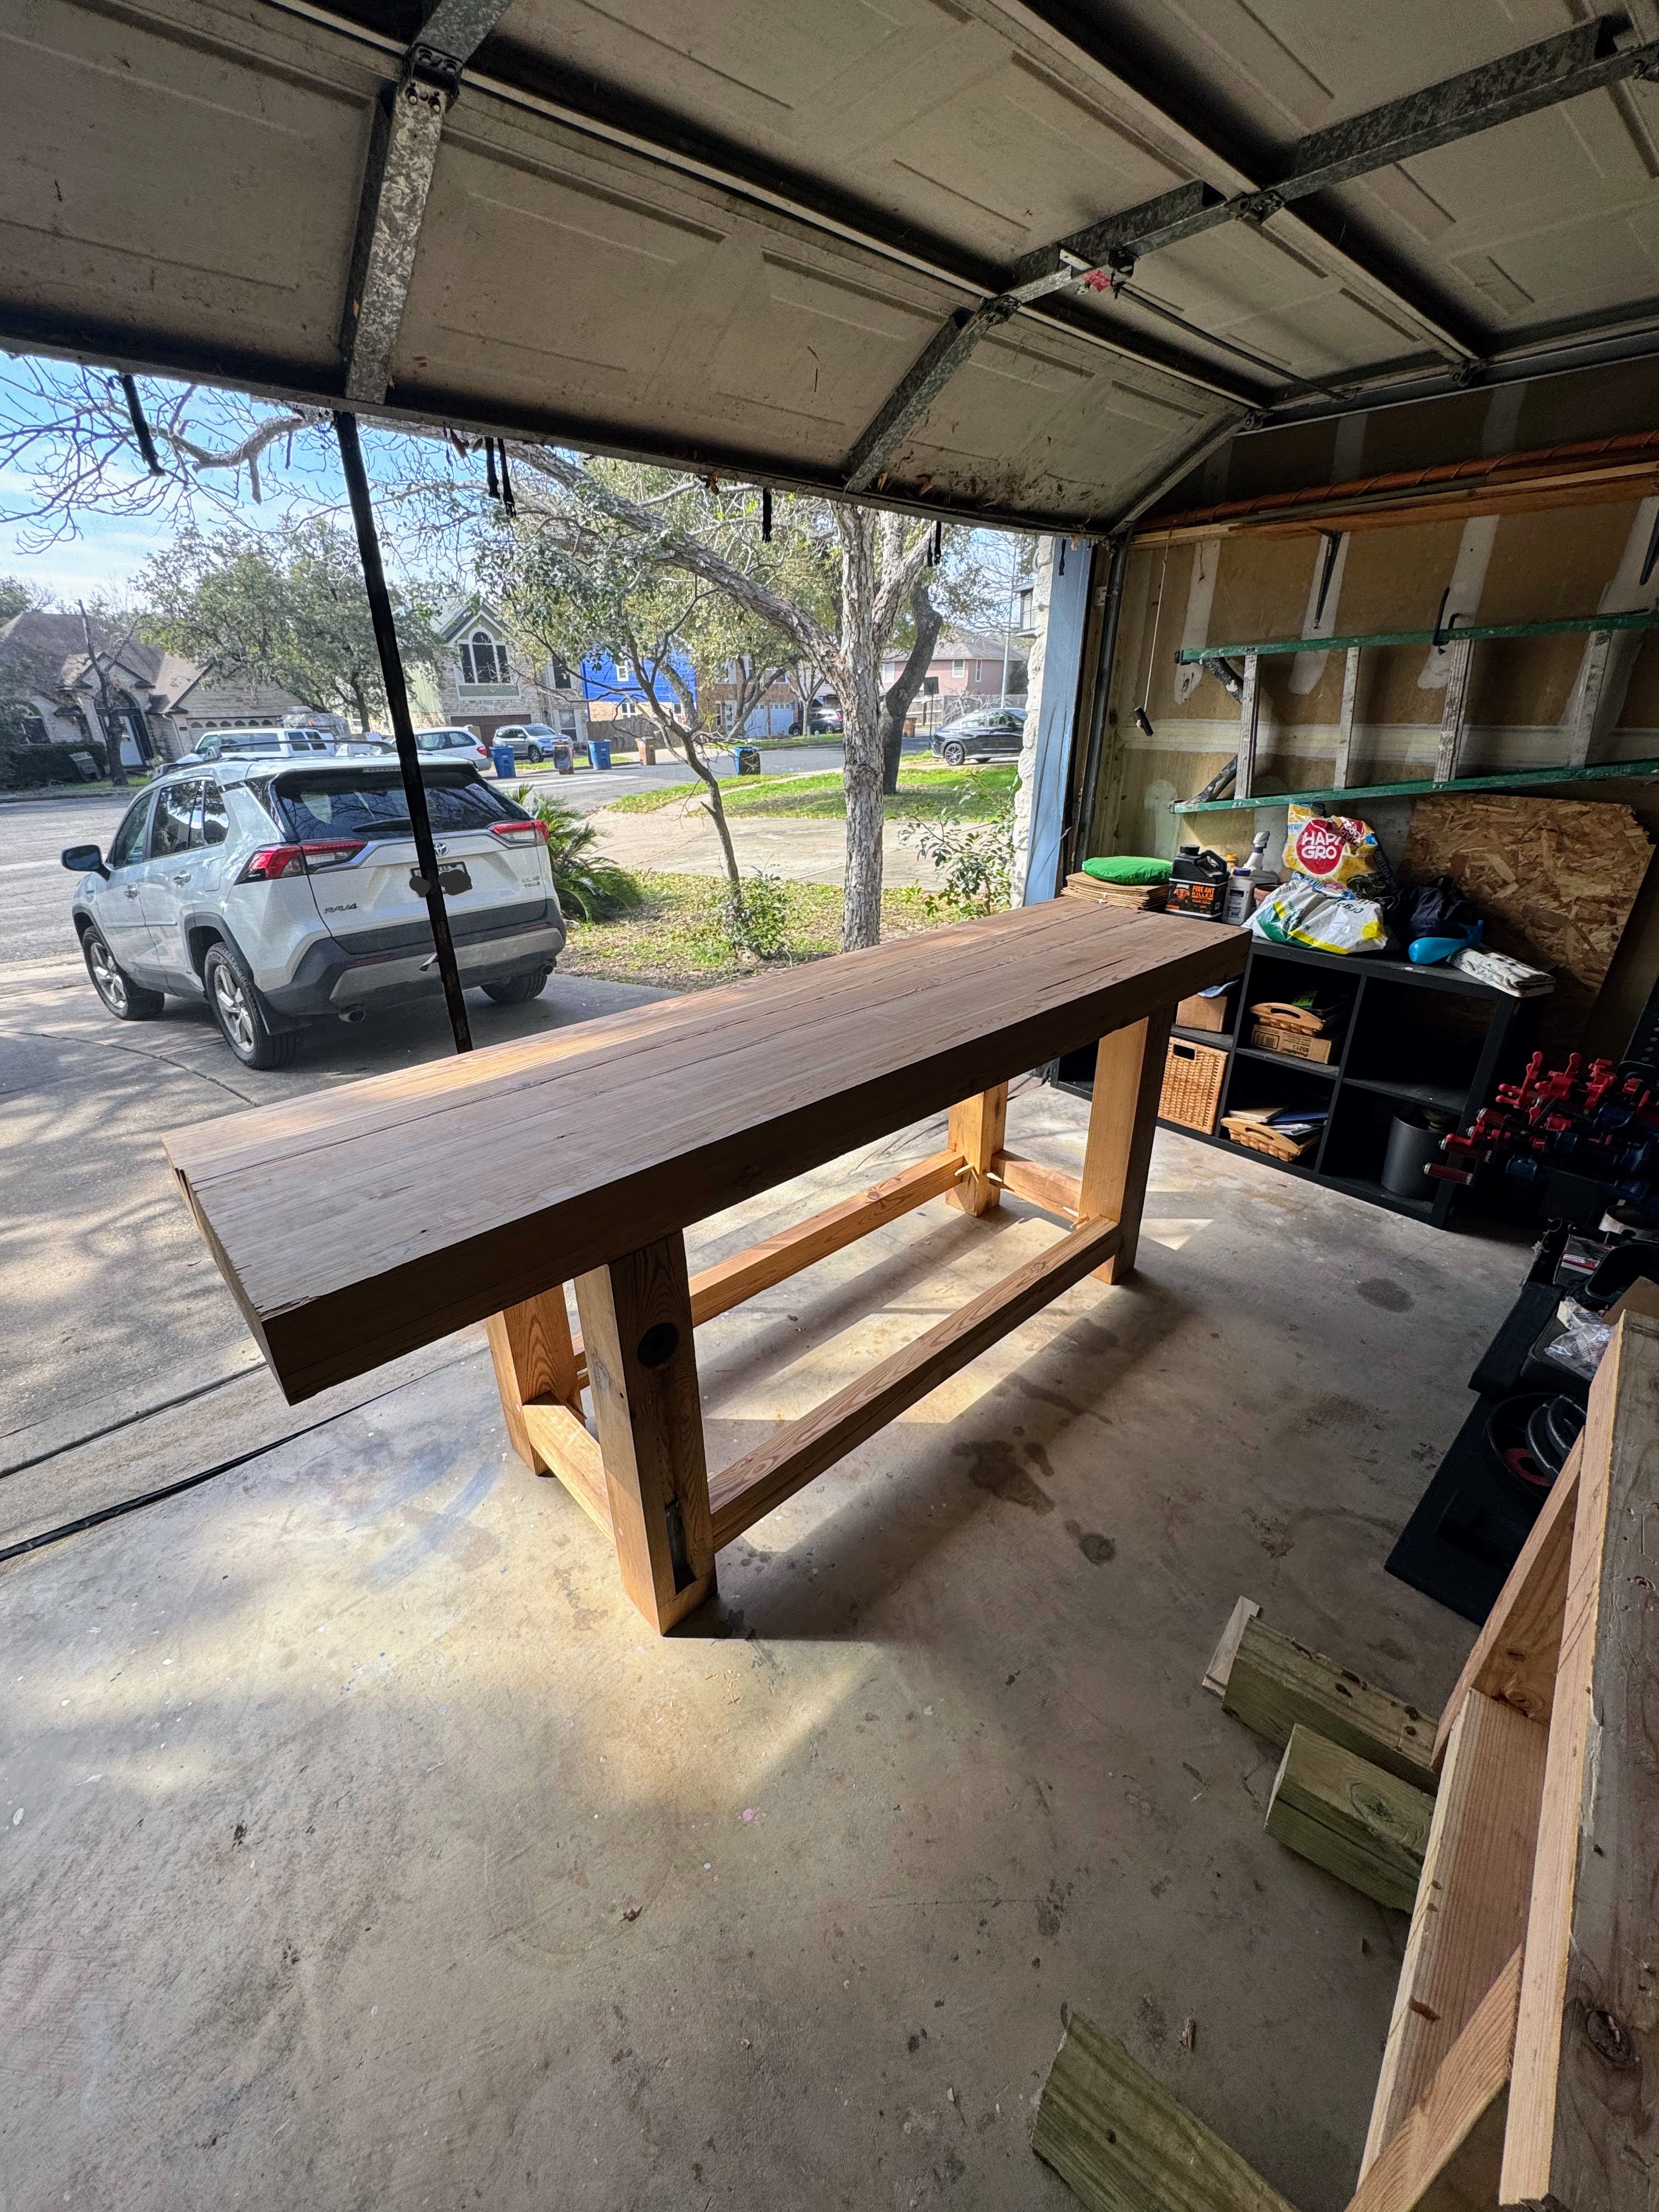
Separately, inspecting the bench now that it was upright, I was pleased with how the earlier epoxy work on the crack in the third beam of the top (the one I had mispositioned during the glue-up) had turned out.
Part 11: The Planing Stop
With the bench upright and assembled, I moved on to installing the planing stop. This involved cutting a mortise in the benchtop and fitting a custom-made stop.
The mortise for the planing stop was, unfortunately, the worst one I cut during the entire build; its walls were not as square as I would have liked. For the planing stop “brick” itself, I used an offcut of the reclaimed pecan from the vise chop. I used hardware from Crucible Tool for this.
My first attempt at fitting the Crucible planing stop into the pecan brick ran into problems. I under-drilled the hole for the hardware, which caused the dense pecan to crack when I tried to install it. Then, while attempting to remove the hardware from the cracked brick, the head of the Crucible planing stop snapped off.
While waiting for a replacement part from Crucible, I repaired the pecan brick by forcing wood glue into the cracks and clamping it tightly. For the second attempt with the new hardware, I over-drilled the hole in the pecan brick. I then set the planing stop hardware into this oversized hole using epoxy, aiming to create a tight, gap-filled fit that would also help prevent any further splitting of the pecan.
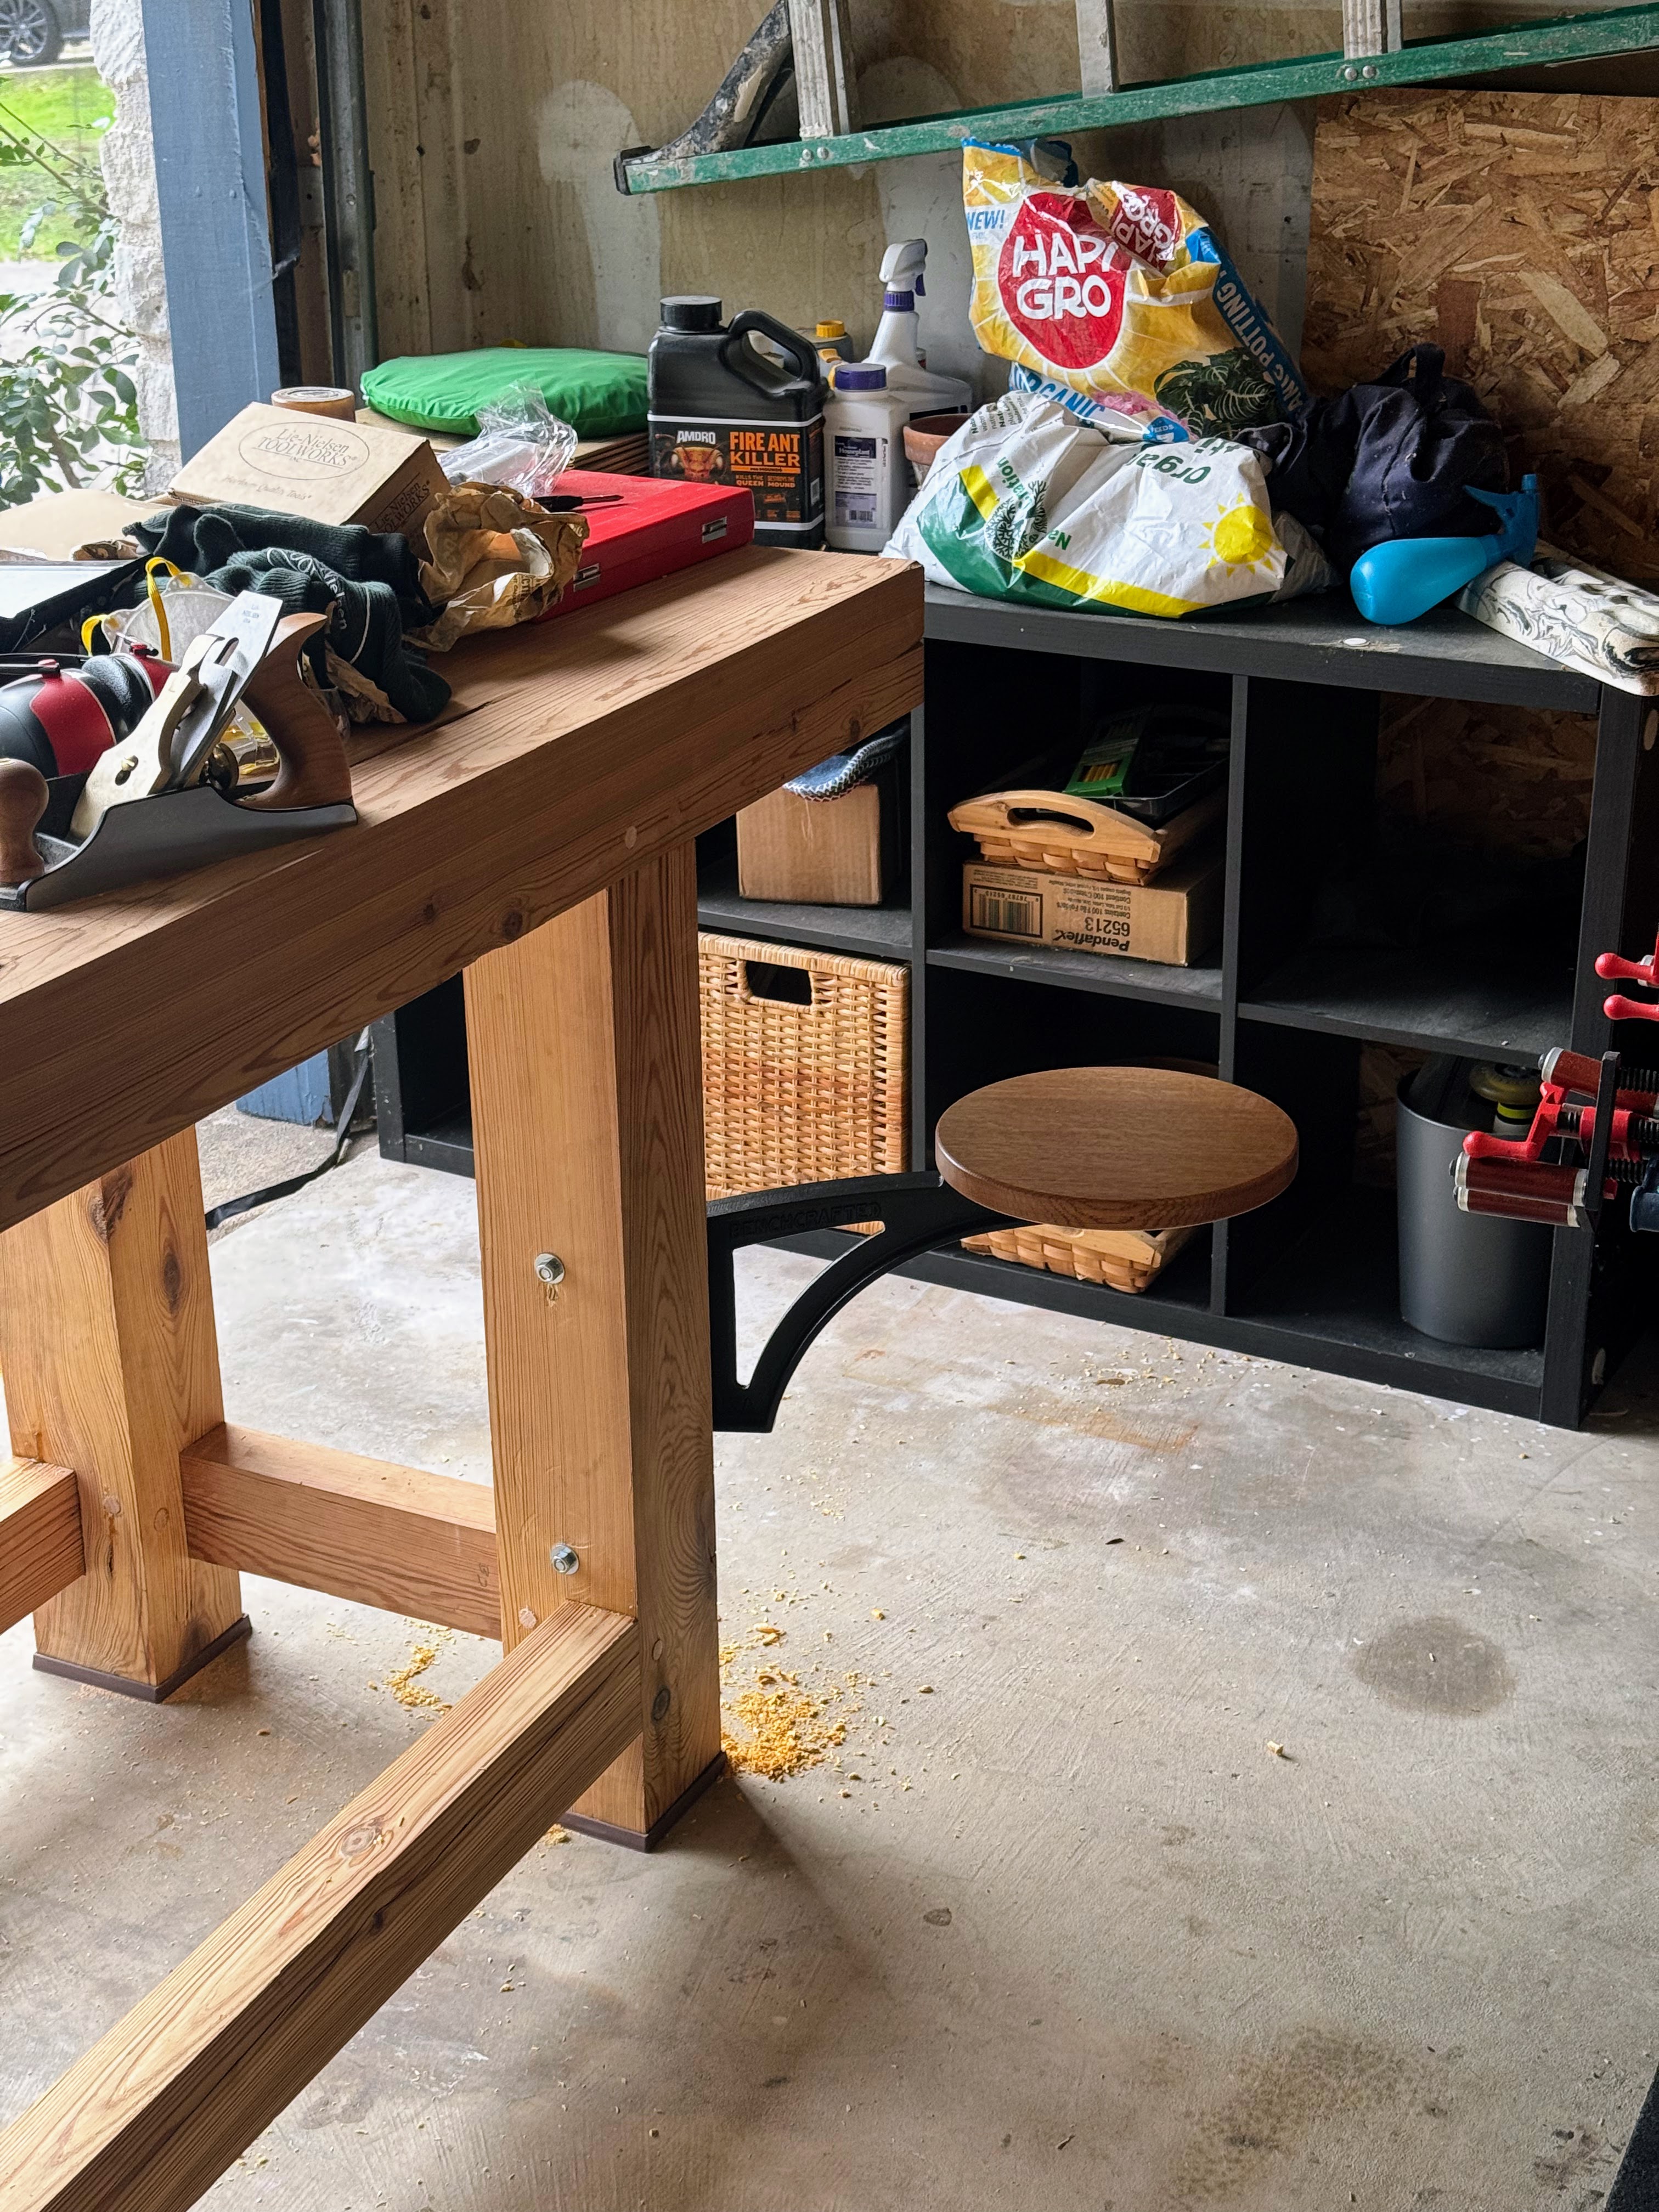
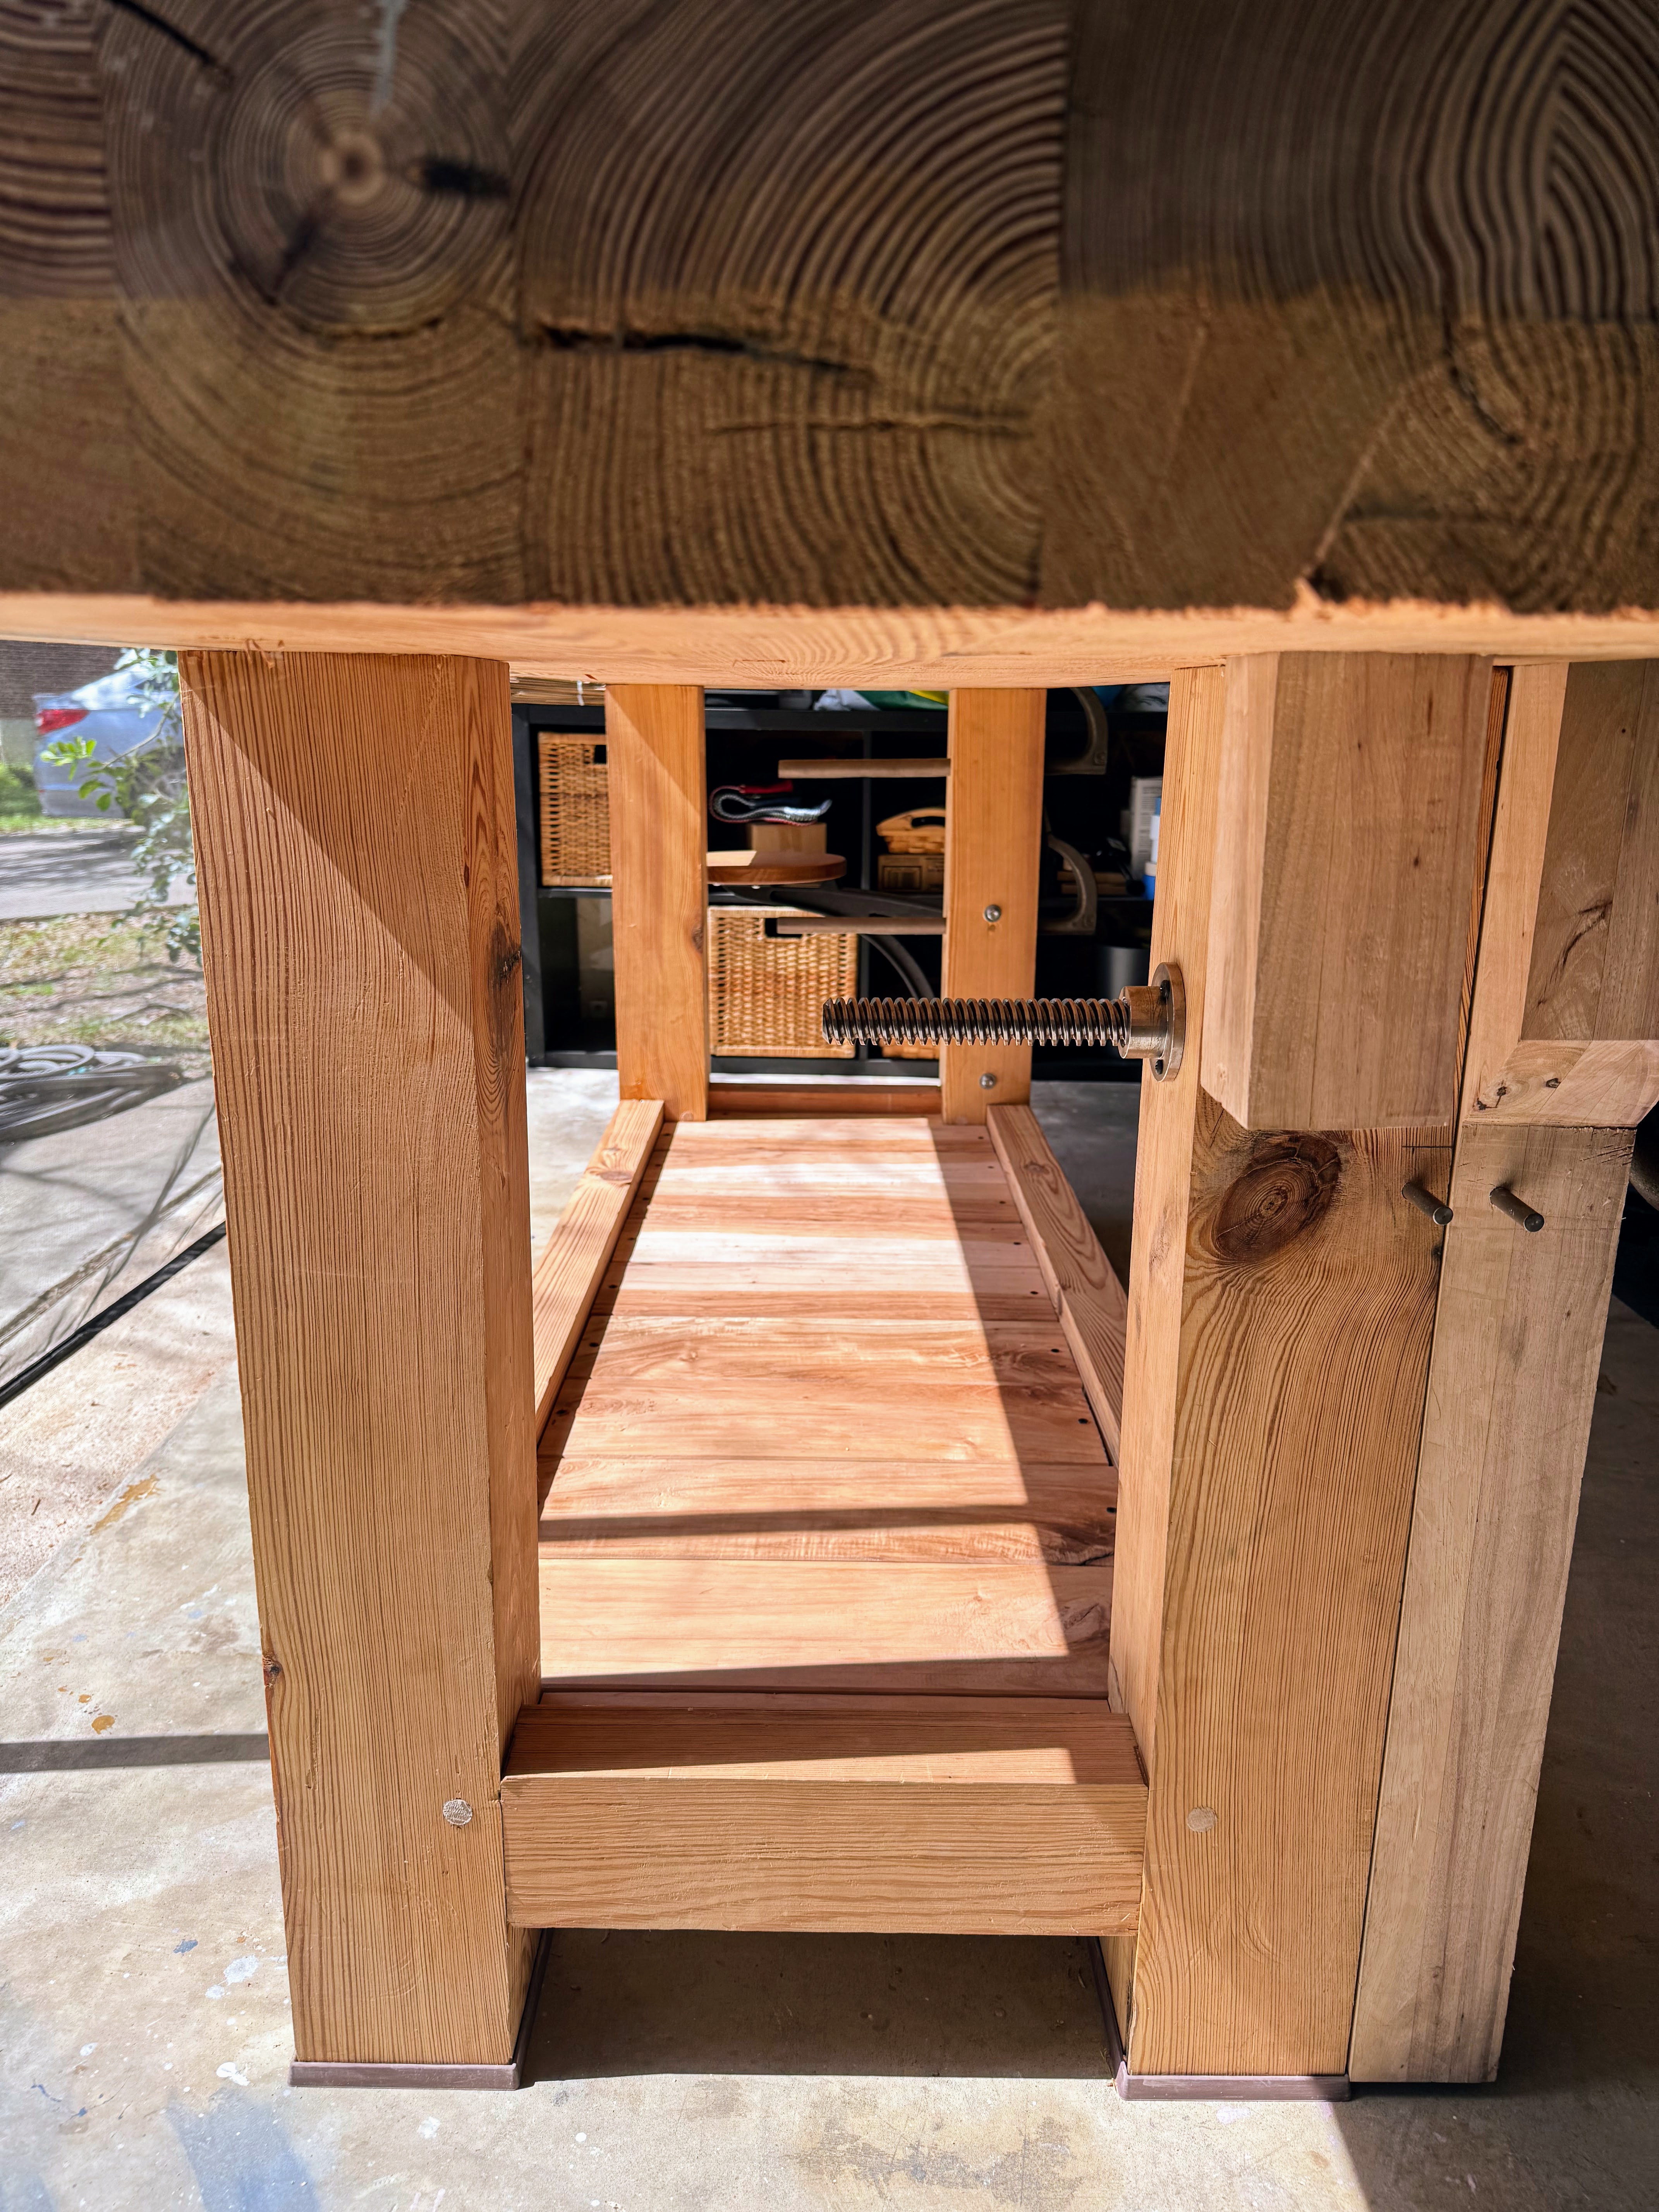
Part 12: Adding the Lower Shelf
The next addition to the workbench was the lower shelving. I chose reclaimed pecan for this, to match the vise chop material. Although a sawmill dimensioned the lumber, considerable fitting work was still required.
The cleats that support the shelves were straightforward. Following Christopher Schwarz’s advice, I lightly glued and screwed them into place without much issue.
Fitting the shelf boards themselves was more of a chore. The smaller shelf sections that fit between the workbench legs needed careful planing and fitting to accommodate some slightly irregular angles and widths in those spaces. For the main shelf boards, I planed each one to create a consistent 1/8-inch gap between them, using 1/8-inch spacers during fastening. These gaps allow for wood movement and provide a path for sawdust to fall through.
During the planing of these individual shelf boards, I later realized I hadn’t been consistently checking for square on a number of them. This resulted in some of the 1/8-inch gaps not having perfectly parallel sides. However, this minor imperfection is unnoticeable in the completed shelf.

Part 13: Side Quest – Repairing a Crack in the Leg
While working on the lower shelves, I noticed a large and concerning crack in the leg that holds the leg vise. I decided it was best to address this immediately, even though it meant the inconvenience of removing vise hardware (better to just get it over with now rather than later when I’d be even lazier about it).
The crack ran through both the lower mortise for one of the stretchers and the mortise for the vise’s parallel guide. Getting glue effectively into the crack would be difficult, especially with the bench upright.
My repair strategy was as follows:
- I drilled a hole into the cracked section, positioned high enough to intersect the stretcher’s tenon internally and pass through the plane of the crack.
- Using a Lie-Nielsen dowel plate, I made a custom dowel from an offcut of Longleaf Pine.
- I squeezed wood glue into the drilled hole, nearly filling it.
- While gently prying the main crack open just slightly, I slowly tapped the custom pine dowel into the glue-filled hole. The intent was to use hydraulic pressure from the dowel to force glue deep into the seams of the crack from the inside.
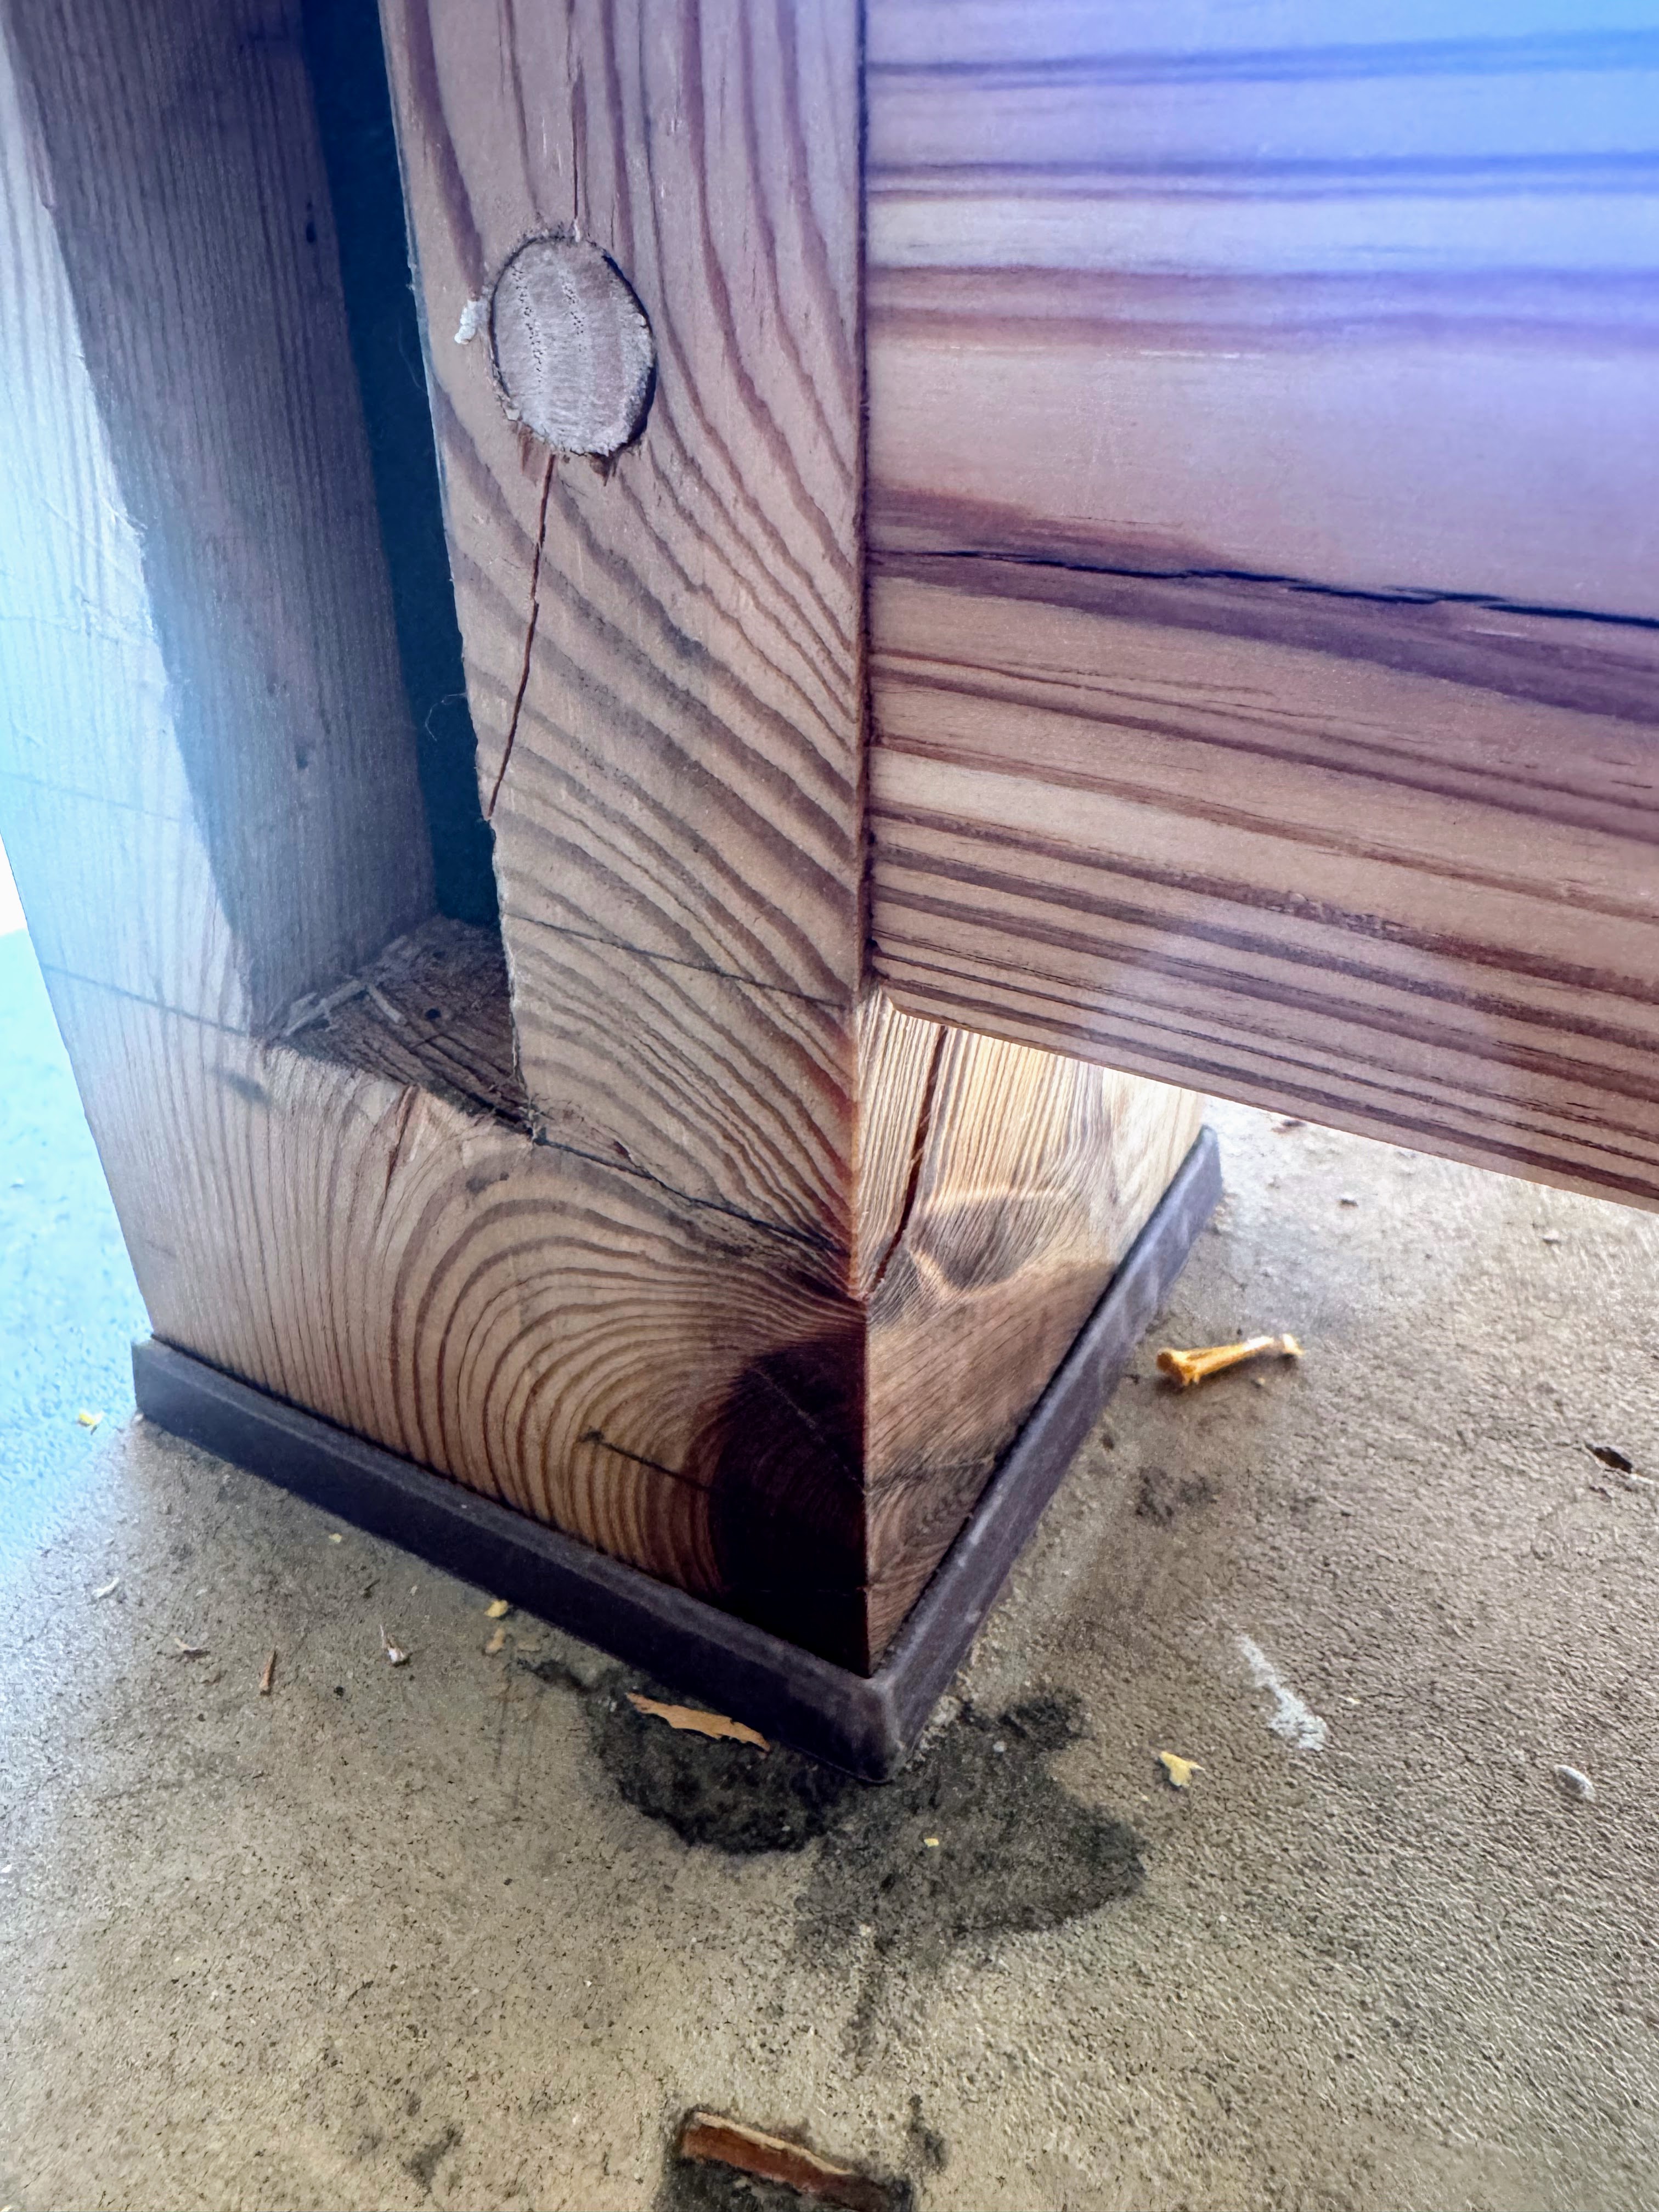
This approach appeared to work very well. Once the peg was fully seated, I clamped the exterior of the crack and left it to dry overnight. The resulting repair felt very strong, and I was quite happy with how it turned out.
Part 14: Finishing Touches – Easing Edges and Applying Finish
With all construction and repairs completed, the final step was to prepare the surfaces and apply a protective finish to the workbench.
First, I eased all sharp edges on the benchtop, legs, and stretchers using sandpaper. This “breaking the corners” makes the bench more comfortable to work around and helps prevent splintering.
For the finish, I used Christopher Schwarz’s “shop finish” recipe, a mixture of one part boiled linseed oil, one part mineral spirits, and one part oil-based spar varnish. I applied this mixture liberally with a rag, ensuring good coverage. Two full coats were applied to all visible surfaces.
This completed the construction of my very own Anarchist’s Workbench!
Conclusion
This was a satisfying project. It was also rather all-consuming. I worked on it in the evenings with a headlamp and every free Saturday and Sunday I had. Many aspects of the project didn’t go as well as I’d planned for but I felt like my skill in adapting to the problems that arose, debugging issues, and correcting “bugs” and other little mistakes was the most gratifying part of this project.